• Skip to main content

CONCRETE CORING COMPANY

  • About Us

    ABOUT PENHALL

    Penhall has been the United States' go-to concrete services partner since 1957.

    • OUR STORY

    • LEADERSHIP TEAM

    • SAFETY

    • CAREERS

    • RESOURCES

    • FREQUENTLY ASKED QUESTIONS

    • SUSTAINABILITY

    CONTACT PENHALL

    We've handled projects of all types and sizes, with a track record of excellence going back more than 65 years. Contact us about your next project.

    TALK TO US
  • Services

    CONCRETE SERVICES

    Whether it's coring, flat sawing, wall sawing, or breaking and removal, we pride ourselves in our experience, expertise, top-of-the-line equipment, and unwavering commitment to safety.

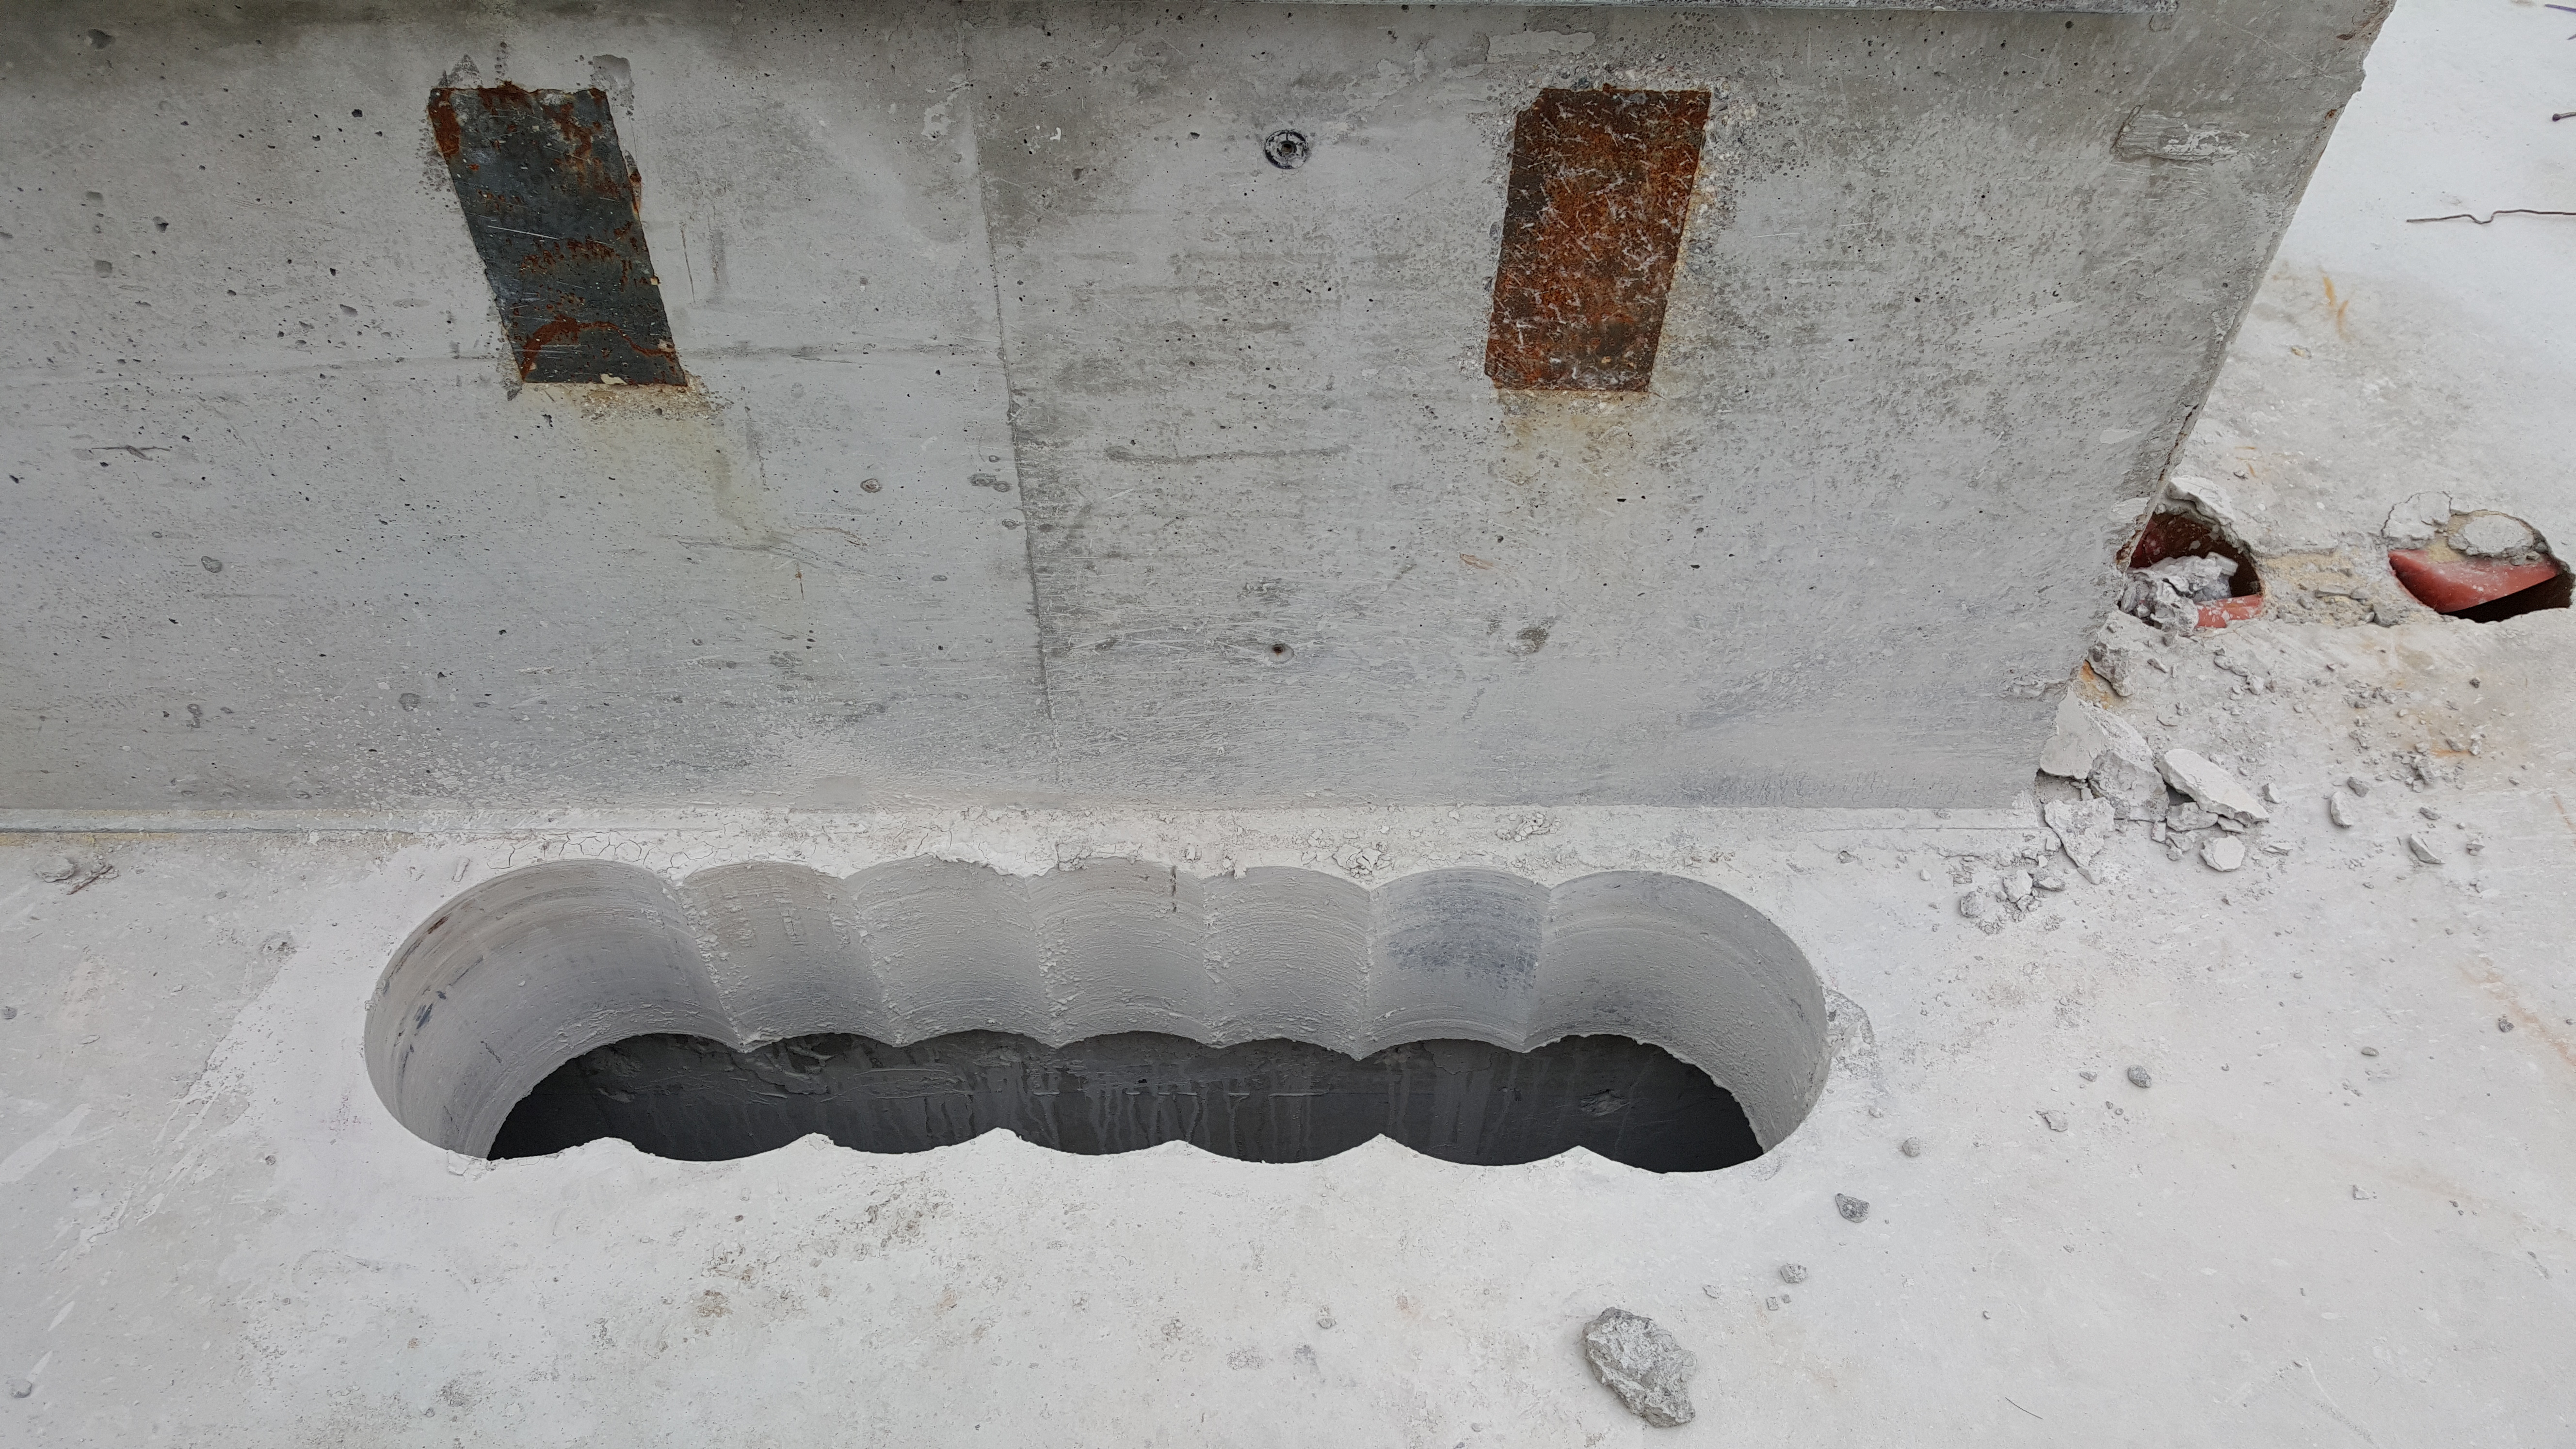
    • CONCRETE CORING

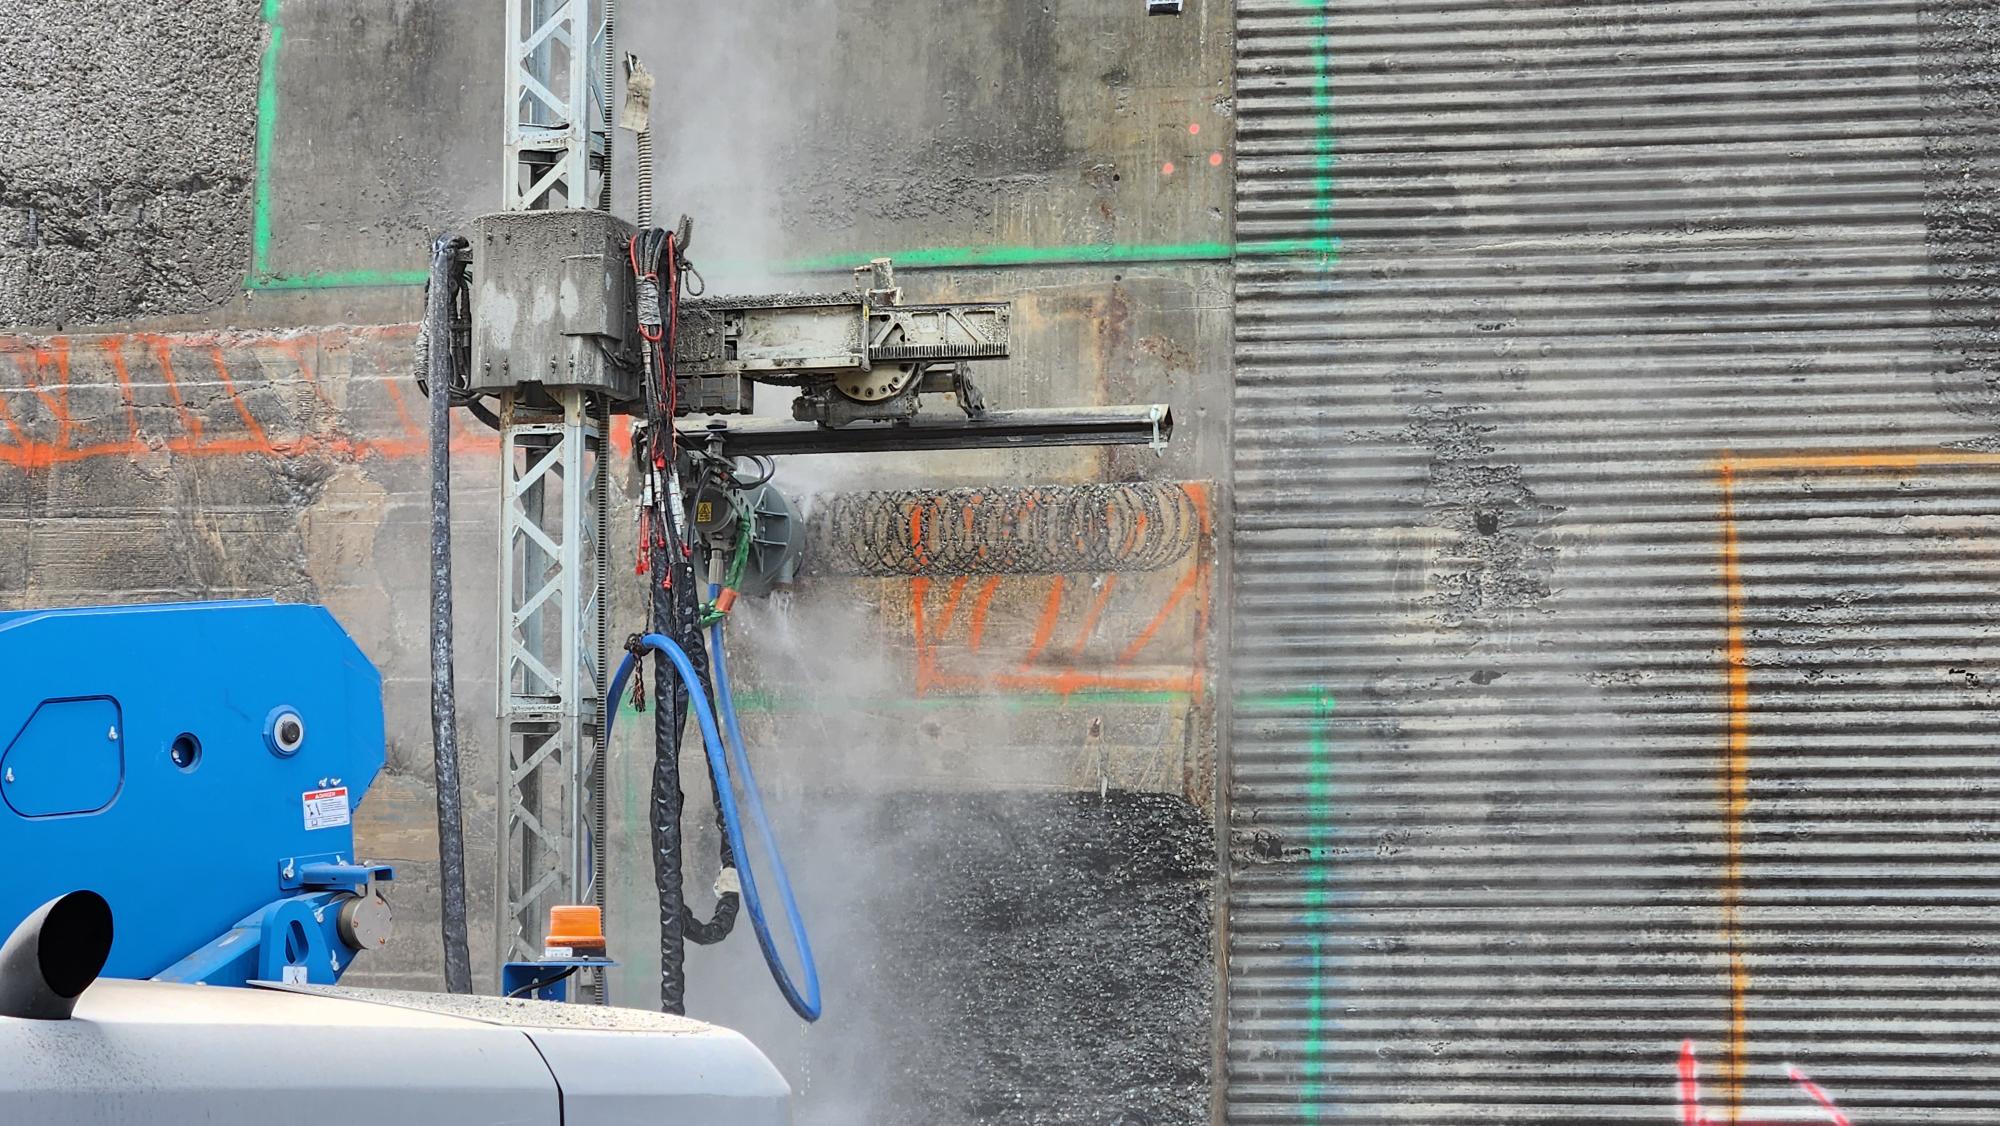
    • CONCRETE CUTTING

    • DEMOLITION

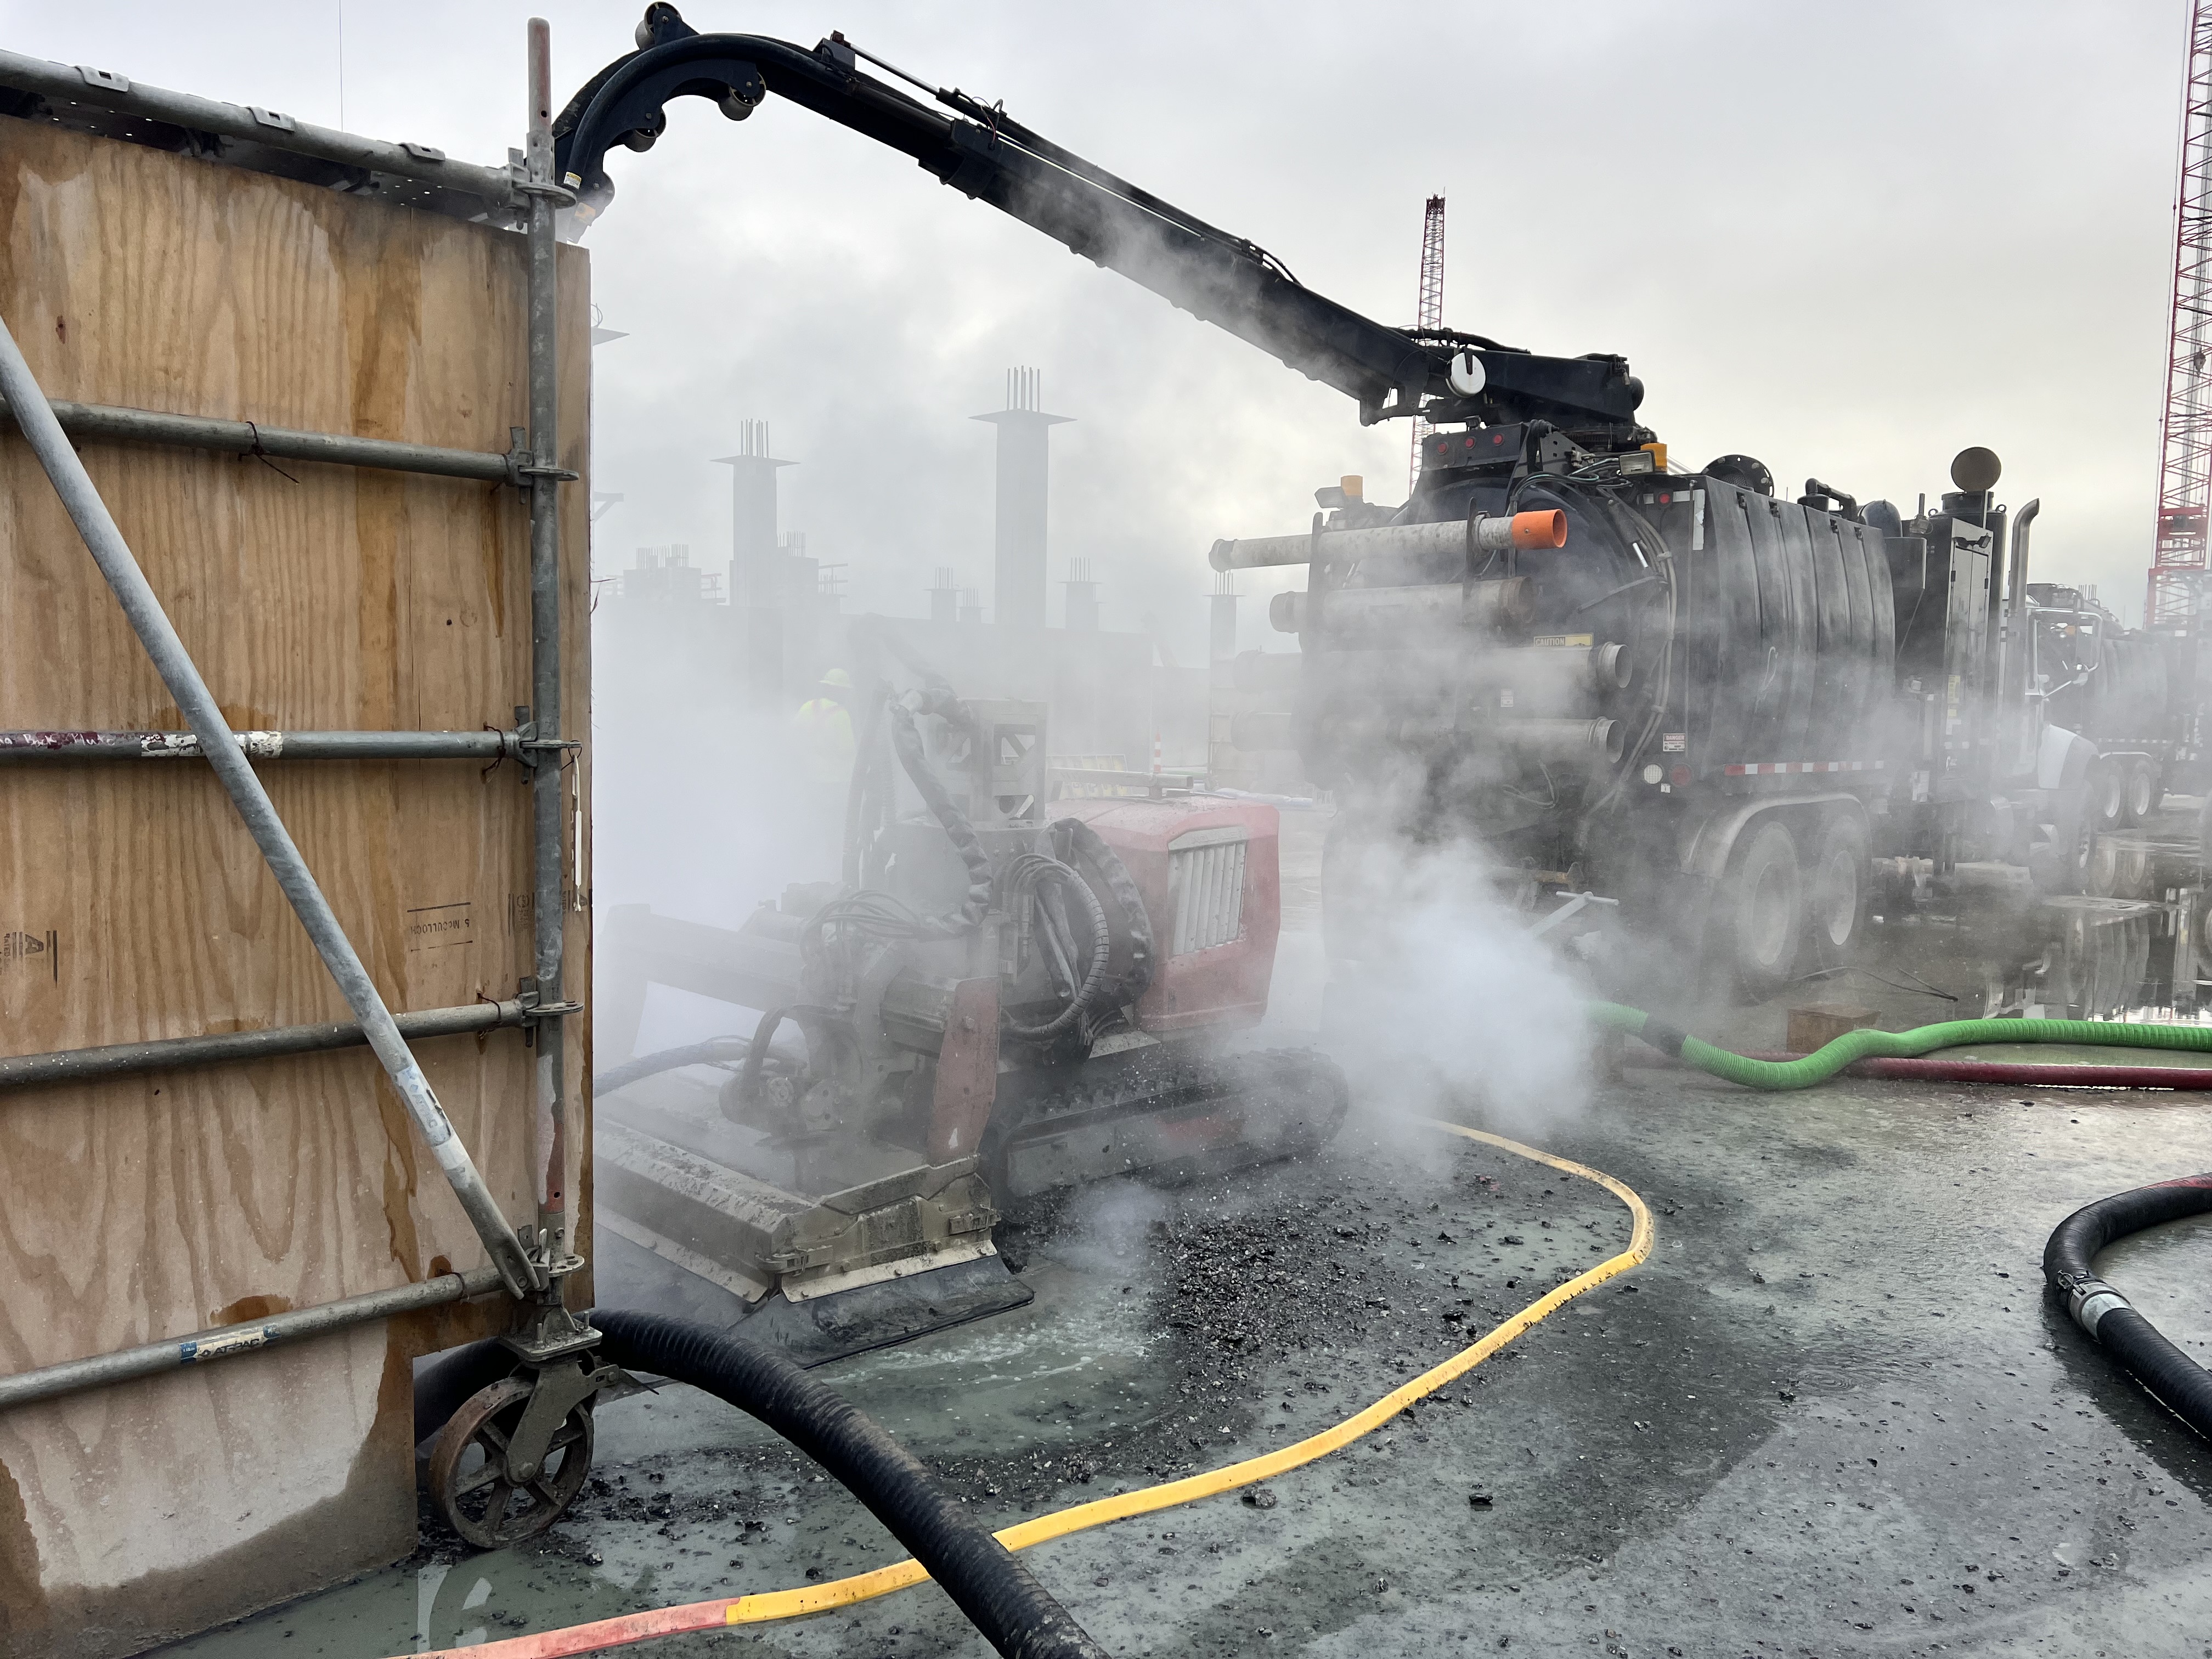
    • HYDRODEMOLITION

    • STRUCTURAL REPAIR

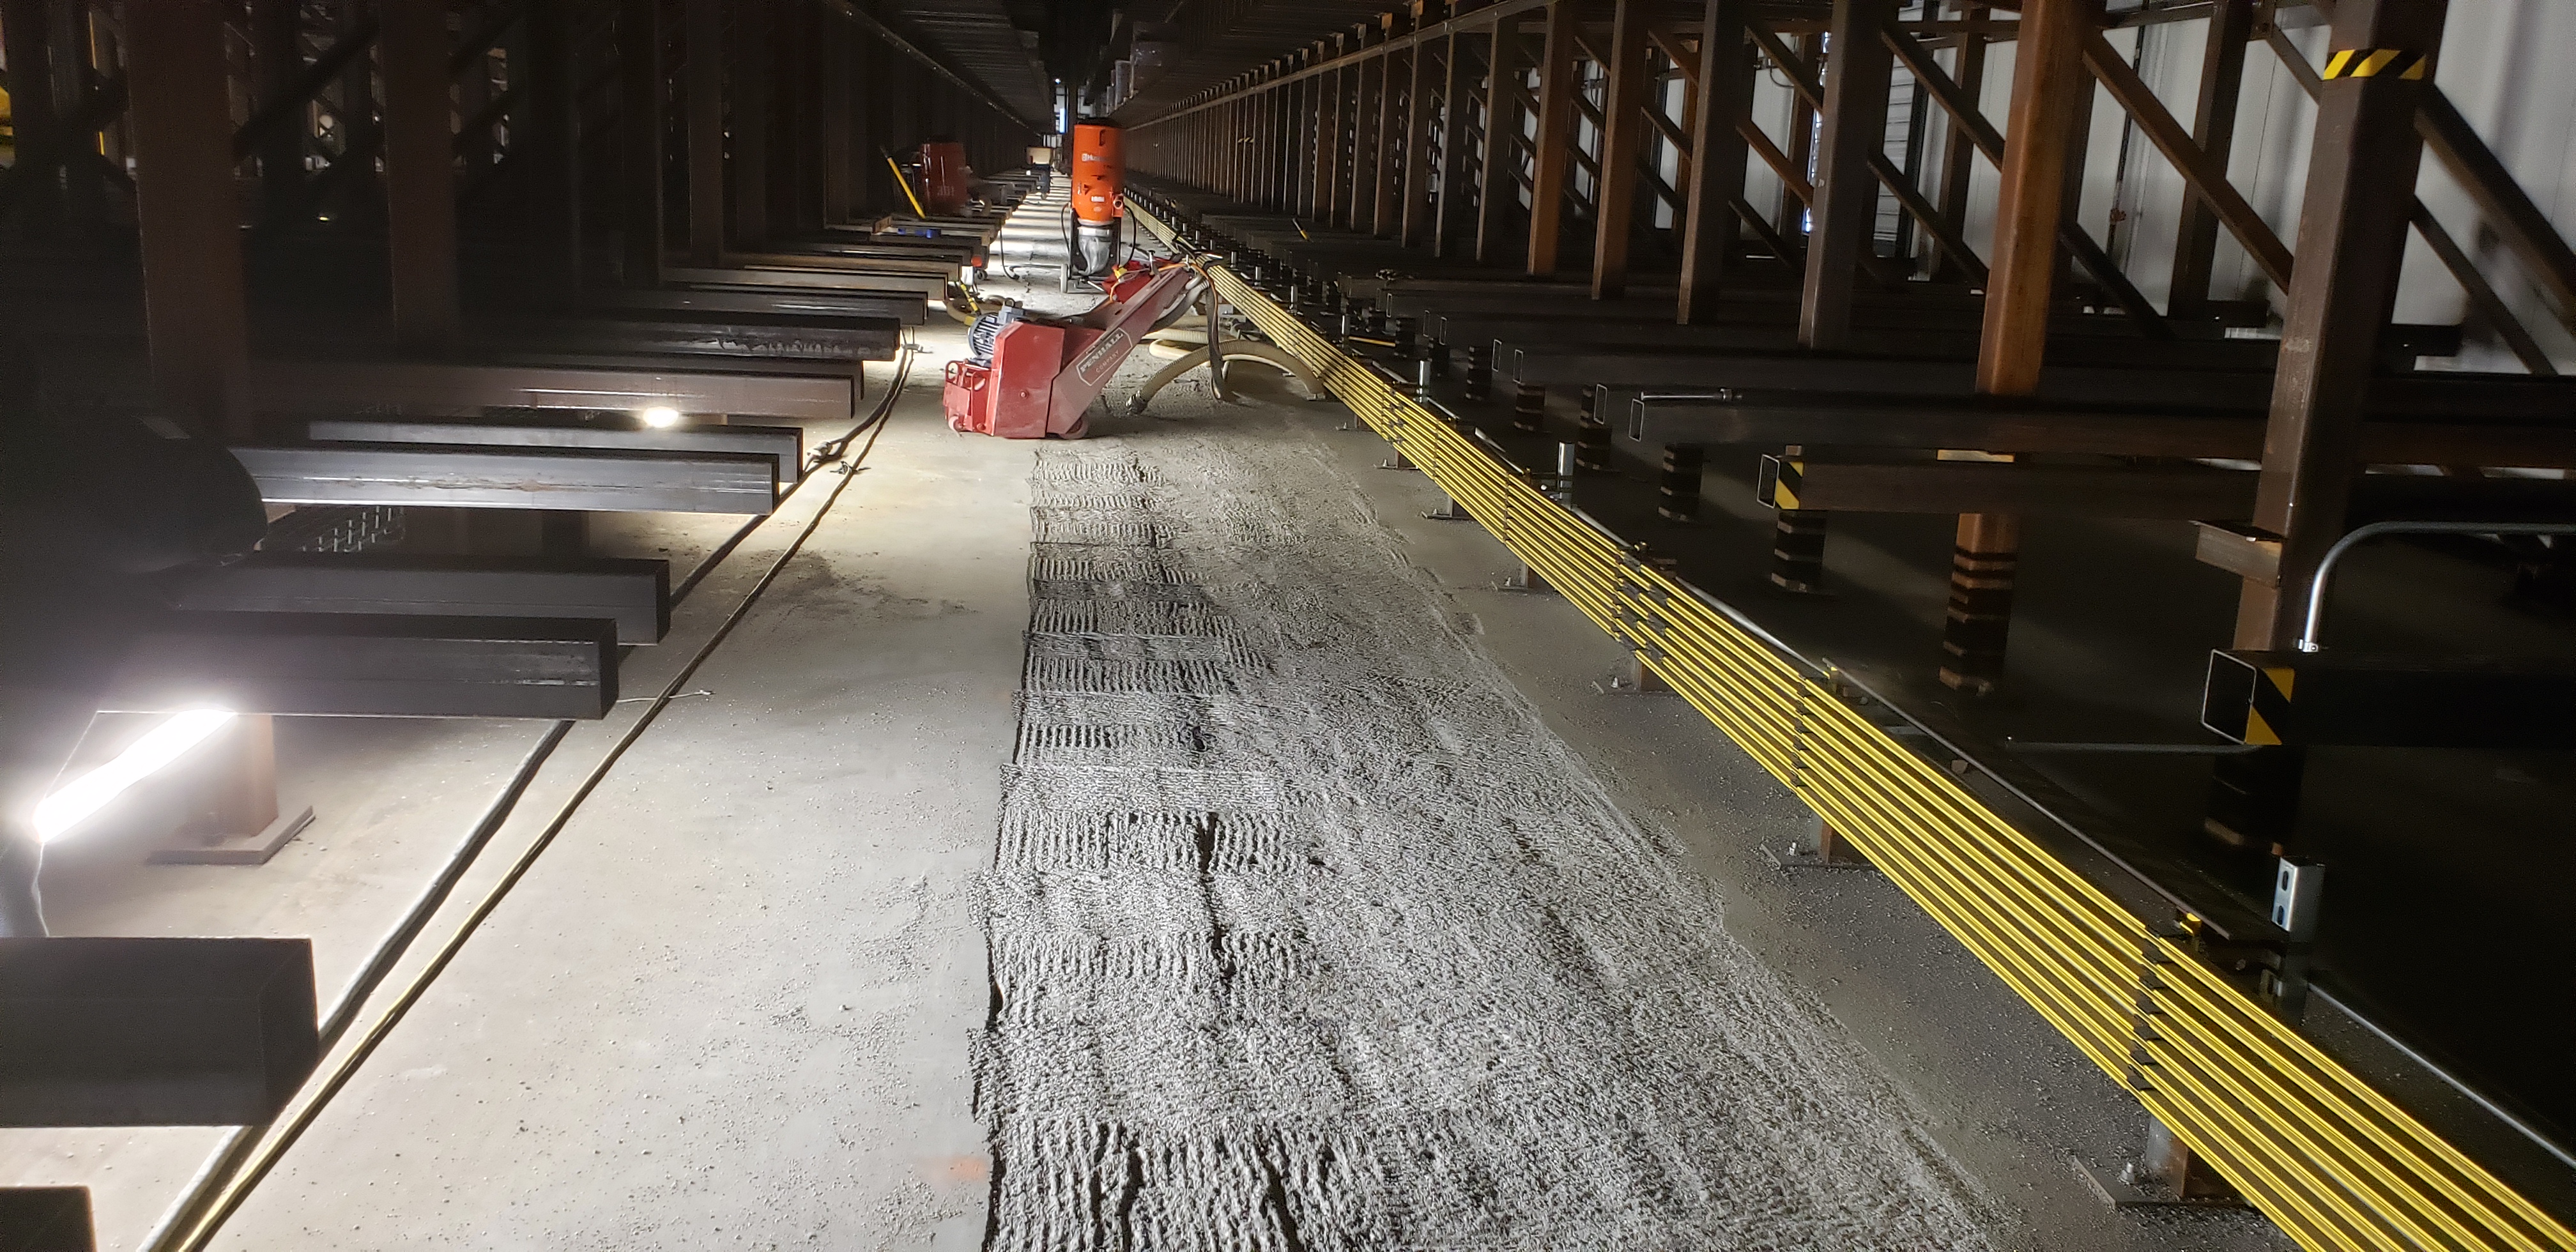
    • GRINDING & GROOVING

    • BRIDGE SERVICES

    • SCARIFYING & SHAVING

    • BREAKING & REMOVAL

    • OPERATED EQUIPMENT RENTALS

    SUBSURFACE SERVICES

    Our subsurface services provide industry-leading solutions in concrete scanning, private utility locating and mapping, digital x-ray imaging and fiber reinforced polymer, ensuring precision, safety, and efficiency.

    • CONCRETE GPR SCANNING

    • CONCRETE X-RAY IMAGING

    • PRIVATE UTILITY LOCATING & MAPPING

    • FIBER REINFORCED POLYMER

    LUNCH AND LEARN WITH PENHALL COMPANY

    Lunch & Learn

    We're excited to offer you an engaging and informative session that will introduce you to our range of services, industry expertise, and innovative solutions. As a leading provider in concrete cutting, coring, and demolition, Penhall Company is committed to delivering top-notch service and exceeding your expectations. Grab your seat, enjoy a delicious meal, and discover how partnering with us can benefit your projects.

    SCHEDULE A LUNCH & LEARN
  • Industries

    OUR PROJECTS

    Penhall Company has had the opportunity to work on some of the most challenging and wide-ranging projects in North America.

    • ALL PROJECTS

    • AVIATION

    • CHURCHES

    • COMMERCIAL

    • DOT / INFRASTRUCTURE

    • EDUCATION

    • ELECTRIC VEHICLE CHARGING

    • GRAFF

    • HEALTHCARE / HOSPITAL

    • HOSPITALITY

    • INDUSTRIAL

    • LOCK / DAM

    • POWER / NUCLEAR

    • RESIDENTIAL

    • WATER / WASTEWATER TREATMENT

    LATEST PROJECT

    Sutter Health 660 J Street Project

    LOCATION: Sacramento, CA
    SERVICE: Demolition, GPR Scanning, Core Drilling
    READ MORE
  • Locations
penhall menu logo
  • Careers
  • Contact Us
  • QUOTE REQUEST
  • This field is for validation purposes and should be left unchanged.
  • Site Contact Information

  • (XXX) XXX-XXXX
  •  
  • Job Site Location

  • After submitting this form a Penhall Company representative will be in contact with you to confirm your request. If this request is urgent, please call 1-800-PENHALL to be connected with the nearest Penhall branch. Upon submitting this form you will also receive occasional updates about our services and company announcements. You may unsubscribe from these e-mails at anytime. Grinding and grooving services are conducted by Emery Sapp & Sons, Inc. For specific inquiries related to grinding and grooving, click here or reach out to Chris Fitzpatrick at chris.fitzpatrick@emerysapp.com

  • About Us
    • Our Story
    • Leadership Team
    • Sustainability
  • Safety
  • Services
    • Concrete Services
      • Concrete Coring
      • Concrete Cutting
      • Demolition
      • Hydrodemolition
      • Structural Repair
      • Grinding & Grooving
      • Bridge Services
      • Scarifying & Shaving
      • Breaking & Removal
      • Operated Equipment Rentals
    • Subsurface Services
      • Concrete GPR Scanning
      • Digital X-Ray Imaging
      • Private Utility Locating & Mapping
      • Fiber Reinforced Polymer
  • Industries
  • Resources
    • Articles
    • Frequently Asked Questions
  • Contact Us
  • Find a Branch
  • Request a Quote
  • JOIN PENHALL COMPANY
  • Concrete Coring Company
×
  • About Us
    • Our Story
    • Leadership Team
    • Sustainability
  • Safety
  • Services
    • Concrete Services
      • Concrete Coring
      • Concrete Cutting
      • Demolition
      • Hydrodemolition
      • Structural Repair
      • Grinding & Grooving
      • Bridge Services
      • Scarifying & Shaving
      • Breaking & Removal
      • Operated Equipment Rentals
    • Subsurface Services
      • Concrete GPR Scanning
      • Digital X-Ray Imaging
      • Private Utility Locating & Mapping
      • Fiber Reinforced Polymer
  • Industries
  • Resources
    • Articles
    • Frequently Asked Questions
  • Contact Us
  • Find a Branch
  • Request a Quote
  • JOIN PENHALL COMPANY
  • Concrete Coring Company
penhall menu logo

Articles

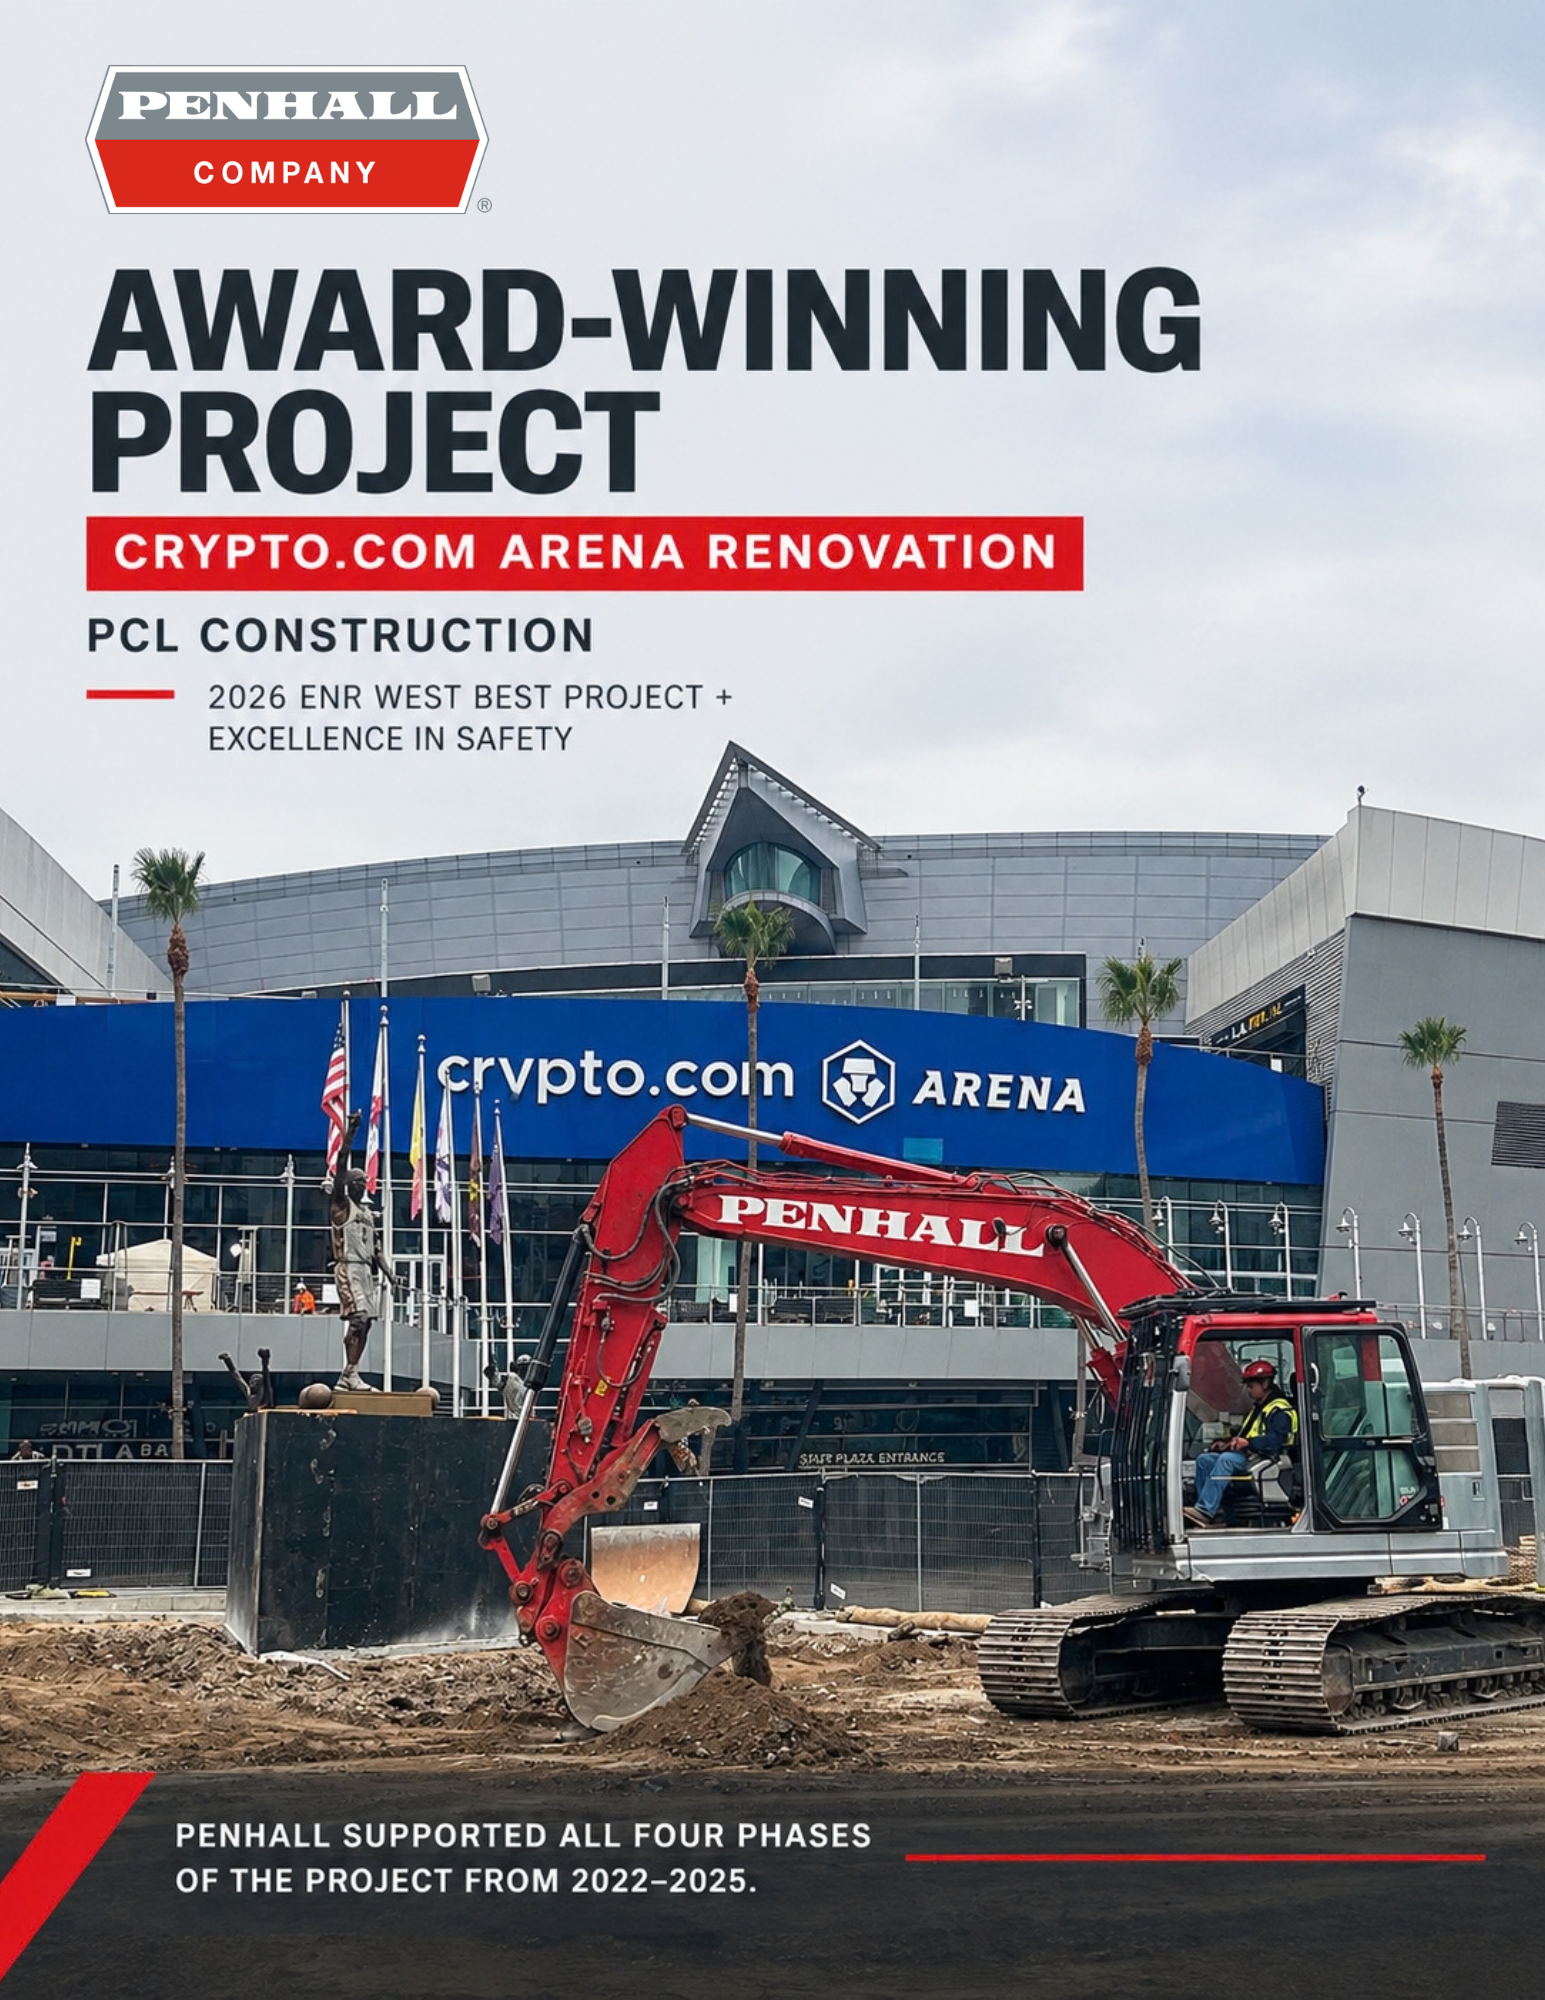
Penhall Supports Award-Winning Crypto.com Arena Renovation

CALL FOR A QUOTE
1-800-736-4255

Penhall Supports Award-Winning Crypto.com Arena Renovation

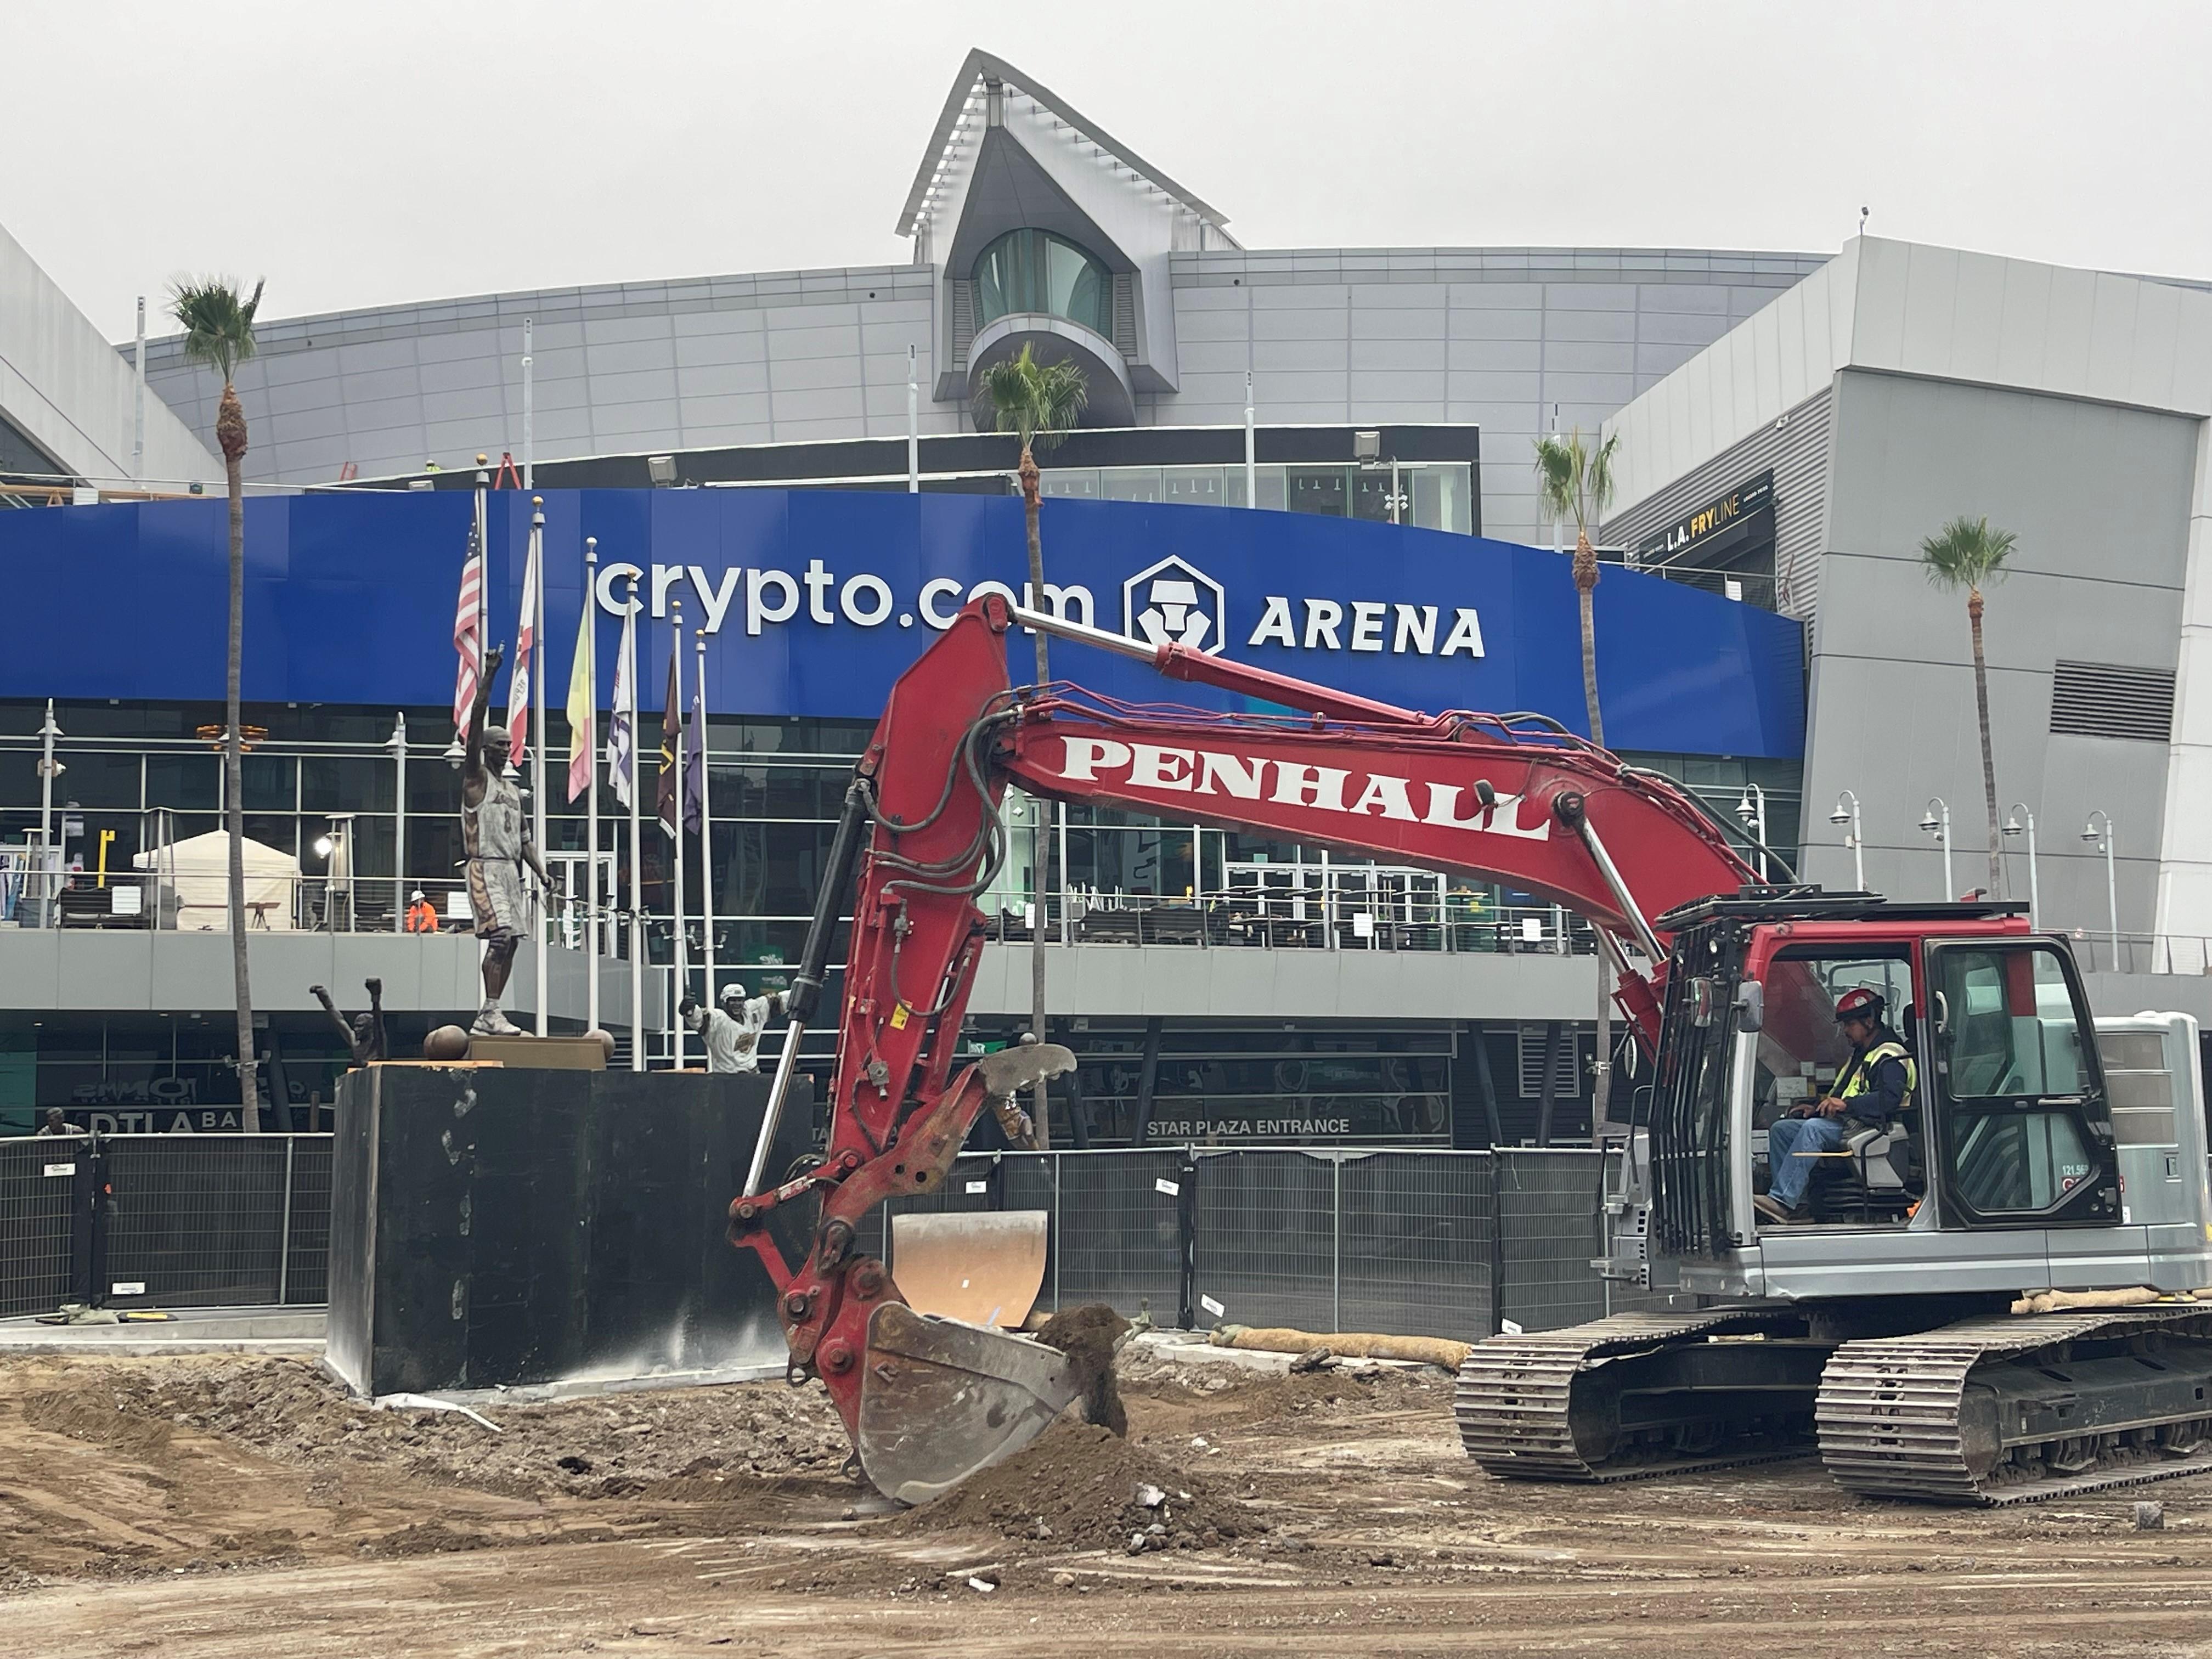
From 2022 through 2025, Penhall supported all four phases of the major renovation at Crypto.com Arena in Los Angeles, California.

Now, the project is receiving recognition from Engineering News-Record (ENR) West, earning both a 2026 Best Project honor and the ENR West Excellence in Safety Award.

The recognition highlights the complexity of modernizing one of Los Angeles' busiest venues while keeping it operational throughout construction. For Penhall, the project was an opportunity to contribute across all four phases of a high-profile renovation that required careful coordination, scheduling and execution.
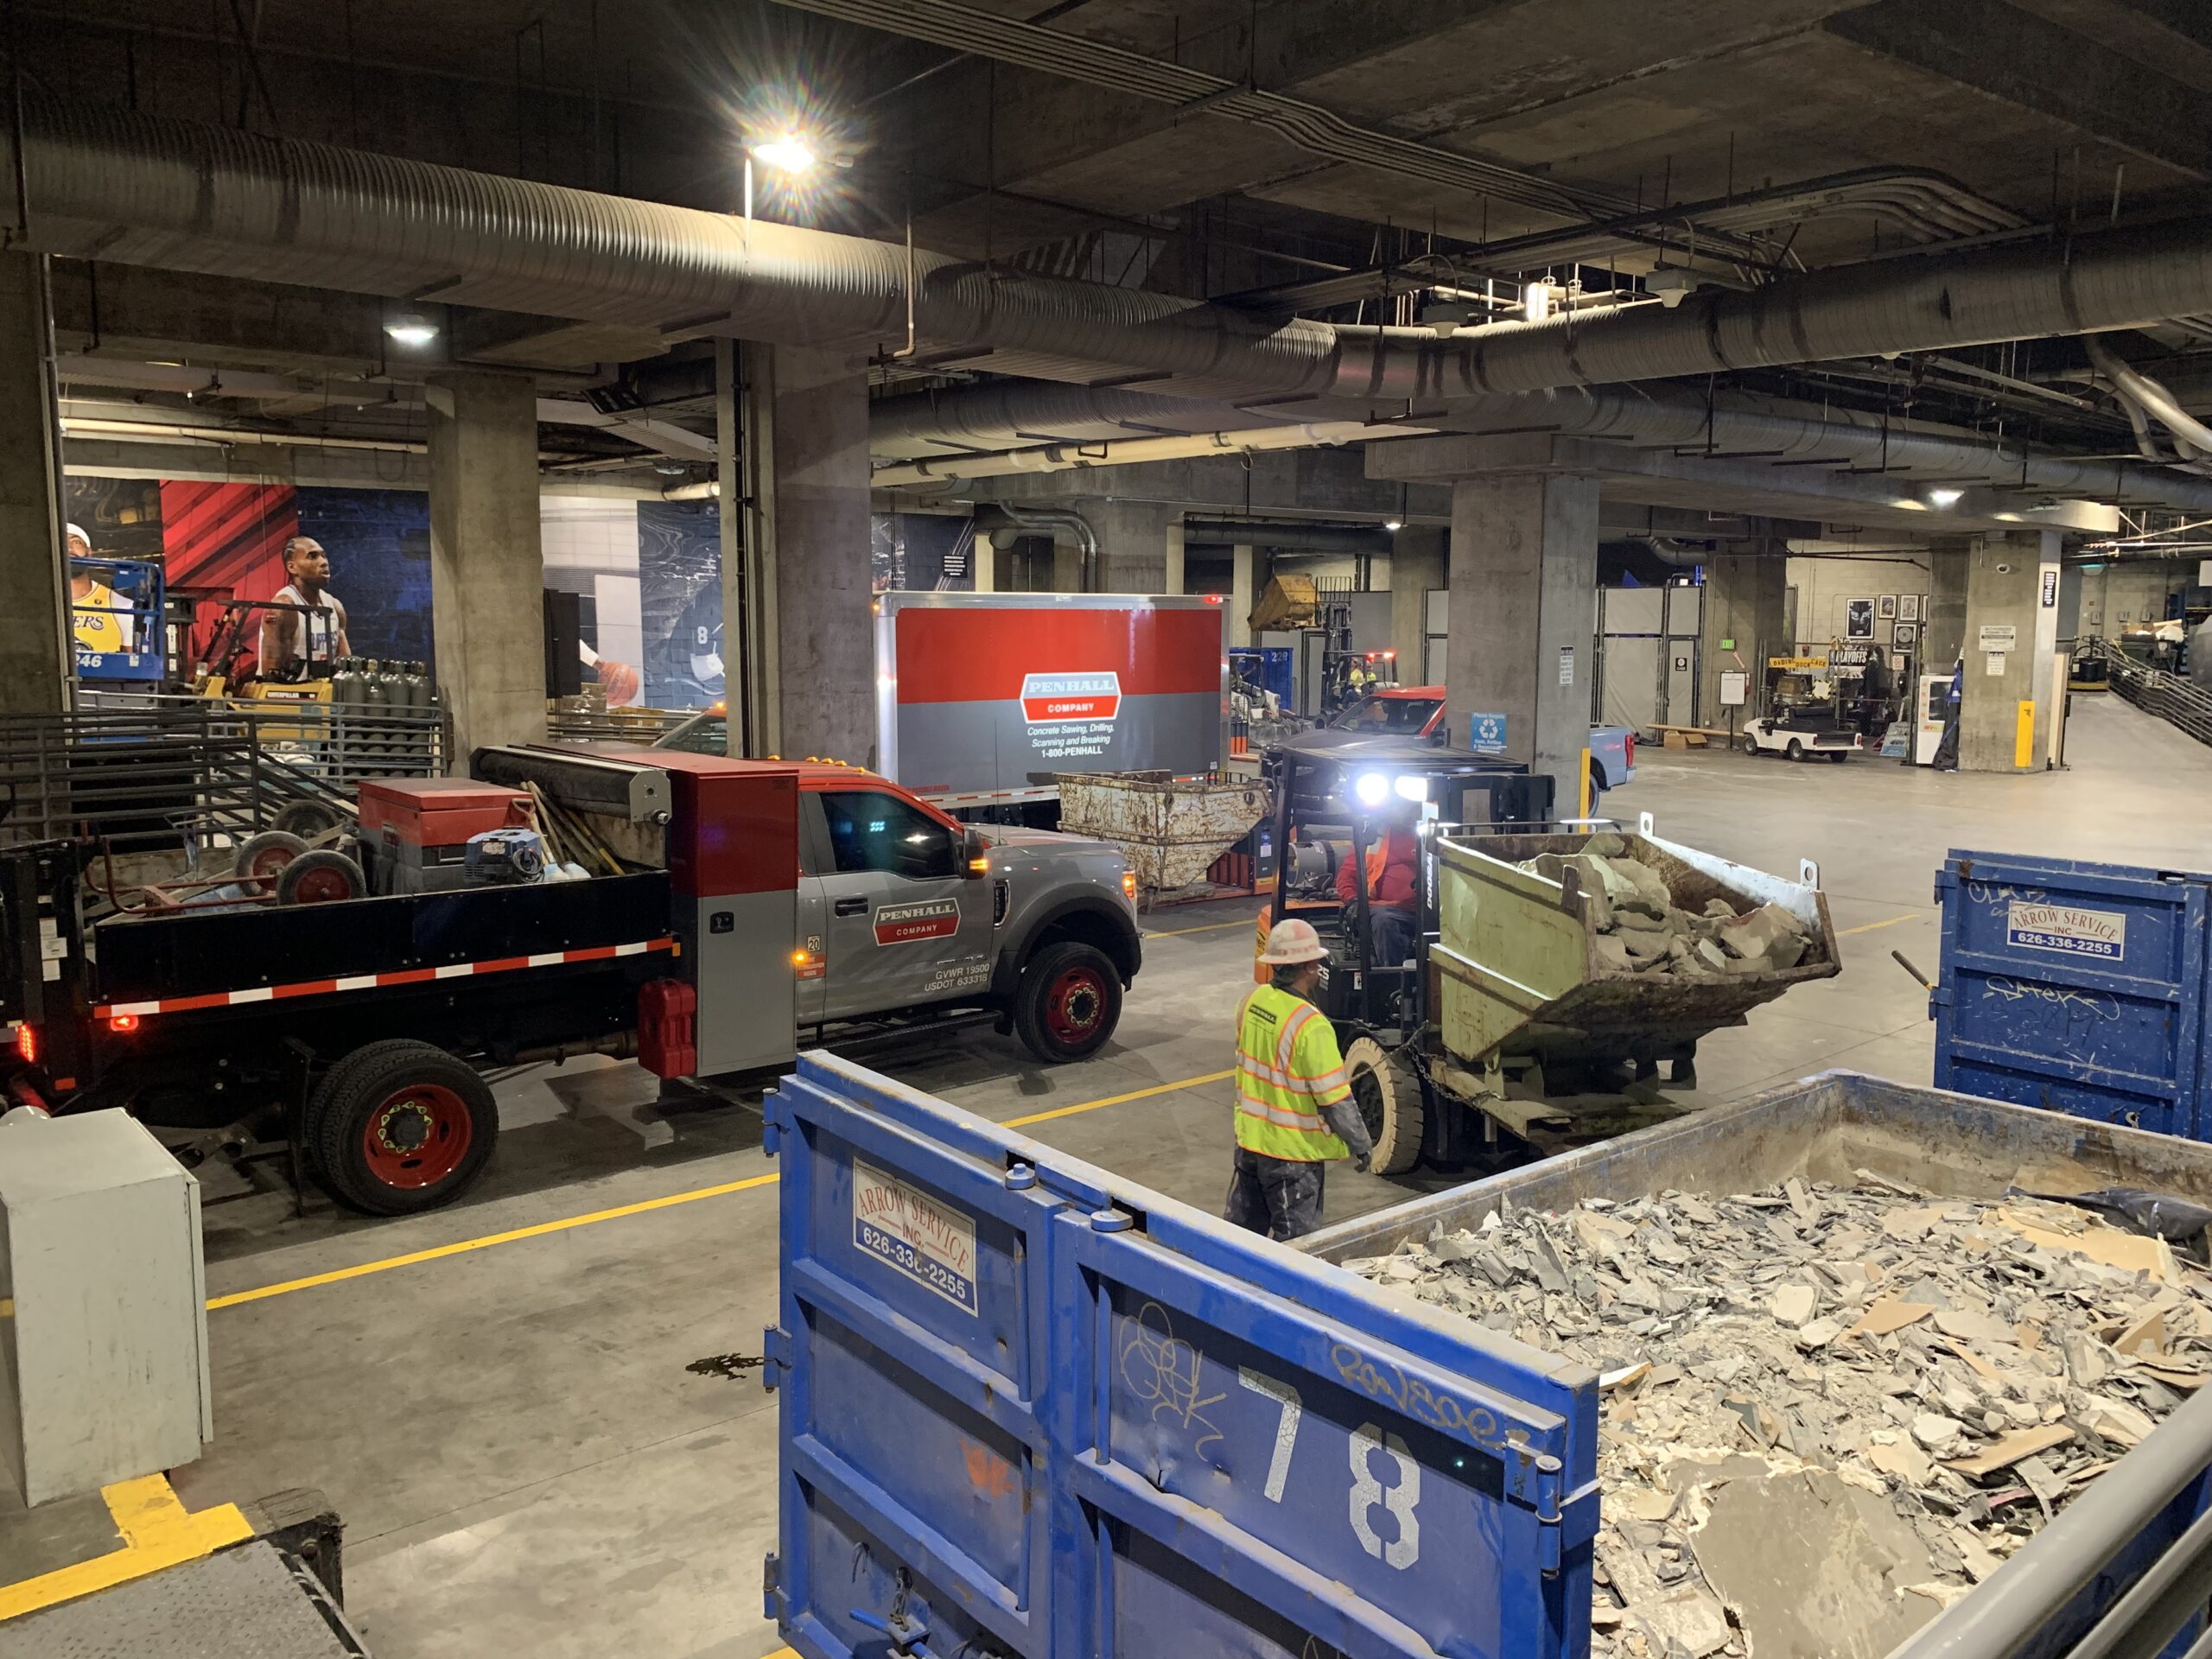
Loading Dock#1
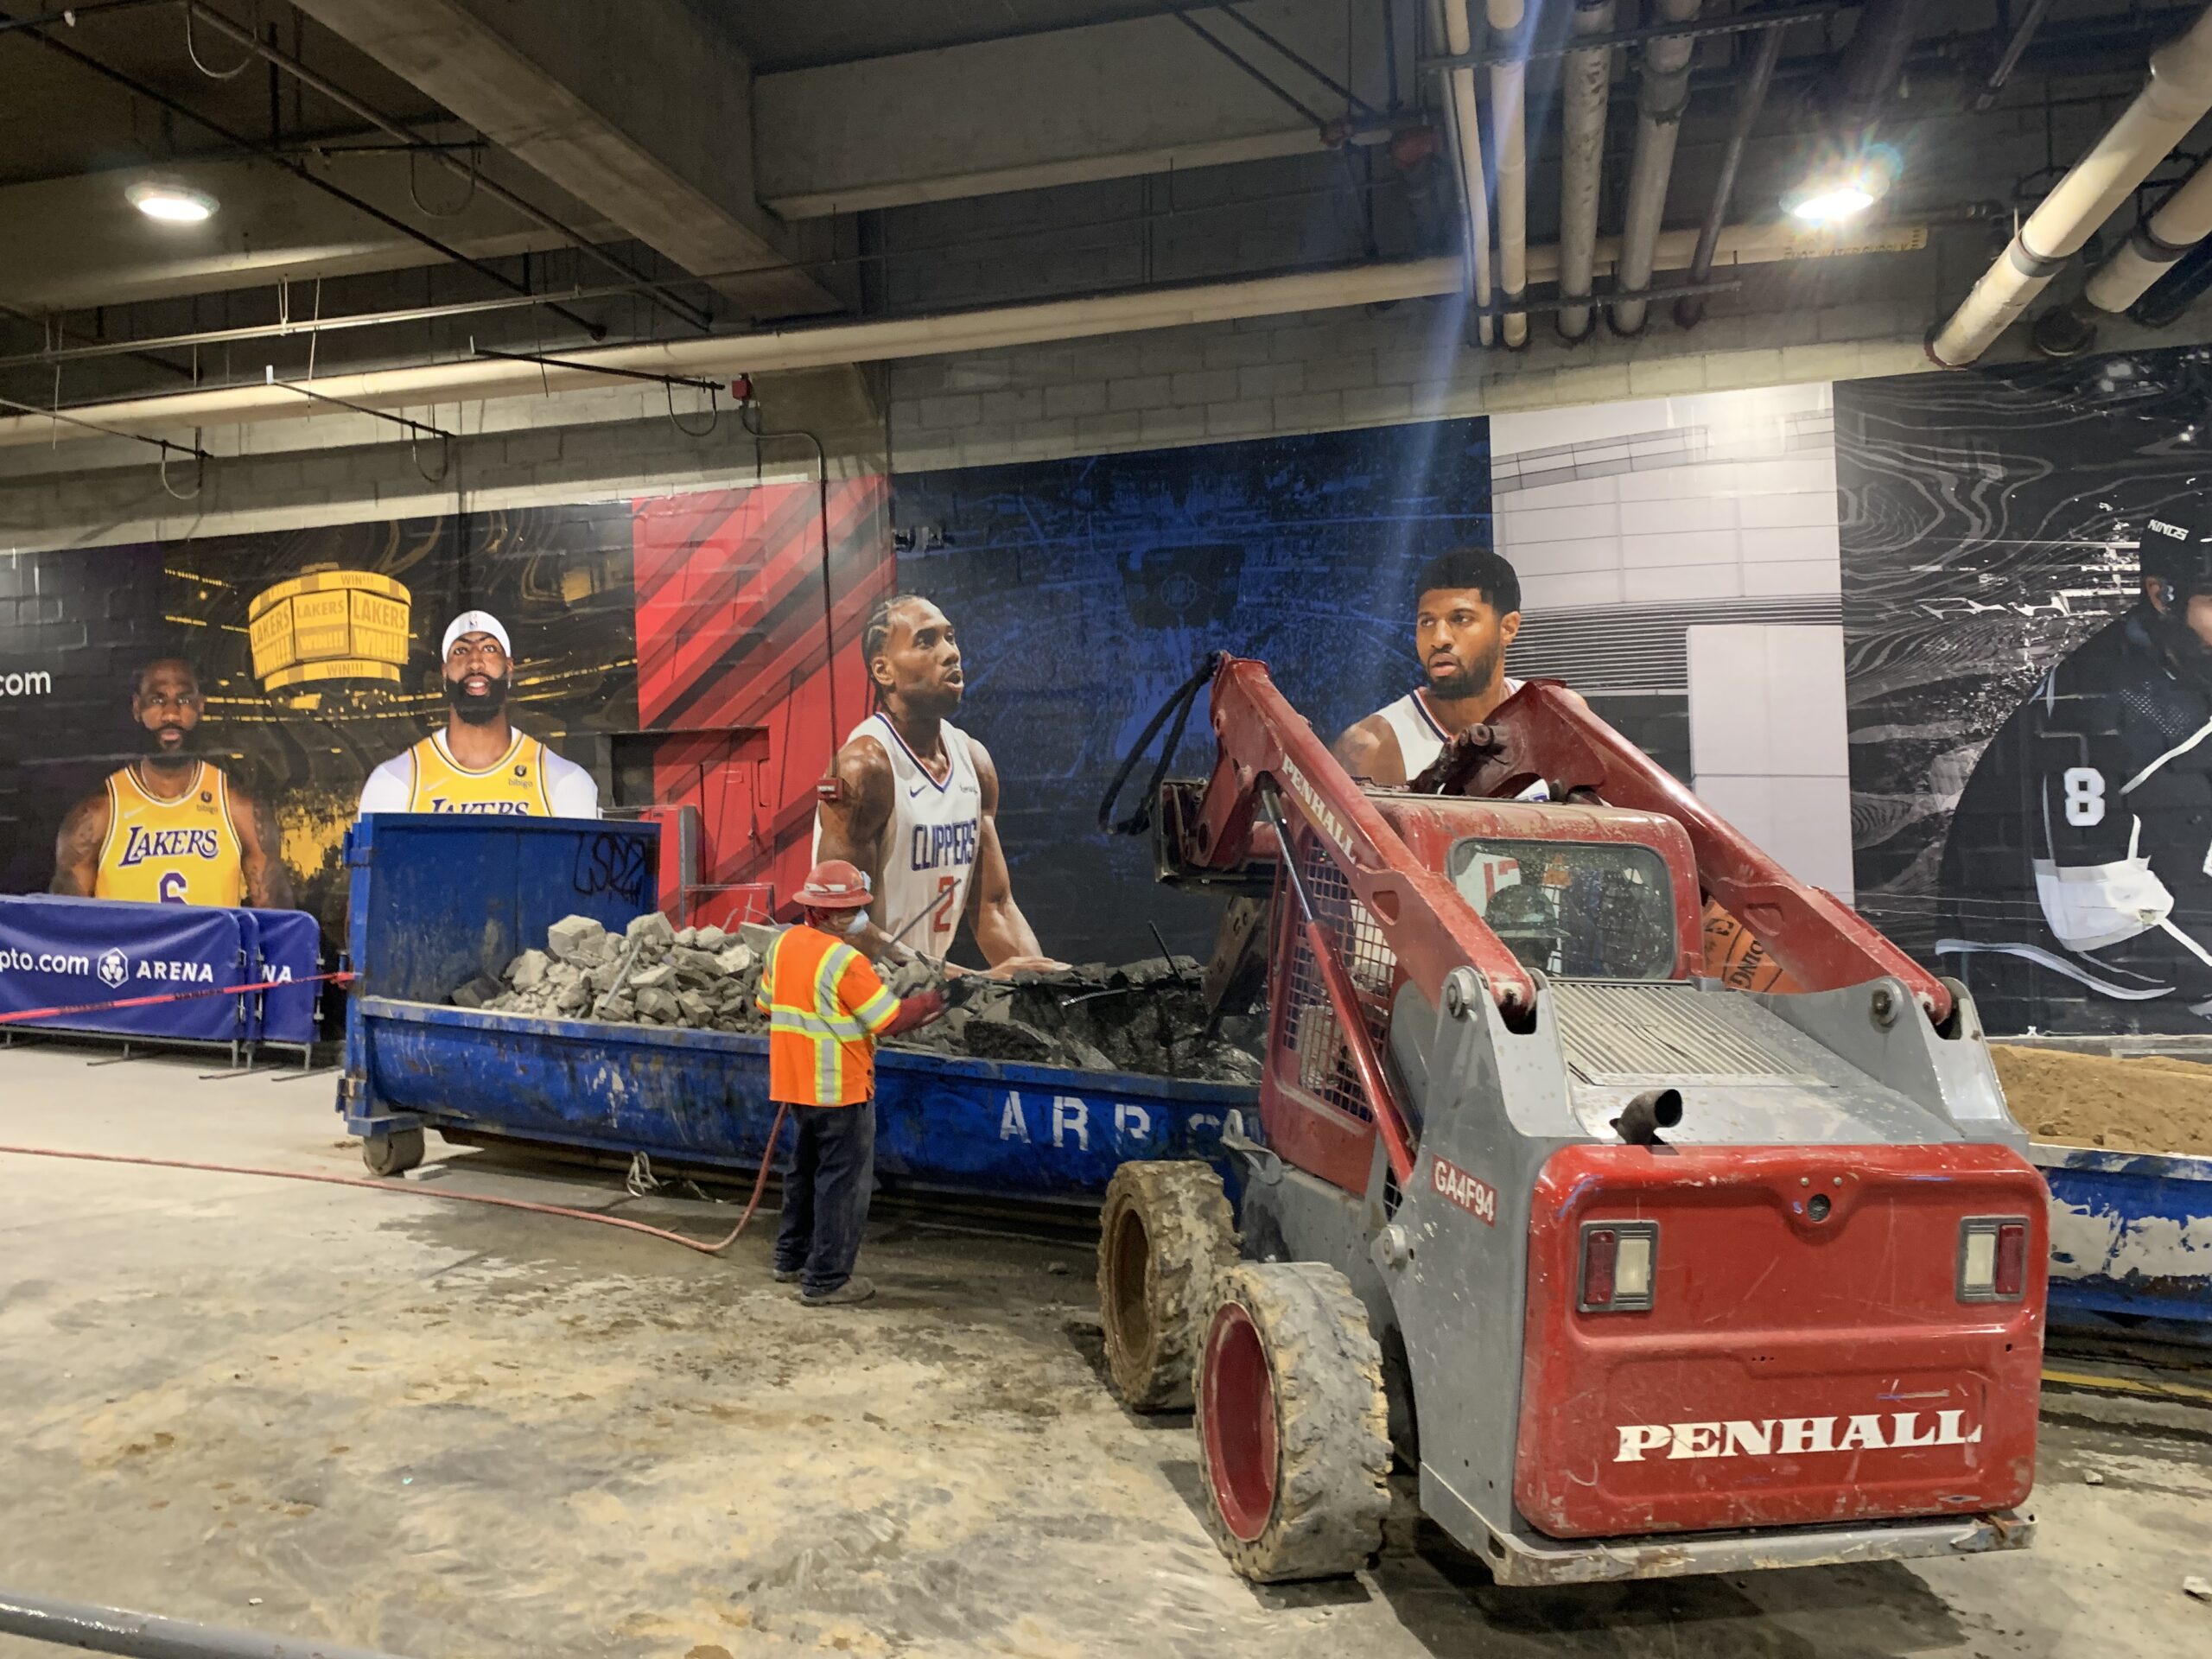
Loading Dock#2

A Four-Phase Renovation in an Active Arena

Crypto.com Arena is a 960,000-square-foot venue that hosts more than 240 events each year and welcomes approximately four million guests annually. The arena is home to the Los Angeles Lakers, Los Angeles Kings and Los Angeles Sparks.

The renovation was completed through four consecutive phases between 2022 and 2025. Each phase was scheduled around the arena's active event calendar, with construction taking place while games, concerts and other major events continued.

PCL Construction led the renovation program, coordinating with the arena, design partners and trade contractors to complete work within tightly controlled offseason schedules. According to PCL, each phase was limited to approximately 16 weeks, with work often performed at night to avoid disrupting scheduled events.

The renovations included upgrades throughout the arena, including concourses, premium clubs and suites, dining areas, seating areas, team facilities and locker rooms.
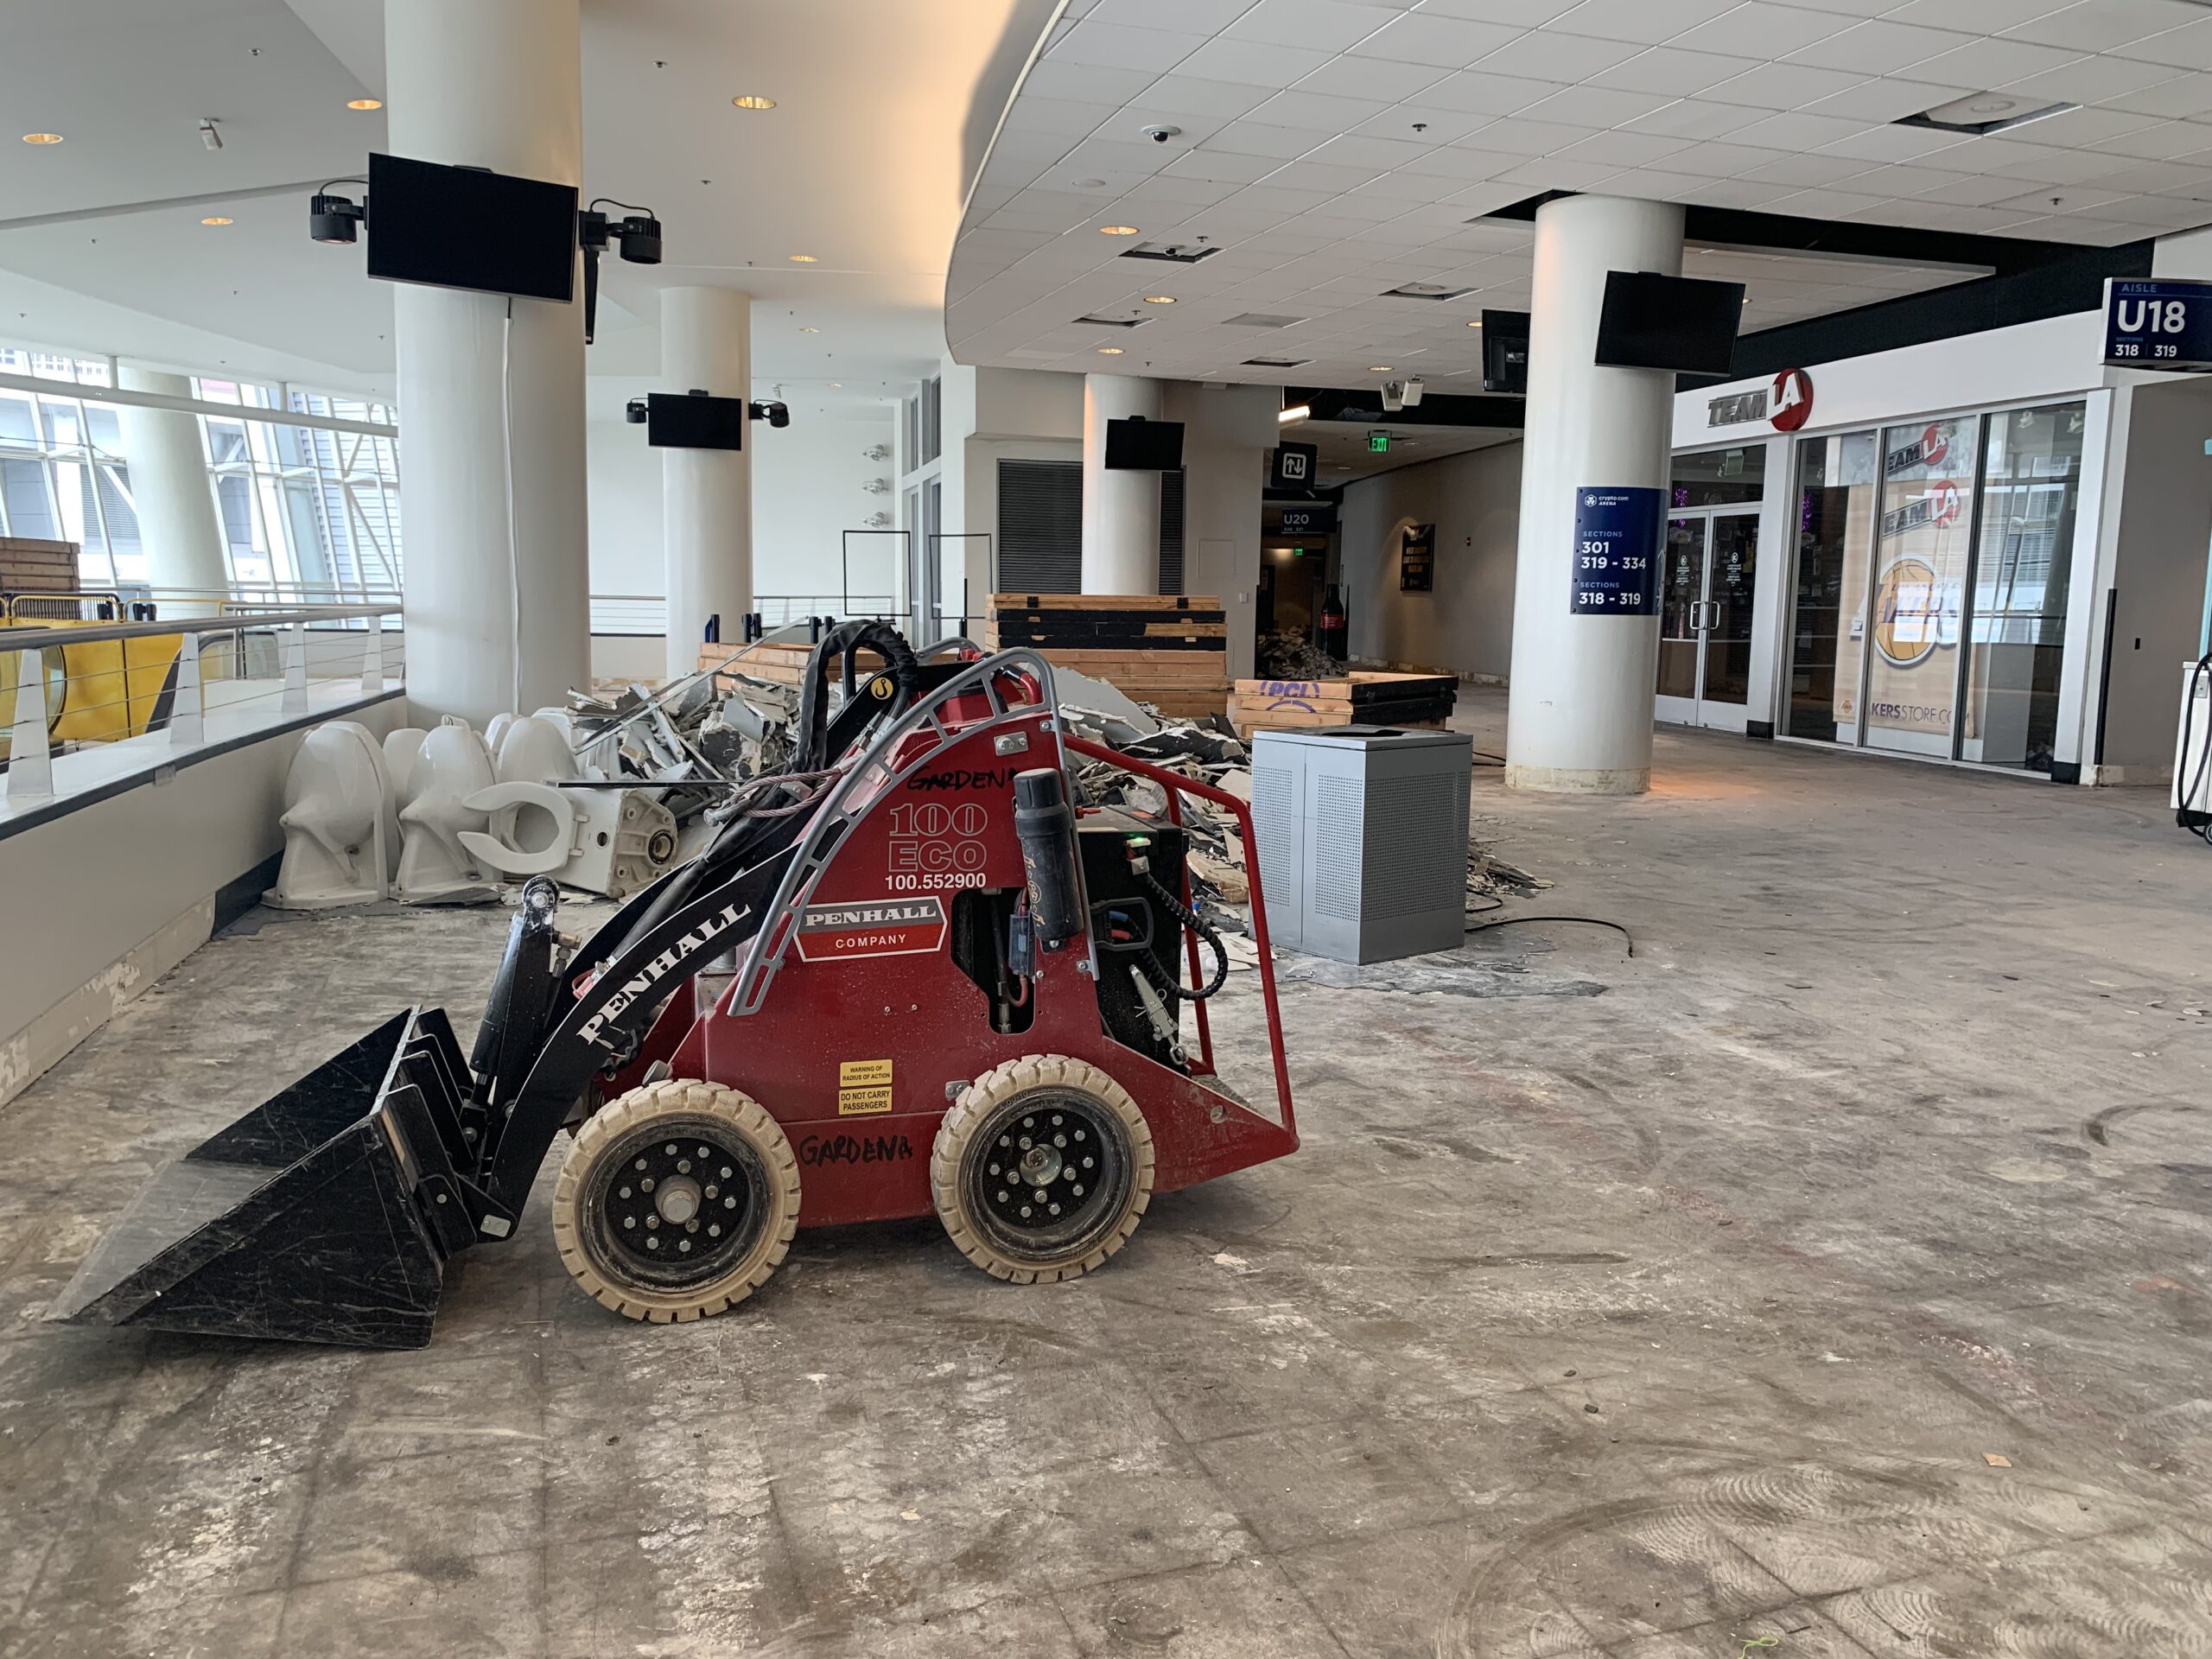
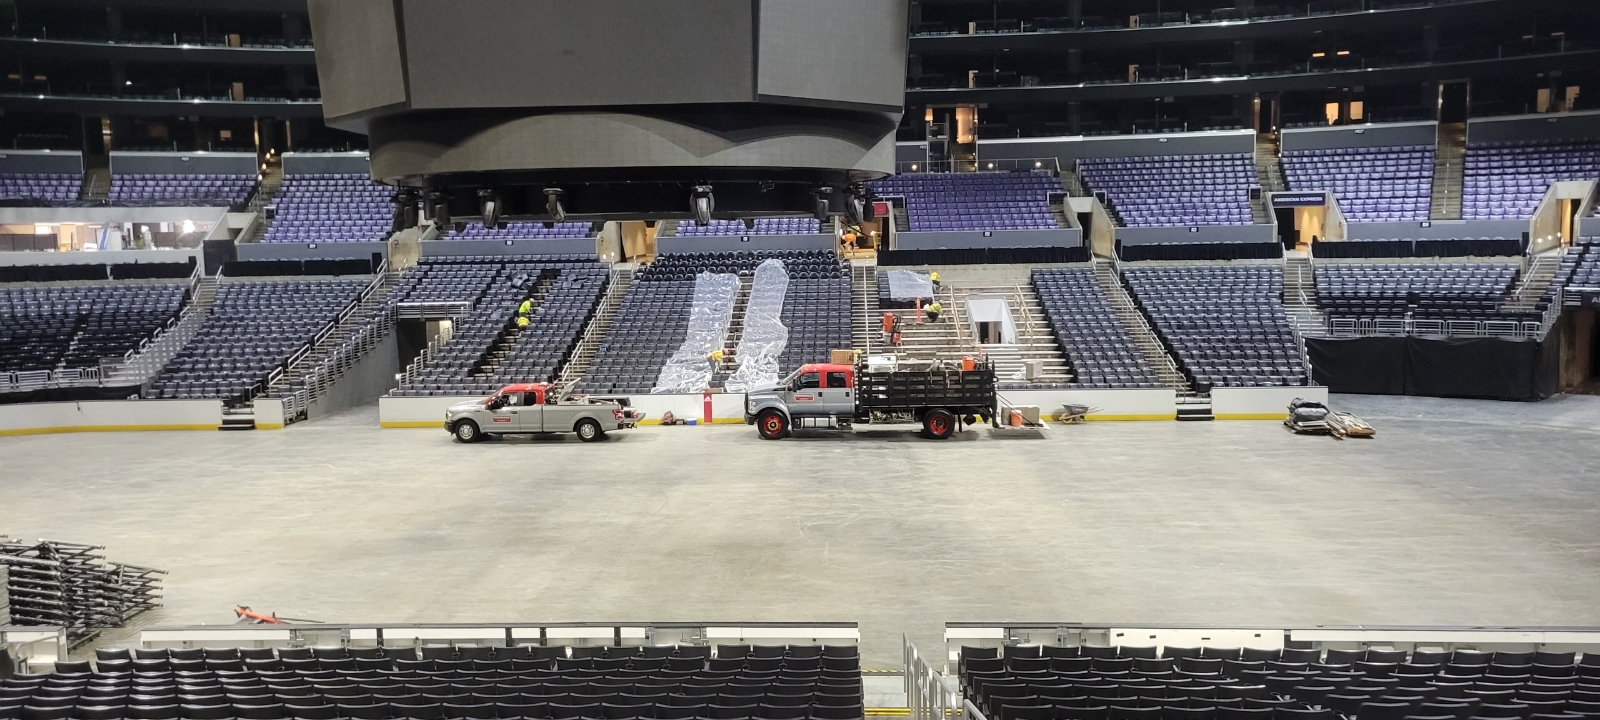
Upper Concourse Flooring Demo
Resized_Resized_20230911_052831

Penhall's Role in the Crypto.com Arena Renovation

Penhall provided selective demolition services throughout all four phases of the Crypto.com Arena renovation from 2022 through 2025, helping prepare the venue for Olympic and seasonal event upgrades.

Work spanned several areas throughout the arena, including the Chairman’s Club, Family Rooms, Impact Club, Suite Level and Upper Concourse, as well as concession removals.

Penhall's scope included:

  • Concrete Demolition: Breaking and removal of existing concrete
  • Soft Demolition: Interior dismantling and removal
  • Flat Sawing & Core Drilling: Precision cutting for controlled demolition
  • Advanced Techniques: GPR imaging, digital X-ray (DXR), Brokk demolition equipment and diamond tooling

Working within an active, high-traffic venue required careful planning and coordination to maintain safety, efficiency and project schedules while minimizing disruption to ongoing arena events.

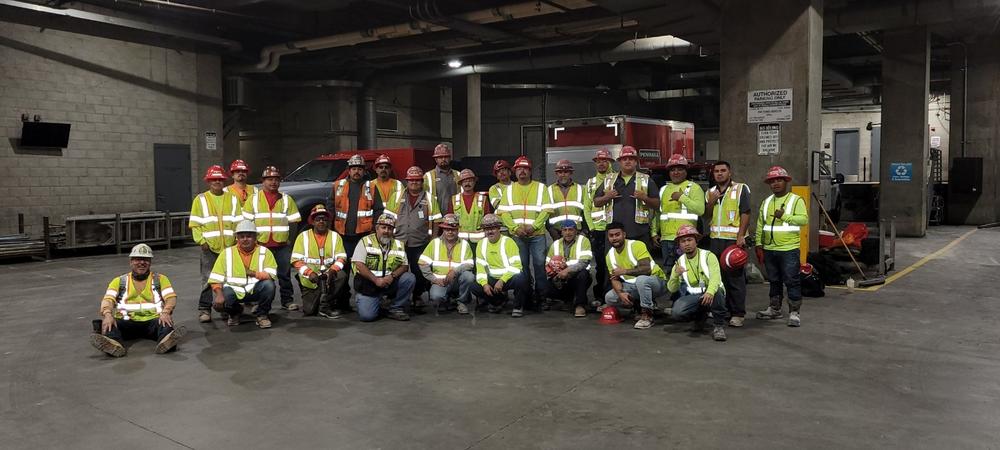
Through all four phases, Penhall's teams provided the specialized demolition and concrete services needed to help keep the renovation moving toward completion ahead of major events.

View the Crypto.com Arena Renovation Project → https://www.penhall.com/projects/crypto-arena-renovation/
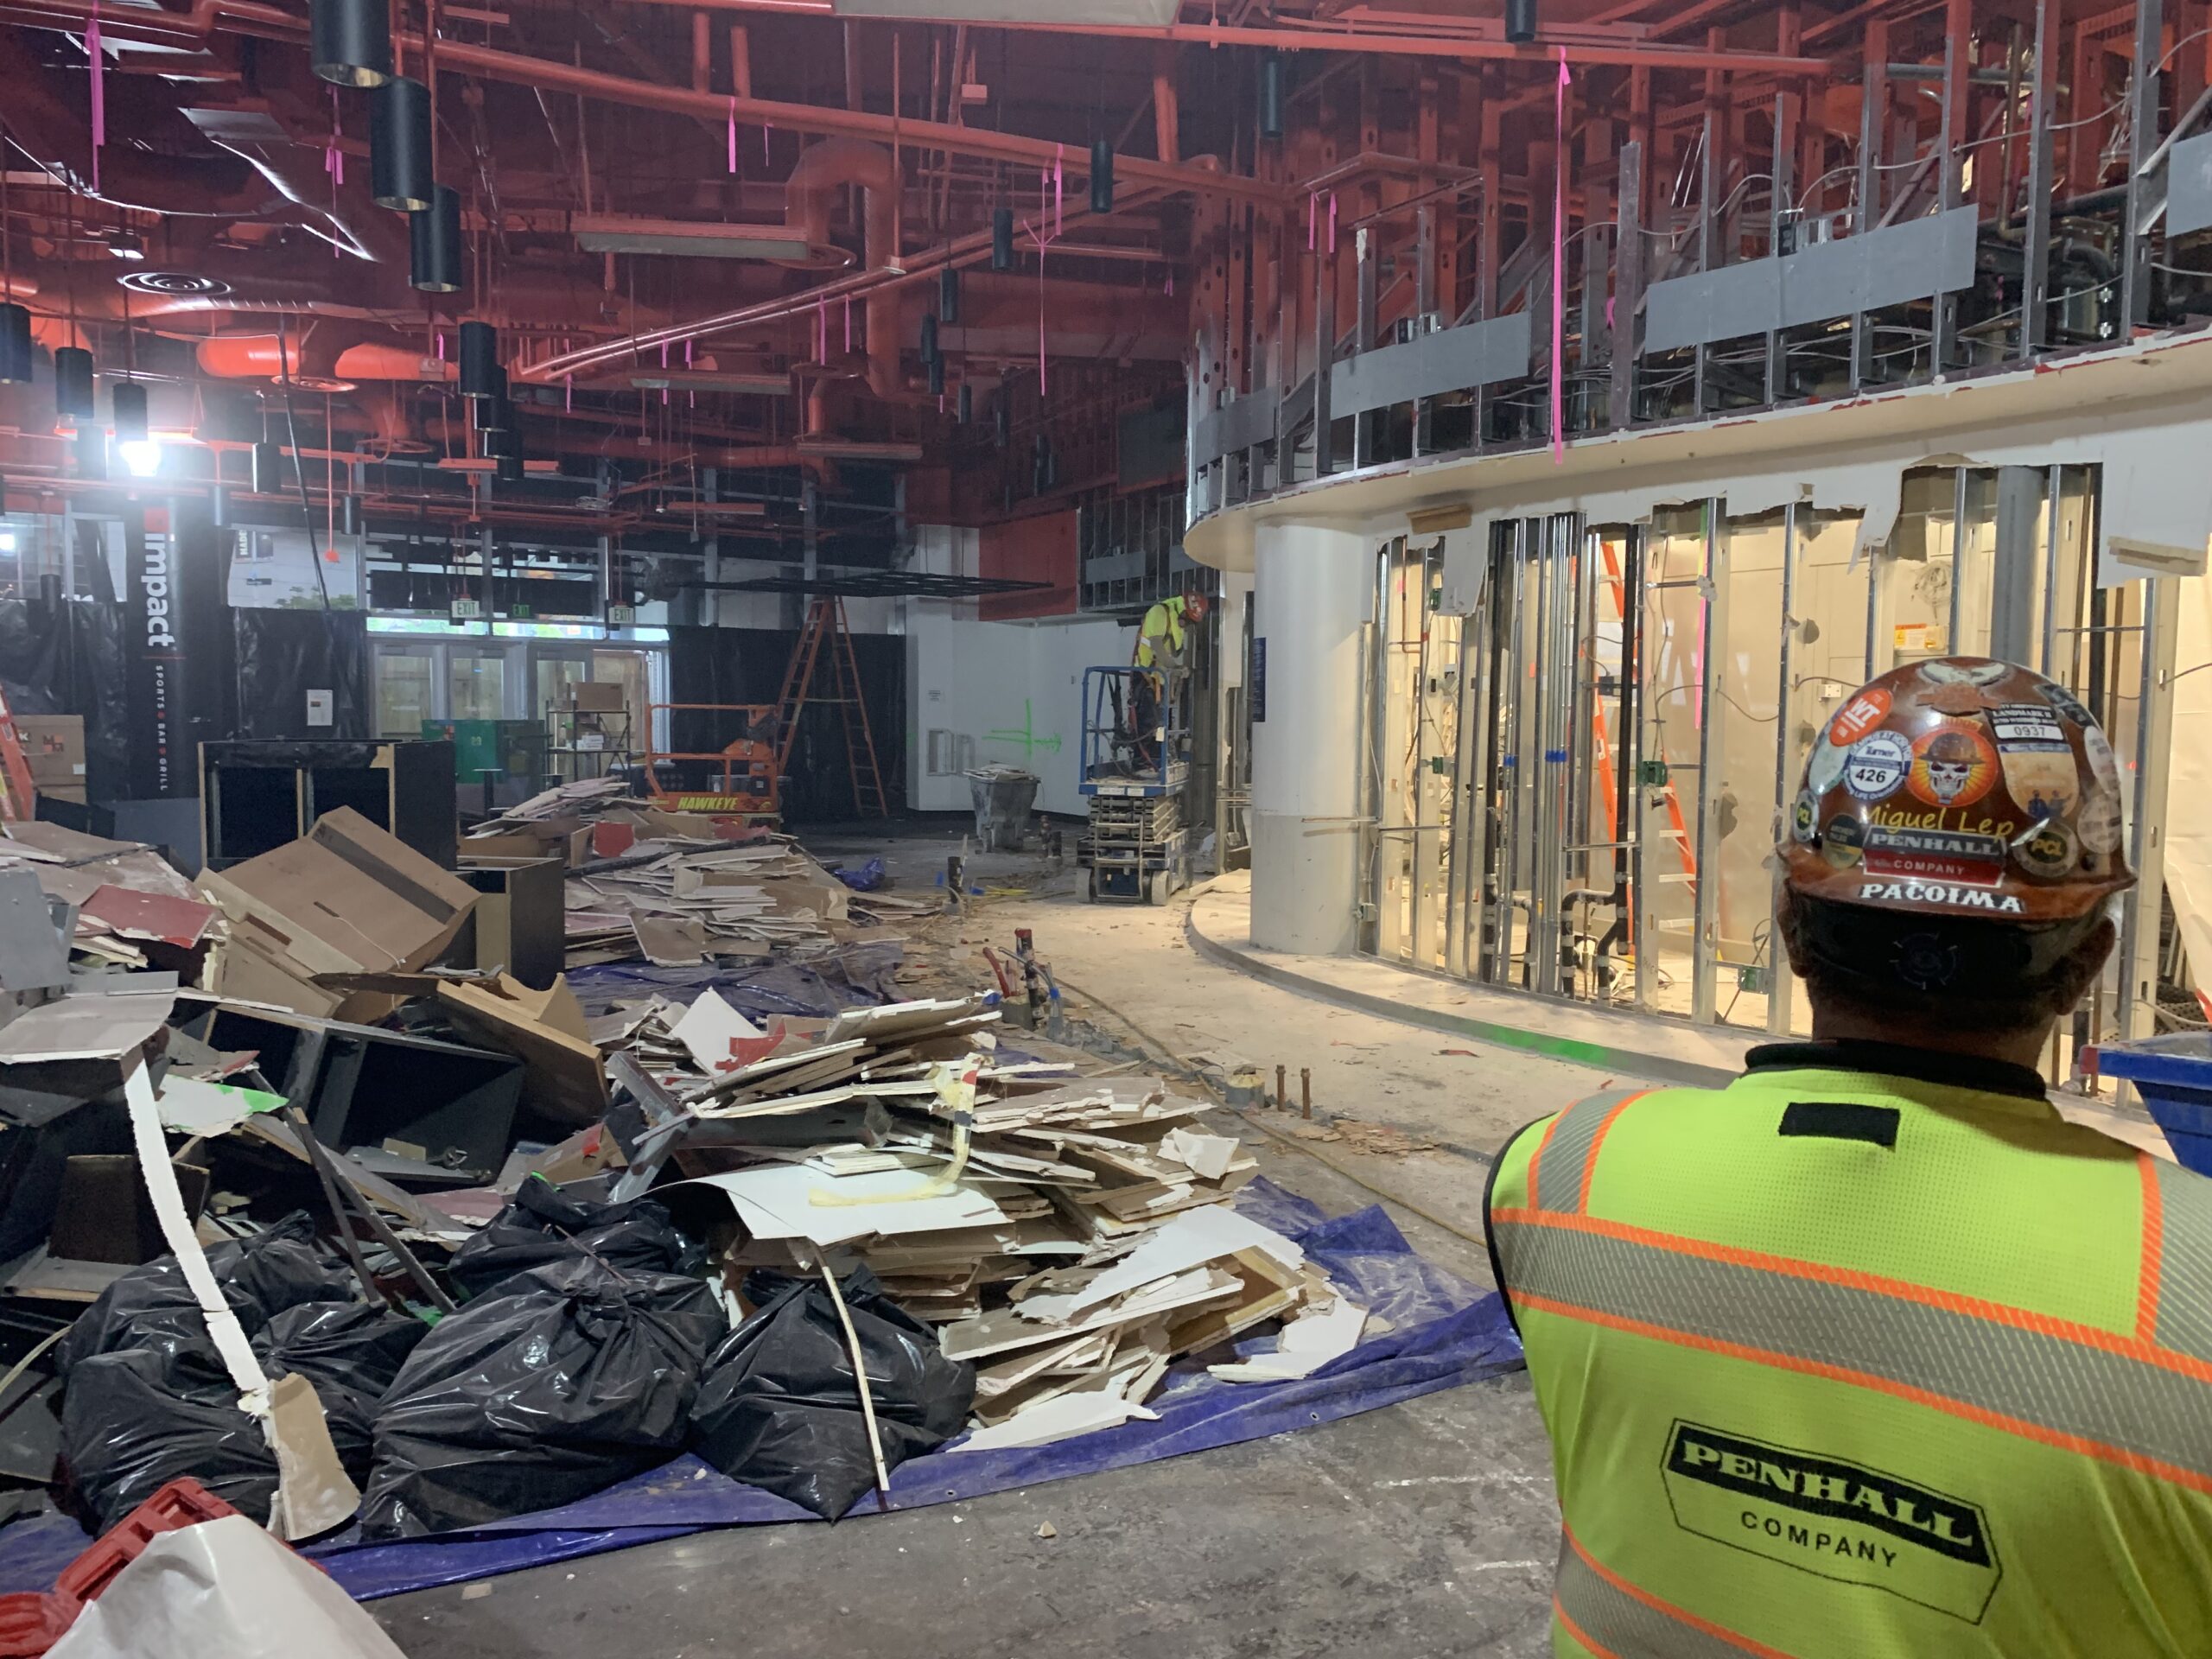
Impact Club 2022
Crypto_Team

Construction in a Venue That Never Stops

One of the biggest challenges of the Crypto.com Arena renovation was the need to balance construction with an active event schedule.

The arena continued hosting professional sports, concerts and nationally televised events throughout the renovation. PCL noted that each phase had to accommodate approximately 50 to 65 interrupted workdays, requiring teams to carefully coordinate construction activities around venue operations.

That meant construction planning extended beyond the physical work itself. Crews and trade partners had to coordinate access, work hours, site conditions and turnover requirements to keep spaces ready for events.

PCL's project information also describes measures used to control dust and debris, coordinate daily activities and protect the guest experience while construction was underway.

For a project in an active entertainment venue, maintaining that balance requires every trade partner to understand the importance of schedule, coordination and site conditions.
Crypto-1
Crypto BBQ2

Recognized for Project Excellence and Safety

The completed renovation has now been recognized by ENR West with two honors.

The project was selected as a 2026 ENR West Best Project in the Sports/Entertainment category. ENR reported that its Best Projects judges evaluated projects based on factors including how teams overcame challenges, teamwork, safety, innovation, industry and community contributions, and construction and design quality.

The project also received the ENR West Excellence in Safety Award.

According to PCL, the project recorded 583,979 worker hours with zero lost-time incidents while construction took place in an occupied venue with constantly changing public access routes and event configurations.

These project-wide results reflect the coordination and safety focus required from the entire project team, including the contractors and trade partners working within the renovation.

Four Phases. One Major Project.

The Crypto.com Arena renovation represents more than a single construction effort. It was a multi-year, four-phase program completed within the constraints of an active sports and entertainment venue.

Penhall was proud to be part of that effort across all four phases from 2022–2025.

Projects like this demonstrate the importance of experienced trade partners who can work within complex schedules, coordinate with larger project teams and adapt to the demands of active construction environments.

Penhall is proud to contribute to projects that keep moving, from major renovations and concrete work to complex construction environments across North America.
Penhall Award

Looking for a construction partner for your next project?

From concrete cutting and coring to demolition, scanning and other specialized construction services, Penhall supports projects across North America.
CALL FOR A QUOTE 1-866-458-3298

Post Tension Slab Cutting and Coring: Engineering Protocols for Field Execution

Executing post tension slab cutting or coring requires pre-drilling GPR scanning to locate high-tensile steel cables and determine parabolic drape depth. General contractors must establish clear safety clearances, verify conduit pathways, and deploy single-source scanning and cutting teams to maintain structural integrity and prevent catastrophic tendon strikes.

CALL FOR A QUOTE
1-800-736-4255

At a Glance

  • High-Tension Mechanical Risks: Post-tension cables carry 25,000 to 33,000 pounds of tensile force per strand. Severing a cable causes explosive energy release, spalling concrete, and structural instability.
  • GPR Antenna Selection: Deploying 2.6 GHz antennas provides high-resolution imaging for top-layer rebar and shallow tendons, while 1.6 GHz antennas penetrate deeper to map parabolic drape zones near mid-span.
  • Dielectric Constant Calibration: Standard concrete radar velocity estimates carry up to 20% error. Field technicians must calibrate dielectric properties using slab depth reflections or exposed edge measurements before marking layout boundaries.
  • Structural Hold Points: Core penetrations located within 6 inches of a marked tendon profile require mandatory structural engineer review and scope adjustment before drilling begins.
  • Single-Source Risk Mitigation: Contracting one specialized company to scan, layout, cut, and core eliminates split liability between separate scanning subcontractors and cutting operators.

High-Tension Mechanics and Structural Risks in Post Tension Slab Construction

Executing modifications on a post tension slab without accurate structural mapping introduces catastrophic hazards to field crews and structural stability. Unlike standard slab-on-grade systems that rely on passive rebar reinforcement, post-tensioned systems incorporate active compression forces.

General contractors facing tight project timelines must manage missing as-builts, unmapped electrical conduits, and unknown cable drape profiles. Reviewing technical engineering resource guides provides structural baseline understanding before field operations commence.

Tensioned Strand Force Dynamics and Post Tension Slab Failure Mechanics

Unbonded monostrand cables are tensioned to 70% to 80% of their ultimate tensile strength, creating high internal energy reserves. Severing an unbonded cable releases this force along the entire strand length, resulting in concrete blowout and immediate structural degradation.

A sudden post tension slab failure causes anchor head release at the slab perimeter, spalling top concrete, and severe shear strength reductions. Project superintendents must enforce safety protocols to protect workers from high-velocity concrete fragmentation during drilling.

Identifying Slab Types: Unbonded Monostrand vs Bonded Multistrand Systems

Unbonded monostrand systems consist of individual steel strands encased in extruded plastic sheathing coated with corrosion-inhibiting grease. These strands move independently of the concrete matrix, meaning a cable strike compromises the full span.

Bonded multistrand systems use corrugated metal ducts filled with high-strength cementitious grout. The grout locks the strands to the concrete, which localizes force dissipation near a strike point but alters structural load paths across heavy industrial foundations.

GPR Concrete Scanning Protocols Before Cutting and Coring Operations

Ground Penetrating Radar (GPR) electromagnetic imaging provides a reliable non-destructive method for mapping subsurface steel and utility lines prior to concrete penetration. Scanning technicians systematically map the concrete to identify structural components.

Engaging GPR concrete scanning services ensures that all embedded targets are identified and documented on the slab surface before any saw blades or drill bits touch the site.

Antenna Frequency Selection: 1.6 GHz vs 2.6 GHz for Parabolic Drape Mapping

Selecting the correct radar frequency directly impacts spatial resolution and target detection depth. High-frequency 2.6 GHz antennas provide exceptional detail for top-layer mesh, shallow conduit, and upper tendon locations down to 12 inches.

Mid-frequency 1.6 GHz antennas penetrate deeper, reaching up to 18 inches into thick elevated floor plates. This penetration depth allows field technicians to plot parabolic drape paths across column heads and mid-span locations.

Dielectric Constant Calibration and Real-Time Depth Verification

Concrete radar velocity depends directly on the material dielectric constant, which varies based on moisture content, aggregate density, and cure time. Uncalibrated radar units produce depth estimation errors up to 20 percent.

Technicians perform field calibrations by comparing radar wave travel time against known slab depths or bottom-of-slab reflections. This process establishes depth accuracy within tight tolerances, protecting low-lying post tension slab foundation elements.

Field Execution Workflows for Core Drilling and Saw Cutting Near Tendons

Moving from radar evaluation to physical execution demands strict adherence to marked layout boundaries and structural clearance rules. Field crews follow verified workflows to maintain safety around high-tensile steel.

Deploying expert operators for diamond core drilling and precision flat saw cutting ensures penetrations stay within approved clear zones while avoiding structural contact.

Minimum Clearance Distances and Layout Adjustment Procedures

A mandatory 3-inch parallel clearance applies to single monostrand cables, while a 6-inch to 12-inch clearance is required around dense cable bands over column heads. Mechanical sleeves or MEP core penetrations must shift away from marked cable paths.

When core locations conflict with tendon layouts, field teams must pause work and request engineering approval. Shifting core locations slightly preserves slab integrity and prevents costly structural repairs.

Single-Source Contractor Execution to Eliminate Subcontractor Liability Gaps

Hiring separate subcontractors for subsurface scanning and concrete saw cutting creates significant liability gaps and communication breakdowns. Misinterpreted scan markings often lead to preventable cable strikes.

Single-source execution ensures that the team scanning the concrete also operates the cutting equipment. The operators directly interpret the radar data, taking full ownership of jobsite safety and structural protection.

Subsurface Method Comparison

Selecting the correct non-destructive testing methodology depends on structural access, jobsite conditions, and required imaging capabilities.

  • Ground Penetrating Radar (GPR) Scanning: Sends electromagnetic wave pulses into the concrete matrix to capture real-time reflections. Provides immediate depth information and requires single-sided slab access, allowing fast layout marking across large floor plates.
  • Concrete X-Ray Imaging: Uses radiographic gamma sources to produce film images of embedded steel and conduits. Requires two-sided slab access, site evacuations due to radiation zones, and extended processing times, making it best suited for dense, highly congested reinforcement areas.

Structural Protection and Safety Across Specialized Asset Classes

Different concrete structures present unique reinforcement layouts and environmental constraints during cutting and coring operations. Adapting field workflows to specific structural types reduces jobsite delays.

Consulting commercial and industrial case studies highlights how specialized scanning and cutting methods apply across diverse commercial, industrial, and infrastructure environments.

Commercial Elevated Slabs and Parking Structures

Elevated commercial slabs feature complex tendon distributions, including dense banded cables running along column lines and uniformly distributed cables crossing bay spans. Parking decks add moisture intrusion and chloride contamination challenges, which affect radar wave propagation.

Technicians perform grid scans on top and bottom slab surfaces whenever accessible. Dual-surface scanning verifies drape positions, ensuring floor penetrations for plumbing or electrical upgrades avoid embedded tendons.

Heavy Industrial Facilities and Infrastructure Foundations

Thick foundation mats, heavy industrial equipment bases, and bridge structures contain dense rebar networks alongside structural post-tensioning. Cutting operations in these environments require high-horsepower equipment and wet-coring containment systems.

Field crews deploy specialized slurry extraction equipment and enforce OSHA Table 1 silica dust controls during wet saw cutting. Maintaining strict containment keeps active facilities safe and operational during structural modifications.

Technical Limitations

  • Signal Attenuation in Fresh or Saturated Concrete: High moisture levels and uncured concrete attenuate high-frequency GPR signals, limiting wave penetration depth and blurring target visibility.
  • Congested Mesh Shielding: Dense top-layer wire mesh or closely spaced rebar grids reflect radar energy, creating a signal blanket that masks deeper post-tension cables.
  • Adjacent Metal Interference: Metallic floor decking, pan forms, and nearby steel beams distort electromagnetic signals, requiring manual depth verification and dual-surface evaluation.

Post Tension Slab Repair and Emergency Cut Mitigation Protocols

When a cable strike occurs or structural modifications require cutting an existing tendon, field operations must transition immediately to containment and remediation protocols.

Executing selective concrete demolition provides safe access to damaged strands without disturbing surrounding sound concrete, laying the ground for structural repairs.

Structural Engineering Evaluation Hold Points

Work must stop immediately if a saw blade or core bit contacts a tendon. Field teams must clear the line of sight along the cable path and notify the structural Engineer of Record (EOR).

The EOR evaluates lost compression capacity, calculates load redistribution, and approves temporary shoring requirements. No further concrete removal or drilling may proceed without written EOR sign-off.

De-Tensioning, Splice Repair, and Pocket Grouting Procedures

Technicians carefully chip away concrete around the damaged cable to expose sound steel. Specialized hydraulic equipment safely de-tensions the strand before installing approved mechanical splice couplers.

Once spliced, hydraulic jacks re-tension the strand to specified engineering values. The repair pocket is then backfilled with high-strength non-shrink grout, restoring the structural integrity of the slab.

Partnering with Penhall Company for Structural Safety

Managing structural risk in post-tensioned structures requires proven technical expertise, modern field equipment, and tight quality controls. Penhall Company brings nearly seven decades of experience to complex commercial, industrial, and infrastructure projects.

Contact local Penhall branch locations for 24/7 emergency dispatch and project planning assistance. You can also schedule a specialized post-tension safety lunch and learn seminar to educate your engineering and field management personnel.


frequently asked questions

What is a post tension slab and how does it differ from a conventionally reinforced slab?

A post tension slab uses high-strength steel strands tensioned after the concrete cures to actively compress the concrete matrix. Unlike standard rebar that acts passively under load, active post-tensioning allows for thinner slabs and longer spans.

What happens during a post tension slab failure if a cable is cut?

Severing a tensioned strand releases thousands of pounds of stored kinetic energy instantly. This energy release can shatter concrete, eject anchor heads from slab edges, cause personal injury, and compromise structural load capacity.

What GPR antenna frequency is required to locate post tension strands?

Technicians use 2.6 GHz high-frequency antennas to capture high-resolution imagery of shallow steel and top-layer tendons. Mid-frequency 1.6 GHz antennas are deployed to penetrate deeper and map parabolic drapes down to 18 inches.

How should a project team handle a post tension slab repair if a cable strike occurs?

Halt work immediately, clear the cable line of sight, and notify the structural engineer. Repairs require chipping back concrete, installing mechanical splice couplers, re-tensioning the strand with hydraulic jacks, and patching with non-shrink grout.

Why is a single-source scanning and cutting contractor required for high-risk penetrations?

Using a single contractor ensures the operators performing the core drilling or saw cutting directly interpret the GPR scan data. This eliminates handoff miscommunications between separate vendors and unifies project liability under one team.

Types of Concrete Saws: Wall Saws, Flat Saws, Wire Saws, and Chain Saws

CALL FOR A QUOTE
1-800-736-4255

At a Glance

  • Flat Saws: Self propelled, walk behind or ride on units built for horizontal cutting, such as slabs, pavements, and expansion joints, at depths up to about 25 inches.
  • Wall Saws: Track mounted saws that cut vertical, inclined, or overhead surfaces with precise, straight lines, reaching depths up to about 36 inches from a single side.
  • Wire Saws: Diamond bead cable driven by a hydraulic power unit, used for mass concrete and irregular shapes where depth or geometry rules out a circular blade.
  • Chain Saws: Diamond chain saws that plunge cut square corners and tight openings without the overcut a circular blade leaves behind.
  • Choosing Between Them: Depth, surface orientation, corner requirements, and site access are the four factors that usually decide which saw fits the job.
10 wiresaw
03070F2E-D51A-4580-B39A-20FBE4B2B433

Why Saw Selection Matters

Choosing a concrete saw isn't just about matching a tool to a task. The wrong choice can mean a saw that can't reach the required depth, a cut that damages structural steel it shouldn't touch, or equipment that simply can't fit or operate on the site. For GCs, project engineers, and estimators specifying or bidding cutting scope, understanding what each saw type can and can't do is what keeps that decision from becoming a change order later.

There are four primary types of concrete saws used on commercial and infrastructure projects: flat saws, wall saws, wire saws, and chain saws. Each is built for a different combination of surface orientation, depth, and site condition.

Flat Saws (Slab Saws)

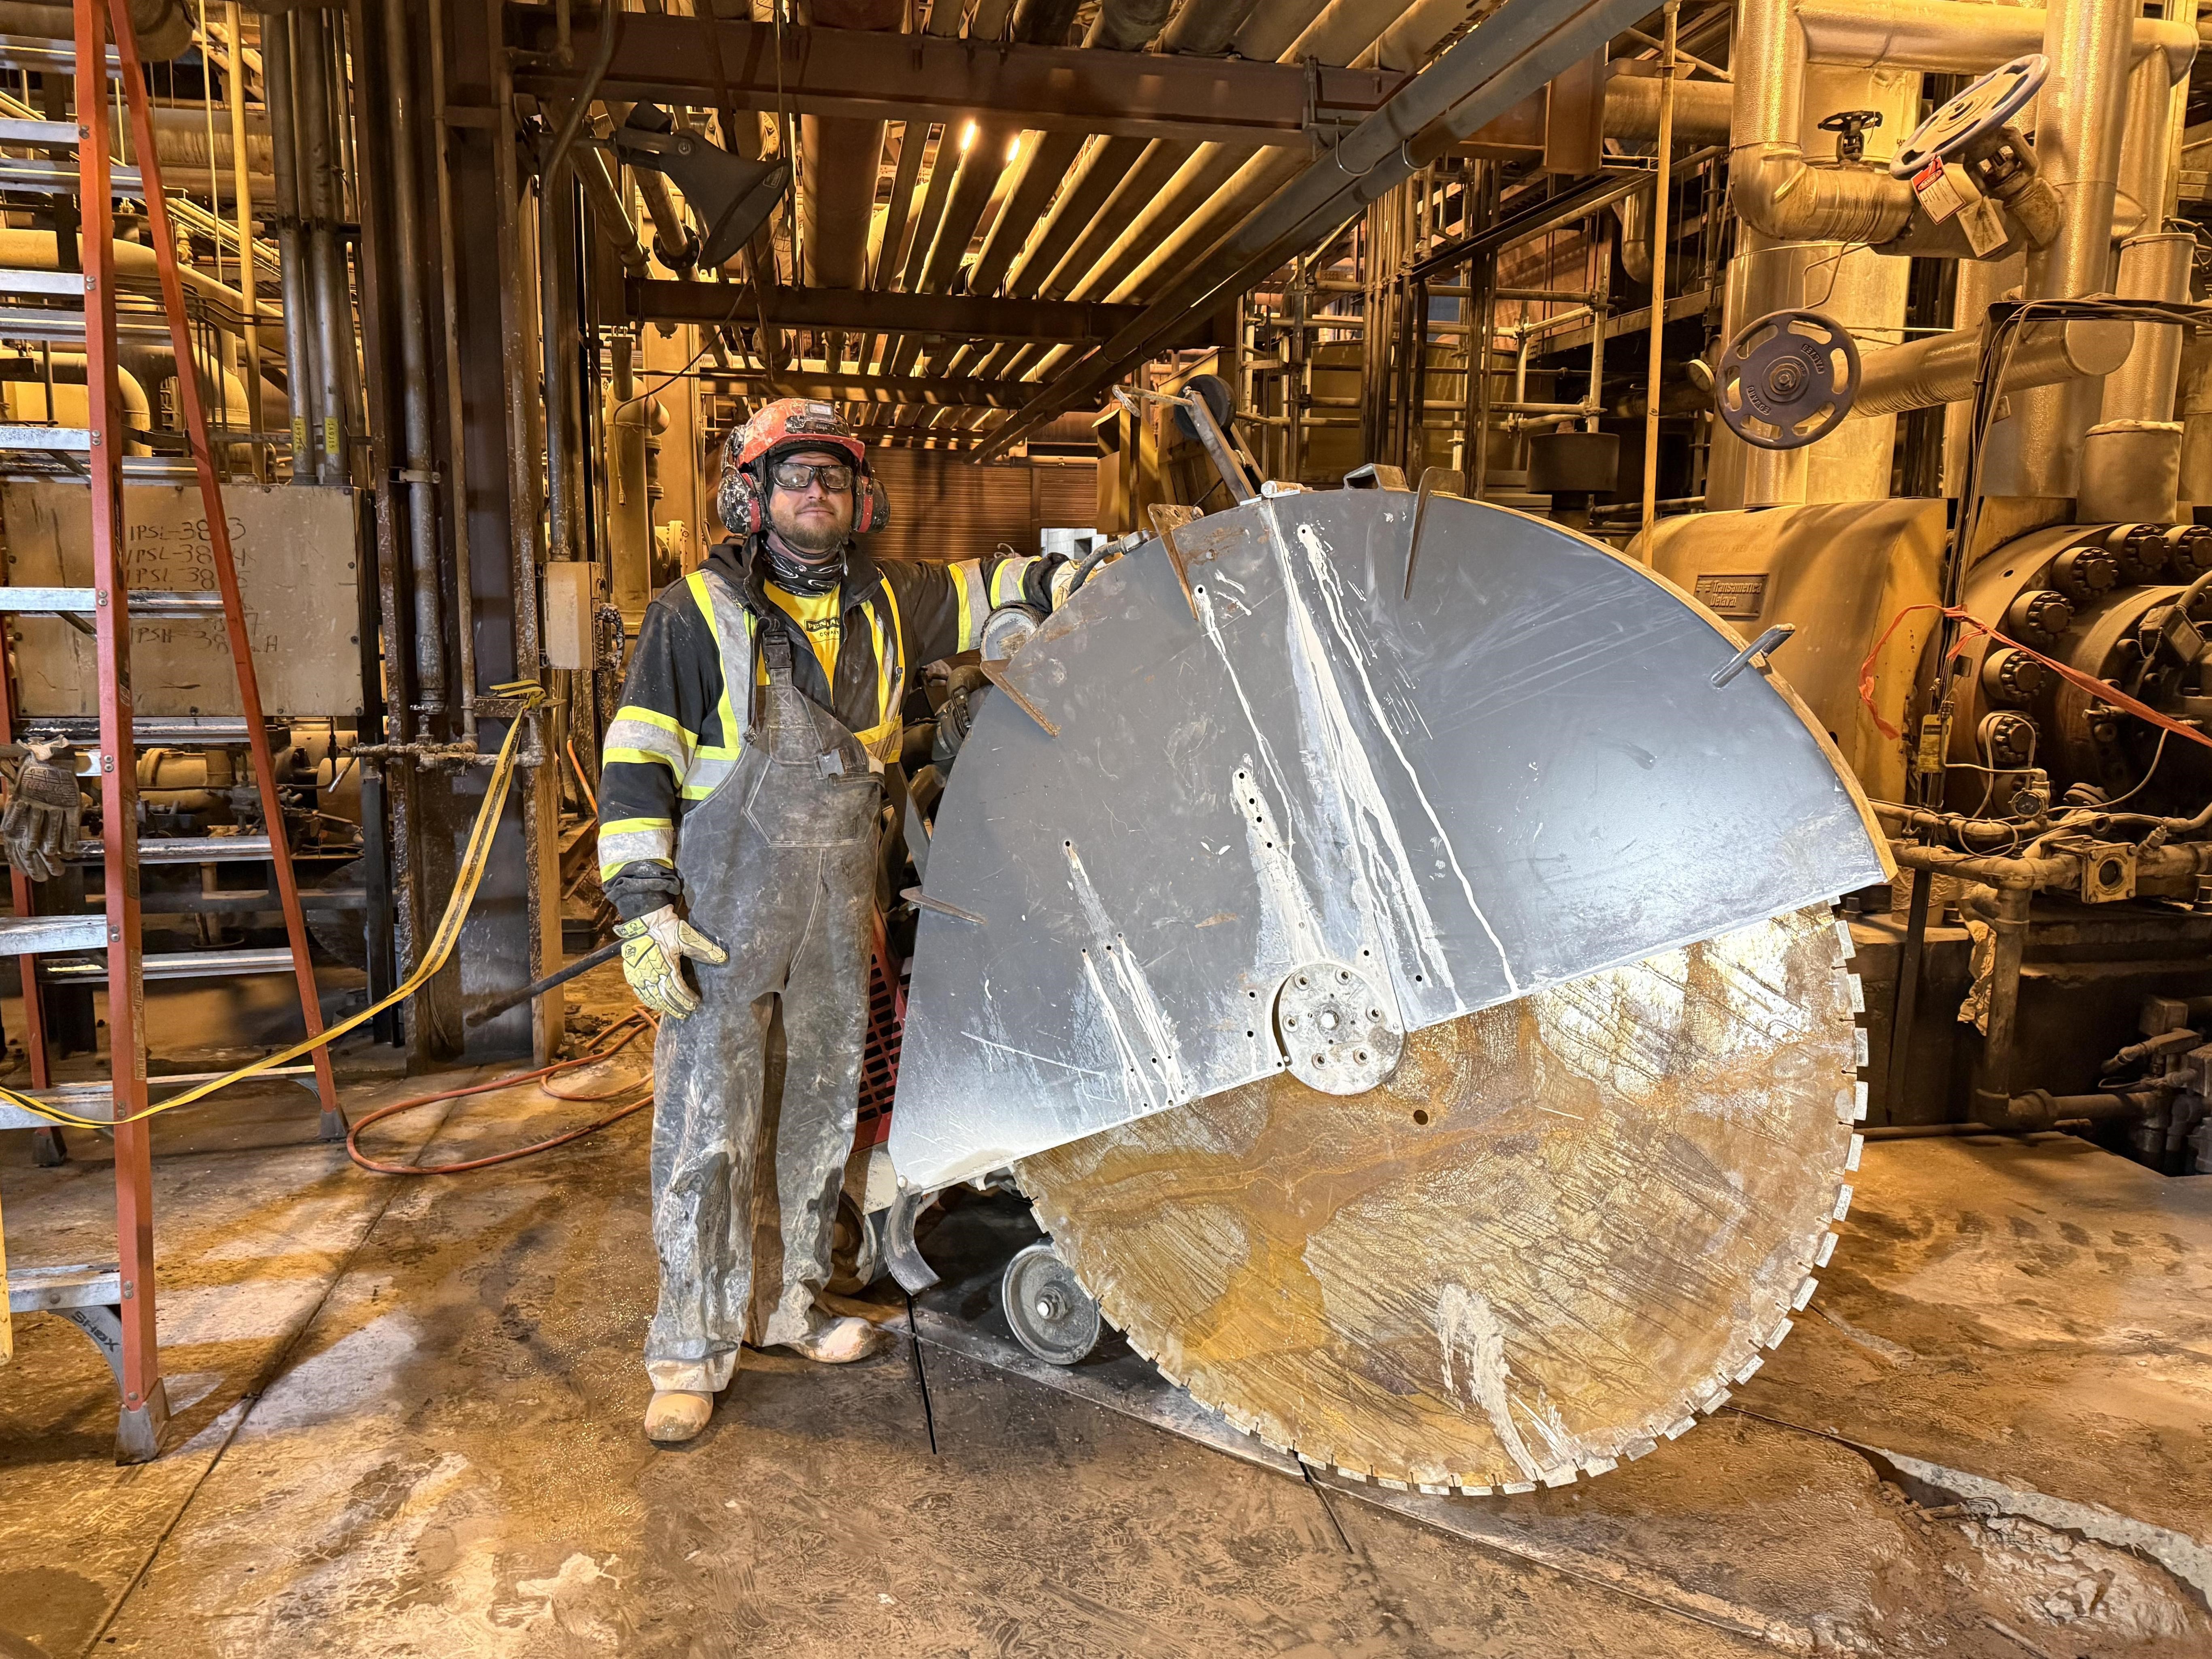
Flat saws, also called slab saws, are built for horizontal cutting. They're the most common saw on a jobsite for a reason: pavement, floor slabs, expansion joints, and utility trenching all call for a saw that can travel a straight line across a flat surface.

  • Depth capability: Up to about 25 inches with the largest blades, though most commercial slab work falls in the 6 to 12 inch range.
  • Power options: Gas, diesel, or electric, depending on whether the work is outdoors or inside an occupied building.
  • Best suited for: Pavement removal, expansion joint cutting, slab sectioning, and trenching for utilities beneath floors.
  • Site consideration: Diesel and gas units aren't an option in enclosed, occupied spaces due to exhaust. Electric flat saws solve that problem but need a power hookup on site.

Wall Saws (Track Saws)

Wall saws, sometimes called track saws, are the vertical counterpart to flat saws. A guide track anchors to the wall or incline, and the saw travels along it, which is what gives wall sawing its signature: straight, plumb, repeatable cuts through vertical or overhead concrete.

  • Depth capability: Up to about 36 inches from a single side, or deeper if the structure is accessible from both faces.
  • Power options: High frequency electric or hydraulic, both quieter and cleaner than gas powered handheld saws.
  • Best suited for: Door and window openings, elevator shaft penetrations, HVAC and mechanical openings, and any vertical cut that needs to stay straight over a long run.
  • Site consideration: The track needs to be anchored to the surface, so wall sawing works best where there's a stable, accessible face to mount to.

Wire Saws

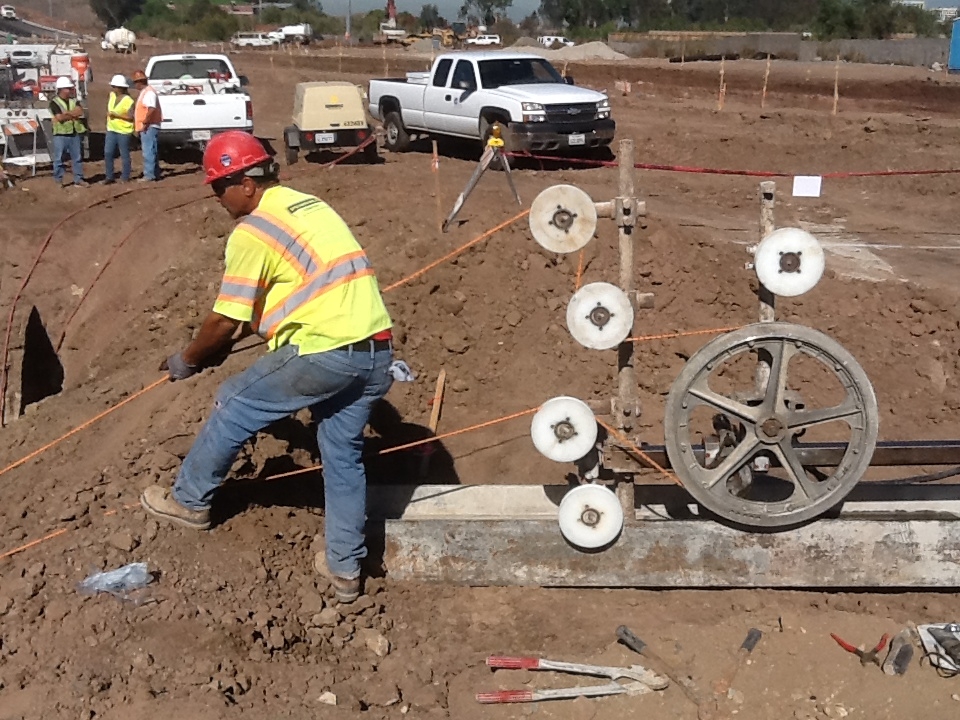
Wire saws use a continuous loop of diamond studded steel cable, driven by a hydraulic power unit, to cut through concrete. Because the wire wraps around the structure rather than plunging in from one face, wire saws aren't limited by blade diameter the way circular saws are.

  • Depth capability: Effectively unlimited. Thickness isn't the constraint it is for a flat or wall saw.
  • Power options: Hydraulic power units, typically staged near the cut.
  • Best suited for: Mass concrete over about 36 inches thick, irregular or curved geometry, and cuts that need to avoid the vibration a circular blade or impact tool would generate.
  • Site consideration: Wire saws need clearance to wrap the cable around the structure and a drop zone kept clear during the cut, so access and layout planning matter more here than with a flat or wall saw.

Chain Saws

Concrete chain saws use a diamond segmented chain around a guide bar, similar in concept to a wood cutting chainsaw but built for reinforced concrete. Their defining advantage is the plunge cut: a chain saw can start cutting from a flat face and cut into a corner cleanly, something a circular blade physically can't do without leaving material behind.

  • Depth capability: Roughly 15 to 25 inches, depending on the bar length.
  • Power options: Electric, hydraulic, or gas.
  • Best suited for: Squaring off corners after a wall saw cut, small openings in tight spaces, and any cut where a circular blade's rounded profile would leave an overcut.
  • Site consideration: Chain saws cut more slowly and wear consumables faster than a wall saw, so they're typically specified for corner work and small openings rather than long linear runs.

Why a Circular Blade Can't Cut as Deep as It Looks

Flat saws and wall saws both use circular diamond blades, and there's a mechanical limit worth knowing when specifying depth. A circular blade's usable cut depth is roughly 40 to 45 percent of its total diameter, not half, because the arbor and blade guard housing take up space at the center. A 36 inch blade, in practice, cuts closer to 14 or 15 inches deep rather than 18.

This also explains why circular blades leave an overcut at corners. As the blade curves down through a wall or slab, its radius causes it to cut past the intended corner line on the far side. When a project spec prohibits that overcut, a wall saw handles the primary linear cuts and a chain saw or core drill finishes the corners flush.

Matching the Saw to the Job

A simple way to work through saw selection:

  • Horizontal surface, depth 25 inches or less: Flat saw.
  • Vertical or inclined surface, depth 36 inches or less: Wall saw.
  • Corner overcut isn't allowed: Wall saw for the linear runs, chain saw to finish the corners.
  • Mass concrete over 36 inches thick, or irregular geometry: Wire saw.
  • Small opening or tight plunge cut: Chain saw.

Site conditions matter as much as the numbers above. Indoor, occupied spaces call for electric equipment over gas or diesel. Vibration sensitive areas, such as near active lab equipment or fresh concrete, favor wire saws and wall saws over impact tools. And any cut path should be checked with subsurface scanning first, since embedded rebar, post tension cable, and live conduit change what's actually safe to cut through.

Where Each Saw Type Shows Up on Real Projects

Heavy Civil and Infrastructure: Bridges, dams, and lock structures often call for wire saws on mass elements like piers and abutments, paired with high horsepower flat saws for deck and pavement work.

Commercial Renovations: Wall saws handle door, window, and shaft openings in occupied buildings, with chain saws squaring off the corners so adjacent rebar stays intact.

Industrial and Processing Facilities: Electric flat saws cut utility trenches without exhaust concerns in active plants, while wire saws section heavy equipment foundations without disrupting nearby operations.

Ready to Discuss Your Next Cutting Scope?

These four methods are the core of Penhall's concrete cutting capabilities, backed by crews who work with this equipment daily. Visit our concrete cutting page to see the full range of services, or check out operated equipment rentals if your project needs extra saws, crews, or equipment on a rental basis.

2012-06-09 Seymoure Johnston AFB 7 Divisions
Tait - Palisades 3_Brandon Rowland

frequently asked questions

What are the main types of concrete saws?

The four primary types are flat saws (also called slab saws) for horizontal cutting, wall saws (also called track saws) for vertical and inclined surfaces, wire saws for mass concrete and irregular shapes, and chain saws for plunge cuts and square corners.

What is wall sawing used for in concrete cutting?

Wall sawing is used to cut vertical, inclined, or overhead concrete surfaces in a straight, controlled line, commonly for door, window, and mechanical openings, and can reach depths up to about 36 inches from a single side.

How deep can a flat saw cut into concrete?

A flat saw can cut up to about 25 inches deep with the largest blades, though most commercial slab cutting for expansion joints or trenching falls between 6 and 12 inches.

When is a wire saw used instead of a wall saw?

A wire saw is used when concrete exceeds about 36 inches in thickness, when the geometry is irregular or curved, or when the cut needs to avoid the vibration a circular blade produces.

Why do wall saws sometimes need a chain saw to finish a cut?

A circular blade used in wall sawing leaves an overcut at corners due to its curved edge. When a project spec doesn't allow that overcut, a chain saw plunge cuts the corner flush after the wall saw completes the main linear cuts.

Specifying Hydrodemolition for Bridge Deck Rehabilitation: Scope, Access, and Sequencing Considerations

CALL FOR A QUOTE
1-800-736-4255

At a Glance

  • What It Solves: Hydrodemolition removes deteriorated bridge deck concrete without micro-fracturing the sound substrate left behind, giving repair crews a clean, high-bond surface for overlay placement.
  • Depth Is Condition-Based, Not Fixed: Removal depth follows the actual condition of the concrete rather than a uniform cut plane ensuring that sound concrete stays in place while deteriorated material is stripped out, even where depths vary across the deck.
  • Rebar Exposure Sets the Repair Class: How much of the reinforcing steel ends up exposed determines whether the area gets a partial-depth overlay or triggers a full-depth repair with bottom-form shoring.
  • Access Drives the Schedule: Lane closure windows, water supply logistics, and traffic control constraints on bridge decks typically shape the sequencing plan more than the demolition itself.
  • Clean Handoff to Repair Crews: Vacuum-captured slurry and a properly cleaned surface keep the deck ready for immediate overlay or patching without a bond-inhibiting layer slowing down the repair crew.

Why Bridge Deck Repair Specifications Call for Hydrodemolition

Bridge decks take a beating from deicing salts, freeze-thaw cycles, and heavy axle loads, which leads to chloride-induced rebar corrosion and delamination beneath the surface. When it's time to specify a repair, the removal method matters as much as the repair material. This is because a poor removal method can undermine the overlay before it's even placed.

That's the core reason bridge deck repair specifications increasingly call for hydrodemolition instead of mechanical jackhammering or milling: it strips deteriorated concrete cleanly while leaving the sound substrate underneath intact and ready to bond.

  • Jackhammering micro-fractures the substrate. Pneumatic breakers transmit shockwaves into the remaining concrete, creating hairline fractures below the removal plane that weaken the bond for the new overlay.
  • Milling alone can't tell sound concrete from bad. Fixed-depth milling machines cut to a set depth regardless of condition, which risks leaving deteriorated concrete in place or striking rebar unnecessarily.
  • Hand-chipping is slow and inconsistent. Manual removal produces uneven depths and can't keep pace with tight weekend lane closures, putting the schedule at risk.

Hydrodemolition solves this by targeting concrete based on condition, not a fixed cut line, which is what makes it the specified method on most state DOT deck rehabilitation projects.

Depth of Removal: Why It Isn't a Single Number

One of the first questions a project engineer has to answer when specifying hydrodemolition is how deep the removal needs to go and the honest answer is that it varies across the deck, by design.

  • A nominal depth sets the baseline. Plans typically specify a nominal removal depth (often in the 1 to 1.5 inch range) as the target for sound concrete areas.
  • Deteriorated concrete goes deeper automatically. Because the water jets remove concrete based on how deteriorated it is rather than a fixed cut plane, areas with more chloride damage or delamination get stripped further without extra passes or manual adjustment.
  • A calibration patch confirms the settings. Before production work starts, crews run a test patch on verified sound concrete to set water pressure, nozzle speed, and travel rate and then confirm those settings clear deteriorated concrete cleanly on a known bad area.

For a project engineer writing the spec, this means the removal depth callout should describe the target condition (sound, bonded concrete) rather than assume a single depth will apply uniformly across the whole deck.

Rebar Exposure Requirements

Because hydrodemolition removes concrete around reinforcing steel as well as above it, rebar exposure becomes a real design consideration and not just a byproduct of the process.

  • Exposure threshold matters. Once more than roughly half of a rebar's circumference is exposed, or the bond between the bar and surrounding concrete is lost, removal typically has to continue until there's enough clearance behind the bar for the new overlay material to fully encase it.
  • This determines the repair class. Areas that only need partial-depth removal and cleanup (commonly called Class A repairs) get an overlay placed relatively quickly. Areas where deterioration runs deeper (often past 50% of the deck's original thickness) get reclassified as full-depth (Class B) repairs, which require bottom-form shoring before any concrete goes back in.
  • Steel condition matters too. Hydrodemolition strips rust scale from exposed rebar without bending or nicking it, which keeps the existing reinforcing steel usable rather than triggering a steel replacement scope.

Getting rebar exposure requirements right in the spec avoids a common field dispute: whether an area needs to escalate from a quick overlay fix to a full-depth repair with formwork and cure time built into the schedule.

Access Constraints on Active Bridge Structures

On most bridge deck projects, access is what actually constrains the schedule. A few access factors that shape sequencing:

  • Lane closure windows. Interstate and highway bridges typically only get single-lane or overnight/weekend closures, which sets the pace for how much deck can be processed per shift.
  • Water supply logistics. Hydrodemolition runs on a continuous water supply, and bridges without nearby hydrants need staged water tanker fleets a logistics detail that has to be planned before mobilization, not discovered on-site.
  • Traffic control and containment. Work adjacent to live traffic lanes requires containment to keep water, slurry, and debris off adjacent lanes, which affects how equipment is staged and how work zones are sequenced across the deck width.
  • Environmentally sensitive locations. Bridges over waterways add wastewater containment requirements (sealed drains, vacuum recovery, and on-site pH treatment) that need to be built into the access and staging plan up front.

Specifying hydrodemolition without accounting for these access realities is one of the more common gaps between a paper schedule and what actually happens on-site.

Handoff to Repair Crews

The point of hydrodemolition is to hand off a deck that's ready for repair and not to add cleanup work to the next crew's scope. A clean handoff typically depends on:

  • Immediate slurry capture. Vacuum recovery running alongside the hydrodemolition equipment keeps slurry from drying onto the prepped surface, which prevents a weak laitance layer from forming and undermining the new overlay's bond.
  • Final surface cleaning before placement. Pressure washing or light sandblasting shortly before overlay placement removes any remaining laitance or flash rust from exposed steel.
  • Clear repair class documentation. Areas that required deeper removal or hit the rebar exposure threshold should be flagged and documented at handoff so the repair crew knows which areas need full-depth treatment versus a standard overlay.
  • Coordinated timing. Because hydrodemolition surfaces are ready for immediate placement, sequencing the repair crew to follow closely behind protects the surface profile from re-contamination.

This is where a single point of coordination between the demolition and repair scopes matters most: a clean handoff on paper doesn't help if the repair crew shows up days later to a deck that's picked up debris or moisture in the meantime.

Where This Applies

Interstate and Highway Overpasses: Deck rehabilitation is sequenced around single-lane closures, with hydrodemolition processing one lane width at a time behind mechanical scarification of the wearing surface.

Bridges Over Waterways: Access planning centers on wastewater containment — sealing drains and expansion joints, capturing runoff, and treating it on-site before discharge — since there's no tolerance for runoff into the waterway below.

Multi-Span and Post-Tensioned Structures: Subsurface scanning to locate shallow post-tensioned ducts happens before hydrodemolition begins, since access to correct any conflicts becomes far more constrained once lane closures and repair sequencing are underway.

Why a Single-Source Scope Simplifies Specification

Splitting subsurface scanning, hydrodemolition, wastewater treatment, and structural repair across separate contractors adds coordination points exactly where lane closure windows leave the least room for delay. Each hand-off between subs is a place where the schedule can slip.

Penhall pairs hydrodemolition with structural repair under its bridge services division, which means:

  • One crew accountable for both concrete removal and the repair that follows it.
  • Consistent documentation of rebar exposure and repair classification from removal through handoff.
  • One schedule to manage against DOT lane closure windows instead of coordinating across multiple contracts.

Specifying a Bridge Deck Rehabilitation Project?

Contact Penhall's Bridge Services team to review depth, access, and sequencing considerations for your next deck rehabilitation specification.

  • 24/7 National Dispatch Hotline: 1-866-846-7379
  • Bridge Services Division: penhall.com/bridge-services
  • Request a Quote: https://www.penhall.com/contact/

frequently asked questions

What is hydrodemolition used for on bridge decks?

Hydrodemolition uses high-pressure water jets to remove deteriorated bridge deck concrete while leaving sound concrete intact, preparing the surface for a new overlay without the micro-fracturing that mechanical breaking methods can cause.

How deep does hydrodemolition remove concrete on a bridge deck repair?

Removal depth follows the concrete's condition rather than a single fixed depth — a nominal depth (commonly around 1 to 1.5 inches) is set for sound concrete, while more deteriorated areas are removed deeper automatically in the same pass.

When does bridge deck repair require full-depth removal instead of an overlay?

Full-depth (Class B) repair is typically triggered when concrete deterioration extends past roughly half the deck's original thickness, or when rebar exposure and bond loss exceed the specified clearance threshold. Both of which require bottom-form shoring before repair concrete is placed.

What access constraints affect hydrodemolition scheduling on bridges?

Lane closure windows, water supply availability, traffic control requirements, and wastewater containment rules are the main factors that shape how a hydrodemolition project is sequenced.

How does hydrodemolition hand off to the repair crew?

 Vacuum recovery captures slurry immediately to prevent a bond-inhibiting laitance layer, the surface is cleaned shortly before placement, and repair-class documentation is passed along so the repair crew knows which areas need full-depth versus standard overlay treatment.

Does hydrodemolition damage sound concrete or existing rebar?

No. The water pressure is calibrated to the strength threshold of deteriorated concrete, so it passes over sound concrete and existing reinforcing steel without causing structural damage, while still stripping rust scale from exposed rebar.

How to Identify and Address Concrete Spalling on Commercial and Industrial Structures

CALL FOR A QUOTE
1-800-736-4255

At a Glance

  • Spalling is the flaking, chipping, or breaking away of the concrete surface, and it can range from minor cosmetic damage to a sign of deeper structural deterioration.
  • The cause of spalling, not just its appearance, determines urgency: rebar corrosion, freeze-thaw cycling, and post-tension system compromise each point toward a different repair path.
  • Rust staining, cracking that follows a pattern along embedded steel, and spalling that keeps returning after a surface patch are signs the damage goes deeper than the surface.
  • Cosmetic spalling can often wait for a scheduled repair, but spalling tied to rebar corrosion or a post-tension issue needs prompt evaluation before it spreads further.
  • Repair scope depends on damage extent and depth, and can range from surface patching to full-depth removal, corrosion mitigation, and replacement.
  • A structural evaluation, not a visual estimate alone, should set the repair scope on commercial buildings, industrial facilities, bridges, and parking structures.
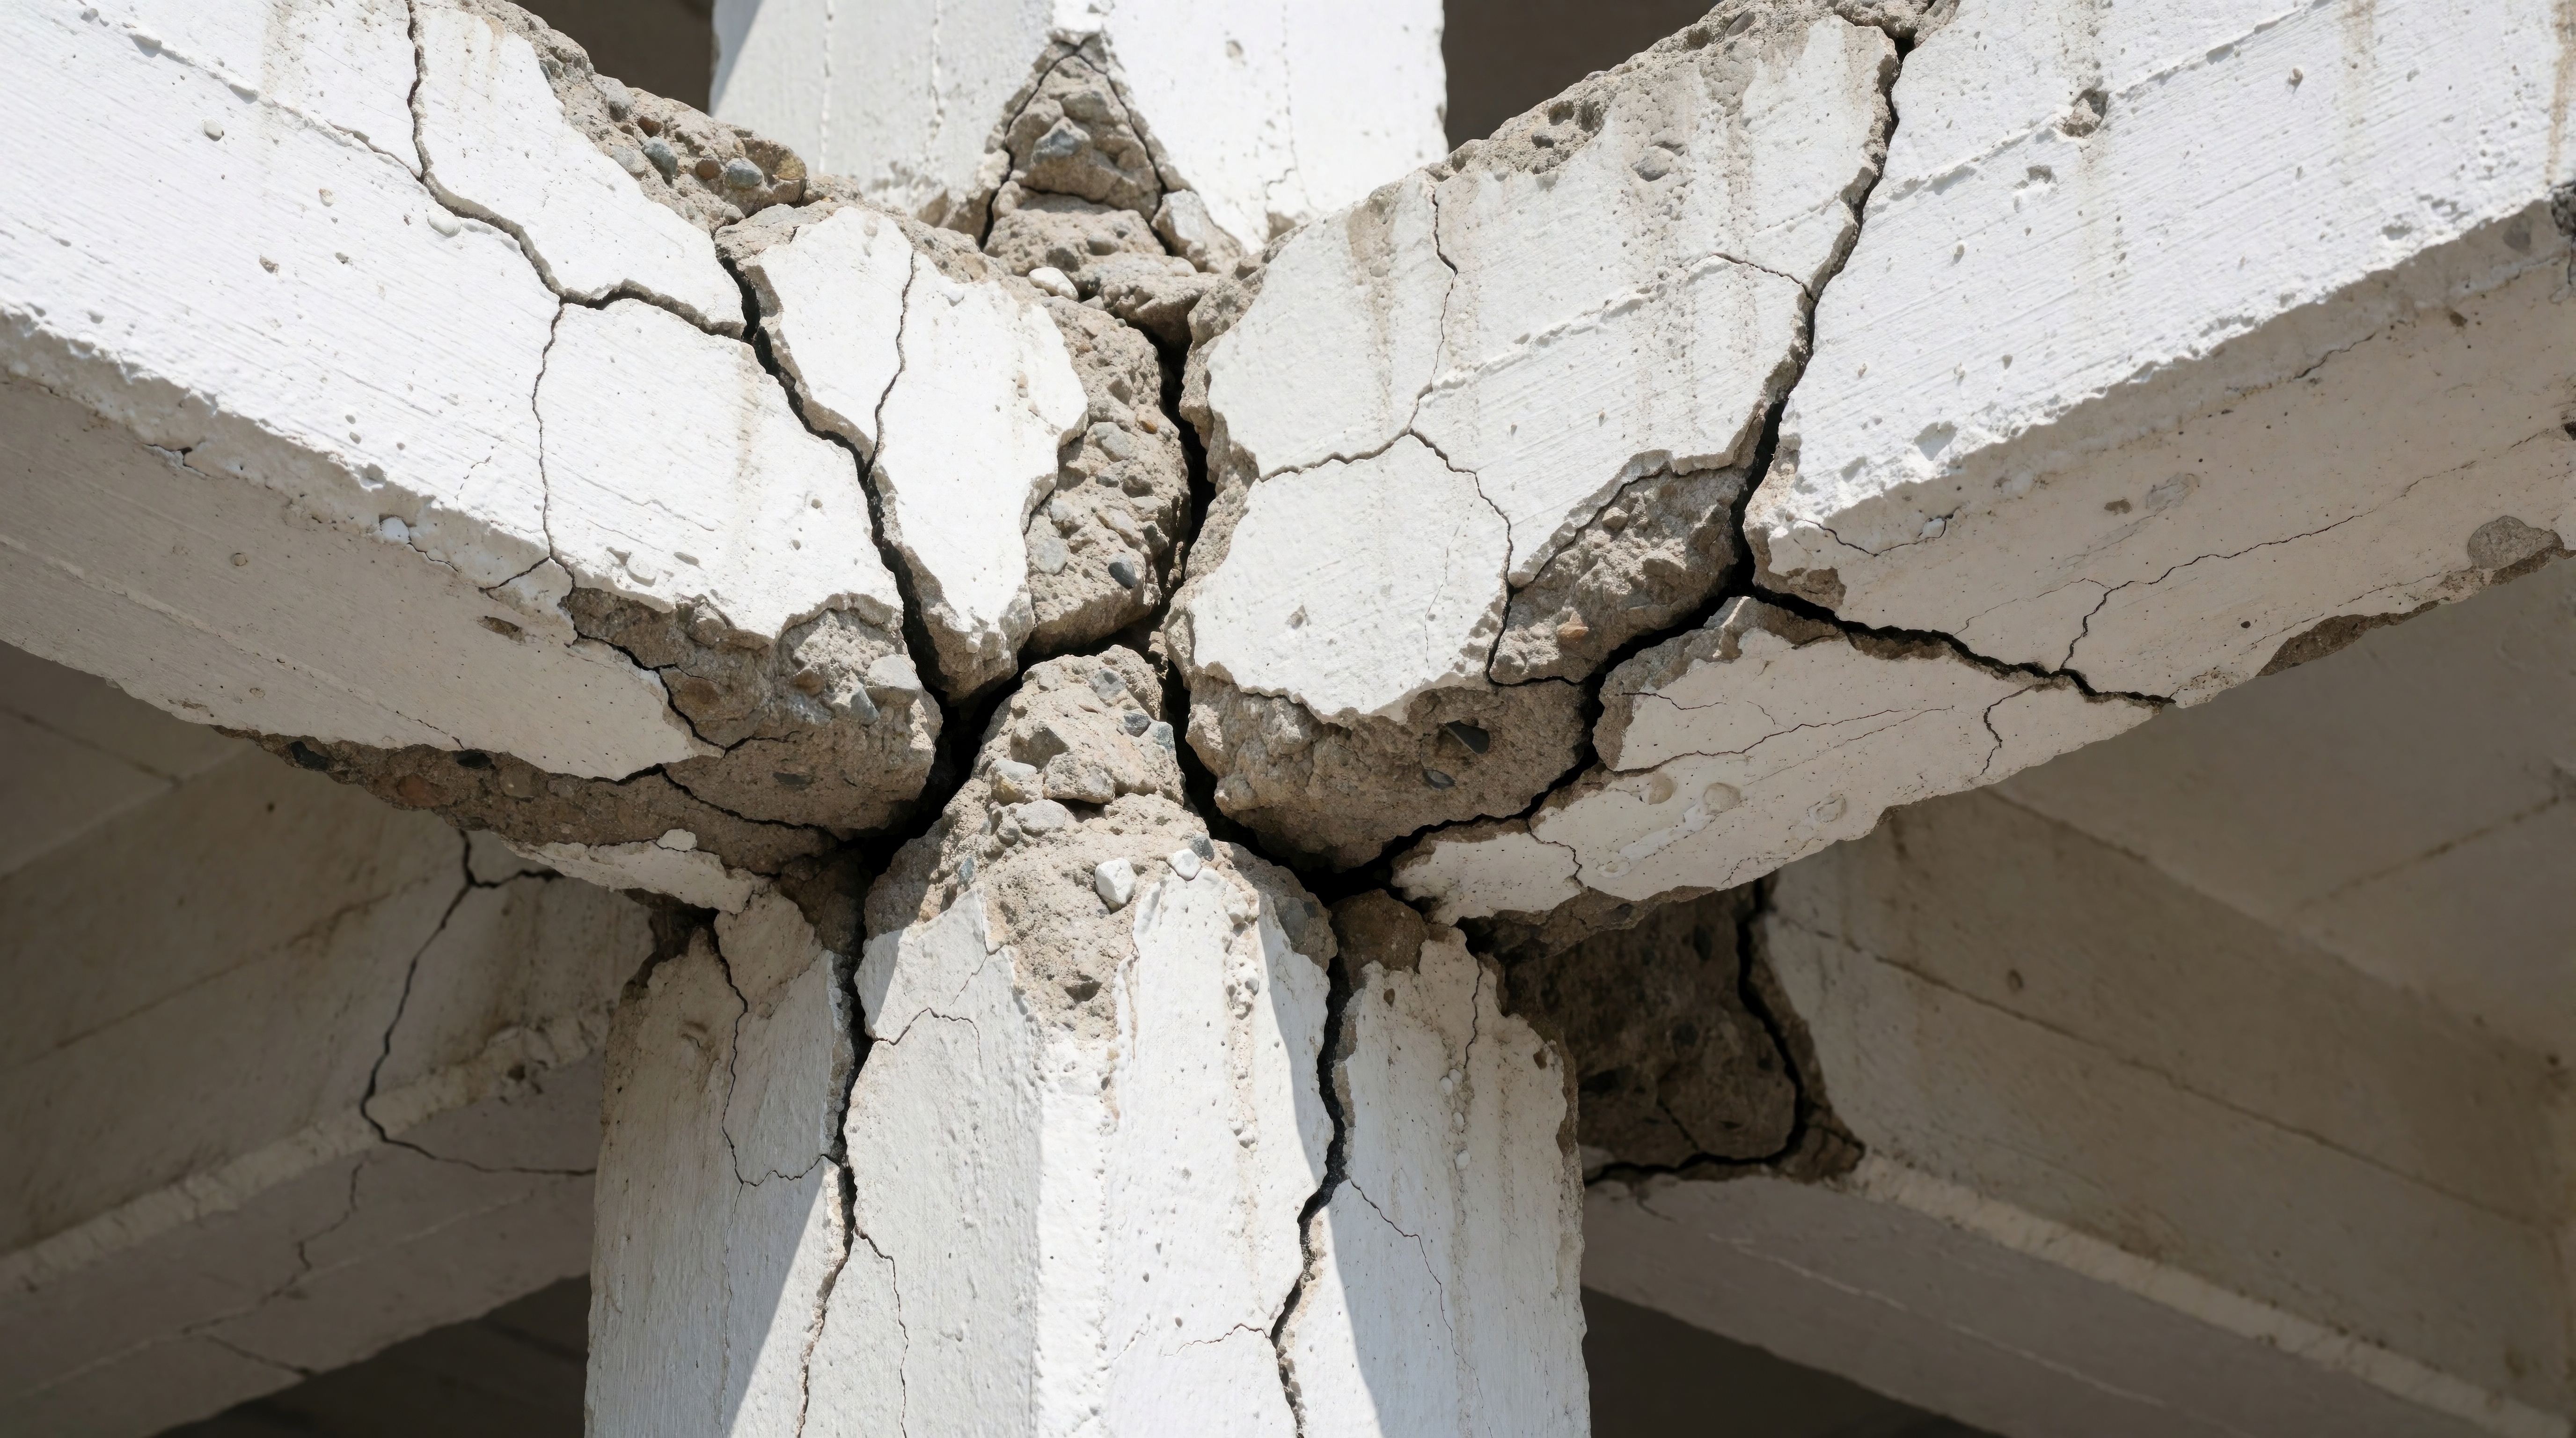
Damaged concrete column and beam junction shows significant structural cracks and spalling concrete. Building integrity is compromised indicating failure risk and need for urgent repair assessment.
Concrete Spalling with Exposed Rebar on Deteriorated Structural Column

What Spalling Looks Like and Why It Happens

Spalling shows up as concrete breaking away from the surface in flakes, chips, or larger sections, often leaving a rough or pitted area where a smooth surface used to be. It can appear on slabs, beams, columns, walls, and bridge decks. The damage itself is a symptom, and the underlying cause determines whether the fix is simple or involved.

Cosmetic Damage vs. a Structural Warning Sign

Signs the spalling is likely cosmetic

  • Shallow, isolated patches with no visible rust staining
  • No cracking pattern connecting the spalled area to nearby sections
  • Location away from load-bearing members or embedded structural steel
  • Damage consistent with surface wear, impact, or minor freeze-thaw scaling

Signs the spalling points to a structural issue

  • Rust staining on or around the spalled area
  • Cracking that follows a line, which often traces the path of embedded rebar or a post-tension cable
  • Spalling that exposes visible corroded reinforcement
  • Damage that keeps returning in the same location after a surface patch
  • Spalling near a known post-tension anchor or along a cable drape line

Common Causes of Concrete Spalling

  • Rebar corrosion, where rust expands the steel and pushes the surrounding concrete apart from the inside, most often caused by chloride exposure from de-icing salts or coastal environments, or by carbonation over time
  • Freeze-thaw cycling, where water trapped in the concrete freezes, expands, and fractures the surface over repeated cycles
  • Post-tension system compromise, where a damaged or corroded tendon or anchor creates stress that shows up as spalling near the affected area
  • Original construction issues, such as insufficient concrete cover over reinforcement or poor consolidation during placement
  • Chemical exposure from industrial processes that attacks the concrete surface over time

How Urgency Is Determined

Not every instance of spalling needs an immediate response, and treating all spalling as an emergency wastes budget that would be better spent on the damage that actually needs it. Urgency depends on a few factors working together.

  • The extent of the damage and whether it is isolated or spreading across the structure
  • The underlying cause, since corrosion and post-tension issues often continue getting worse over time while surface wear generally does not
  • Whether the affected area is a structural member carrying load or a non-load-bearing surface
  • The exposure conditions at the location, since ongoing moisture or chemical exposure can speed up deterioration that would otherwise progress slowly

Spalling near a post-tension anchor or along a cable line deserves prompt evaluation given the consequences of a compromised tendon. Spalling on a non-load-bearing wall with no rust staining can usually go on a scheduled maintenance list without the same urgency.

What a Repair Scope Usually Involves

  1. Visual inspection combined with sounding, such as chain drag or hammer sounding, to identify delamination beyond what is visible on the surface
  2. Removal of deteriorated concrete down to sound material, which may be a shallow surface removal or a full-depth removal depending on the damage
  3. Evaluation of any exposed reinforcement or post-tension components for corrosion or damage
  4. Cleaning and corrosion mitigation for exposed steel, which can include cleaning to bare metal and applying a corrosion-inhibiting coating
  5. Placement of repair material, matched to the depth and location of the damage, followed by proper curing
  6. Application of a protective treatment or sealer where ongoing exposure conditions call for added protection against future deterioration

Skipping the sounding step in this sequence is a common mistake. Visible spalling often marks only part of the damaged area, and a repair that stops at the visible boundary can leave delaminated concrete in place that fails again within a short time.

Spalling on Bridges and Parking Structures: What Changes at Infrastructure Scale

Bridge decks and parking structures face concentrated exposure to de-icing salts, vehicle traffic, and repeated freeze-thaw cycling, which makes spalling from rebar corrosion a common finding on structures of a certain age in cold-weather regions. Repair work on these structures often needs to account for maintaining traffic or parking access during the work, coordinating with a structural engineer on load ratings during partial-depth removal, and evaluating whether isolated spalling points to a broader corrosion problem across the deck or structure that calls for a wider inspection scope before the repair plan is finalized.

Choosing a Contractor for Spalling Repair

Spalling repair on commercial and infrastructure structures calls for a contractor that can assess the full extent of damage, not just patch what is visible, and that has experience matching repair method to cause. Project teams should look for a contractor with sounding and evaluation capability, experience with corrosion mitigation and post-tension conditions, and the ability to scale from a single spalled area to a full structure evaluation when conditions call for it.

Penhall provides spalling assessment and repair services on commercial buildings, industrial facilities, bridges, and parking structures. Learn more about Penhall's Structural Repair, Bridge Services, and Fiber-Reinforced Polymer capabilities.

frequently asked questions

What is spalling concrete?

Spalling concrete is concrete that is flaking, chipping, or breaking away from the surface, often exposing a rough or pitted area underneath. It ranges from minor cosmetic wear to a visible sign of corrosion or structural deterioration underneath the surface.

What causes spalling in concrete?

The most common causes are rebar corrosion from chloride exposure or carbonation, freeze-thaw cycling in cold-weather climates, post-tension system compromise, and original construction issues such as insufficient concrete cover over reinforcement.

How do you fix concrete spalling?

The repair depends on the cause and extent of the damage. Minor cosmetic spalling can often be patched after removing loose material and preparing the surface. Spalling caused by corrosion needs removal down to sound concrete, cleaning and treatment of the exposed steel, and proper repair material placement to prevent the damage from returning.

Is concrete spalling always a structural problem?

No. Spalling can be a cosmetic issue caused by surface wear or minor freeze-thaw damage, or it can point to a structural problem such as rebar corrosion or post-tension system compromise. Rust staining, cracking patterns, and the location of the spalling relative to structural members help determine which one it is.

How urgent is a concrete spalling repair?

Urgency depends on the cause, the extent of the damage, and whether the affected area is a load-bearing structural member. Spalling linked to active corrosion or a post-tension issue needs prompt evaluation, while isolated cosmetic spalling on a non-load-bearing area can often go on a scheduled repair list.

Does Penhall handle spalling repairs on bridges and parking structures?

Yes. Penhall assesses and repairs concrete spalling on commercial buildings, industrial facilities, bridges, and parking structures, matching repair scope to the underlying cause and extent of the damage.

FRP Structural Upgrades on Aging Transportation and Civil Infrastructure: When It's the Right Specification

CALL FOR A QUOTE
1-800-736-4255

At a Glance

  • Fiber reinforced polymer (FRP) is a strengthening method used to add load capacity or extend service life on an existing concrete structure without adding significant weight.
  • FRP is often specified when a structure needs added strength, but full replacement is not justified by cost, schedule, or continued service requirements.
  • Load requirements, remaining service life, and access conditions determine whether FRP, added rebar reinforcement, or replacement fits the project best.
  • Common applications include bridge girders and columns, parking structure beams, and industrial members carrying increased load demands.
  • FRP resists corrosion well because it will not rust, but it carries different fire and UV exposure limits than steel reinforcement, so exposure conditions matter in the specification.
  • A structural engineer needs to evaluate loading, environment, and existing condition before FRP is specified as the repair method, not a general contractor working from a catalog spec.
Penhall Sacramento-16
penhall lax edited-24

Repair, Reinforce, or Replace: The Decision in Front of Structural Engineers

Aging transportation and civil infrastructure rarely reaches a clean choice between fixing a structure in place and leaving it alone. Bridge components, parking structure beams, and industrial members age unevenly. Some sections show real deterioration while the surrounding structure remains sound. Full replacement solves the problem but comes with cost, schedule, and often closure impacts that owners want to avoid when a targeted repair will do the job. Reinforcement with FRP is one of the tools available to close that gap, but it fits some situations far better than others.

What FRP Reinforcement Does and How It Is Applied

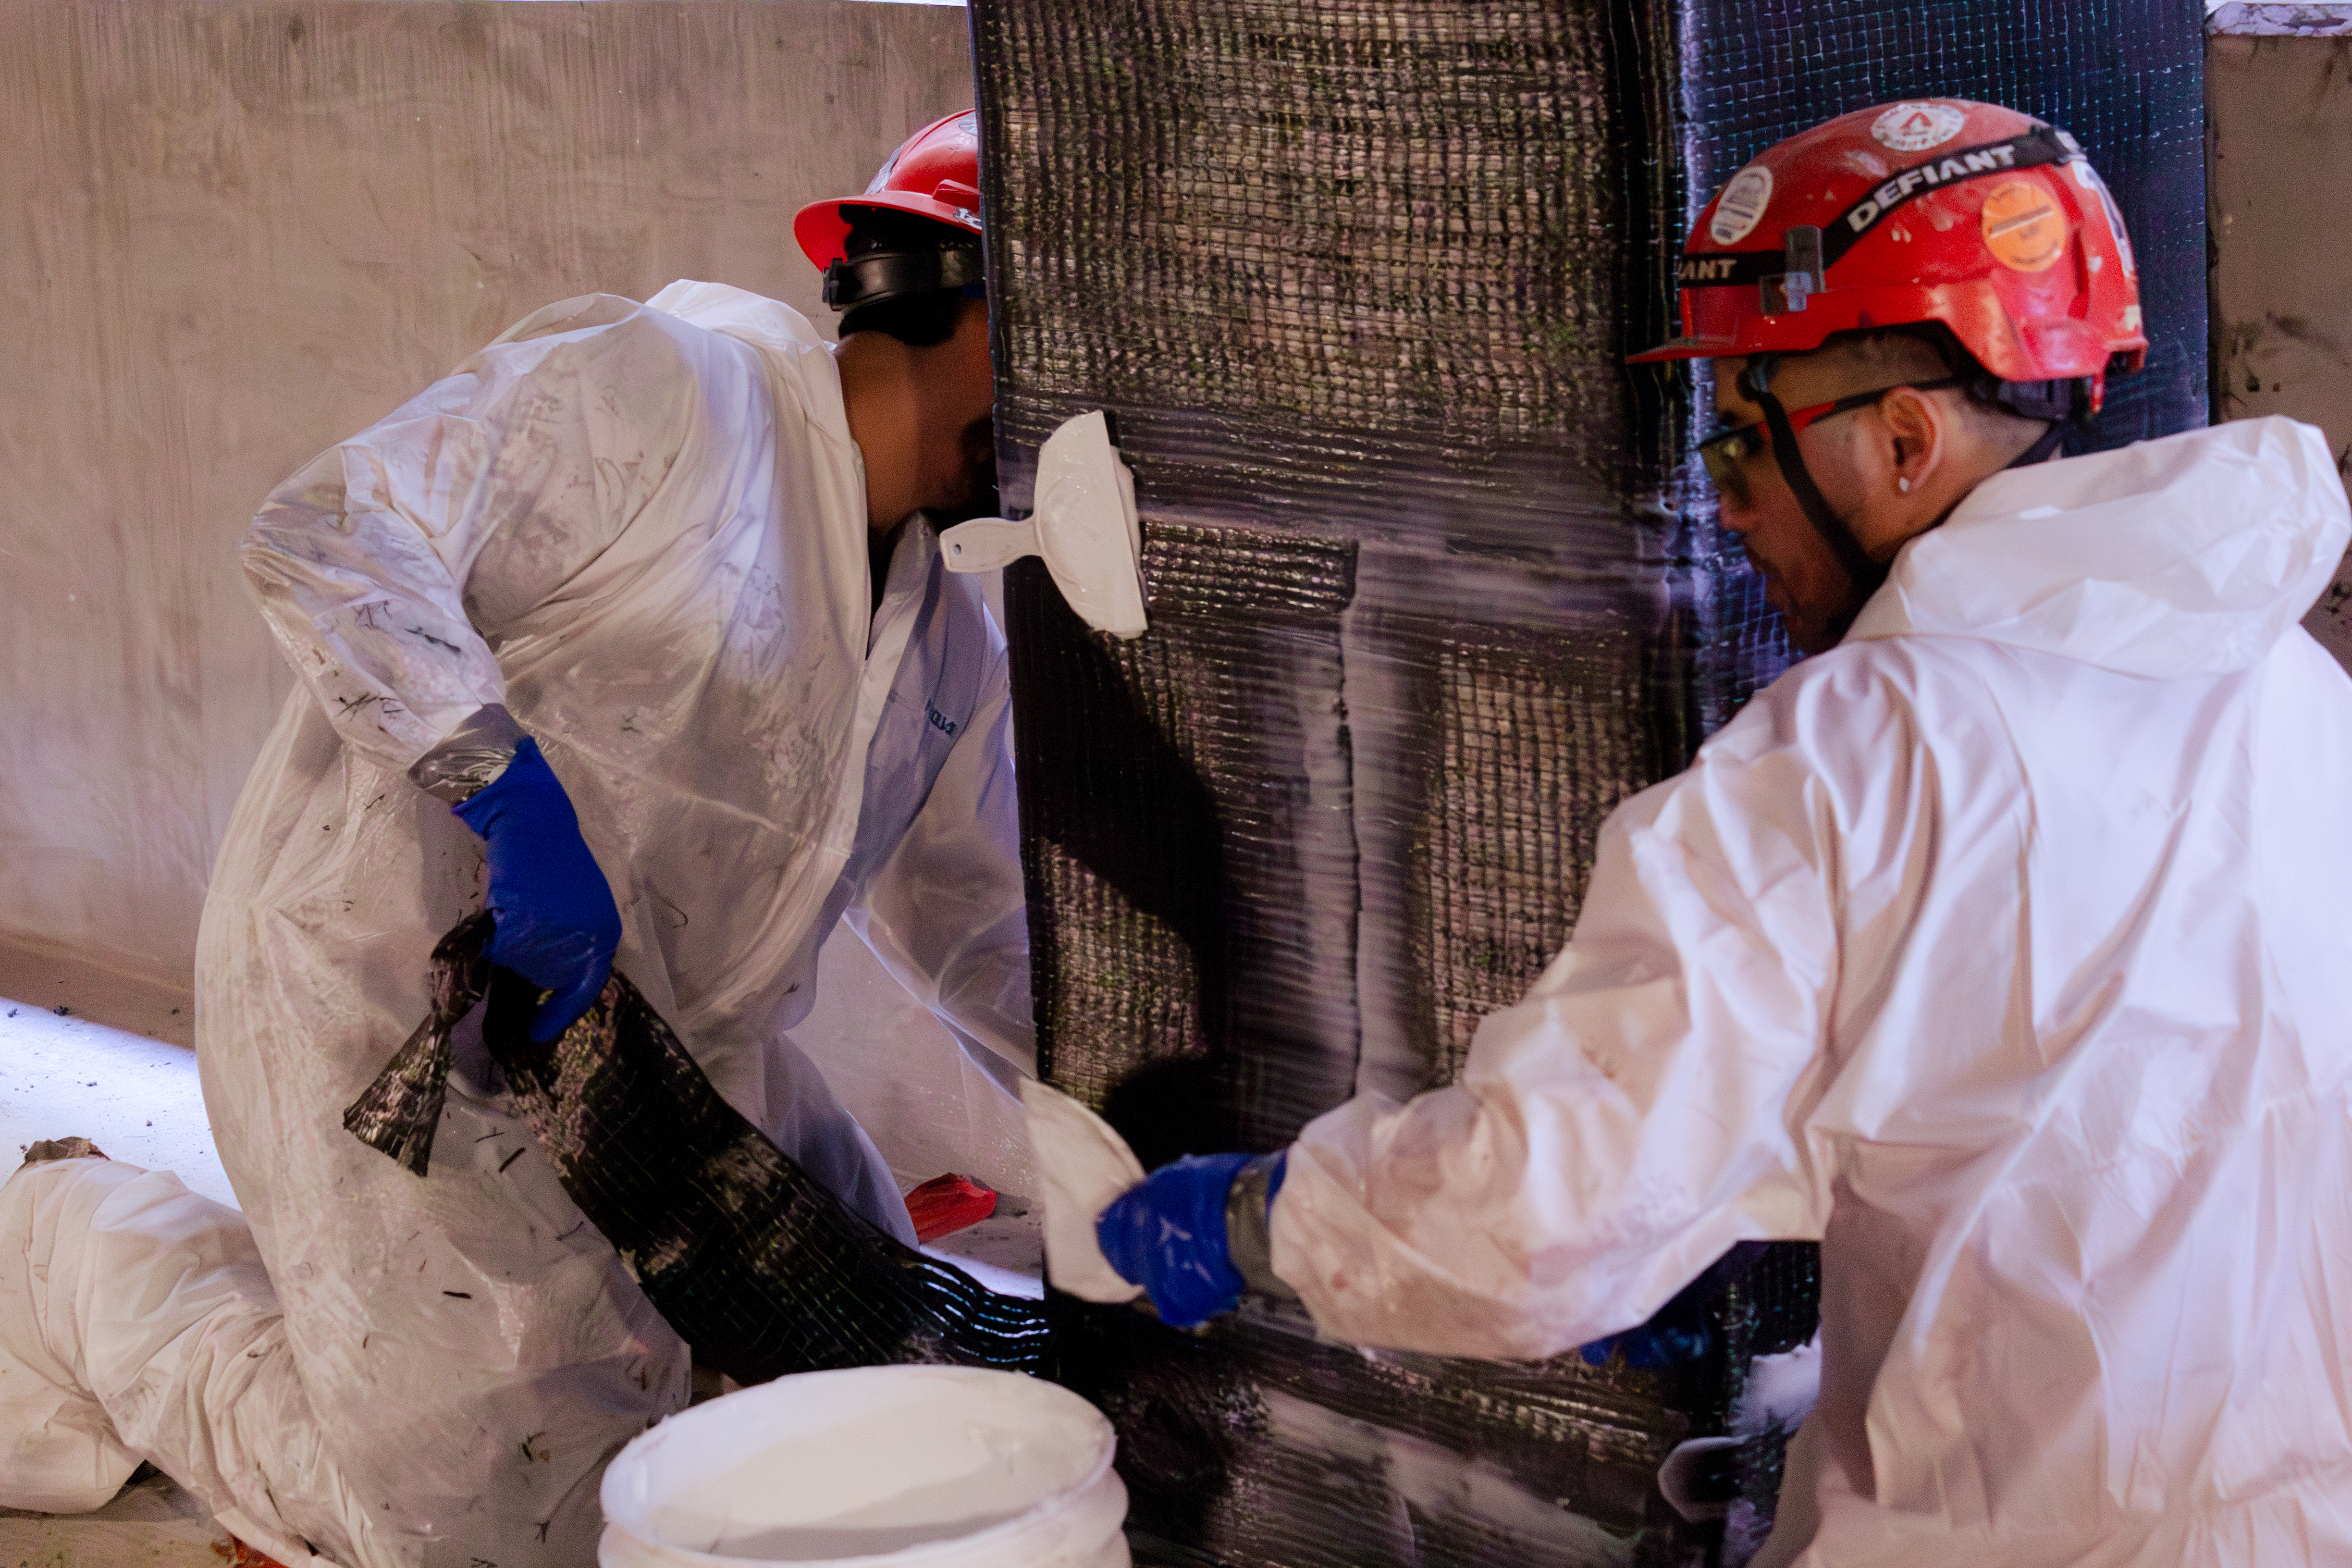
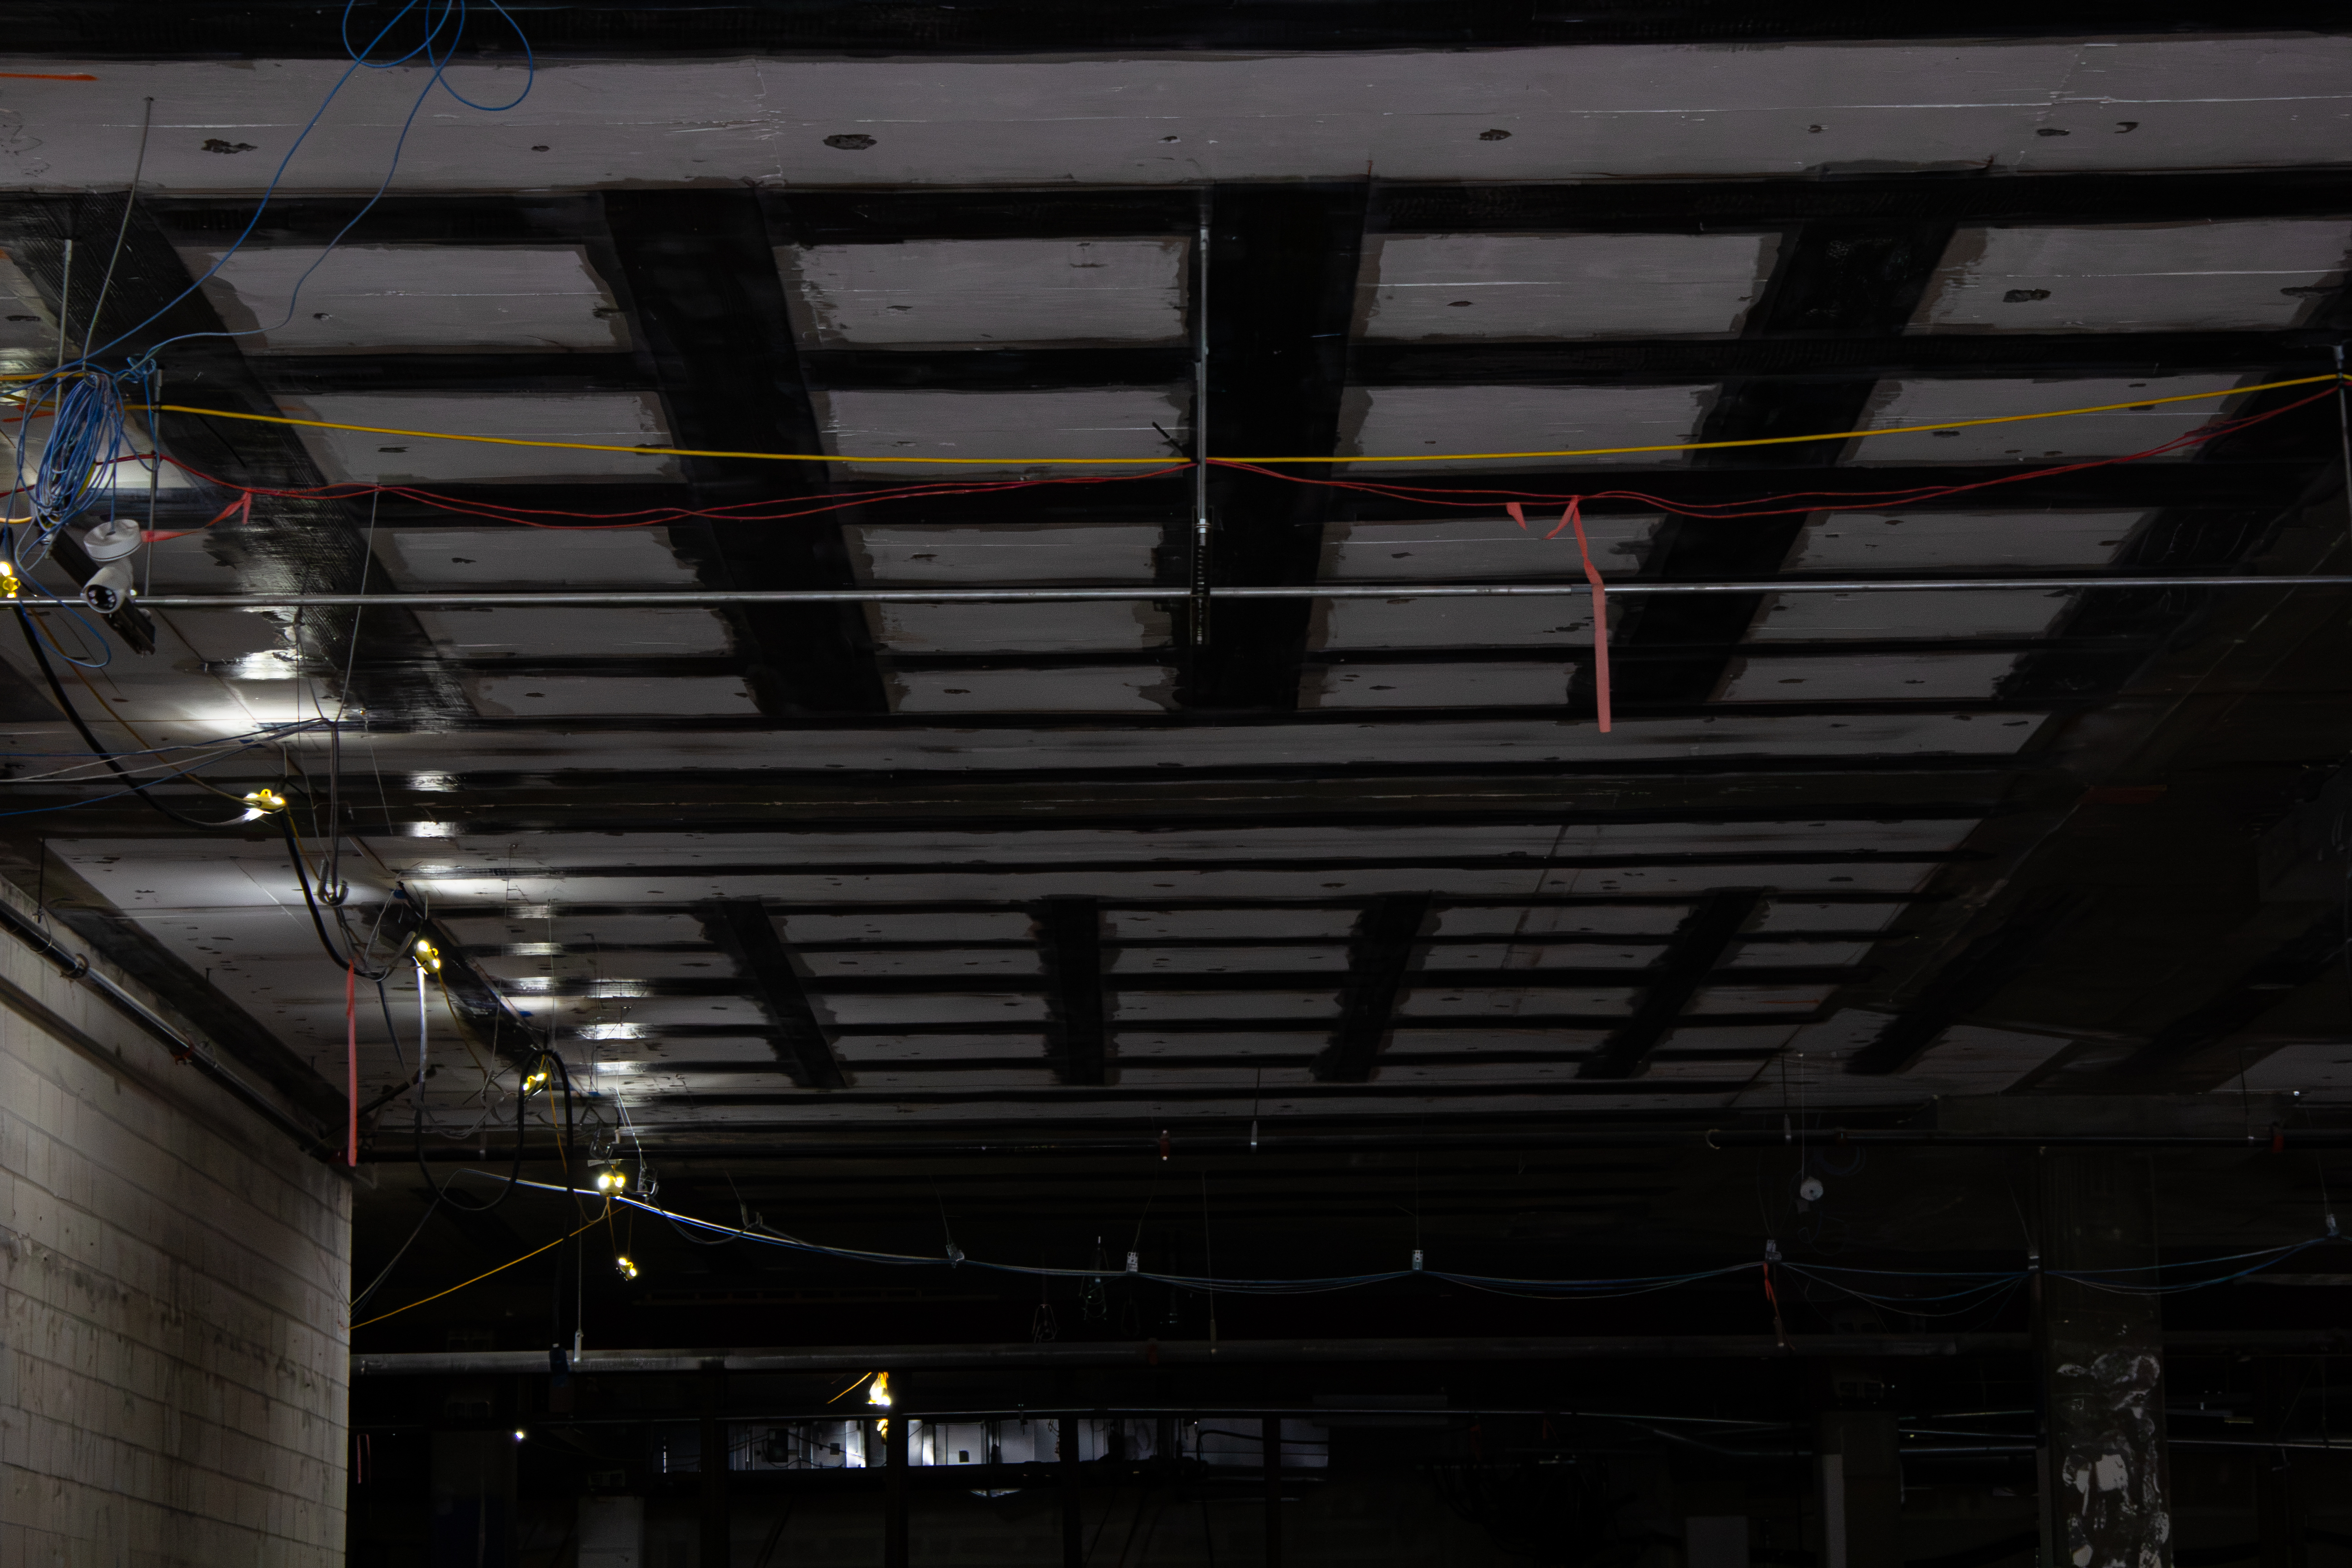
FRP systems add tensile or flexural strength to an existing concrete member by bonding fiber material to the surface or embedding it near the surface. Fiber type varies by application: carbon fiber offers the highest strength-to-weight ratio and sees the most use on structural upgrades, glass fiber costs less and works well where strength demands are lower, and aramid fiber sees more specialized use where impact resistance matters.

Common installation methods

  • Wet layup, where fiber sheets are saturated with resin and applied directly to a prepared concrete surface
  • Near-surface mounted (NSM) bars, where FRP rods are set into grooves cut into the concrete cover and bonded in place
  • Pre-cured FRP strips, which are manufactured off site and bonded to the structure with an adhesive

Surface preparation determines how well an FRP system performs over time. The concrete surface has to be sound, clean, and free of laitance or contamination before bonding, since the strength of the system depends on the bond between the fiber and the substrate holding under load.

When FRP Is the Right Specification

  • A structure needs added load capacity and the underlying concrete is still structurally sound
  • Section loss from corrosion or deterioration is present but has not compromised the member beyond repair
  • The environment involves corrosion exposure where added steel reinforcement would face the same deterioration risk
  • Added weight from a conventional concrete jacket or steel plate would create other problems, such as exceeding a foundation's load capacity
  • Access conditions limit the use of heavier construction methods or require the structure to stay in service during the work

When FRP Is Not the Right Fit

  • The concrete substrate has deteriorated too far for a reliable bond, such as widespread delamination or advanced section loss
  • The application requires a fire rating that FRP resin systems cannot meet without added protection
  • The structure needs a change in geometry or load path that reinforcement alone cannot deliver
  • A cost comparison shows replacement is the more practical choice once schedule, traffic control, and closure costs are factored in

Applications on Aging Transportation and Civil Infrastructure

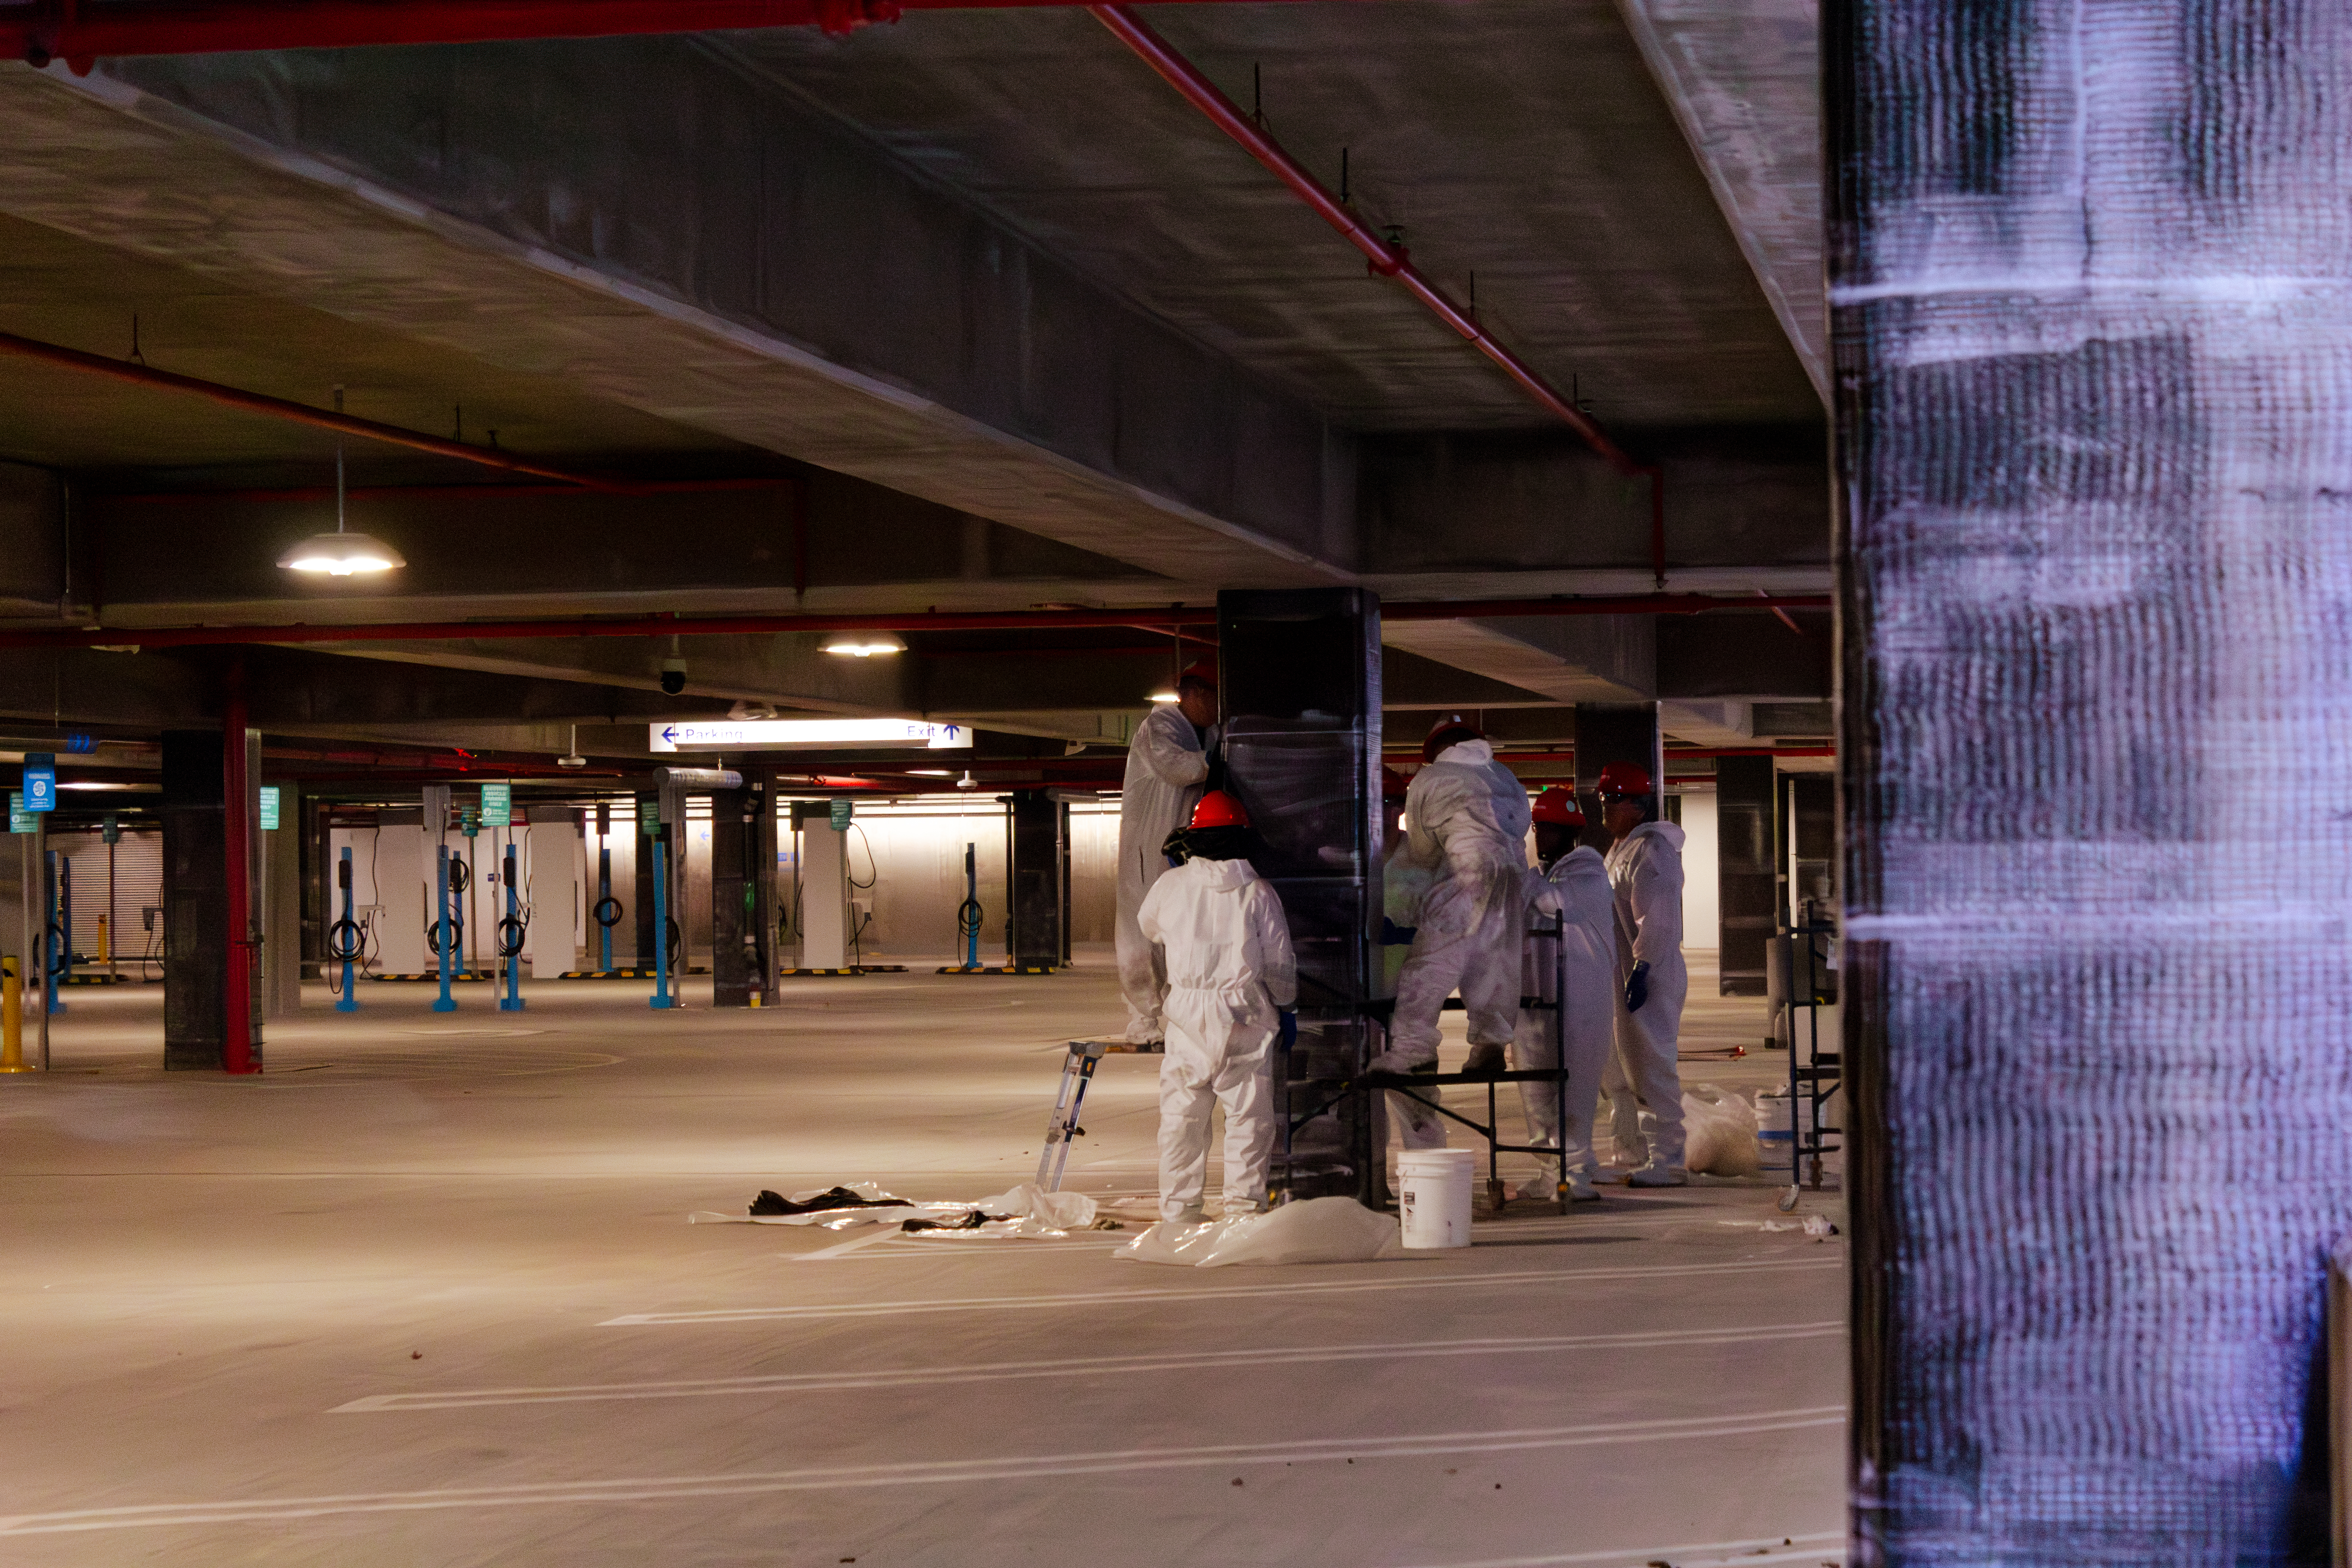
Bridges make up a large share of FRP reinforcement work, most often on girders and columns that show deterioration but retain enough section to carry an FRP wrap or strip system. Parking structures are another common application, particularly on beams and slabs where corrosion from de-icing chemicals has reduced rebar section without compromising the member outright. Industrial structures see FRP used to reinforce members carrying new or increased load demands, such as equipment additions that raise the design load beyond what the original structure was built for.

Evaluating Load Requirements and Long-Term Performance

  1. Complete a condition assessment to document existing deterioration, section loss, and substrate quality
  2. Establish the current load rating and the target load capacity the structure needs to reach
  3. Evaluate environmental exposure, including moisture, chemical exposure, and temperature range at the site
  4. Have the structural engineer design the FRP system, including fiber type, layup schedule, and anchorage details
  5. Install the system following the manufacturer's specification and the engineer's design
  6. Complete quality assurance testing, such as bond testing, to confirm the installed system performs as designed

Long-term performance depends on getting each of these steps right. An FRP system installed over a substrate that was not properly prepared, or designed without an accurate load assessment, will not deliver the service life the specification assumes.

Choosing a Contractor for FRP Structural Upgrades

FRP installation calls for a contractor with documented experience preparing substrates, installing fiber systems to manufacturer specifications, and coordinating with the structural engineer on design details and field conditions. Project teams should confirm a contractor's history on similar structure types, its quality assurance process for bond testing, and its ability to adjust installation sequencing around active transportation or facility operations.

Penhall supports FRP structural upgrades on bridges, parking structures, and industrial facilities. Learn more about Penhall's Fiber Reinforced Polymer, Bridge Services, and Structural Repair capabilities.

Penhall Sacramento-12
penhall lax edited-43

frequently asked questions

What is FRP concrete repair?

FRP concrete repair uses fiber reinforced polymer material, bonded to or embedded near the surface of an existing concrete member, to add strength without the added weight of a conventional concrete jacket or steel plate. It is used on bridges, parking structures, and industrial members that need more load capacity or additional support after section loss from deterioration.

What is the difference between FRP reinforcement and FRP reinforcement bars?

FRP reinforcement is a general term for strengthening an existing structure with fiber material, most often applied as sheets, strips, or wraps bonded to the concrete surface. FRP reinforcement bars, sometimes used in near-surface mounted applications or in new construction, are rigid FRP rods that replace or supplement steel rebar, offering corrosion resistance in place of traditional reinforcement.

How long does an FRP structural upgrade last?

Service life depends on installation quality, exposure conditions, and ongoing maintenance, but a properly designed and installed FRP system can add decades of service life to a structure when the substrate is sound and the bond is verified during installation.

Can FRP be used on a structure with active corrosion?

FRP can be applied over a structure with corrosion-related section loss once the affected concrete has been removed and the substrate has been repaired to a sound condition. FRP does not stop ongoing corrosion inside the concrete, so any active corrosion needs to be addressed as part of the repair scope before the FRP system goes on.

Is FRP more cost-effective than replacing a structure?

In many cases, yes, particularly when the underlying concrete remains sound and replacement would trigger closure, traffic control, or schedule costs that outweigh the reinforcement scope. A full cost comparison depends on the specific structure, its condition, and the owner's schedule constraints.

Does Penhall design FRP systems or only install them?

Penhall installs FRP systems designed by the project's structural engineer, coordinating substrate preparation, fiber application, and quality assurance testing to the approved design.

Sequencing Selective Demolition in Occupied Facilities: Engineering Protocols for Structural Isolation and Risk Mitigation

CALL FOR A QUOTE
1-800-736-4255

At a Glance

  • What It Is: Selective demolition removes targeted walls, slabs, foundations, or structural sections while the rest of a facility stays fully operational as opposed to full-structure teardown.
  • Scheduling Discipline: Work is sequenced around production shifts, maintenance windows, and shutdown days so the demolition scope never dictates the facility's operating calendar.
  • Containment First: Dust, noise, and vibration are physically isolated from live production, warehouse, or refinery zones using containment barriers, negative-air systems, and vibration-controlled equipment.
  • Trade Coordination: Electrical, mechanical, fire protection, and process piping trades are sequenced into the demolition schedule through lockout/tagout (LOTO) coordination and shared logistics planning.
  • Single-Source Scope: Pairing selective demolition with concrete breaking, removal, and interior demolition services under one contractor reduces schedule risk and eliminates finger-pointing between subs.
  • Integrated Single-Source Execution: Combining subsurface GPR scanning, mechanical scarification, robotic hydrodemolition, perimeter saw-cutting, and structural concrete repair under one contract eliminates trade hand-off delays during tight lane closure windows.
2
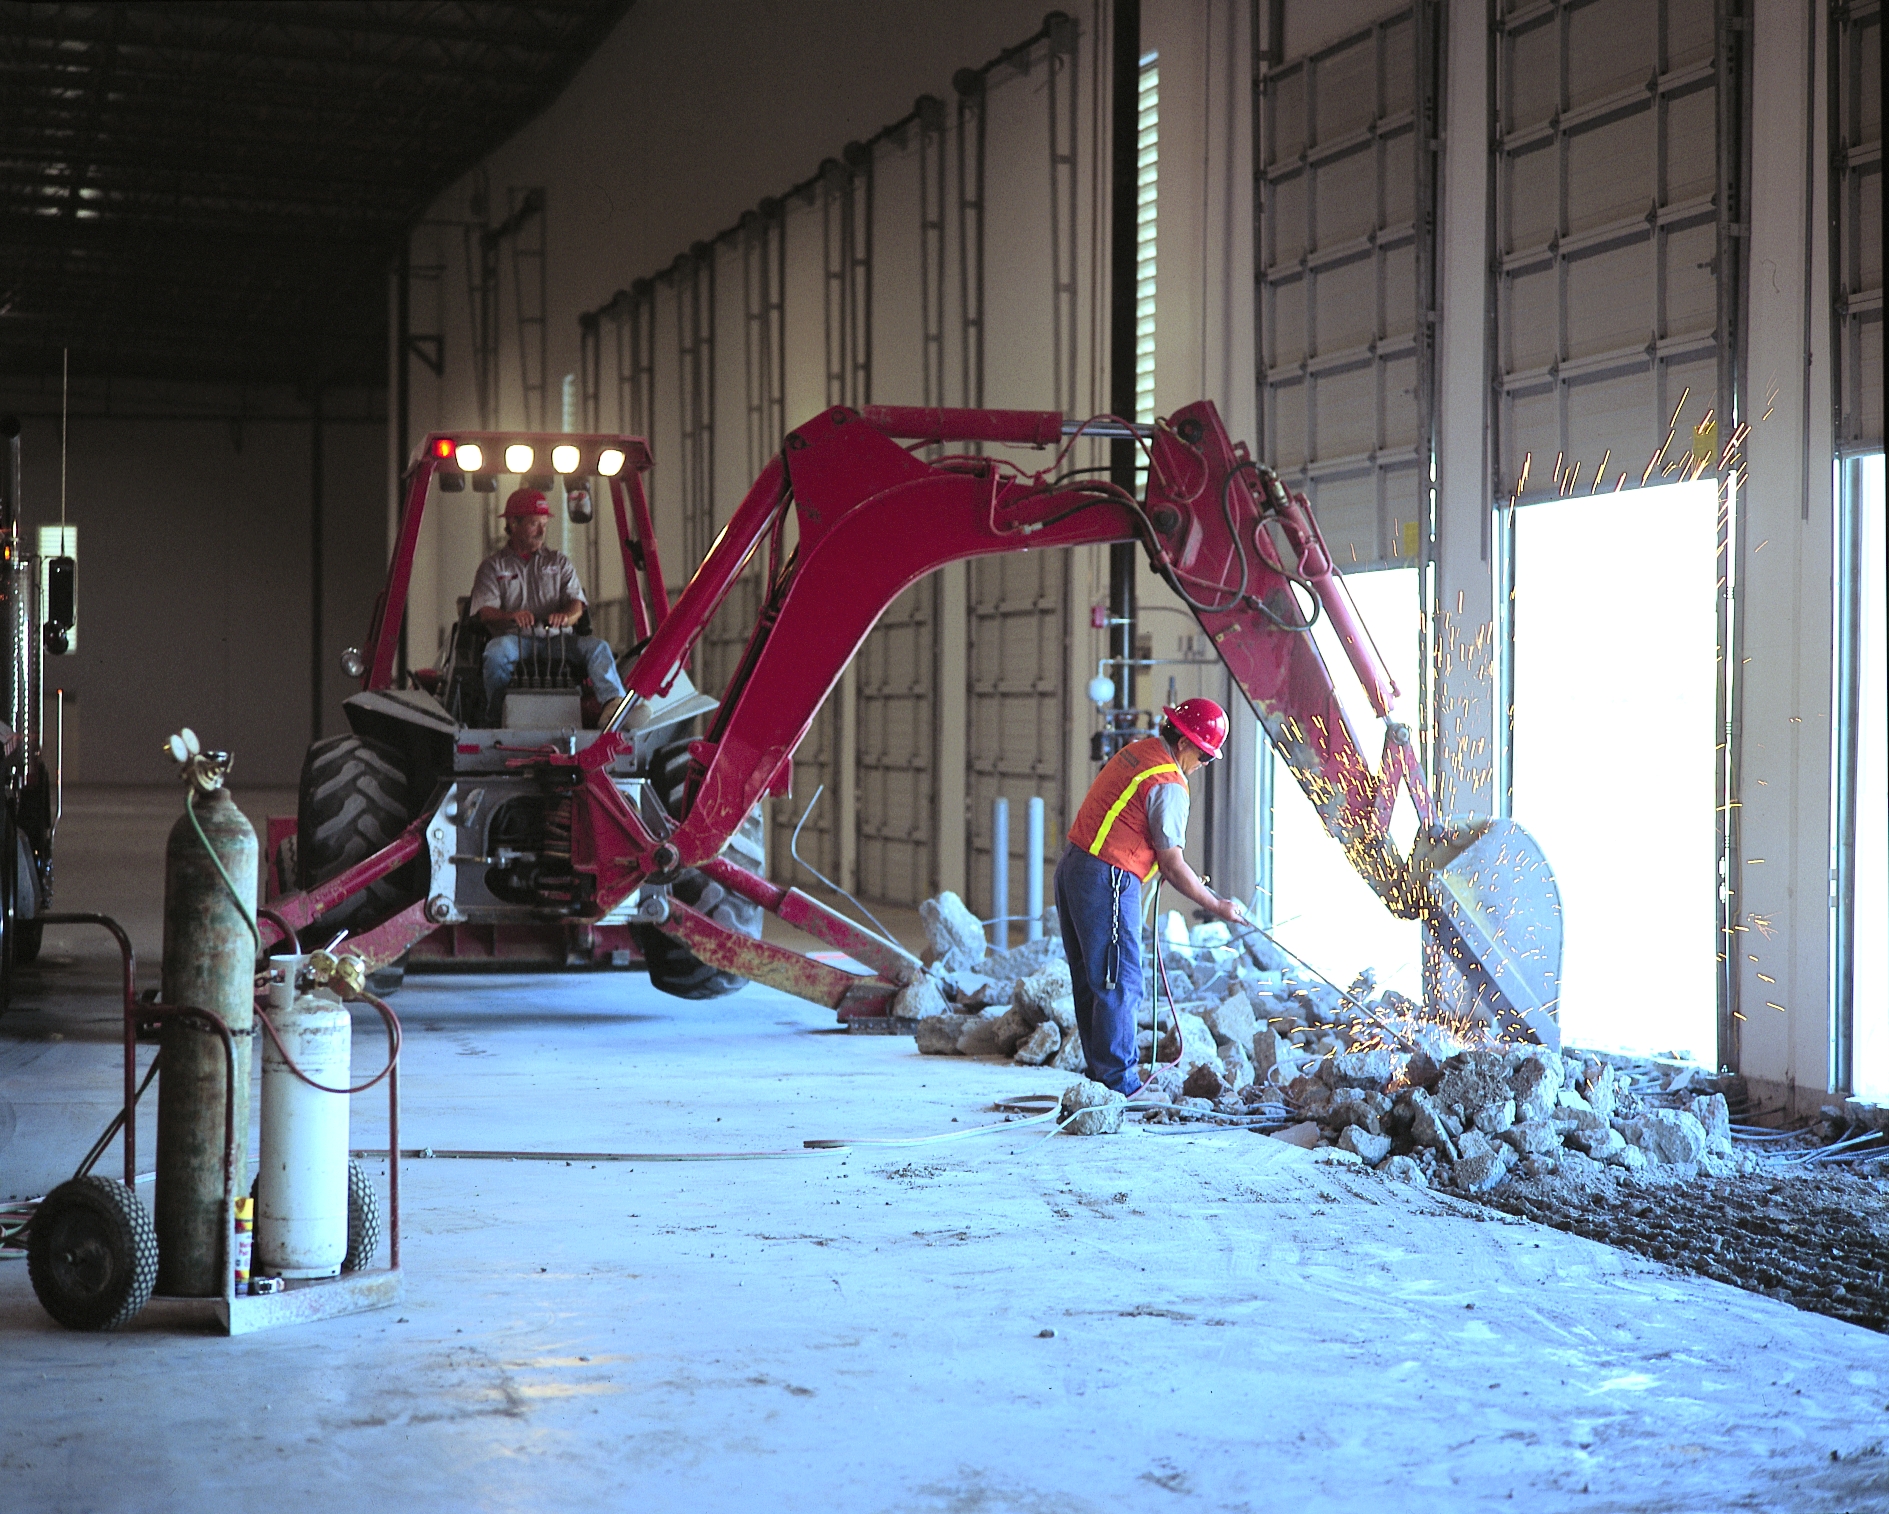
Backhoe and torch

What Is Selective Demolition?

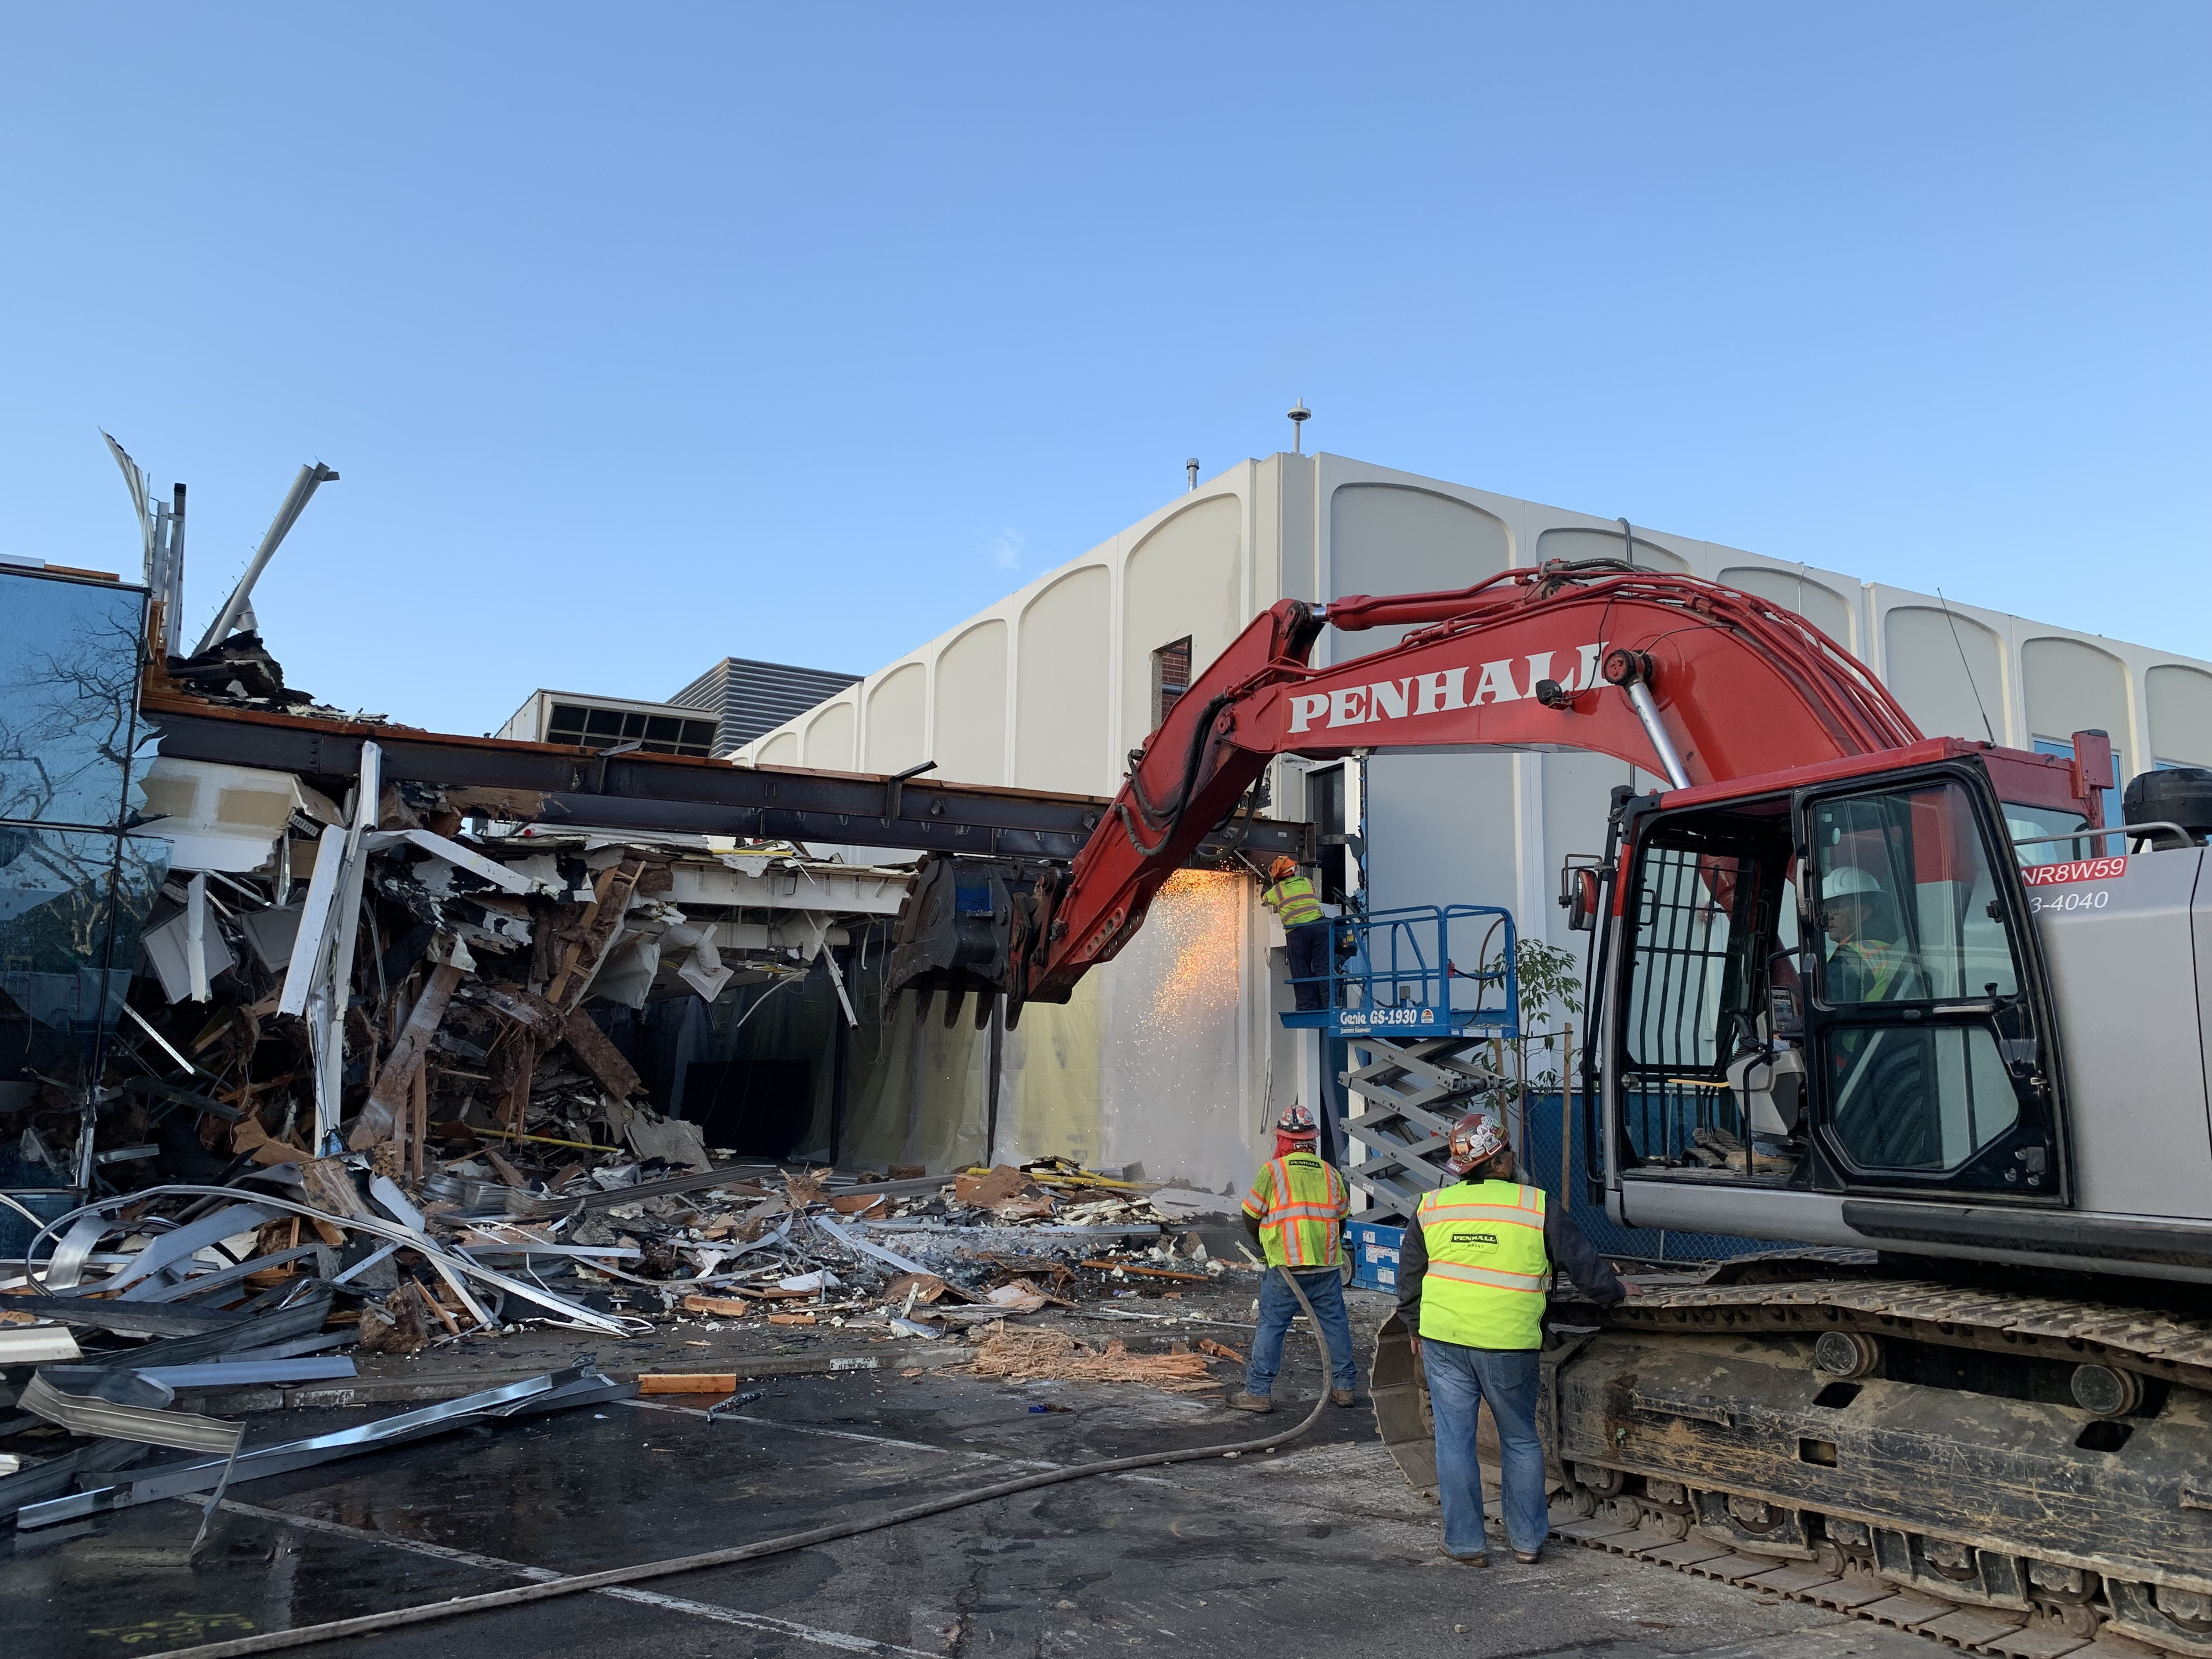
Selective demolition is the removal of specific building components like interior walls, floor slabs, foundations, mezzanines, or structural sections without taking down the surrounding structure or shutting down the rest of the facility. It's the standard approach for any project where a plant, warehouse, distribution center, or refinery needs to modify part of its footprint while operations continue everywhere else.

Unlike full-building demolition, selective demolition is defined by precision and sequencing: cutting and removing only what's scoped, protecting everything adjacent to it, and doing the work in a sequence that fits around the facility's operating schedule instead of forcing a full shutdown.

For GCs and owners, that makes selective demolition less of a "how do we tear this down" problem and more of a "how do we do this without stopping the business" problem. This is where scheduling, containment, and trade coordination become the real scope of work.

The Challenge: Operations Can't Stop

Manufacturing plants, warehouses, and refineries rarely have downtime built into their calendars. A production line stopping for even a few hours can cost far more than the demolition scope itself, and most facilities have zero appetite for an open-ended shutdown while a contractor figures out logistics on the fly.

That reality creates a specific set of constraints GCs and owners have to plan around:

  • No full shutdown available. Demolition has to happen around production shifts, not instead of them.
  • Adjacent operations are sensitive. Dust migrating onto a production line, vibration reaching calibrated equipment, or noise disrupting a warehouse pick schedule can create problems well beyond the demo zone itself.
  • Live utilities and process lines run through or near the work area. Electrical conduit, compressed air, process piping, and fire suppression lines are frequently routed through the exact walls, slabs, or foundations being removed.
  • Other trades are on-site at the same time. Electrical, mechanical, and structural crews often need access to the same area before, during, or immediately after demolition — and scheduling conflicts between trades are one of the most common sources of project delay.

Solving for these constraints is what separates a selective demolition plan that protects the schedule from one that quietly extends it.

Scheduling: Building the Sequence Around Production

Phased teardown work starts with a sequencing plan built around the facility's actual operating calendar. That typically means:

  • Shift and shutdown alignment. Demolition activities are scheduled into planned maintenance windows, off-shift hours, or weekend shutdowns to avoid touching active production time.
  • Zone-by-zone phasing. Rather than opening the entire scope at once, work is broken into phases that isolate one section at a time, letting the rest of the facility continue operating around it.
  • Milestone-based hand-offs. Each phase is scoped with a clear completion point so structural, mechanical, or electrical trades can move in immediately behind demolition without waiting on the full scope to finish.
  • Contingency built into the sequence. Unexpected conditions are accounted for in the schedule logic up front, rather than treated as change orders that blow up the timeline later.

A sequencing plan that accounts for all of this up front is what keeps a phased teardown from turning into an open-ended disruption to the facility's operations.

Containment: Keeping Demolition From Becoming an Operations Problem

In an occupied facility, containment is what keeps demolition from becoming a production, safety, or environmental problem somewhere else in the building. Effective containment strategy typically covers:

  • Physical isolation. Floor-to-ceiling containment barriers separate the work zone from adjacent production floors, warehouse aisles, or process areas.
  • Dust and air quality control. Negative-air systems with HEPA filtration keep airborne dust from migrating into occupied or sensitive zones, which matters as much for OSHA respirable silica compliance as it does for protecting product or equipment nearby.
  • Vibration and noise management. Equipment selection — sawing versus breaking, hydraulic versus pneumatic — is chosen based on how much vibration and noise the adjacent operation can tolerate, not just how fast the demolition crew can move.
  • Housekeeping and debris logistics. Debris routing is planned to avoid crossing active aisles, dock doors, or production paths, so demolition traffic doesn't collide with the facility's day-to-day material flow.

For teams handling the concrete removal piece of a phased teardown, coordinated containment and debris handling is also core to how Penhall's concrete breaking & removal crews approach occupied-site work.

Coordination With Other Trades

Selective demolition rarely happens in isolation. In an active plant, warehouse, or refinery, electrical, mechanical, fire protection, and structural trades are usually staged in around the same footprint — and poor coordination between trades is one of the most common causes of schedule slip on occupied-facility projects.

Getting this right generally means:

  • Utility lockout/tagout (LOTO) coordination. Before any cutting or breaking starts, electrical, mechanical, and process utilities serving the work area are identified, verified, and locked out in coordination with facility maintenance staff.
  • Sequenced trade hand-offs. Structural shoring, electrical rough-in, and mechanical rework are scheduled to follow demolition phases in order, so trades aren't waiting on each other or working in the same footprint simultaneously.
  • Shared site logistics. Laydown areas, access routes, and crane or lift usage are planned jointly across trades to avoid the kind of on-site conflicts that stall multiple crews at once.
  • Single point of communication. A clear line of accountability between the demolition contractor, other trades, and facility operations staff keeps schedule and safety information from getting lost between subcontractors.

Interior Demolition Services for Live Facilities

Much of this phased work falls under interior demolition which includes removing walls, mezzanines, interior slabs, or equipment pads inside a facility that's still operating around the work zone. Interior demolition services carry their own set of constraints beyond structural teardown:

  • Confined work areas. Interior spaces often mean tighter access, lower ceiling clearance, and less room for large equipment.
  • Finish protection. Adjacent flooring, ceilings, and finishes outside the demo scope need to be protected from dust, debris, and incidental damage during removal.
  • Floor load limits. Interior work has to respect the building's live-load and point-load ratings, which can rule out heavier equipment in favor of smaller units.
  • Multi-trade footprint. Interior scopes frequently overlap with MEP rework, making the trade coordination piece above just as relevant indoors as it is on a slab-on-grade teardown.

Application Snapshots

Manufacturing Plants: Selective demolition around production lines is typically phased into scheduled maintenance shutdowns, with equipment foundations and slab sections removed in sequence to avoid disrupting adjacent lines still running.

Warehouses and Distribution Centers: Teardown of racking foundations, dock areas, or interior walls is scheduled around pick/pack cycles and inventory flow, with containment planned to keep dust and debris away from active aisles.

Refineries: Selective demolition near process units requires strict LOTO coordination, hot work permitting, and containment planning to work safely around live piping and process equipment without interrupting adjacent operations.

Why a Single-Source Scope Reduces Risk

Splitting selective demolition, concrete cutting, and concrete removal across multiple subcontractors creates exactly the kind of coordination gaps this article has been describing — different schedules, different site logistics, and no single point of accountability if something goes wrong.

Penhall handles selective demolition alongside demolition and concrete breaking & removal scopes under one contract, which means:

  • One schedule to manage instead of several overlapping ones.
  • One point of contact for facility operations, other trades, and project management.
  • Consistent containment, safety, and site logistics standards across every phase of the teardown.

Planning a Phased Teardown in an Active Facility?

Contact Penhall's team to walk through scheduling, containment, and trade coordination for your next occupied-facility demolition project. Reach our 24/7 national dispatch hotline at 1-800-736-4255, or request a quote to get started.

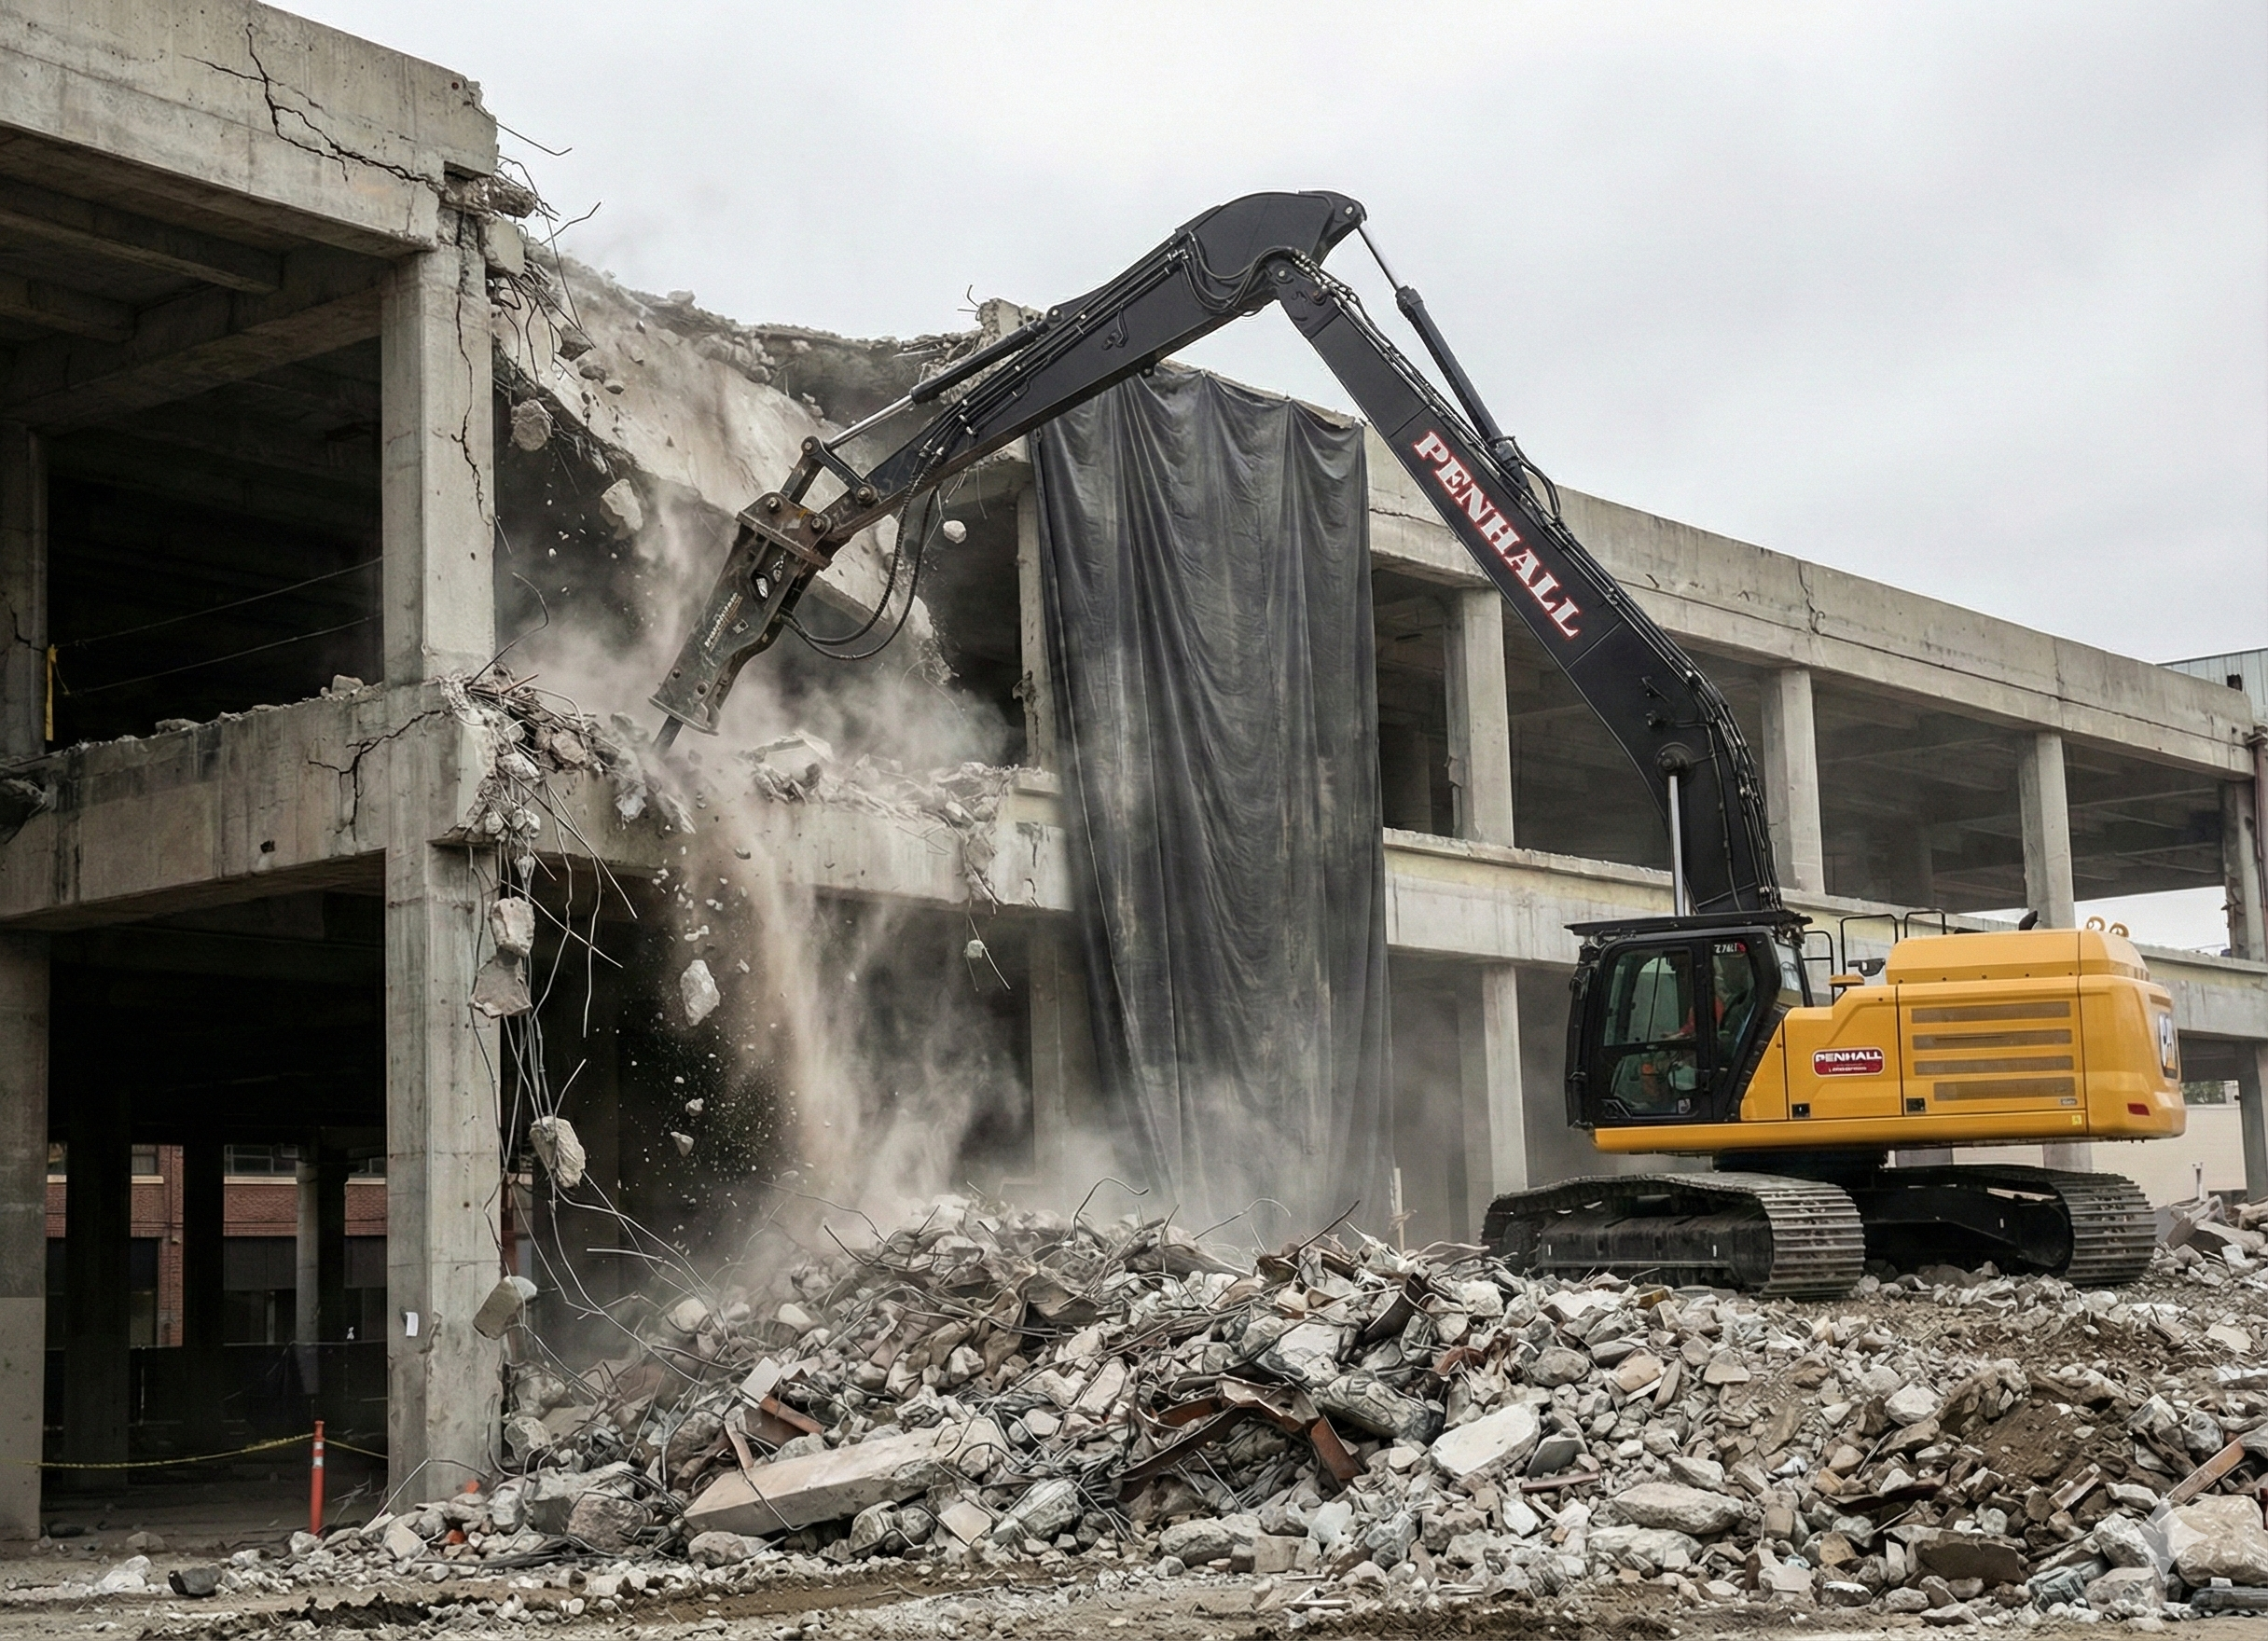
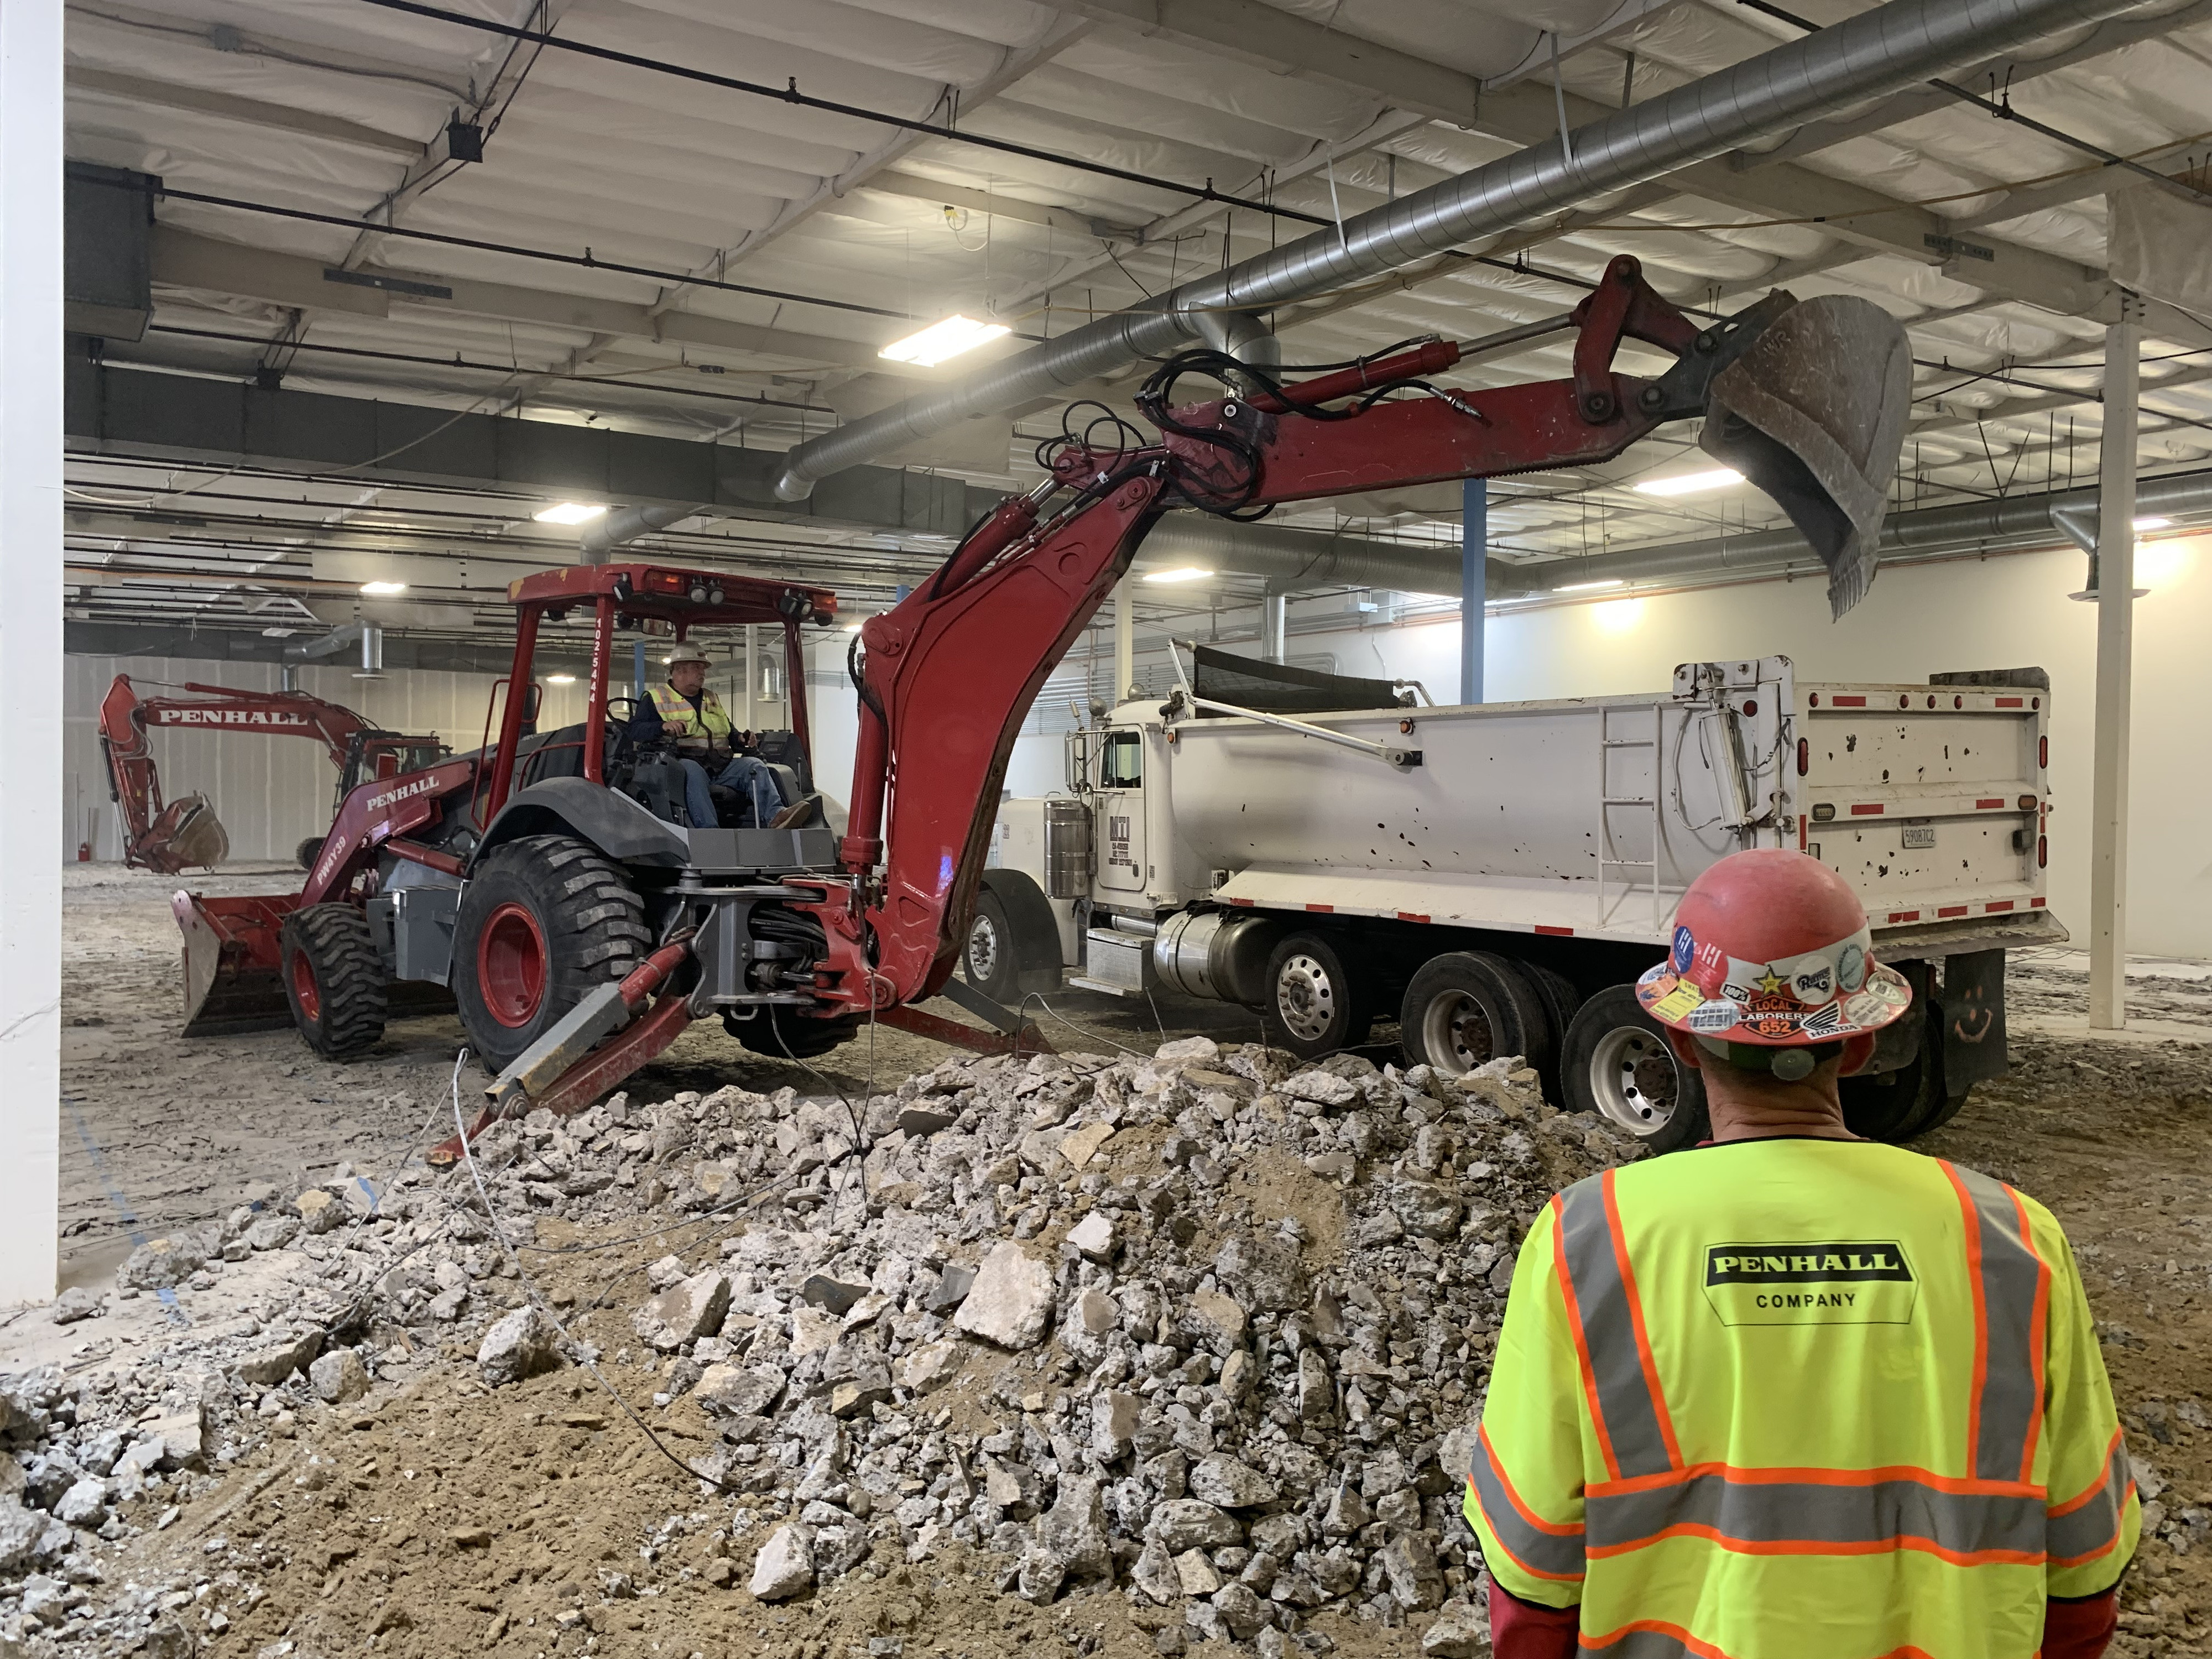
Penhall Demo
03

frequently asked questions

What is selective demolition?

Selective demolition is the removal of specific building elements such as walls, slabs, foundations, or structural sections while the rest of the facility remains standing and operational, as opposed to demolishing an entire structure.

How is selective demolition different from interior demolition?

Interior demolition is a type of selective demolition scoped specifically to the inside of a building (removing walls, mezzanines, or interior structural elements) while selective demolition more broadly can include exterior, foundation, or structural scopes as well.

Can selective demolition happen while a facility stays fully operational?


Yes, selective demolition is specifically designed for this scenario, using phased scheduling, physical containment, and trade coordination to isolate the work zone from ongoing operations elsewhere in the facility.

How do you prevent demolition dust and vibration from affecting nearby operations?

Containment barriers, negative-air HEPA systems, and vibration-appropriate equipment selection (such as sawing or hydraulic crushing instead of pneumatic breaking) keep dust, noise, and vibration isolated to the demolition zone.

Who coordinates other trades during a phased demolition project?

Typically the demolition contractor coordinates directly with the GC, facility maintenance staff, and other trades on LOTO, site logistics, and sequencing, ideally through a single point of contact to avoid scheduling conflicts.

Why use one contractor for demolition, saw cutting, and concrete removal?

A single-source scope eliminates the coordination gaps and finger-pointing that come from splitting related work across multiple subcontractors, keeping schedule, safety, and site logistics consistent across the whole project.

Rebar Mapping for Structural Assessment on Aging Infrastructure: What Engineers Need to Know

CALL FOR A QUOTE
1-800-736-4255

At a Glance

  • GPR rebar scanning locates embedded rebar without demolition or core drilling, preserving structural integrity during assessment.
  • When original drawings are missing, outdated, or inaccurate, rebar mapping provides a reliable basis for repair and retrofit decisions.
  • Rebar depth, spacing, diameter estimates, and cover thickness data all inform corrosion risk evaluation and load capacity analysis.
  • Bridges, parking structures, and industrial facilities each present distinct scanning challenges that require field-experienced crews and proper equipment calibration.
  • Early identification of reinforcement anomalies -- such as congested zones, misplaced bars, or insufficient cover -- can prevent costly structural failures and project overruns.
  • GPR rebar scanning integrates with broader structural assessment workflows, including structural repair planning, concrete rehabilitation, and bridge inspection programs.
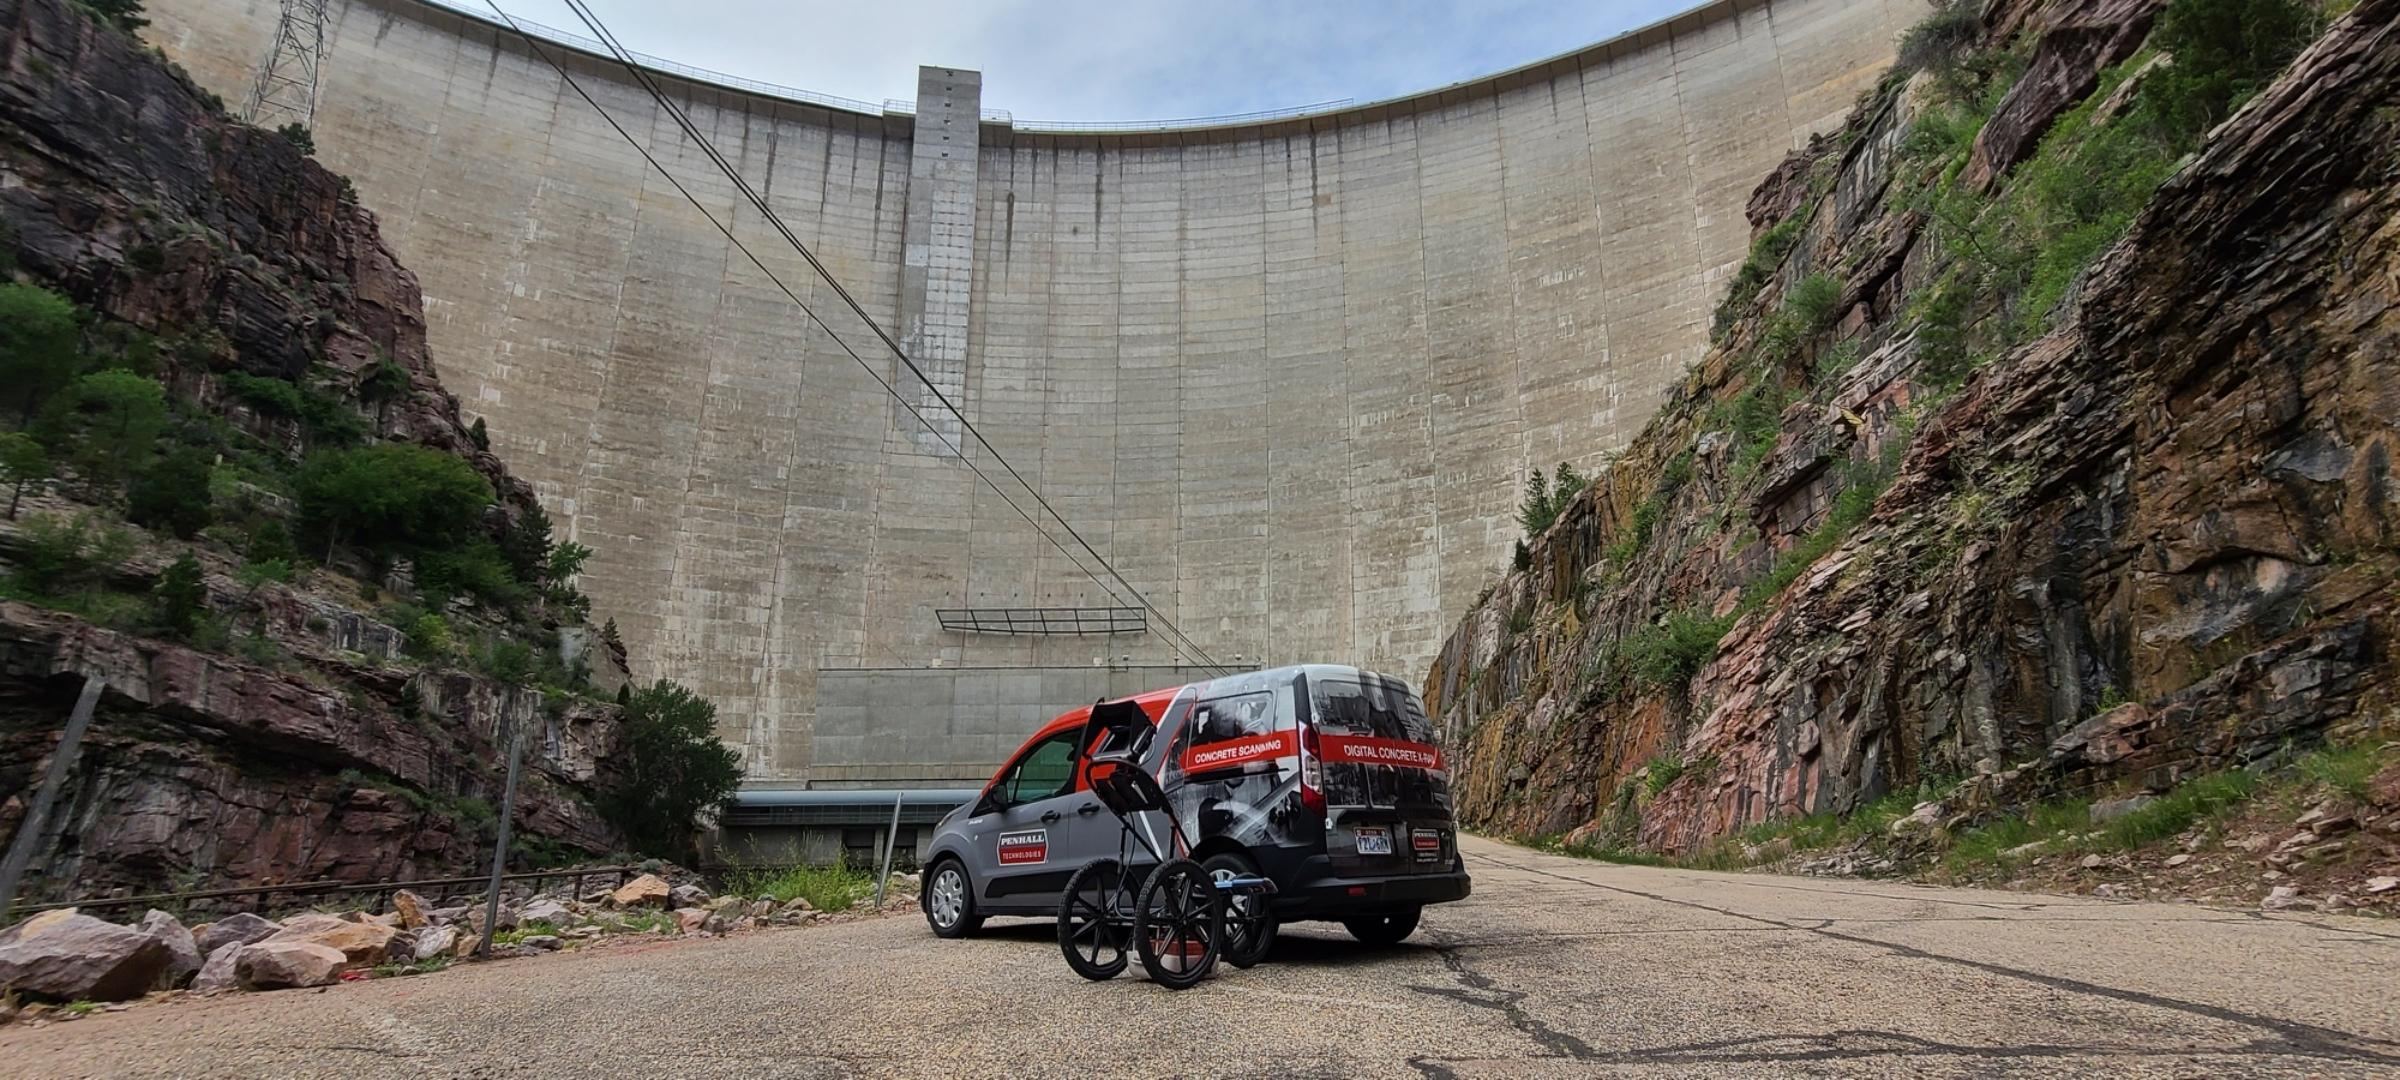
truck with view
Penhall GPR Scanning (2)

The Problem with Aging Infrastructure Documentation

When a structural engineer walks onto a 1960s-era parking deck or a bridge built before computerized documentation became standard, the first question is often the same: where is the rebar, and is it where it should be?

Original construction drawings, when they exist at all, may reflect design intent rather than as-built conditions. Reinforcement placement in older structures frequently deviated from plans due to field adjustments, substitutions, or simple human error during placement. Decades of carbonation, chloride ingress, and repeated load cycles compound the uncertainty. Before any repair scope can be defined, engineers need to know what is actually inside the concrete.

Ground penetrating radar (GPR) rebar scanning answers that question without a jackhammer.

What GPR Rebar Scanning Actually Does

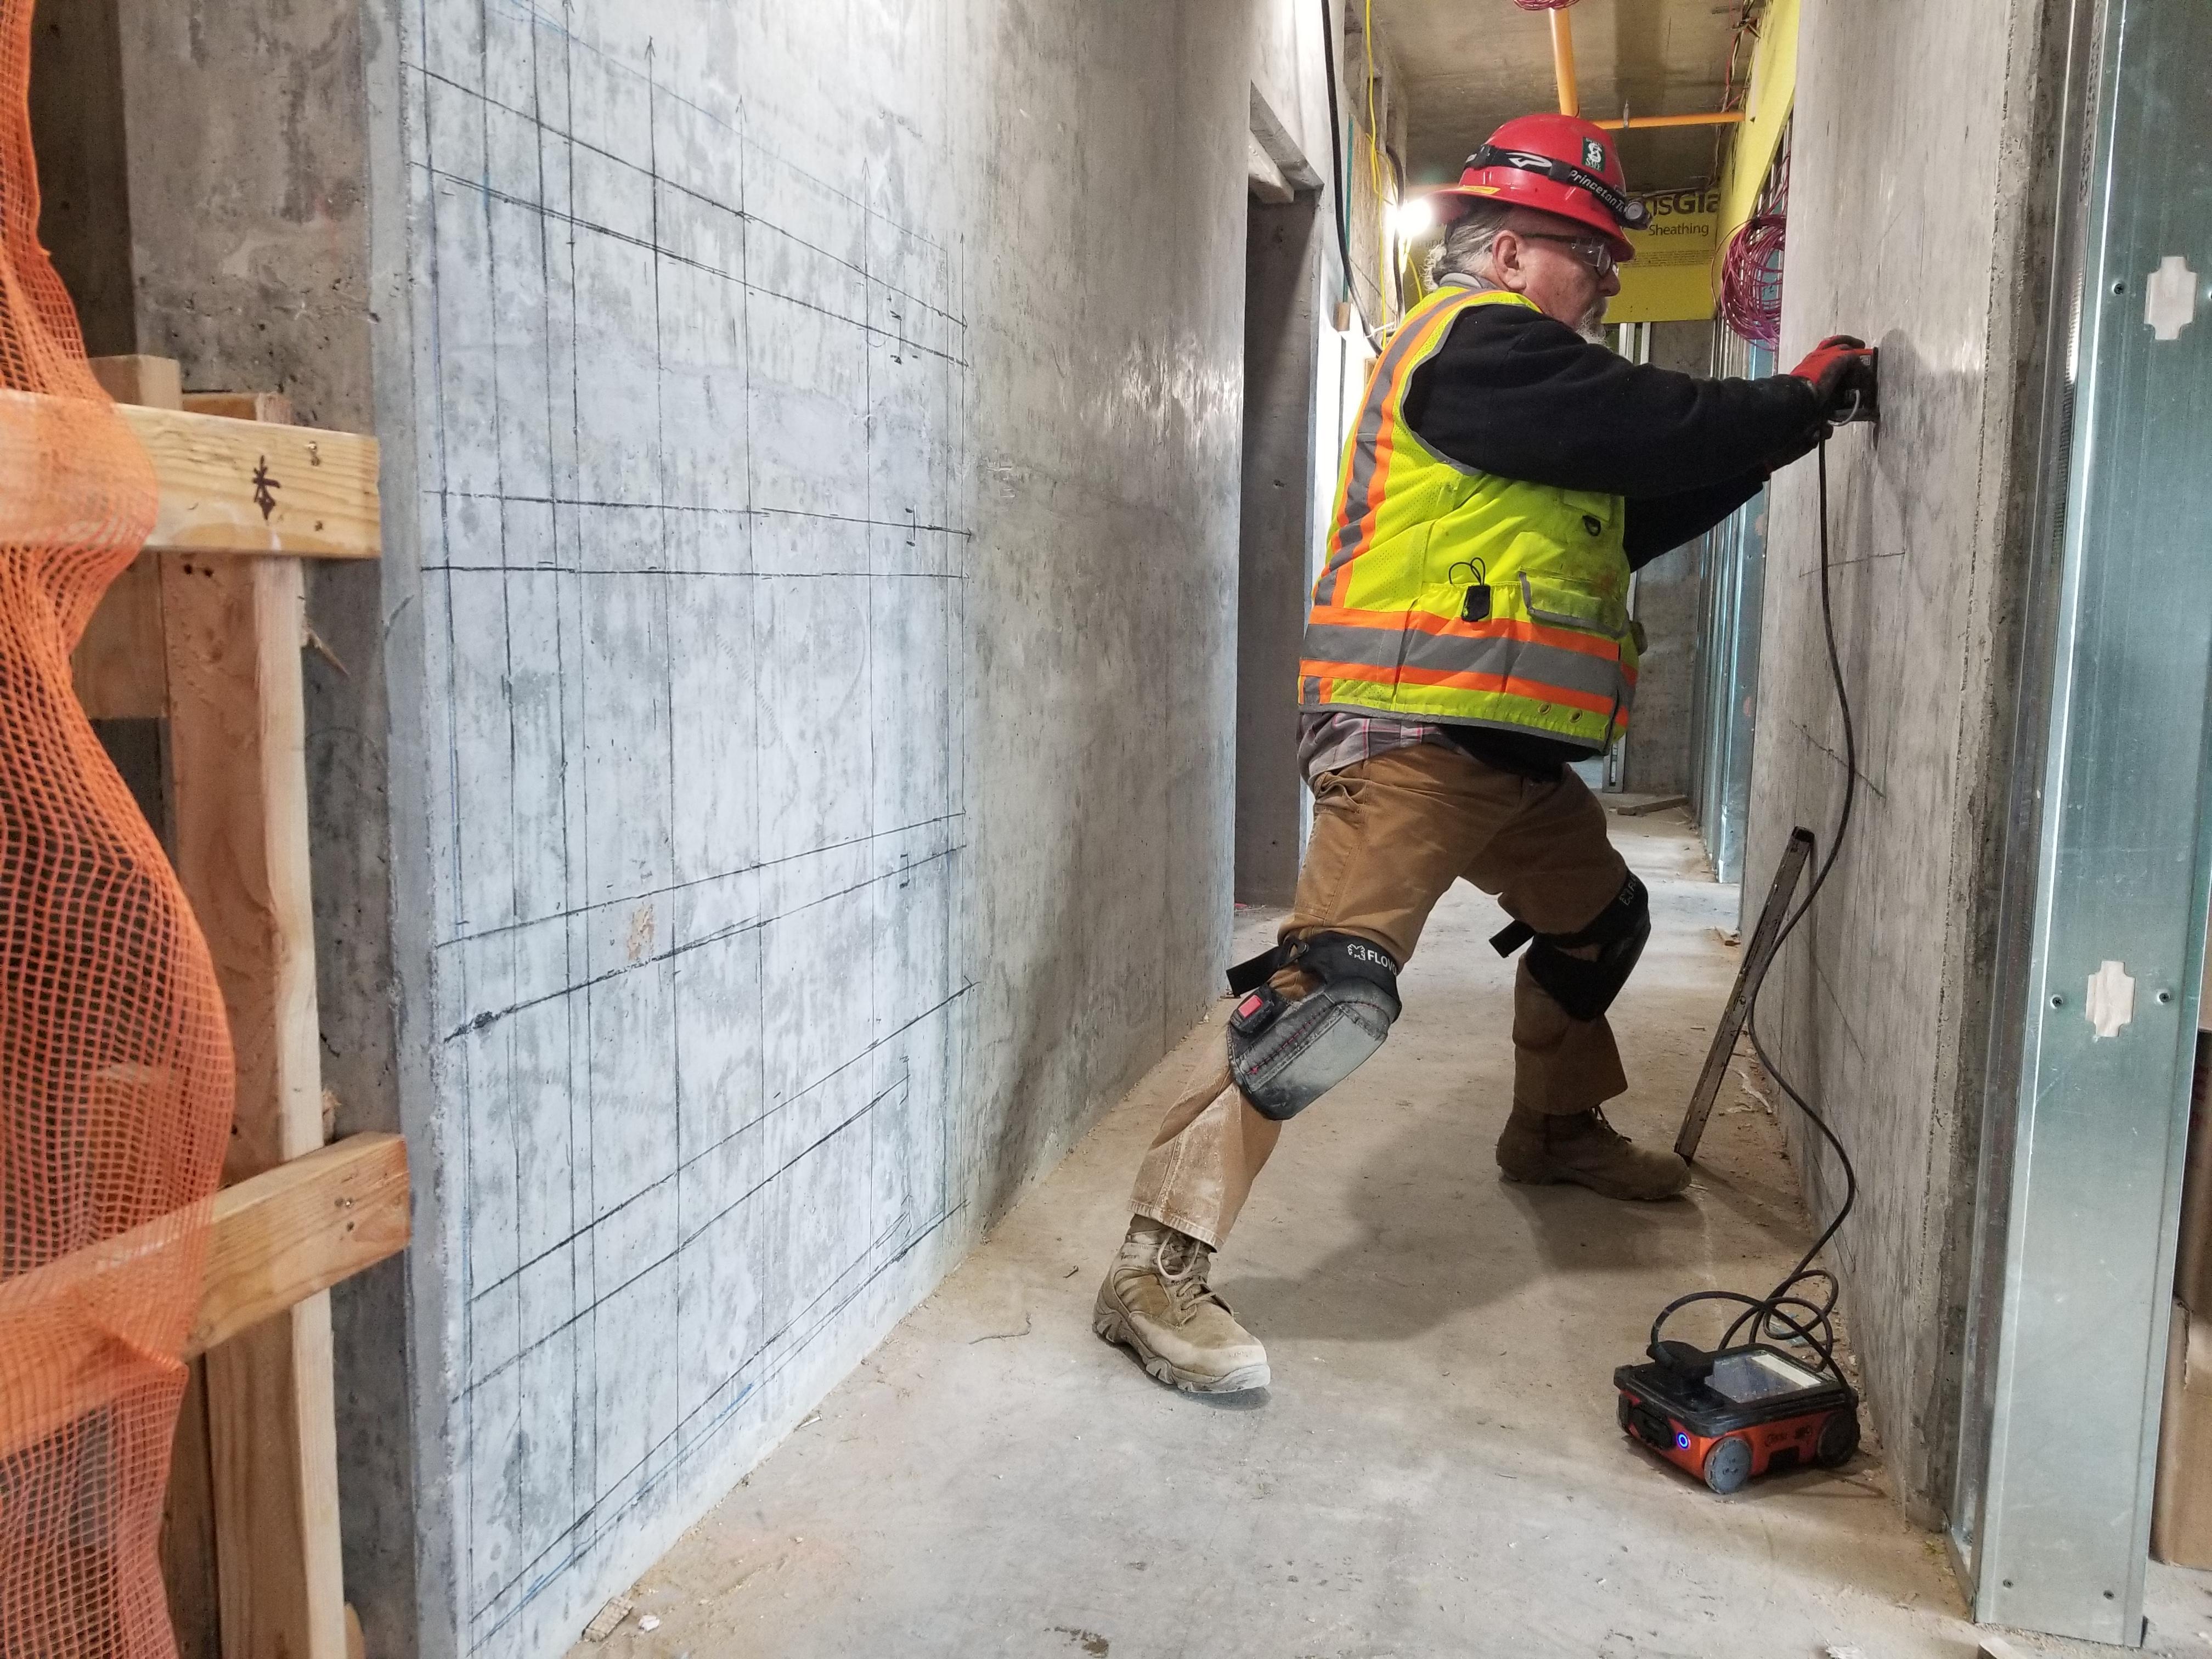
GPR works by emitting high-frequency electromagnetic pulses into a concrete substrate and recording the time it takes for those signals to reflect back from embedded objects and interfaces. Rebar, post-tension cables, voids, and layer boundaries all produce distinct return signatures. The result is a subsurface profile that a trained technician can interpret in real time.

In the context of rebar mapping, GPR rebar scanning produces:

  • Rebar location in both plan view and cross-section
  • Depth of cover from the surface to the top of each bar
  • Bar spacing across a given area
  • Estimated bar diameter based on signal amplitude and hyperbola geometry
  • Identification of anomalies such as missing bars, crossed layers, congested zones, or significant section loss

Modern GPR systems used for concrete rebar scanning can resolve features at depths of 12 to 18 inches in typical reinforced concrete, with accuracy sufficient to guide core sample placement, anchor installation, and saw-cut operations.

Why Aging Infrastructure Creates Higher Stakes

Newer construction typically comes with complete, accessible documentation. Design drawings, submittals, pour records, and inspection reports are available digitally and provide a starting point for any structural assessment.

Aging infrastructure is a different situation. Consider what engineers routinely encounter:

Missing or incomplete drawings. Structures built before the 1990s may have paper-only records that were lost, damaged, or never archived. In some cases, only partial plans survived -- covering the original footprint but not subsequent additions or modifications.

Undocumented repairs and modifications. A parking structure that underwent deck patching in 1988 may have had rebar added, removed, or relocated without formal documentation. A bridge with a widened deck may have integrated new reinforcement in ways that are not reflected in the original as-builts.

Deterioration that obscures assessment. Spalled concrete, corroded rebar, and carbonated cover layers change the acoustic and electrical properties of the substrate. Scanning rebar in concrete that has experienced significant deterioration requires technicians who understand how signal return patterns shift in compromised material.

Regulatory and liability pressure. Bridge inspection programs, building department audits, and litigation-related assessments all place a premium on documented, defensible data. Visual inspection alone does not satisfy that standard when subsurface reinforcement is in question.

For all of these reasons, GPR rebar scanning has become a standard component of structural due diligence on assets built before modern documentation practices were widespread.

Three Asset Classes Where Rebar Mapping Is Particularly Valuable

Bridges

Bridge decks are among the most demanding environments for concrete rebar scanning. Chloride exposure from deicing chemicals is the leading cause of reinforcement corrosion in northern climates, and early corrosion is often invisible at the surface. GPR allows engineers to map cover depth across an entire deck, identifying zones where reduced cover creates higher corrosion risk -- and where patch repairs may have introduced rebar at inconsistent depths.

For bridges undergoing load rating analysis, rebar mapping provides input data for moment capacity calculations. A bar that is one inch deeper than assumed in the original analysis can meaningfully affect the calculated capacity of a member. When original drawings are unavailable or suspect, GPR-derived rebar location data becomes the input for finite element models and rating calculations.

Penhall's Bridge Services capabilities include scanning integrated with bridge inspection and repair scopes, providing engineers with a single source for assessment and execution.

Parking Structures

Multi-level parking structures are consistently among the most deterioration-prone concrete assets in urban environments. They combine thin deck slabs, high chloride exposure from vehicle drip, repetitive dynamic loading, and construction methods that, historically, did not always achieve specified cover depths.

Rebar mapping on parking structures is used to:

  • Establish baseline cover depth data for corrosion risk zonation
  • Confirm reinforcement layout before slab saw-cutting or core drilling during drainage system repairs
  • Support repair design by identifying areas of reduced section that may require supplemental reinforcement
  • Document existing conditions before ownership transfer or refinancing that triggers structural review

Because parking decks often have post-tensioned components in addition to mild reinforcement, scanning rebar in concrete in these environments requires equipment and operators capable of distinguishing PT tendons from rebar -- a distinction that matters significantly for saw-cut clearance.

Industrial Facilities

Industrial floors, equipment foundations, and elevated slabs present their own set of challenges. These structures are often heavily loaded, have been modified repeatedly, and may contain embedded conduit, anchor systems, and drainage structures that complicate the reinforcement picture.

For structural repair or new penetration work, engineers and contractors need to know not just where the rebar is, but what else is in the slab. GPR concrete rebar scanning at industrial facilities typically occurs alongside utility mapping, so the subsurface model reflects all embedded elements -- not just reinforcement.

How Rebar Mapping Informs Repair and Retrofit Decisions

The output of a GPR rebar scanning engagement is not just a map. When used correctly, it becomes part of a structural decision chain.

Defining repair boundaries. Engineers specifying full-depth deck replacement or partial-depth patching need to know whether the underlying reinforcement is in a location that allows the repair to be executed as designed. Rebar too close to the surface can require modified saw-cut depths; unanticipated bar clustering can require revised joint layouts.

Evaluating corrosion risk by zone. Cover depth data from scanning rebar in concrete, combined with half-cell potential surveys and chloride content testing, allows engineers to produce a risk-stratified deterioration map. This directly supports the prioritization of repair zones and the sequencing of maintenance budgets.

Supporting retrofit design. When structural upgrades require new anchors, adhesive anchors, or mechanical fasteners, GPR rebar scanning confirms clear zones ahead of drilling. For seismic retrofit work on bridges and industrial structures, rebar mapping verifies that existing reinforcement is sufficient to develop the forces required by new connection elements -- or flags where supplemental reinforcement may be needed.

Reducing contractor risk. A repair contractor working from a GPR-verified rebar map can submit more confident unit prices and avoid change orders driven by subsurface surprises. That has direct value to asset owners managing fixed-budget repair programs.

What to Expect from a GPR Rebar Scanning Engagement

A well-executed concrete rebar scanning scope includes:

Pre-field coordination. Any available drawings, repair records, or prior inspection reports should be reviewed before scanning. Even incomplete documentation improves the accuracy of field interpretation.

Equipment selection. Antenna frequency selection affects both depth penetration and resolution. Assessments focused on cover depth and near-surface rebar typically use higher-frequency antennas (900 MHz to 2.6 GHz). Deeper investigations, such as evaluating post-tension tendons or thick foundations, use lower frequencies with wider beam angles.

Systematic grid scanning. Accurate rebar mapping requires overlapping scan lines in orthogonal directions. Skipping lines or relying on spot checks produces incomplete data and is not appropriate for structural assessment applications.

Data processing and reporting. Raw GPR data requires processing to convert two-way travel time to depth and to produce plan-view rebar maps. Reports should include calibration methodology, depth confidence intervals, and any areas where signal quality was compromised by reinforcement congestion or surface conditions.

Integration with the broader assessment. Rebar scanning data is most useful when it feeds directly into the structural engineer's assessment model, repair specification, or drawing set. The scanning provider and the engineer of record should coordinate on deliverable format requirements before the field work begins.

Limitations Engineers Should Understand

GPR rebar scanning is a powerful assessment tool, but it has real limitations that need to be factored into project planning.

Congested reinforcement. When multiple layers of closely spaced rebar are present, signals from deeper bars can be obscured by shallower ones. This is common in bridge girder flanges and heavily reinforced industrial foundations. In these conditions, GPR provides reliable data on the top mat but may not fully resolve lower layers.

Highly conductive concrete. Salt-contaminated concrete and conductive aggregates absorb electromagnetic energy and reduce effective depth penetration. Scanning results in severely deteriorated or chloride-saturated decks should be interpreted with awareness of signal attenuation effects.

Diameter estimation accuracy. GPR provides estimated bar diameters based on signal amplitude. These estimates are useful for preliminary assessment but should be confirmed by core extraction in critical applications.

The scanning is not the engineering. GPR rebar scanning services produce field data. Converting that data into structural conclusions requires a licensed engineer applying appropriate analysis methods. The scan itself does not constitute a structural assessment.

Connecting Rebar Mapping to a Complete Assessment Program

Rebar mapping rarely stands alone. On aging infrastructure, it typically occurs as part of a larger condition assessment that may include:

  • Visual inspection and distress mapping
  • Delamination surveys by sounding or impact echo
  • Half-cell potential and resistivity testing for corrosion activity
  • Chloride content sampling at multiple depths
  • Core extraction for compressive strength and petrographic analysis

When the full picture is assembled, the structural engineer has a defensible, data-supported basis for repair prioritization, specification development, and cost estimation.

Penhall provides Concrete Scanning, Structural Repair, and Bridge Services as integrated capabilities, which means the assessment data and the repair execution can stay within a single accountable relationship. For asset owners managing aging infrastructure on a defined maintenance budget, that continuity reduces coordination overhead and improves the reliability of scope-to-cost translation.

Penhall LAX GPR-3
penhall lax edited-43

frequently asked questions

What is GPR rebar scanning, and how does it differ from X-ray?

GPR rebar scanning uses radar pulses to detect and map rebar inside concrete from one side of the surface. It is non-destructive, requires no radiation safety protocols, and can be performed while a structure is in service. X-ray imaging requires access to both sides of a member and involves ionizing radiation, which limits its use in occupied or operational facilities. GPR is faster and more practical for large-area mapping, while X-ray provides higher image resolution for specific critical details.

How accurate is GPR rebar scanning for determining bar depth?

In standard reinforced concrete with known or estimated dielectric properties, GPR depth accuracy is typically within 5 to 10 percent of true depth, or approximately plus or minus 0.25 inches in most deck scanning applications. Accuracy improves when a calibration core is taken to verify the dielectric constant of the concrete being scanned.

Can GPR rebar scanning be performed on a structure that is in active use?

Yes. GPR scanning is non-destructive and does not require lane or area closures beyond what is needed for safe technician access. Bridge deck scanning, for example, can often be performed during off-peak traffic hours with standard lane closure setups. Industrial facility scanning frequently occurs during regular business hours.

When original drawings are not available, can GPR alone establish the as-built reinforcement layout?

GPR provides reliable data on rebar location, cover depth, and spacing that can serve as the basis for structural analysis when drawings are absent. However, confirmation of bar size and condition typically requires selective core drilling to extract and inspect samples. A complete as-built assessment for engineering purposes combines GPR mapping with targeted physical sampling

How large an area can be scanned in a typical project day?

Productivity depends on access conditions, surface texture, and the required scan density. For open bridge deck or parking structure scanning, a two-person crew using a cart-mounted GPR system can typically scan 2,000 to 5,000 square feet per day while maintaining the overlapping grid pattern required for accurate rebar mapping. Complex or access-limited areas take longer.

What deliverables should I expect from a rebar scanning services provider?

At minimum, a professional rebar scanning report should include plan-view rebar maps showing bar location and estimated cover depth, cross-section profiles from representative scan lines, notes on any areas where data quality was limited, and methodology documentation including antenna frequency, scan line spacing, and calibration method. For structural assessment applications, deliverables should be in a format that the engineer of record can incorporate directly into their analysis.

Is GPR rebar scanning appropriate for post-tensioned concrete structures?

Yes, with important caveats. GPR can locate post-tension tendons as well as mild reinforcement, but distinguishing between them requires an experienced operator. In unbonded PT systems, the grease-filled sheathing around tendons produces a different radar return than bonded tendons grouted in metal ducts. For any saw-cutting or drilling near PT elements, GPR data should be reviewed by an engineer familiar with the structural system before work proceeds.

Concrete Removal and Breaking: Methods, Equipment, and Applications on Commercial Projects

CALL FOR A QUOTE
1-800-736-4255

At a Glance

  • Commercial concrete removal requires selecting the right method based on site conditions, proximity to active operations, structural sensitivity, and debris management requirements.
  • The four primary methods used on commercial and industrial projects are hydraulic breaking, robotic demolition, sawing and removal, and selective hand demolition.
  • Utility scanning and coordination must precede any concrete breaking work to protect embedded systems and avoid costly damage or safety incidents.
  • Robotic demolition equipment is the preferred approach in low-headroom, confined, or high-vibration-sensitive environments where full-size equipment cannot safely operate.
  • Sawing and removal produces clean, controlled cuts that protect adjacent structures and allow for precise removal boundaries, making it well suited for phased work in occupied facilities.
  • Project sequencing matters: concrete removal that happens without proper planning for debris handling, utility protection, and replacement phasing leads to schedule overruns and rework.

Why Method Selection Matters on Commercial and Industrial Sites

Concrete removal on a commercial construction or industrial maintenance project is not a uniform task. A warehouse floor replacement, a bridge deck rehabilitation, a parking structure repair, and a manufacturing facility expansion each present different constraints: vibration sensitivity, access limitations, dust and noise restrictions, structural adjacency concerns, and the need to maintain operations in surrounding areas.

Choosing the wrong removal method creates problems that go beyond the breaking work itself. Excessive vibration can damage adjacent structures or sensitive equipment. Uncontrolled demolition near active utilities creates serious risk. Poor sequencing between removal, scanning, and replacement can stall downstream trades and push a project off schedule.

The methods covered here -- hydraulic breaking, robotic demolition, sawing and removal, and selective hand demolition -- each have conditions where they perform well and conditions where they should be avoided. Understanding those distinctions allows general contractors, project owners, and facility managers to plan work that is efficient, safe, and appropriate for the site.

Hydraulic Breaking

Hydraulic breaking is the standard approach for large-scale concrete removal on open commercial and infrastructure projects. Hydraulic breakers, typically mounted on excavators or skid steers, deliver high-impact force through a steel tool driven into the concrete surface. This breaks the slab or structure into manageable sections that can be loaded and removed.

When hydraulic breaking is appropriate:

  • Open sites with sufficient equipment access and overhead clearance
  • Large volume removal where production rate is a priority
  • Exterior work or interior spaces where vibration and noise are not primary constraints
  • Projects where demolition debris will be stockpiled and processed on site

Limitations to account for:

Hydraulic breaking is not precise. It generates significant vibration, noise, and airborne dust. On projects adjacent to occupied spaces, sensitive equipment, or existing structures with limited tolerance for vibration, the method requires careful evaluation or may need to be replaced with an alternative. Debris management also requires planning: broken concrete must be removed from the work zone efficiently to maintain production rates and site safety.

For large commercial demolition projects -- parking lots, industrial slabs, bridge approach slabs -- hydraulic breaking remains one of the most cost-effective and time-efficient options available when site conditions allow.

Robotic Demolition

Robotic demolition equipment has expanded the range of projects where controlled, mechanical concrete breaking is feasible. Remote-controlled demolition robots are compact, low-profile machines that can work in environments inaccessible to standard excavators -- low-headroom parking structures, occupied buildings, confined utility vaults, and spaces where operator safety in close proximity to unstable structure is a concern.

When robotic demolition is appropriate:

  • Interior demolition in occupied or partially occupied facilities
  • Low-headroom environments such as parking garages or basement levels
  • Spaces with ventilation restrictions where full-size diesel equipment is not permitted
  • Projects where precision and reduced vibration are required alongside mechanical breaking force
  • Hazardous environments where remote operation protects workers

Equipment capabilities:

Modern demolition robots can be fitted with hydraulic breakers, crushers, and shear attachments, allowing them to perform a range of tasks beyond simple breaking. Their electric or hydraulic drive systems reduce emissions concerns in enclosed spaces. Operators work at a safe distance from the demolition face, which is a significant advantage in structurally compromised or hazardous environments.

Robotic demolition does not replace high-volume breaking for large open sites, but it fills a critical role in the commercial and industrial project mix where access, safety, or environmental constraints make conventional equipment unsuitable. Learn more about Penhall's demolition services.

Sawing and Removal

Concrete sawing is a controlled cutting process that uses diamond-tipped saw blades or wire to produce precise, straight cuts through concrete slabs, walls, and structural members. On commercial projects, sawing is frequently used to define removal boundaries before breaking begins, or as the primary removal method when the work requires clean edges, minimal vibration, and controlled depth.

Common sawing applications on commercial projects:

  • Defining saw-cut joints at the perimeter of a repair area before slab removal
  • Full-depth slab cutting for section removal and replacement
  • Wall sawing to create openings in concrete walls or barriers
  • Wire sawing for large-section cuts on bridge piers, foundations, or thick structural elements
  • Removing concrete in occupied facilities where vibration and noise must be minimized

Why sawing and removal fits phased commercial work:

Many commercial and industrial facilities cannot shut down completely for concrete replacement. A distribution center, hospital, data center, or manufacturing plant may need concrete work completed in sections, around active operations, without disturbing adjacent areas. Sawing defines clean removal boundaries that protect in-service sections of floor or structure, allows for precise coordination with replacement phasing, and reduces vibration transmission to surrounding areas.

Sawing also produces a cleaner substrate at the repair boundary. In overlay and repair applications, a saw-cut edge performs better than a broken edge because it provides a uniform interface for bonding.

Explore Penhall's concrete breaking and removal capabilities to understand how sawing integrates with broader project scopes.

Selective Hand Demolition

Not every concrete removal task calls for mechanical equipment. In areas with extremely tight access, near sensitive embedded utilities or structural elements, or where the removal must be executed with fine control to protect adjacent work, selective hand demolition with jackhammers, chipping guns, and hand tools is the right approach.

When selective hand demolition is appropriate:

  • Removing concrete immediately around embedded utilities, conduit, or rebar that must be preserved
  • Partial-depth removal such as scarifying a deteriorated surface layer while leaving the substrate intact
  • Areas too confined for even compact robotic equipment
  • Final cleanup and detailing after mechanical breaking
  • Situations where removal boundaries are irregular or defined by structural conditions that require real-time judgment

Integration with other methods:

Selective hand demolition rarely stands alone as the primary method on a commercial project. It typically follows mechanical breaking to clean out corners, remove material adjacent to sensitive elements, or achieve final elevations and edges that equipment cannot reach. On projects where sawing defines the removal boundary, hand demolition may be used to break and remove the cut section in areas where lifting equipment cannot work effectively.

Scanning and Utility Coordination Before Breaking Begins

One of the most consequential steps in any concrete removal project is what happens before the first break. Concrete slabs, walls, and structures on commercial and industrial sites routinely contain embedded post-tension cables, conduit, rebar, water lines, and other utilities that are not visible from the surface and may not be fully documented in as-built drawings.

Ground-penetrating radar (GPR) scanning identifies subsurface conditions before breaking begins. This is not optional on commercial projects -- hitting a post-tension cable during demolition creates an immediate safety hazard and can cause structural distress to adjacent sections. Severing an active conduit delays the project and creates liability. Damaging a waterline in an occupied facility creates far larger problems than the cost of the scan.

Utility coordination with facility managers and applicable utility owners should accompany the scanning process. On projects where as-built documentation is incomplete or where the facility has been modified over time, field scanning is the baseline for safe removal planning.

Proper sequencing looks like this:

  1. Review available as-built drawings and identify known embedded systems
  2. Complete GPR scanning across the removal area
  3. Mark subsurface findings on the slab surface for field reference
  4. Coordinate with facility management and utility owners to confirm findings and establish protection requirements
  5. Define removal boundaries and method selection based on scanning results
  6. Execute breaking work with markings maintained and visible to equipment operators

Skipping or abbreviating this process is one of the most common reasons commercial concrete removal projects encounter unplanned delays and cost overruns.

Sequencing Concrete Removal with the Broader Project Scope

On commercial construction and infrastructure projects, concrete removal is rarely an isolated scope item. It connects to the trades and activities that follow: base preparation, utility rough-in or replacement, formwork, and concrete placement. How removal is sequenced affects everything downstream.

Common sequencing considerations:

Phased removal in occupied facilities. When the facility must remain in operation, removal must be sequenced in sections that maintain safe access and operations. This typically means establishing clear separation between work zones and in-service areas, often using concrete saw cuts as the defining boundary between active and inactive sections.

Debris handling and haul routes. Broken concrete must leave the site. On projects with limited site access or tight schedules, debris staging and haul-out timing must be planned alongside the breaking work itself. Equipment congestion that delays haul-out slows breaking production.

Substrate preparation. Replacement concrete or overlays require a prepared substrate. The removal method affects what preparation is needed. Hydraulic breaking typically leaves a rough, fractured surface that may require additional grinding or scarification. Saw cuts leave clean edges that are ready for repair material. Planning for substrate preparation as part of the removal scope prevents surprises during replacement.

Utility replacement integration. If existing utilities within the slab are being replaced as part of the project, utility rough-in typically follows removal and precedes replacement concrete. Coordinating the removal scope with utility contractors avoids conflicts and rework.

Choosing a Contractor for Commercial Concrete Removal

The scale and complexity of commercial and industrial concrete removal requires a contractor with the equipment, experience, and project management capability to execute the work safely and on schedule. Key factors to evaluate:

  • Experience on projects of similar scale and type (industrial, infrastructure, occupied facilities)
  • In-house scanning capabilities or established scanning coordination processes
  • Equipment fleet that covers the range of methods likely to be required: hydraulic breaking, robotic demolition, sawing, and hand demolition
  • Familiarity with utility coordination requirements and post-tension slab protocols
  • Demonstrated ability to work within facility operating schedules on phased projects

Concrete removal scopes that appear straightforward at the outset frequently encounter conditions -- hidden utilities, post-tension systems, structural constraints -- that require the contractor to adapt. A contractor with limited method capability or experience will have fewer options when conditions change.

Penhall has performed concrete breaking and removal on commercial, industrial, and infrastructure projects across the country. Our crews are equipped for hydraulic breaking, robotic demolition, sawing and removal, and hand demolition, and our scanning capabilities support proper pre-work planning on every project.

Scope definition before assessment is a risk signal. A contractor who quotes square footage without a floor condition assessment is pricing based on assumptions. Those assumptions may be wrong in either direction.

The Bottom Line: Matching the Repair to the Condition

Concrete floor repair in commercial and industrial facilities works best when the decision follows the condition rather than leading it. Patching, resurfacing, and replacement are each the right answer for a specific set of conditions. The cost difference between them is significant, and so is the operational disruption. Getting the assessment right at the front end avoids the more expensive outcome of a repair approach that does not match the actual damage.

Surface preparation is what makes any of these approaches work. The repair material is only as durable as the bond to the substrate beneath it.

For facilities with active deterioration or upcoming floor repair work, early involvement of an experienced contractor produces better scope definition and better outcomes than waiting until conditions become critical.

Learn more about Penhall's capabilities in structural repair and scarifying and shaving.

201_ Demo_ Estancia HS Pool _ Doyle Palmer.jpg2
0607

frequently asked questions

What is the difference between concrete breaking and concrete removal?

Concrete breaking refers to the process of fracturing or cutting concrete into sections using mechanical force or saw cutting. Concrete removal encompasses the complete scope: breaking the concrete, loading the debris, and hauling it from the site. On commercial projects, both terms are often used together because the breaking and removal steps are closely integrated in project sequencing and cost planning.

When should robotic demolition be used instead of a standard hydraulic breaker?

Robotic demolition equipment is the preferred approach when overhead clearance is insufficient for an excavator-mounted breaker, when the work is in an enclosed space with ventilation restrictions, when operator safety near unstable or hazardous structure is a concern, or when vibration and noise must be controlled in areas adjacent to sensitive equipment or occupied spaces. In open exterior applications with good access, a standard hydraulic breaker mounted on an excavator or skid steer is generally more productive.

Why is GPR scanning required before concrete breaking on commercial projects?

Commercial and industrial concrete slabs frequently contain post-tension cables, electrical conduit, water lines, and other embedded systems that are not visible from the surface. Striking a post-tension cable during breaking creates an immediate structural and safety hazard. Damaging embedded utilities causes delays and cost overruns. Ground-penetrating radar scanning identifies subsurface conditions before breaking begins, allowing the contractor to define removal boundaries and work methods that protect critical systems.

How is concrete removal sequenced in a facility that must stay in operation?

Occupied facility concrete removal is typically executed in phases. The work area is saw-cut at the boundary to isolate the removal section from the in-service floor. Breaking and removal are completed within that defined section while adjacent areas remain in use. Replacement concrete is placed and cured before the next section is opened. This approach requires close coordination with facility management on work hours, haul routes, dust and noise controls, and safe separation between construction zones and active operations.

What factors affect the cost of commercial concrete removal?

Key cost factors include the thickness and reinforcement of the concrete being removed, the method required based on site conditions, debris volume and haul distance, access constraints that affect equipment selection and production rates, the scope of pre-work scanning and utility coordination, and whether the project must be executed in phases around active facility operations. Phased work in occupied facilities typically carries a higher cost per square foot than open-site bulk removal due to the additional planning, sequencing, and access management required.

Does Penhall handle both the breaking and the haul-off of debris?

Yes. Penhall's concrete removal scope includes breaking, loading, and debris removal from the site. For large commercial and infrastructure projects, coordinating breaking production with debris haul-out is part of the project management process to ensure the work zone stays clear and production is not interrupted.

Commercial and Industrial Concrete Floor Repair: When to Patch, Resurface, or Replace

CALL FOR A QUOTE
1-800-736-4255

At a Glance

  • Concrete floor deterioration in warehouses, manufacturing plants, and distribution centers follows predictable patterns. Early identification of damage type determines the right repair strategy.
  • Patching is appropriate for localized, isolated damage covering less than 25% of the floor surface with no underlying structural issues.
  • Resurfacing works best when damage is widespread but shallow, and when the existing slab retains structural integrity.
  • Full removal and replacement is warranted when the slab has systemic structural failure, extensive subbase problems, or when repeated patching has failed.
  • Surface preparation is the single biggest factor in repair durability. A repair that bonds poorly to the existing slab will fail regardless of the material used.
  • Scarifying and shaving the concrete before any repair restores proper surface profile and removes contamination that prevents bonding.
  • Consulting a qualified contractor early in the evaluation process prevents costly over-engineering or under-engineering of the repair scope.

Why Industrial Concrete Floors Deteriorate

Concrete floors in commercial and industrial settings endure conditions that accelerate deterioration far beyond what residential or light commercial slabs experience. Forklift traffic, heavy point loads from racking systems, chemical spills, thermal cycling, and deicing salt infiltration all work against slab integrity over time.

The result is a spectrum of damage conditions, from minor surface scaling to full-depth cracking and subbase failure. Each condition has a distinct cause, a distinct failure mechanism, and a distinct repair approach. Misidentifying the damage type leads to repairs that fail early, which wastes budget and creates the same safety and operational hazards the repair was meant to eliminate.

Understanding what you are looking at before committing to a scope of work is the foundation of effective concrete floor repair in warehouses, manufacturing plants, and distribution centers.

Evaluating Floor Condition: A Systematic Approach

Before any decision about patching, resurfacing, or replacement, a proper condition assessment is necessary. The assessment should cover four areas.

Surface condition. Look for scaling, spalling, delamination, and surface erosion. These are the most visible signs of deterioration, but surface damage alone does not indicate the depth or severity of the problem.

Crack mapping. Document crack patterns, widths, and locations. Hairline shrinkage cracks are normal and generally non-structural. Cracks wider than 1/4 inch, pattern (map) cracking across large areas, and cracks with vertical displacement (faulting) are more serious indicators of structural movement or subbase failure.

Slab stability. Rocking or deflecting slabs indicate voids beneath the surface. Chain drag testing, where an experienced contractor drags a chain across the floor and listens for hollow sounds, is a simple field method. Ground-penetrating radar provides a more definitive picture of void locations and subbase conditions.

Joint condition. Control joints and expansion joints protect the slab from stress buildup. When joint edges have spalled or the joint filler has failed, wheels and forks impact the unsupported edge repeatedly, causing progressive damage in a pattern called joint edge spalling or joint deterioration.

This assessment produces a damage map of the facility, which forms the basis for the repair decision matrix.

The Decision Framework: Patch, Resurface, or Replace

No single rule covers every situation, but the following criteria provide a starting framework for facility managers and project engineers working through the decision.

When to Patch

Patching is appropriate when:

  • Damage is localized to specific areas representing less than 20 to 25 percent of the total floor surface
  • The surrounding slab is structurally sound with no evidence of voids, subbase failure, or systemic cracking
  • Damage is full-depth in isolated areas, such as around drain openings, column bases, or areas with documented point load history
  • Joint edge spalling is limited in scope and confined to identifiable high-traffic lanes
20210501_031530

Resurfacing is not a structural repair. If applied over a slab with movement, voids, or ongoing cracking, the overlay will reflect the same cracks and fail. A resurfacing decision must be preceded by a subbase assessment and any necessary void filling.

When to Replace

Full removal and replacement is the appropriate scope when:

  • Structural cracking is systemic, with crack widths exceeding 1/4 inch, vertical displacement, or pattern cracking across more than 30 to 40 percent of the slab area.
  • Subbase investigation reveals extensive voids, saturated soils, or compromised base course material.
  • Previous repair attempts have failed repeatedly in the same locations, indicating an underlying condition that surface repairs cannot address.
  • The floor has settled unevenly and cannot be corrected to acceptable flatness tolerances without full-depth work.
  • Chemical contamination has penetrated the full slab depth, preventing adequate bond for any overlay or patch system.

Replacement is the highest-cost option in the short term but is often the most cost-effective decision over the facility's operational life when the underlying conditions make lower-intervention approaches unreliable.

Surface Preparation: The Factor That Determines Repair Success

Surface preparation receives less attention than material selection in most discussions of concrete floor repair, but it has greater influence over long-term repair performance. A premium repair material applied to a poorly prepared substrate will fail. A standard repair material applied to a properly prepared substrate will outperform it significantly.

The goal of surface preparation is twofold: remove all contamination that would inhibit bond, and create a surface profile that gives the repair material mechanical interlock with the existing concrete.

Common Contamination Sources in Industrial Facilities

  • Hydraulic fluid and lubricant infiltration from equipment maintenance
  • Forklift battery acid
  • Curing compounds and surface sealers from previous treatments
  • Laitance (the weak surface layer that forms during concrete placement)
  • Carbonation of the concrete surface from atmospheric exposure

Any of these contaminants, left in place, creates a bond-breaking layer between the old concrete and the repair material. Mechanical preparation removes them.

Mechanical Preparation Methods

Shot blasting is the standard preparation method for large floor areas. It removes the surface layer, exposes aggregate, and creates a consistent surface profile (measured in CSP, or Concrete Surface Profile). Shot blasting is fast, contained, and produces minimal dust with proper equipment.

Scarifying and shaving is used when more aggressive material removal is needed, when existing coatings must be removed, or when high spots must be brought down to restore floor flatness. Scarifying cuts into the concrete surface with rotating carbide cutters, producing a more open, aggressive profile suitable for thick overlays or where the surface layer is significantly contaminated or deteriorated.

Grinding is appropriate for lighter profiling work, seam preparation, or when the objective is a smoother finish profile.

Saw cutting defines the perimeter of patch areas with clean, vertical edges. Feathered edges on patches fail; saw-cut boundaries with a minimum depth of 1/4 inch prevent edge delamination.

Profile Requirements by Repair Type

  • Thin overlays (less than 1/4 inch): CSP 3 to 4 (shot blast or light scarify)
  • Thick overlays (1/4 inch or greater): CSP 5 to 7 (medium to heavy scarify)
  • Full-depth patching: saw cut perimeter, removal to sound concrete, aggregate exposure

Getting surface preparation right requires equipment matched to the scale of the project and operators experienced with industrial floor conditions. Over-preparation (too aggressive a profile for the overlay thickness) and under-preparation (insufficient profile for bond strength) are both common errors.

Special Considerations for Warehouses and Distribution Centers

Warehouse floor repair introduces operational constraints that manufacturing environments may not share. The floor is a production asset. Downtime for repairs has a direct cost in throughput, and repairs that fail within months of installation create recurring disruptions.

Several factors specific to warehouse and distribution center floor repair warrant attention.

Floor flatness tolerance. Modern racking systems and high-reach forklifts operate within strict floor flatness tolerances (F-number systems define these limits). A repair that restores the floor structurally but leaves a high spot or low spot within a racking aisle creates an equipment clearance problem. Grinding and shaving after patching or resurfacing may be required to restore tolerance.

Joint protection. Armored joint systems, where a steel or polymer insert is installed at the joint edge, substantially extend joint life in high-traffic aisles. If joints are being opened for repair, incorporating armored joints is worth evaluating for the aisles with the highest forklift frequency.

Rapid-return materials. Standard repair mortars cure over 24 to 72 hours. Rapid-setting repair materials return to service in as little as one to four hours, which significantly reduces the operational impact of floor repair in active facilities. These materials carry a cost premium, but the tradeoff is often favorable when dock throughput is the constraint.

Staging repair in sections. Large-scale floor repair in operating warehouses is almost always staged in sections, working around active racking and operations. Proper sequencing and coordination with facility operations is as important to project success as the technical execution.

Working With a Qualified Contractor

Industrial concrete floor repair is not a commodity service. The range of damage conditions, substrate variables, repair materials, and preparation requirements means that contractor experience and equipment capability have a direct effect on repair longevity.

When evaluating contractors for warehouse floor repair or industrial concrete floor repair, look for:

  • Direct experience with your facility type (warehouse, manufacturing, food processing, etc.)
  • Access to appropriate surface preparation equipment for the project scale
  • Familiarity with rapid-return material systems if operational constraints are tight
  • A clear assessment process before the scope is defined, not after

Scope definition before assessment is a risk signal. A contractor who quotes square footage without a floor condition assessment is pricing based on assumptions. Those assumptions may be wrong in either direction.

The Bottom Line: Matching the Repair to the Condition

Concrete floor repair in commercial and industrial facilities works best when the decision follows the condition rather than leading it. Patching, resurfacing, and replacement are each the right answer for a specific set of conditions. The cost difference between them is significant, and so is the operational disruption. Getting the assessment right at the front end avoids the more expensive outcome of a repair approach that does not match the actual damage.

Surface preparation is what makes any of these approaches work. The repair material is only as durable as the bond to the substrate beneath it.

For facilities with active deterioration or upcoming floor repair work, early involvement of an experienced contractor produces better scope definition and better outcomes than waiting until conditions become critical.

Learn more about Penhall's capabilities in structural repair and scarifying and shaving.

61276246099__92CC9FDE-2301-4BCF-B83B-C45444193F85
TGC 6

frequently asked questions

How do I know if my warehouse floor needs to be replaced or can be repaired?

The primary indicators that replacement is necessary are systemic structural cracking across large portions of the slab, evidence of subbase failure or voids, vertical displacement at cracks, and a history of repairs failing repeatedly in the same areas. If damage is localized and the slab is otherwise stable, repair is usually the appropriate approach.

Why does surface preparation matter so much for concrete floor repair?

Repair materials bond to the existing concrete through chemical adhesion and mechanical interlock. Contamination on the surface, including oils, sealers, laitance, and carbonation, breaks that bond. Without adequate surface profile (roughness), the repair material has insufficient mechanical interlock to resist the stresses of industrial traffic. Repairs applied to inadequately prepared surfaces fail at the bond line, often within months.

What causes joint edge spalling in industrial floors?

Joint edge spalling occurs when control joint edges lose support or the joint filler fails, leaving the concrete edge unsupported. Forklift wheels and pallet jacks repeatedly impact the unsupported edge, breaking off pieces of concrete progressively. High traffic frequency and heavy axle loads accelerate the process. Repair involves removing the damaged material to a saw-cut boundary, restoring the joint edge with appropriate repair mortar, and refilling the joint with semi-rigid filler sized for the joint width.

How long does industrial concrete floor repair take?

Duration depends heavily on the scope and materials selected. Localized patching with rapid-setting materials can return individual areas to service in one to four hours. Large-scale resurfacing projects are typically staged over multiple shifts or days to allow sections to cure before reopening to traffic. Full replacement of a major floor area in a warehouse is typically a multi-week project depending on the square footage, slab thickness, and operational constraints around active facility areas.

What is scarifying and why is it used for floor repair?

Scarifying is a mechanical surface preparation method that uses rotating carbide-tipped cutters to remove a controlled layer of concrete. It is used when aggressive profile creation is needed for thick overlays, when surface coatings or contamination must be removed, or when high spots need to be reduced to restore floor flatness tolerance. Scarifying produces a more open, aggressive surface profile than shot blasting and is appropriate for heavier repair applications.

Precision Concrete Cutting for Infrastructure & Utility Upgrades

CALL FOR A QUOTE
1-800-736-4255

At a Glance

  • Commercial concrete cutting and coring are load-bearing decisions, not just demolition tasks. Wrong sequencing damages structural integrity and delays adjacent trades.
  • GPR scanning before any cut or core is the standard that separates responsible contractors from reactive ones. It maps rebar, post-tension cables, conduits, and voids without a single saw blade touching the slab.
  • Horizontal directional drilling installs utility conduit beneath roads, bridges, and waterways without surface disruption, protecting existing infrastructure and eliminating lane closures in many scenarios.
  • Phased execution and underground utility coordination are not optional on infrastructure projects. They are the methodology.
  • Penhall integrates scanning, cutting, coring, and directional drilling under one contractor scope, reducing interface risk across trades.

Why Structural Concrete Repair in Commercial Facilities Is Different from Standard Patching

Structural concrete repair in commercial and industrial settings is an engineering intervention, not a maintenance task. A cosmetic crack in a parking garage fascia and a corroded post-tension cable in the same structure both present as concrete problems, but they occupy entirely different categories of risk, methodology, and urgency.

The deterioration mechanisms that affect commercial and industrial concrete are specific to how those structures are built and how they are used. Post-tensioned floor systems, hollow core slab assemblies, and reinforced industrial foundations each fail through distinct pathways. Applying the wrong repair approach to any of them does not fix the structure. Epoxy injection on a delaminating hollow core unit, or patching over a corroded tendon anchorage zone, conceals the failure while it continues to progress underneath.

Penhall's structural repair work in commercial and industrial environments starts with accurate diagnosis. The repair specification follows from what the structure actually needs, not from what is easiest to apply. That distinction separates structural repair from maintenance patching, and it is the difference between a repair that holds and one that fails on a shorter cycle than the original deterioration.

Post-Tensioned Concrete: What Fails, Why, and What Repair Requires

How Post-Tension Systems Work and Where They Break Down

Post-tensioned concrete uses high-strength steel tendons or cables threaded through ducts cast into the concrete slab or beam. After the concrete reaches design strength, hydraulic jacks tension the cables to predetermined loads, then anchor them at each end. The compressed concrete gains significant flexural capacity as a result. This system is common in parking structures, mid-rise commercial floors, and transfer slabs because it allows longer spans with thinner sections.

The failure modes are specific to this configuration. Corrosion of post-tension cables is the most consequential. In bonded systems, moisture that infiltrates duct failures or inadequate grout fill reaches the high-strength steel, which is more susceptible to hydrogen embrittlement and stress corrosion cracking than conventional rebar. In unbonded systems, the sheathing that protects individual tendons can be damaged during construction, deteriorated by age, or compromised by later construction activity. Coring through an unmarked tendon location is one of the most common causes of sudden, localized strand failure.

Anchorage zone deterioration is a separate but related failure path. The concrete at each bearing point concentrates the tendon load. Corrosion at the anchor plate, deterioration of the pocket cap, or carbonation of the grout can reduce the effective bearing area and cause the tendon to lose tension or, in advanced cases, fail at the anchor.

Diagnosing Post-Tension Failures Before They Become Structural Emergencies

Ground-penetrating radar (GPR) and half-cell potential surveys identify the location of tendons and indicate areas of active corrosion before visible distress appears. Lift-off testing measures actual tendon stress and identifies cables that have lost a meaningful portion of their design prestress. In bonded systems, radiography or borescope inspection of duct grout voids can confirm whether moisture pathways exist.

The diagnostic phase is not optional. Tendon locations must be confirmed before any core drilling, saw cutting, or mechanical anchoring in a post-tensioned floor. Severing a stressed tendon releases energy and can cause immediate local collapse of the slab. Penhall's GPR scanning capabilities exist specifically to protect against this scenario in both planned repair work and emergency response situations.

Repairing Post-Tensioned Concrete: The Technical Requirements

Repair of corroded or failed post-tension cables in occupied commercial buildings requires careful planning because the structural system is continuous. Replacing a failed tendon section means cutting back concrete to expose the duct, removing the damaged strand, threading a replacement or coupling to an intact section, re-tensioning to design load, and restoring the concrete. Each step affects the stress state of adjacent bays.

Anchorage zone repairs involve removing deteriorated concrete to the depth of sound material, treating corroded anchor hardware, and placing high-strength repair mortar or concrete to restore bearing. Where the tendon has lost stress and replacement is not feasible, supplemental post-tensioning or supplemental mild steel reinforcement in a new concrete overlay may restore design capacity.

This work requires close coordination with a structural engineer of record. Penhall operates as the execution contractor, providing the concrete removal, scanning, and placement capabilities, working from repair drawings that specify the structural requirements for each intervention.

Hollow Core Slab Repair: Understanding a Frequently Misdiagnosed System

What Hollow Core Slabs Are and How They Carry Load

Hollow core slabs are precast prestressed concrete units manufactured with longitudinal voids running the length of each plank. The voids reduce dead load while retaining depth for flexural stiffness. Hollow core systems are standard in commercial office buildings, parking structures, multi-family construction, and industrial mezzanines because they can be fabricated to long spans, delivered to site, and erected quickly.

The structural behavior of a hollow core slab depends on the integrity of the prestressing strands at the bottom of each unit, the topping slab where one exists, and the grout keys at the longitudinal joints between planks. Each of these elements deteriorates through different mechanisms, and a repair approach that addresses one without accounting for the others will not restore full system performance.

How Hollow Core Units Fail in Commercial and Industrial Buildings

Strand corrosion is the primary structural failure mechanism. Because the prestressing strands in hollow core units carry the full flexural tension, even partial section loss from corrosion significantly reduces load capacity. Moisture access occurs through joint grout failures, deteriorated topping slabs, or penetrations that were not properly sealed. In parking structures, chloride-laden water migrating down through failed waterproofing reaches the planks and initiates active corrosion.

Longitudinal joint failures are a less dramatic but important performance issue. When grout keys between planks crack or erode, the load-sharing behavior of the system degrades and individual planks carry higher-than-designed loads. In industrial settings with heavy point loads from racking systems or forklifts, this redistribution can be significant.

End bearing failures occur when hollow core units do not have sufficient bearing length on their support, when the support material deteriorates, or when thermal movement causes the unit to creep off its bearing. This failure mode often presents as a diagonal crack near the support end.

Concrete in the webs between voids can spall or crack without obvious external symptoms. Internal delamination is not visible from the underside and requires destructive investigation or specialized scanning to detect.

Repair Methodology for Hollow Core Systems

Repair of hollow core slabs depends heavily on the extent and location of deterioration. Where damage is limited to the topping slab or grout keys, removing the failed material and replacing it with a properly bonded repair mortar or a new topping can restore system integrity. Where strand corrosion is active and the section has lost structural capacity, the plank requires either removal and replacement or supplemental structural reinforcement.

Partial plank replacement is more common in commercial buildings than full-floor replacement. It involves temporary shoring of adjacent structure, saw cutting to isolate the affected unit or section, carefully removing the damaged plank without disturbing adjacent bays, and installing a new precast unit or cast-in-place replacement section with appropriate connections to the existing system.

Penhall's selective demolition capabilities are directly relevant here. Removing a hollow core plank in an occupied building without damaging adjacent units, the supporting structure below, or the finishes above requires controlled saw cutting and specialized lifting. The precision required is the same precision that Penhall brings to any selective demolition project in occupied or sensitive environments.

Industrial Concrete Repair: Foundation and Floor Systems Under Sustained Attack

What Makes Industrial Concrete Deterioration Different

Industrial facilities subject their concrete floors, foundations, slabs-on-grade, and containment structures to conditions that commercial buildings do not experience. Chemical attack from process fluids, oils, and cleaning agents degrades the cement matrix from the surface inward. Thermal cycling in facilities with high-temperature processes creates expansion and contraction stresses beyond normal service ranges. Vibration and impact loading from heavy equipment accelerates fatigue cracking. Hydrostatic pressure in below-grade slabs can cause uplift, delamination, or steady moisture infiltration that softens the slab and initiates reinforcement corrosion.

Industrial concrete repair cannot be specified from a product datasheet as a result. The repair material and method must be selected based on the specific deterioration mechanism present, the chemistry of the attacking agents, the structural loads that will continue after repair, and the operational constraints of the facility.

Foundation Deterioration in Industrial Settings

Industrial foundations often support equipment with significant dynamic loads: presses, compressors, turbines, and conveyor systems. Concrete under sustained vibration develops fatigue cracking that propagates differently than static-load cracking. Grout pads under equipment base plates can deteriorate through chemical contamination or abrasion, transferring loads in an uneven pattern that damages the concrete below.

Repair of industrial foundations involves removing contaminated or deteriorated concrete to sound material, cleaning and preparing the reinforcing steel, placing a cementitious or epoxy repair mortar matched to the load and chemical exposure conditions, and restoring equipment alignment. Where the foundation has lost section, structural analysis may require supplemental reinforcement or a new concrete cap.

Slab-on-Grade Repair in High-Load Industrial Environments

Industrial slabs-on-grade fail through joint deterioration, subgrade settlement, and surface abrasion, but also through more serious mechanisms including reinforcement corrosion from below and full-depth cracking from overloading or inadequate design for changes in use. Repair strategy depends on root cause. A surface repair applied over an actively settling subgrade will fail. A full-depth slab repair placed without addressing drainage or waterproofing will re-saturate.

Penhall's concrete removal capabilities allow precise full-depth removal of failed slab sections for replacement, controlled joint reconstruction, and preparation of repair areas to the standard profiles required for bonded repair systems. The removal work is as technical as the repair work; removing only what needs to come out, without damaging sound adjacent material or embedded infrastructure, is a precision requirement, not an approximation.

Grounding Grid Integrity and Structural Concrete Repair

Why Grounding Systems Are a Structural Repair Consideration

In industrial facilities including power generation plants, substations, manufacturing facilities, and data centers, a buried grounding grid connects electrical equipment to earth ground through a network of conductors embedded in or below the concrete. This grounding grid is safety-critical infrastructure. A compromised grounding system creates shock hazards, equipment damage risk, and potential regulatory non-compliance.

Structural concrete repair work in these environments intersects with grounding grid integrity in specific ways. Core drilling, saw cutting, and mechanical anchoring all have the potential to sever grounding conductors embedded in or passing through concrete slabs and foundations. In facilities where the grounding grid was installed during original construction and documentation is incomplete, the exact routing of conductors may not be known.

Where corrosion is the deterioration mechanism affecting the concrete, the same electrochemical conditions attacking the reinforcing steel may also be affecting buried grounding conductors. Identifying areas of active corrosion during the repair investigation phase should prompt a review of grounding grid continuity in the same zones.

Managing Grounding Grid Risk During Concrete Repair Projects

Pre-work scanning of concrete in industrial facilities where grounding grids are present is a direct safety requirement. GPR scanning identifies metallic conductors, including grounding grid elements, before cutting or drilling begins. In facilities where grid documentation exists, field verification against as-built drawings is standard practice.

Repair work that requires removal of concrete containing grounding conductors must include a plan for temporary grounding continuity during the work and permanent reconnection that meets the facility's electrical engineering requirements. Penhall coordinates with the facility's electrical engineering team on these requirements as a standard part of pre-work planning for industrial concrete repair in affected facility types.

The grounding grid is one of several embedded infrastructure systems, alongside post-tension cables, conduit runs, and piping sleeves, that make industrial concrete repair fundamentally different from work in simpler structures. Managing all of them accurately is a project management and technical competency requirement, not a safety checkbox alone.

Selective Demolition as a Structural Repair Strategy

Why What You Remove Matters

Selective demolition in structural repair is not simply making room for new material. The removal process itself determines whether the repair will perform. Over-removal damages adjacent sound concrete and creates stress concentrations at repair boundaries. Under-removal leaves deteriorated material that will continue to degrade and undermine the repair from within.

The standard for concrete removal in structural repair is removal to sound concrete, confirmed by hammer sounding, pull-off testing, or petrographic analysis where the failure mechanism warrants it. In post-tension and hollow core systems, the geometry of the removal must also account for the structural consequences of removing restraint from a pre-stressed system. That calculation belongs in the repair specification, not in field decision-making.

Penhall's selective demolition work in structural repair contexts uses hydrodemolition, saw cutting, and mechanical breaking depending on the geometry of the repair area, the required boundary profile, and the sensitivity of adjacent structure. Hydrodemolition uses high-pressure water to remove deteriorated material while leaving sound concrete and intact reinforcing steel largely undisturbed. This produces a better repair bond surface than mechanical methods in many applications and reduces micro-cracking at the repair perimeter.

Occupied Facility Constraints

Commercial and industrial concrete repair almost always occurs in partially or fully occupied facilities. Operational shutdowns for concrete repair work carry significant cost and business disruption. Repair sequences must be phased to maintain structural continuity throughout the work, temporary shoring must be adequate for the loads that will be on the structure during each phase, and construction activity must be managed to protect occupants, operations, and adjacent structure.

Penhall's experience in occupied commercial and industrial facilities, where the operational context is as much a project constraint as the structural one, is a direct differentiator in complex structural repair engagements.

When to Escalate from Maintenance Repair to Structural Assessment

The indicators that a concrete repair situation has crossed from maintenance to structural concern include:

  • •Cracks that are wide, actively growing, or accompanied by differential deflection between adjacent structural elements
  • •Any sign of post-tension tendon failure: sudden cracking in a fan pattern, visible tendon exposure, or audible wire breaks
  • •Hollow core planks with visible longitudinal cracking along the prestress strand lines, significant deflection, or evidence of end bearing movement
  • •Spalling or delamination over a large area of an industrial foundation or floor under equipment loads
  • •Recurring repairs in the same location after multiple repair cycles
  • •Any structural concern in a post-tensioned or prestressed system that cannot be fully explained by available documentation

In all of these situations, the appropriate first step is a structural assessment by a licensed structural engineer before repair work begins. Penhall works alongside engineering teams on structural repair projects, providing the technical concrete removal, scanning, and construction capabilities that translate a repair specification into executed work.

frequently asked questions

What is commercial concrete cutting on infrastructure projects?

Commercial concrete cutting on infrastructure projects refers to precision sawing and coring operations performed on bridge decks, roadway slabs, retaining walls, and structural concrete elements as part of modifications, expansions, or utility access work. Unlike demolition cutting, infrastructure cutting preserves structural integrity in adjacent sections and requires coordination with engineering drawings and phasing plans.

Why is GPR scanning required before cutting or coring concrete?

GPR scanning before cutting or coring concrete identifies embedded rebar, post-tension tendons, conduit, and other subsurface features that would be damaged by an unplanned cut. On infrastructure projects, severing a post-tension cable or an active utility conduit during cutting creates structural and safety consequences. GPR data lets the crew verify the cut path is clear before any blade or bit touches the surface.

What is horizontal directional drilling and when is it used?

Horizontal directional drilling is a trenchless installation method that bores a steerable path beneath roads, waterways, railways, and structures to install utility conduit without surface excavation. It is used when open-cut trenching would require lane closures, environmental disturbance, or disruption to existing infrastructure that the project schedule or permit conditions do not allow.

How deep can directional drilling for utilities go?

Depth capacity for directional drilling on utility projects depends on equipment size and soil conditions. Typical utility crossings beneath roadways range from 5 to 20 feet of cover. Larger equipment and wireline guidance systems can execute bores at greater depths for major crossings beneath highways, levees, or water bodies. [INSERT: Penhall specific depth capacity from equipment specs]

How does phased concrete cutting work on a bridge modification?

Phased concrete cutting on bridge modifications sequences the cut areas to maintain structural load capacity at each phase. Before any deck section is cut, the phasing plan identifies which areas can be removed without transferring load to sections that are not yet shored or reinforced. GPR scanning is performed for each phase area before cutting begins. Penhall coordinates each mobilization with the project's structural shoring and traffic control schedule.

What is the difference between coring and flat sawing concrete?

Coring produces a cylindrical penetration through concrete for round openings used in utility installations, drainage, sampling, and anchor installations. Flat sawing, also called slab sawing, cuts a linear path through horizontal concrete surfaces for joint work, section removal, or trench access. Both require GPR scanning prior to execution on infrastructure projects. Penhall performs both scopes and integrates them within a single project plan where both are required.

Structural Concrete Repair in Commercial & Industrial Facilities

CALL FOR A QUOTE
1-800-736-4255

At a Glance

  • Post-tension cable failures are often invisible until significant structural capacity has already been lost; early detection through specialized scanning prevents catastrophic outcomes.
  • Hollow core slab systems require a different repair methodology than cast-in-place concrete; misdiagnosis leads to ineffective repairs and recurring failures.
  • Industrial concrete foundations face unique deterioration mechanisms including chemical attack, dynamic loading, and hydrostatic pressure that standard repair protocols do not address.
  • Selective demolition and concrete removal are active parts of a structural repair strategy, not just preparatory steps; what you remove matters as much as what you replace.
  • Grounding grid integrity is a structural concern in industrial facilities, not only an electrical one; concrete repair work that disrupts buried grounding systems creates compounding liability.
  • Repair cost trajectories accelerate sharply once deterioration crosses structural thresholds; the window for targeted intervention is narrower than most facility managers expect.

Why Structural Concrete Repair in Commercial Facilities Is Different from Standard Patching

Structural concrete repair in commercial and industrial settings is an engineering intervention, not a maintenance task. A cosmetic crack in a parking garage fascia and a corroded post-tension cable in the same structure both present as concrete problems, but they occupy entirely different categories of risk, methodology, and urgency.

The deterioration mechanisms that affect commercial and industrial concrete are specific to how those structures are built and how they are used. Post-tensioned floor systems, hollow core slab assemblies, and reinforced industrial foundations each fail through distinct pathways. Applying the wrong repair approach to any of them does not fix the structure. Epoxy injection on a delaminating hollow core unit, or patching over a corroded tendon anchorage zone, conceals the failure while it continues to progress underneath.

Penhall's structural repair work in commercial and industrial environments starts with accurate diagnosis. The repair specification follows from what the structure actually needs, not from what is easiest to apply. That distinction separates structural repair from maintenance patching, and it is the difference between a repair that holds and one that fails on a shorter cycle than the original deterioration.

Post-Tensioned Concrete: What Fails, Why, and What Repair Requires

How Post-Tension Systems Work and Where They Break Down

Post-tensioned concrete uses high-strength steel tendons or cables threaded through ducts cast into the concrete slab or beam. After the concrete reaches design strength, hydraulic jacks tension the cables to predetermined loads, then anchor them at each end. The compressed concrete gains significant flexural capacity as a result. This system is common in parking structures, mid-rise commercial floors, and transfer slabs because it allows longer spans with thinner sections.

The failure modes are specific to this configuration. Corrosion of post-tension cables is the most consequential. In bonded systems, moisture that infiltrates duct failures or inadequate grout fill reaches the high-strength steel, which is more susceptible to hydrogen embrittlement and stress corrosion cracking than conventional rebar. In unbonded systems, the sheathing that protects individual tendons can be damaged during construction, deteriorated by age, or compromised by later construction activity. Coring through an unmarked tendon location is one of the most common causes of sudden, localized strand failure.

Anchorage zone deterioration is a separate but related failure path. The concrete at each bearing point concentrates the tendon load. Corrosion at the anchor plate, deterioration of the pocket cap, or carbonation of the grout can reduce the effective bearing area and cause the tendon to lose tension or, in advanced cases, fail at the anchor.

Diagnosing Post-Tension Failures Before They Become Structural Emergencies

Ground-penetrating radar (GPR) and half-cell potential surveys identify the location of tendons and indicate areas of active corrosion before visible distress appears. Lift-off testing measures actual tendon stress and identifies cables that have lost a meaningful portion of their design prestress. In bonded systems, radiography or borescope inspection of duct grout voids can confirm whether moisture pathways exist.

The diagnostic phase is not optional. Tendon locations must be confirmed before any core drilling, saw cutting, or mechanical anchoring in a post-tensioned floor. Severing a stressed tendon releases energy and can cause immediate local collapse of the slab. Penhall's GPR scanning capabilities exist specifically to protect against this scenario in both planned repair work and emergency response situations.

Repairing Post-Tensioned Concrete: The Technical Requirements

Repair of corroded or failed post-tension cables in occupied commercial buildings requires careful planning because the structural system is continuous. Replacing a failed tendon section means cutting back concrete to expose the duct, removing the damaged strand, threading a replacement or coupling to an intact section, re-tensioning to design load, and restoring the concrete. Each step affects the stress state of adjacent bays.

Anchorage zone repairs involve removing deteriorated concrete to the depth of sound material, treating corroded anchor hardware, and placing high-strength repair mortar or concrete to restore bearing. Where the tendon has lost stress and replacement is not feasible, supplemental post-tensioning or supplemental mild steel reinforcement in a new concrete overlay may restore design capacity.

This work requires close coordination with a structural engineer of record. Penhall operates as the execution contractor, providing the concrete removal, scanning, and placement capabilities, working from repair drawings that specify the structural requirements for each intervention.

Hollow Core Slab Repair: Understanding a Frequently Misdiagnosed System

What Hollow Core Slabs Are and How They Carry Load

Hollow core slabs are precast prestressed concrete units manufactured with longitudinal voids running the length of each plank. The voids reduce dead load while retaining depth for flexural stiffness. Hollow core systems are standard in commercial office buildings, parking structures, multi-family construction, and industrial mezzanines because they can be fabricated to long spans, delivered to site, and erected quickly.

The structural behavior of a hollow core slab depends on the integrity of the prestressing strands at the bottom of each unit, the topping slab where one exists, and the grout keys at the longitudinal joints between planks. Each of these elements deteriorates through different mechanisms, and a repair approach that addresses one without accounting for the others will not restore full system performance.

How Hollow Core Units Fail in Commercial and Industrial Buildings

Strand corrosion is the primary structural failure mechanism. Because the prestressing strands in hollow core units carry the full flexural tension, even partial section loss from corrosion significantly reduces load capacity. Moisture access occurs through joint grout failures, deteriorated topping slabs, or penetrations that were not properly sealed. In parking structures, chloride-laden water migrating down through failed waterproofing reaches the planks and initiates active corrosion.

Longitudinal joint failures are a less dramatic but important performance issue. When grout keys between planks crack or erode, the load-sharing behavior of the system degrades and individual planks carry higher-than-designed loads. In industrial settings with heavy point loads from racking systems or forklifts, this redistribution can be significant.

End bearing failures occur when hollow core units do not have sufficient bearing length on their support, when the support material deteriorates, or when thermal movement causes the unit to creep off its bearing. This failure mode often presents as a diagonal crack near the support end.

Concrete in the webs between voids can spall or crack without obvious external symptoms. Internal delamination is not visible from the underside and requires destructive investigation or specialized scanning to detect.

Repair Methodology for Hollow Core Systems

Repair of hollow core slabs depends heavily on the extent and location of deterioration. Where damage is limited to the topping slab or grout keys, removing the failed material and replacing it with a properly bonded repair mortar or a new topping can restore system integrity. Where strand corrosion is active and the section has lost structural capacity, the plank requires either removal and replacement or supplemental structural reinforcement.

Partial plank replacement is more common in commercial buildings than full-floor replacement. It involves temporary shoring of adjacent structure, saw cutting to isolate the affected unit or section, carefully removing the damaged plank without disturbing adjacent bays, and installing a new precast unit or cast-in-place replacement section with appropriate connections to the existing system.

Penhall's selective demolition capabilities are directly relevant here. Removing a hollow core plank in an occupied building without damaging adjacent units, the supporting structure below, or the finishes above requires controlled saw cutting and specialized lifting. The precision required is the same precision that Penhall brings to any selective demolition project in occupied or sensitive environments.

Industrial Concrete Repair: Foundation and Floor Systems Under Sustained Attack

What Makes Industrial Concrete Deterioration Different

Industrial facilities subject their concrete floors, foundations, slabs-on-grade, and containment structures to conditions that commercial buildings do not experience. Chemical attack from process fluids, oils, and cleaning agents degrades the cement matrix from the surface inward. Thermal cycling in facilities with high-temperature processes creates expansion and contraction stresses beyond normal service ranges. Vibration and impact loading from heavy equipment accelerates fatigue cracking. Hydrostatic pressure in below-grade slabs can cause uplift, delamination, or steady moisture infiltration that softens the slab and initiates reinforcement corrosion.

Industrial concrete repair cannot be specified from a product datasheet as a result. The repair material and method must be selected based on the specific deterioration mechanism present, the chemistry of the attacking agents, the structural loads that will continue after repair, and the operational constraints of the facility.

Foundation Deterioration in Industrial Settings

Industrial foundations often support equipment with significant dynamic loads: presses, compressors, turbines, and conveyor systems. Concrete under sustained vibration develops fatigue cracking that propagates differently than static-load cracking. Grout pads under equipment base plates can deteriorate through chemical contamination or abrasion, transferring loads in an uneven pattern that damages the concrete below.

Repair of industrial foundations involves removing contaminated or deteriorated concrete to sound material, cleaning and preparing the reinforcing steel, placing a cementitious or epoxy repair mortar matched to the load and chemical exposure conditions, and restoring equipment alignment. Where the foundation has lost section, structural analysis may require supplemental reinforcement or a new concrete cap.

Slab-on-Grade Repair in High-Load Industrial Environments

Industrial slabs-on-grade fail through joint deterioration, subgrade settlement, and surface abrasion, but also through more serious mechanisms including reinforcement corrosion from below and full-depth cracking from overloading or inadequate design for changes in use. Repair strategy depends on root cause. A surface repair applied over an actively settling subgrade will fail. A full-depth slab repair placed without addressing drainage or waterproofing will re-saturate.

Penhall's concrete removal capabilities allow precise full-depth removal of failed slab sections for replacement, controlled joint reconstruction, and preparation of repair areas to the standard profiles required for bonded repair systems. The removal work is as technical as the repair work; removing only what needs to come out, without damaging sound adjacent material or embedded infrastructure, is a precision requirement, not an approximation.

Grounding Grid Integrity and Structural Concrete Repair

Why Grounding Systems Are a Structural Repair Consideration

In industrial facilities including power generation plants, substations, manufacturing facilities, and data centers, a buried grounding grid connects electrical equipment to earth ground through a network of conductors embedded in or below the concrete. This grounding grid is safety-critical infrastructure. A compromised grounding system creates shock hazards, equipment damage risk, and potential regulatory non-compliance.

Structural concrete repair work in these environments intersects with grounding grid integrity in specific ways. Core drilling, saw cutting, and mechanical anchoring all have the potential to sever grounding conductors embedded in or passing through concrete slabs and foundations. In facilities where the grounding grid was installed during original construction and documentation is incomplete, the exact routing of conductors may not be known.

Where corrosion is the deterioration mechanism affecting the concrete, the same electrochemical conditions attacking the reinforcing steel may also be affecting buried grounding conductors. Identifying areas of active corrosion during the repair investigation phase should prompt a review of grounding grid continuity in the same zones.

Managing Grounding Grid Risk During Concrete Repair Projects

Pre-work scanning of concrete in industrial facilities where grounding grids are present is a direct safety requirement. GPR scanning identifies metallic conductors, including grounding grid elements, before cutting or drilling begins. In facilities where grid documentation exists, field verification against as-built drawings is standard practice.

Repair work that requires removal of concrete containing grounding conductors must include a plan for temporary grounding continuity during the work and permanent reconnection that meets the facility's electrical engineering requirements. Penhall coordinates with the facility's electrical engineering team on these requirements as a standard part of pre-work planning for industrial concrete repair in affected facility types.

The grounding grid is one of several embedded infrastructure systems, alongside post-tension cables, conduit runs, and piping sleeves, that make industrial concrete repair fundamentally different from work in simpler structures. Managing all of them accurately is a project management and technical competency requirement, not a safety checkbox alone.

Selective Demolition as a Structural Repair Strategy

Why What You Remove Matters

Selective demolition in structural repair is not simply making room for new material. The removal process itself determines whether the repair will perform. Over-removal damages adjacent sound concrete and creates stress concentrations at repair boundaries. Under-removal leaves deteriorated material that will continue to degrade and undermine the repair from within.

The standard for concrete removal in structural repair is removal to sound concrete, confirmed by hammer sounding, pull-off testing, or petrographic analysis where the failure mechanism warrants it. In post-tension and hollow core systems, the geometry of the removal must also account for the structural consequences of removing restraint from a pre-stressed system. That calculation belongs in the repair specification, not in field decision-making.

Penhall's selective demolition work in structural repair contexts uses hydrodemolition, saw cutting, and mechanical breaking depending on the geometry of the repair area, the required boundary profile, and the sensitivity of adjacent structure. Hydrodemolition uses high-pressure water to remove deteriorated material while leaving sound concrete and intact reinforcing steel largely undisturbed. This produces a better repair bond surface than mechanical methods in many applications and reduces micro-cracking at the repair perimeter.

Occupied Facility Constraints

Commercial and industrial concrete repair almost always occurs in partially or fully occupied facilities. Operational shutdowns for concrete repair work carry significant cost and business disruption. Repair sequences must be phased to maintain structural continuity throughout the work, temporary shoring must be adequate for the loads that will be on the structure during each phase, and construction activity must be managed to protect occupants, operations, and adjacent structure.

Penhall's experience in occupied commercial and industrial facilities, where the operational context is as much a project constraint as the structural one, is a direct differentiator in complex structural repair engagements.

When to Escalate from Maintenance Repair to Structural Assessment

The indicators that a concrete repair situation has crossed from maintenance to structural concern include:

  • •Cracks that are wide, actively growing, or accompanied by differential deflection between adjacent structural elements
  • •Any sign of post-tension tendon failure: sudden cracking in a fan pattern, visible tendon exposure, or audible wire breaks
  • •Hollow core planks with visible longitudinal cracking along the prestress strand lines, significant deflection, or evidence of end bearing movement
  • •Spalling or delamination over a large area of an industrial foundation or floor under equipment loads
  • •Recurring repairs in the same location after multiple repair cycles
  • •Any structural concern in a post-tensioned or prestressed system that cannot be fully explained by available documentation

In all of these situations, the appropriate first step is a structural assessment by a licensed structural engineer before repair work begins. Penhall works alongside engineering teams on structural repair projects, providing the technical concrete removal, scanning, and construction capabilities that translate a repair specification into executed work.

frequently asked questions

What is the difference between structural concrete repair and standard concrete patching?

Standard concrete patching addresses surface deterioration such as spalling, scaling, and minor cracks where the underlying structural capacity of the member is intact. Structural concrete repair addresses deterioration that has affected or threatens the load-carrying capacity of the member, including corroded reinforcement, failed prestressing systems, reduced section, and compromised connections. Structural repair requires engineering analysis and a repair specification developed by a licensed engineer.

How do I know if post-tension cables in my building's floor system are failing?

The most reliable early indicators are detected through inspection rather than visible symptoms. Half-cell potential surveys identify areas of active corrosion in the tendon steel before the concrete shows surface distress. GPR scanning maps tendon locations and can indicate grout voids in bonded systems. Visible indicators of advanced failure include sudden radiating crack patterns in the slab, exposed or fractured tendon ends at slab edges, and localized deflection. Any suspected post-tension failure should be evaluated by a structural engineer immediately.

Can hollow core slab planks be repaired in place, or do they require replacement?

The answer depends on the extent and type of deterioration. Hollow core planks with damaged topping slabs, failed grout keys, or localized concrete deterioration can often be repaired in place with appropriate removal and replacement of the damaged elements. Planks with significant strand corrosion, large section loss, or end bearing failures require removal and replacement of the affected unit. An engineering assessment determines which approach is appropriate for a given condition.

Why does grounding grid integrity matter for concrete repair projects in industrial facilities?

Industrial facilities use buried grounding conductors to connect electrical equipment to earth ground. These conductors are often embedded in or below concrete slabs and foundations. Saw cutting, core drilling, and mechanical demolition can sever these conductors if their location is not identified before work begins. A compromised grounding system creates electrical safety hazards and potential regulatory violations. Pre-work GPR scanning to locate metallic conductors is standard practice before any cutting or drilling in industrial facilities where grounding grids are present.

How long does structural concrete repair take in an occupied commercial building?

Project duration varies based on the extent of deterioration, the structural system involved, and the operational constraints of the facility. A targeted post-tension anchorage zone repair in a parking structure might be completed in days. A phased hollow core plank replacement program across multiple floors of an occupied office building might span several months of sequenced work. Penhall develops phased work plans that allow facilities to remain operational during repair work where structural continuity requirements permit.

What is hydrodemolition, and when is it used in structural concrete repair?

Hydrodemolition uses high-pressure water to remove deteriorated concrete while leaving sound concrete and reinforcing steel largely undisturbed. It produces a clean, irregular bond surface that bonded repair mortars adhere to well and avoids the micro-cracking that mechanical impact methods can introduce into adjacent concrete. Penhall uses hydrodemolition on structural repair projects where the removal boundary profile, reinforcement exposure requirements, or sensitivity of adjacent structure make it preferable to saw cutting or mechanical breaking.

Does Penhall offer GPR utility locating services?

Yes. Penhall provides GPR utility locating as part of full-service underground utility locating and subsurface investigation programs. Services include EM and GPR field investigation, subsurface utility mapping, and vacuum excavation confirmation.

GPR Utility Locating: How It Fits Into Subsurface Utility Locating and Mapping

CALL FOR A QUOTE
1-800-736-4255

At a Glance

  • Ground penetrating radar utility locating is one method within a broader subsurface utility investigation workflow. It excels at locating non-conductive utilities that electromagnetic induction cannot detect, including plastic gas lines and PVC conduit.
  • GPR does not positively identify every utility in the ground on its own. Soil conditions, depth, utility material, and signal interference all affect data quality and require trained interpretation.
  • The most accurate subsurface utility locating programs layer GPR with electromagnetic (EM) methods, vacuum excavation confirmation, and existing record review.
  • Proper site preparation, antenna frequency selection, and grid pattern scanning meaningfully improve GPR data reliability.
  • Quality Level B subsurface utility location work, which includes both EM and GPR, produces the type of documented output required for ASCE 38 design-level projects.
scan w truck outside
scan wall

What Ground Penetrating Radar Utility Locating Actually Does

GPR maps subsurface anomalies based on material contrast. It detects what EM cannot, but it requires skilled interpretation and site-specific calibration to produce reliable data.

Ground penetrating radar utility locating works by transmitting radio wave energy pulses into the ground and recording the reflections that return when those waves encounter a change in material density. A buried pipe, conduit, or void creates a reflective boundary that appears on the GPR screen as a hyperbolic arc. A trained technician reads those arcs, accounts for signal velocity in the specific soil type present, and marks the approximate depth and horizontal position of the anomaly.

The fundamental output of a GPR scan is a two-dimensional cross-section of the subsurface called a radargram. On a radargram, depth is represented on the vertical axis and horizontal distance traveled is on the horizontal axis. Each hyperbolic shape represents a point-source reflection, typically a pipe, cable, or conduit crossing the scan line perpendicularly. The apex of that hyperbola marks the utility's location. Reading radargrams accurately takes field experience and cannot be automated reliably on complex or congested sites.

GPR is not a metal detector. It responds to dielectric contrast, meaning the difference in electrical properties between a buried object and the surrounding soil. This is why GPR can locate plastic water mains, PVC conduit, fiber optic ducts, and concrete-encased duct banks that electromagnetic induction misses entirely. Conversely, GPR can struggle to distinguish a steel pipe from a concrete foundation edge if both produce similar reflective signatures in the same scan line.

Where GPR Fits in a Subsurface Utility Investigation Workflow

Subsurface utility locating is not a single-method process. The American Society of Civil Engineers standard ASCE 38-22 defines four Quality Levels of subsurface utility information, ranging from D (records only) through A (vacuum excavation confirmation). GPR utility locating operates primarily at Quality Level B, alongside electromagnetic induction, as part of the field investigation that produces designatable utility data.

A standard workflow for a commercial or infrastructure site typically moves through these stages:

Stage 1: Records collection and conflict assessment. The crew gathers as-built drawings, 811 one-call markings, utility owner records, and any prior survey data. These records establish expected utility corridors and flag potential conflicts before field work begins.

Stage 2: Electromagnetic induction scanning. EM locating traces conductive utilities, including metallic water mains, gas lines, electrical conduit, and steel-jacketed telecommunications lines. EM is faster across large areas and produces a reliable signal on conductive targets with a good ground contact.

Stage 3: GPR scanning to fill detection gaps. Non-conductive utilities, abandoned lines not visible on records, and congested duct banks in close proximity often fall outside what EM detects reliably. GPR scanning runs in a grid pattern over the investigation area to capture these targets. It also provides independent depth confirmation on lines already located by EM.

Stage 4: Correlation and mapping. Field data from EM and GPR is correlated with the records from Stage 1. Anomalies that do not match any known utility are flagged for vacuum excavation confirmation before excavation proceeds.

Stage 5: Quality Level A confirmation where required. On high-consequence projects, vacuum excavation exposes selected utilities for physical measurement of depth, diameter, and material, converting Quality Level B data to Quality Level A.

Running GPR in isolation without EM correlation and records review is how misses happen. Each method covers detection gaps the others leave behind.

What GPR Utility Locating Can and Cannot Detect

Understanding GPR's detection envelope prevents both overconfidence in its results and unnecessary skepticism about its role.

GPR reliably detects:

  • Plastic, PVC, and HDPE water and gas lines
  • Concrete-encased duct banks and conduit systems
  • Fiber optic and telecommunications ducts
  • Steel, ductile iron, and copper metallic utilities (though EM is typically more efficient for these)
  • Concrete structures, footings, and slabs below grade
  • Voids, sinkholes, and subsidence zones
  • Reinforcement steel (rebar) in concrete structures

GPR detection is reduced or unreliable when:

  • Soils are high in clay content or moisture-saturated. Clay attenuates the GPR signal rapidly, often limiting penetration depth to 18 inches or less in severe conditions.
  • Utilities run parallel to the scan line rather than perpendicular to it. Parallel targets do not produce the hyperbolic reflection needed for confident identification.
  • Multiple utilities are closely spaced. Signal overlap between adjacent lines can obscure individual pipes in congested corridors.
  • Conductive soil fills, road base material, or buried debris create high-amplitude background clutter that masks weaker reflections from smaller-diameter utilities.
  • Depth exceeds the antenna's effective penetration range for the soil conditions present.

These limitations are not reasons to avoid GPR. They are inputs for planning scan frequency, antenna selection, and field confirmation strategy.

Antenna Frequency Selection and Its Effect on Results

GPR antenna frequency is the primary variable that controls the trade-off between penetration depth and resolution. Higher frequency antennas resolve smaller targets more clearly but attenuate faster in the ground. Lower frequency antennas penetrate deeper but cannot distinguish closely spaced targets or small-diameter utilities.

The most common antenna ranges used in underground utility locating services work are:

200 to 400 MHz antennas are standard for utility locating on most site types. They balance depth penetration (typically 8 to 15 feet in moderate soils) with enough resolution to identify pipes in the 4-inch diameter range and larger. Most municipal infrastructure and commercial utility corridors fall within this range.

500 to 900 MHz antennas resolve shallower targets with greater clarity. They are appropriate for congested shallow duct banks, shallow conduit, and sites where maximum depth is less important than distinguishing closely spaced utilities at 3 to 6 feet of depth.

100 MHz and below are used when deep penetration is required, such as geological investigation, deep foundation work, or void detection below 20 feet. Resolution at these frequencies is insufficient for standard utility line differentiation.

On sites with variable soil conditions or uncertain utility depth, crews may run dual-frequency passes to capture both shallow and deep targets in a single investigation. Antenna selection should be part of the pre-job planning conversation, not a default choice made in the field.

How to Set Up a Job Site for Reliable GPR Results

Site preparation is where GPR data quality is won or lost before the antenna touches the ground. Several field conditions are within the project team's control and directly affect signal quality.

Surface condition. GPR antennas must maintain contact with the surface. Broken pavement, standing water, thick gravel beds, and heavy debris scatter the signal before it enters the ground. Surface preparation, including clearing loose material from scan lanes, measurably improves data coherence.

Scan line grid planning. Utilities run in multiple orientations across a site. Scanning in a single direction only captures utilities oriented perpendicular to that pass. A complete investigation covers orthogonal scan lines, typically in both X and Y directions at a maximum of 18-inch spacing for comprehensive coverage, tighter on congested sites. Mark scan lines before field work begins so coverage is documented.

Interference identification. Metal objects at or near the surface, overhead utilities directly above the scan corridor, and vehicles parked adjacent to the scan area all introduce noise. Identifying and removing or documenting these interference sources before scanning prevents false positives and ambiguous data interpretation.

Calibration passes. On sites where known utility depths exist from records or previous vacuum excavation, a calibration pass over a known target allows the technician to determine the actual signal velocity in the site's specific soil matrix. Calibrated velocity produces more accurate depth estimates across the rest of the site.

Pre-scan EM work first. Complete electromagnetic induction passes before GPR whenever possible. EM results allow the GPR crew to cross-reference expected utility locations and orient their scan lines for maximum perpendicular intercept with target utilities.

GPR Data Output and Documentation Standards

GPR utility locating produces deliverables that should be documented, not just verbally communicated. On projects governed by ASCE 38-22, Quality Level B data must be recorded in a format that supports plan incorporation.

Standard GPR documentation outputs include:

Radargram files. Raw data files from the GPR control unit, stored in the equipment manufacturer's format and archived for re-processing or review if questions arise post-investigation.

Interpreted utility maps. Field-marked surface positions transferred to a site base map, annotated with estimated depth, utility type where identified, confidence rating, and anomaly flags for targets requiring confirmation.

Scan coverage diagrams. A record of scan line locations and directions, confirming that the investigation area was systematically covered. This is the basis for demonstrating that negative results (no utility found in a given area) reflect actual coverage, not missed scans.

Field notes. Documentation of soil conditions, surface preparation status, antenna frequencies used, calibration data, interference sources, and any conditions that may have limited signal quality in specific zones.

Quality Level B deliverables are the standard for projects where designers need subsurface utility information before finalizing plans. Providing raw field marks without documented backup leaves the project team without the chain of evidence needed to defend excavation decisions if a utility conflict occurs.

How Penhall Approaches Underground Utility Locating Services

Penhall's underground utility locating services combine GPR utility locating, electromagnetic induction, and vacuum excavation into a coordinated workflow managed by experienced field crews. The process is calibrated to each site's soil conditions, utility complexity, and project Quality Level requirements before the first scan pass begins.

Penhall's field technicians document GPR results in a format that supports plan-level deliverables, conflict mapping, and vacuum excavation follow-up on anomalies that require physical confirmation. For projects with tight excavation schedules or congested utility corridors, coordinating the subsurface utility locating scope early, before design is finalized or excavation permits are pulled, reduces the risk of field-discovered conflicts that delay work.

To discuss a subsurface utility locating scope for an upcoming project, contact Penhall directly.

frequently asked questions

What is GPR utility locating?

Ground penetrating radar (GPR) utility locating is a non-destructive investigation method that uses pulsed radio wave energy to detect buried utilities, pipes, conduit, and other subsurface objects. The radar antenna transmits pulses into the ground and records reflections from density boundaries, producing a subsurface cross-section that trained technicians interpret to identify utility positions and estimated depths.

What types of utilities can GPR detect that other methods miss?

GPR is particularly valuable for locating non-conductive utilities that electromagnetic induction cannot trace, including plastic gas and water mains, PVC conduit, HDPE pipes, fiber optic ducts, and concrete-encased duct banks. It also detects abandoned utilities that are not energized and therefore invisible to EM locating.

What limits GPR performance on a utility locating job?

The primary factors that reduce GPR effectiveness are high-clay or moisture-saturated soils (which attenuate the signal rapidly), utilities running parallel to the scan line, closely spaced congested utility corridors, and surface interference from metal objects or pavement irregularities. Antenna frequency selection and proper site preparation address many of these factors, but some soil conditions require supplemental methods such as vacuum excavation for confirmation.

Is GPR accurate enough to use without other locating methods?

GPR alone is not a complete subsurface utility locating program. It is most reliable when combined with electromagnetic induction, existing utility records, and vacuum excavation confirmation on flagged anomalies. Each method covers detection gaps left by the others. Projects that rely on a single method consistently produce less complete subsurface utility data than those using a layered approach.

What does Quality Level B subsurface utility locating include?

Under ASCE 38-22, Quality Level B involves field investigation using non-destructive methods, including both electromagnetic induction and GPR, to designate the horizontal position of underground utilities. It produces documented, plan-ready output. Quality Level A adds vacuum excavation to physically confirm depth and material type on selected utilities. Quality Level B is the standard for design-phase investigations on most infrastructure and commercial projects.

How should a job site be prepared for GPR utility locating?

Effective site preparation includes clearing debris and loose material from scan lanes, identifying and documenting surface interference sources such as metal objects and overhead utilities, planning a systematic orthogonal scan grid, and completing electromagnetic induction passes before GPR scanning begins. Calibration passes over known utility depths improve depth accuracy across the site.

Does Penhall offer GPR utility locating services?

Yes. Penhall provides GPR utility locating as part of full-service underground utility locating and subsurface investigation programs. Services include EM and GPR field investigation, subsurface utility mapping, and vacuum excavation confirmation.

Utility Mapping for Construction: How Subsurface Utility Mapping Prevents Conflicts and Rework

CALL FOR A QUOTE
1-800-736-4255

At a Glance

  • Subsurface utility mapping combines ground penetrating radar (GPR), electromagnetic locating, and vacuum excavation to produce verified, georeferenced maps of underground infrastructure before excavation begins.
  • Utility mapping is a retrieval-stage deliverable, not just a safety checkbox. Crews get scaled plan drawings, 3D models, and field-marked layouts they can act on immediately.
  • Unlocated or mislocated utilities are among the leading causes of costly rework, project delays, and utility strikes. Mapping addresses all three.
  • ASCE 38-22 defines four Quality Levels (QL-D through QL-A) for subsurface utility engineering. Higher quality levels require physical verification, which is what distinguishes professional SUE services from simple record review.
  • Mapping integrates directly into phasing, sequencing, and subcontractor coordination, reducing last-minute conflicts during cuts, boring, and deep excavation.
  • GPR mapping works on concrete, asphalt, and open soil, making it applicable across site types from urban street cuts to greenfield development.
Screenshot 2026-03-04 184118
utility locating flags

What "Utility Mapping" Actually Means on a Construction Site

Utility mapping is a planning and risk management tool. The value of the deliverable is directly proportional to the rigor of the investigation method.

Utility mapping is the process of identifying, locating, and documenting the position of underground utilities before excavation, demolition, or construction activity begins. In practice, that means combining multiple detection technologies with field verification and translating the findings into a deliverable format the project team can use: scaled drawings, georeferenced data files, or physical surface markings that show where gas lines, water mains, electrical conduits, telecommunications infrastructure, and drainage systems are buried.

The term covers a spectrum of rigor. At the lowest end, a utility map might be assembled from as-built records and utility owner mark-outs, which are frequently incomplete or inaccurate due to decades of undocumented repairs, relocations, and additions. At the highest end, a subsurface utility engineering (SUE) investigation combines geophysical detection with vacuum excavation to physically expose and measure utility positions, then integrates those findings into a deliverable tied to project survey control.

For construction teams, the distinction matters because the quality of the mapping determines how much confidence the field crew has when making the first cut. A map assembled from outdated records provides liability documentation. A map produced through professional subsurface utility mapping provides operational intelligence.

The Outputs: What Your Team Actually Receives

The output of a utility mapping engagement should be a usable, actionable deliverable tied to your project's coordinate system and immediately applicable to design, phasing, and field operations.

A professional subsurface utility mapping engagement produces deliverables that feed directly into project documentation, not a report that sits in a folder.

Scaled plan drawings show horizontal utility positions overlaid on the project survey base map, typically in plan view with depth annotations where physical verification was performed. These drawings can be issued in CAD format (DWG/DXF) or PDF, and they reference the project coordinate system so they align with civil drawings from day one.

GPR scan data and processed interpretations show anomalies and reflections in the subsurface profile, reviewed by trained technicians who interpret utility signatures from background noise. Raw data is often retained for QA documentation.

Surface markings applied using color-coded paint or flags follow APWA standards and allow field crews to visualize utility corridors directly on the ground surface. This is the format that saw operators, drill crews, and excavator operators work from in real time.

3D utility models are increasingly common on larger projects, particularly those using BIM workflows. Georeferenced utility data is integrated into the project model, allowing clash detection between proposed structures, foundations, and buried infrastructure before a single shovel moves dirt.

Depth data is the critical variable that record drawings rarely provide accurately. Where vacuum excavation or test holes are performed, actual depth measurements are incorporated into the deliverable, eliminating the guesswork that drives conservative and expensive utility avoidance buffers.

The ASCE 38-22 Quality Level Framework

Scoping the right quality level for each project zone is a cost management decision as much as a technical one. Blanket QL-A coverage is rarely necessary; targeted application is the professional standard.

Understanding quality levels is essential for scoping a subsurface utility mapping engagement correctly. ASCE 38-22 (Standard Guideline for Investigating and Documenting Existing Utilities) defines four quality levels that represent increasing degrees of accuracy and verification.

Quality Level D (QL-D) is a records review only. Utility owner records, as-builts, and permit drawings are compiled and reviewed. No field investigation is performed. QL-D is useful for early desktop screening but provides the lowest confidence for field operations.

Quality Level C (QL-C) adds a field survey of visible utility appurtenances such as manholes, valve boxes, and meters, and reconciles them with available records. Still no subsurface detection.

Quality Level B (QL-B) is where subsurface utility locating begins. Geophysical methods, primarily GPR mapping and electromagnetic locating, are applied to detect and horizontally position buried utilities. This is the most common scope for pre-construction utility mapping on commercial and infrastructure projects.

Quality Level A (QL-A) adds physical verification through vacuum excavation or test holes, providing precise three-dimensional position data for critical utilities. QL-A is required where design decisions, structural elements, or deep excavation will occur in close proximity to high-risk utilities.

Project teams should specify quality levels by zone, concentrating QL-A investigation in high-conflict areas such as proposed pile locations, deep utility crossings, and areas with known utility congestion, while applying QL-B across broader project areas.

How GPR Mapping Works in the Field

GPR mapping and electromagnetic locating are complementary technologies. Professional subsurface utility mapping engagements deploy both, with field technicians experienced enough to interpret results accurately.

Ground penetrating radar is the primary geophysical technology used in subsurface utility locating and mapping. A GPR antenna transmits electromagnetic pulses into the ground and records the reflections that return when those pulses encounter materials with different dielectric properties, including pipe walls, conduit, and the disturbed soil that surrounds buried utilities.

The antenna is moved across the survey area in a systematic grid pattern. Data is collected continuously and displayed as a radargram showing subsurface reflections at depth. Trained technicians interpret hyperbolic reflection signatures characteristic of cylindrical utilities and distinguish them from geological features, reinforcement, and interference.

GPR works through concrete, asphalt, and native soil. It is particularly effective for detecting non-conductive utilities such as plastic pipe and fiber conduit that electromagnetic locating cannot identify through induction. On concrete surfaces, GPR also detects rebar and post-tensioning cables, a critical capability for concrete cutting scopes.

Electromagnetic locating complements GPR by applying a signal directly to conductive utilities through physical connection or inductive coupling. The signal is then traced from the surface, providing high positional accuracy for metallic utilities where a connection point can be established.

The combination of both methods is the professional standard for underground utility mapping because each technology addresses the other's blind spots.

Timing and Logistics

Utility mapping is most cost-effective as a pre-design or pre-construction investment. The later in the project sequence it is commissioned, the narrower the window to act on what it finds.

The highest-value window for utility mapping is during design development, when there is still time to adjust alignments, relocate utilities proactively, and sequence work to avoid high-conflict zones. Mapping at this stage informs the design rather than reacting to it.

The second-highest-value window is during pre-construction, before subcontractors mobilize and before excavation begins. At this stage, mapping deliverables drive subcontractor coordination meetings, establish no-dig zones, and inform the shoring and dewatering design for deep excavation.

Mapping requested reactively, after a utility conflict is discovered during excavation, costs many times more than proactive mapping because the project is already stopped. Emergency utility locating can be mobilized, but it cannot recover the schedule time already lost.

For phasing and sequencing specifically, mapping deliverables allow project managers to phase excavation work around utility corridors rather than through them. Areas with high utility density can be scheduled for hand dig or vacuum excavation. Boring and HDD alignments can be designed with verified utility positions rather than record drawings alone. Pile layout can be adjusted to clear identified utilities before the drilling subcontractor mobilizes.

The Cost of Not Mapping: Utility Strikes, Rework, and Project Delays

The ROI on utility mapping is calculated against the cost of utility strikes, rework, and delay, not against the cost of doing nothing. On most projects, the calculus is straightforward.

The Common Ground Alliance publishes annual data on excavation damage in the United States. Utility strikes cause service outages, environmental releases, project shutdowns, and in cases involving gas or electrical infrastructure, fatalities. Beyond the safety dimension, a single utility strike on a congested urban site can trigger a cascade of consequences: the utility must be repaired by the utility owner on their timeline, not the contractor's. The excavation area is typically placed off-limits pending investigation. Subcontractors already mobilized absorb standby costs. Schedule float that took months to build disappears in hours.

Rework costs from utility conflicts extend beyond strike events. Crews that discover an unmarked utility mid-excavation face decisions with no good options: work around it with improvised methods, stop and wait for locating, or remove and reinstall the conflicting utility. None of these are in the original budget.

Utility mapping quantifies and manages this risk rather than accepting it. The investment in professional subsurface utility locating and mapping is a fraction of the cost of a single significant utility conflict on most project types.

Penhall's Subsurface Utility Mapping Capabilities

Penhall delivers subsurface utility mapping and locating services across the United States, supporting owners, general contractors, engineers, and utility owners on projects ranging from urban infrastructure rehabilitation to large-scale site development.

Penhall's utility mapping crews combine GPR scanning, electromagnetic locating, and field interpretation to produce deliverables that meet project requirements from early planning through construction support. Where physical verification is required, Penhall integrates vacuum excavation capabilities to support QL-A investigation in critical zones.

Deliverables are produced in the formats project teams use, including CAD drawings, georeferenced data, and BIM-compatible formats. Field crews apply APWA color-coded surface markings coordinated with plan deliverables, so the documentation and the field layout tell the same story.

Penhall has the national footprint to support multi-site programs and the field experience to work efficiently in the complex, congested utility environments common to urban construction, transportation infrastructure, and industrial facility projects.

frequently asked questions

What is the difference between utility locating and utility mapping?

Utility locating refers to the field process of detecting and marking the position of underground utilities using GPR, electromagnetic methods, or vacuum excavation. Utility mapping is the broader process that incorporates locating field data into a documented deliverable: a scaled drawing, georeferenced dataset, or 3D model that becomes part of the project record. Locating produces marks on the ground; mapping produces a deliverable that survives the project and informs design and construction decisions.

How accurate is GPR mapping for underground utilities?

Horizontal accuracy for GPR mapping is generally within a few inches when performed by trained technicians under favorable soil conditions. Vertical depth accuracy depends on material properties and requires calibration. For critical applications where precise depth is required, such as deep foundation design or directional boring alignment, GPR mapping is supplemented with vacuum excavation test holes that provide directly measured depth data. Accuracy claims should always be qualified by the quality level of investigation performed.

Can subsurface utility mapping detect all types of underground utilities?

No single detection method identifies all utility types with equal reliability. GPR mapping detects both metallic and non-metallic utilities, including plastic pipe, fiber conduit, and PVC. Electromagnetic locating identifies metallic and conductive utilities with high accuracy where a signal can be applied. Utilities that are too deep, surrounded by conductive soils, or located beneath interference sources may be difficult to detect reliably with geophysical methods alone. This is why professional utility mapping engagements use multiple technologies and incorporate record review to correlate findings.

When during a project should utility mapping be commissioned?

The highest-value window is during design development, when utility positions can still influence design decisions and alignment choices. Pre-construction mapping, performed before excavation begins, is the minimum standard for projects in areas with known utility congestion. Commissioning mapping after excavation has started limits the ability to act on findings and reduces the return on the investigation investment.

What deliverable formats does subsurface utility mapping produce?

Professional utility mapping deliverables typically include scaled plan drawings in CAD format (DWG or DXF) and PDF, surface markings applied per APWA color-coding standards, and a report documenting methodology, limitations, and findings. On projects using BIM workflows, georeferenced utility data can be delivered in formats compatible with 3D project models. Where vacuum excavation is performed, depth measurements and photographic documentation of exposed utilities are included.

Does Penhall provide utility mapping for both public and private projects?

Yes. Penhall provides subsurface utility mapping and locating services for public infrastructure projects, private commercial development, industrial facilities, and utility owner programs. Project scope, deliverable format, and quality level requirements are tailored to the specific project type and phase.

Precision Commercial Concrete Resurfacing and Surface Preparation for Infrastructure Projects

CALL FOR A QUOTE
1-800-736-4255

At a Glance

  • Commercial concrete resurfacing extends service life 15-25 years by bonding a new wear layer to a structurally sound slab. ICRI CSP 3-5 surface profiles are required for polymer-modified overlays; inadequate prep is the leading cause of delamination failure.
  • Concrete surface preparation is not a single method but a decision tree: the appropriate technique (scarifying, shot blasting, diamond grinding, or hydrodemolition) depends on contamination depth, existing profile, overlay system, and project specification per ICRI Guideline No. 310.2R.
  • Scarifying concrete removes up to 1/2" of surface per pass using rotating cutting wheels, making it the correct tool for coating removal, deep laitance elimination, and CSP 4-9 profile creation on heavily scaled or contaminated slabs.
  • Coring concrete per ASTM C42 extracts 2"- to 4"-diameter cylinders to measure compressive strength, carbonation depth, chloride ion penetration, and delamination thickness before any overlay or resurfacing decision is made.
  • Cross slope correction on commercial parking lots, roadways, and accessible routes must target 1%-2% per AASHTO and ADA standards. Deviations beyond 2% on pedestrian surfaces trigger ADA non-compliance; deviations below 1% cause standing water and freeze-thaw deterioration.
20201004_151910
20201004_152105

What Is Commercial Concrete Resurfacing?

Commercial concrete resurfacing is the application of a bonded overlay system, typically 1/4" to 2" thick, to a structurally sound but deteriorated slab to restore load-bearing capacity, surface texture, cross slope, and service life without full-depth replacement.

Resurfacing is appropriate when the existing slab retains structural integrity (compressive strength of at least 3,000 psi verified by core testing per ASTM C42), but the surface exhibits scaling, spalling, delamination, freeze-thaw damage, or loss of skid resistance. It is not appropriate over slabs with active cracking from differential settlement, insufficient subbase compaction, or expansive soils without addressing the root cause first.

Overlay System Selection by Application

Overlay Type Thickness Range Compressive Strength Best Application Bond Mechanism
Thin-Bonded Polymer-Modified 1/4" - 3/4" 4,000-6,000 psi Parking decks, walkways, industrial floors Epoxy or latex bonding agent; CSP 3-5 required
Unbonded Concrete Overlay 4" - 6" 4,500+ psi Heavy-traffic roadways, truck courts Separation layer (bond breaker); no profile required
Ultrathin Bonded Wearing Course 3/4" - 1.5" 5,000-8,000 psi Bridge decks, airport aprons, DOT roads Epoxy binder; ICRI CSP 5-7 required
Polyurea/Polyurethane Coating 40-80 mils N/A (flexible) Waterproofing, chemical resistance Mechanical adhesion; CSP 3-4 required
Cementitious Microtoping 1/8" - 1/4" 3,000-4,500 psi Aesthetic restoration, light pedestrian Moisture-tolerant primer; CSP 2-3 required

Resurfacing becomes cost-ineffective when full-depth delamination affects more than 25% of the slab area (identified via chain-drag sounding per ASTM D4580 or ground-penetrating radar), when rebar is corroding and section loss exceeds 20%, or when subgrade conditions have produced slab deflection under load. In these cases, partial or full-depth replacement is the more durable and economical solution.

What Is Concrete Surface Preparation?

Concrete surface preparation is the systematic mechanical, chemical, or thermal treatment of a slab surface to achieve a defined International Concrete Repair Institute (ICRI) Concrete Surface Profile (CSP), remove contaminants, eliminate laitance, and establish the tensile bond strength necessary for an overlay or coating system to perform to specification.

ICRI Guideline No. 310.2R-2013 defines 9 CSP levels (CSP 1-9) measured in surface amplitude. Selecting the wrong profile level is the most common cause of premature delamination. A thin epoxy coating requires CSP 2-3 (0.001"-0.006" amplitude). A bonded cementitious overlay requires CSP 4-6. An ultrathin structural wearing course requires CSP 5-7. Mismatch between specified and achieved profile voids most manufacturer warranties.

Surface Preparation Methods Compared

Method CSP Range Achieved Removal Depth Best For Limitations
Diamond Grinding CSP 1-3 < 1/16" Profile leveling, joint grinding, cross slope correction Cannot remove coatings > 20 mils or heavy contamination
Scarifying CSP 4-9 1/16" - 1/2" per pass Coating removal, laitance, scaling, surface profiling Produces aggressive texture; requires follow-up grind for some coatings
Shot Blasting CSP 3-7 < 1/8" Large flat areas, parking structures, warehouse floors Ineffective near edges/walls; requires containment system
Milling / Cold Planing CSP 6-9 1/4" - 2" per pass Full overlay removal, cross slope restoration, pavement rehab High vibration; not suitable for bridge decks or thin slabs
Hydrodemolition CSP 5-9 Variable, selective Selective removal, rebar-tight areas, bridge decks Water management required; higher mobilization cost
Abrasive Blasting CSP 3-5 < 1/16" Spot treatment, vertical surfaces, small areas Slow; not suitable for large horizontal areas

Pre-Preparation Diagnostics: Advanced Entity Testing

Before selecting a preparation method, a competent contractor performs subsurface diagnostic testing to characterize the slab condition. Skipping this step produces incorrect method selection and scope errors.

  • Chain drag / hammer sounding (ASTM D4580): Identifies hollow, delaminated areas acoustically. Cost-effective first screen; covers 100% of surface area.
  • Ground-penetrating radar (GPR): Maps rebar depth, spacing, and condition; detects subsurface voids; locates post-tension cables without contact. Penetrates 18"-24" in concrete.
  • Electromagnetic induction (cover meter): Measures precise rebar depth (accurate to +/- 1/4") and estimates bar diameter. Required before any coring or milling operation.
  • Phenolphthalein carbonation testing: Determines carbonation front depth (typically 0.25" to 1.5" in aged slabs). Carbonated concrete has reduced pH, compromising passive rebar protection.
  • Chloride ion profiling (ASTM C1152): Quantifies chloride concentration at 1" depth increments. Chloride levels above 0.6 lb/yd3 at rebar depth indicate active corrosion risk.
  • Tensile pull-off testing (ASTM C1583): Measures in-place tensile bond strength of existing overlay or substrate. Minimum 200 psi required for most bonded overlay systems.

What Is Scarifying Concrete?

Scarifying concrete is a high-production mechanical surface preparation method that uses a rotating drum equipped with multiple tungsten carbide or hardened steel cutting wheels to fracture and remove surface concrete at a controlled depth, creating ICRI CSP 4-9 profiles appropriate for bonded overlays, coating systems, and coating removal.

A single-pass concrete scarifier removes between 1/16" and 1/2" of material depending on drum configuration, cutter spacing, machine speed, and concrete hardness. Multiple passes increase removal depth. Walk-behind units process 1,500-3,000 SF/hour; ride-on scarifiers achieve 8,000-15,000 SF/hour on open floor areas.

Scarifying vs. Shot Blasting vs. Diamond Grinding

Factor Scarifying Shot Blasting Diamond Grinding
ICRI CSP Output CSP 4-9 (aggressive) CSP 3-7 (moderate) CSP 1-3 (fine)
Removal Depth 1/16" - 1/2" per pass < 1/8" < 1/16"
Coating Removal Yes, up to 1/4" thick coatings Yes, up to 50 mils No; for profile only
Production Rate 1,500-15,000 SF/hr 3,000-10,000 SF/hr 500-3,000 SF/hr
Edge Access Within 1/2" of walls Limited (4"-6" from edges) Within 1/4" of walls
Dust Generation High; HEPA vacuum required Contained in blast cycle Moderate; wet or dry
Substrate Vibration Moderate Low Low
Ideal Follow-on Shot blast or grind to refine Ready for most overlays Apply coating directly

When scarifying is the correct preparation method, the existing surface has contamination deeper than 1/8" (oils, deicers, chlorides); failed coatings or membranes bonded to the slab; scaling damage from freeze-thaw exceeding CSP 3; or a specified bonded overlay requiring CSP 5+. It is also used to roughen slabs that have been over-ground or trowel-burnished to a CSP below the overlay manufacturer's requirement.

What Is Coring Concrete?

Coring concrete is the extraction of cylindrical samples from in-place concrete using a diamond-tipped rotary drill per ASTM C42, producing 2" to 4" diameter cores used to evaluate compressive strength, carbonation depth, chloride ion penetration, delamination presence, overlay bond integrity, and existing slab thickness prior to any resurfacing or structural modification.

Compressive strength from field cores is evaluated at a diameter-to-length ratio of 2:1 after correction factors are applied per ASTM C42 Section 7.4. A core with a length-to-diameter ratio below 1.75 requires a strength correction factor of 0.87-0.96. Results below 3,000 psi typically indicate the slab cannot support a bonded overlay without full-depth repair or replacement in that zone.

Coring Protocol for Pre-Resurfacing Assessment

  • Core frequency: Minimum 1 core per 1,000 SF for condition assessment; 1 per 500 SF in areas with visible distress or suspected delamination.
  • Core diameter: 3" standard for compressive strength testing; 4" when extracting cores through existing overlays to preserve bond interface for examination.
  • Rebar clearance: Use electromagnetic cover meter before drilling. Maintain minimum 3" clear from rebar to avoid cutting reinforcement and generating ASTM C42 exclusion conditions.
  • Chloride sampling: Extract concrete powder at 0"-1", 1"-2", and 2"-3" increments during coring using a vacuum drill system. Submit to lab per ASTM C1152 within 24 hours of extraction.
  • Documentation: Photograph core extraction location, core top and bottom surfaces, and any delamination or voids encountered. Map core locations on site plan with GPS coordinates or dimensioned reference points.

Advanced Diagnostic Integration: Beyond the Core

Coring alone provides point data. For large infrastructure projects, core results are most valuable when integrated with GPR scan data to correlate anomalies with physical samples. A GPR anomaly at 1.5" depth confirmed by a core showing delaminated overlay and zero bond strength at the same depth produces a defensible condition map for scope and pricing.

What Is Cross Slope and Why Does It Matter for Commercial Concrete?

Cross slope is the transverse grade of a paved surface measured perpendicular to the direction of travel, expressed as a percentage, and it governs surface drainage performance, vehicle stability, pavement structural durability, and ADA pedestrian accessibility compliance on commercial facilities and public infrastructure.

On roadways and parking lots, AASHTO Green Book standards specify a cross slope of 1.5%–2% on tangent sections to ensure positive drainage without exceeding vehicle stability thresholds. Under ADA Standards for Accessible Design (Section 402.2), pedestrian accessible routes may not exceed a 2% (1:50) cross slope in any direction; running slope is separately governed. FHWA Technical Advisory T 5040.36 cross-references these standards for federal-aid highway projects.

Cross Slope Failure Modes and Their Consequences

Cross Slope Condition Primary Failure Mode Secondary Effect Applicable Standard
< 1% (insufficient drainage) Standing water, freeze-thaw D-cracking Black ice formation; slip liability AASHTO Green Book 3-22
1% - 2% (target range) No failure mode; optimal performance Positive drainage; ADA-compliant if pedestrian ADA Sec. 402.2; AASHTO
2% - 4% (marginal; roadway acceptable) ADA non-compliance on ped. routes Tire wear asymmetry on tangent roads ADA Sec. 402.2
> 4% (excessive) Vehicle stability risk; hydro pooling at transitions Accelerated overlay delamination at transitions AASHTO; local traffic eng.
Reverse cross slope (negative) Ponding at curb or gutter; structural undercutting Frost heave amplification All drainage standards

Cross Slope Correction Methods for Commercial Infrastructure

Correcting out-of-tolerance cross slope on existing commercial concrete requires one of three approaches, selected based on deviation magnitude, slab condition, and overlay compatibility:

  • Diamond grinding (deviation < 3/8"): Removes high spots to restore correct slope geometry. Achieves tolerance of +/- 1/8" over 10-foot straightedge per ACPA grinding specifications. Best suited for joints, localized high crowns, and ADA ramp corrections.
  • Bonded overlay with variable thickness (deviation 3/8" to 1.5"): Places a polymer-modified or cementitious overlay in feathered variable depth to build up low areas and restore positive drainage slope. Requires substrate preparation to CSP 4-5.
  • Full-depth milling and resurfacing (deviation > 1.5" or slab approaching end of service life): Cold milling removes the existing surface to a grade-controlled depth, restoring designed cross slope geometry before overlay application. Most precise method for large-area slope restoration.

Measurement and Verification

Cross slope on commercial facilities is measured using a digital level or slope measurement device calibrated to +/- 0.01%, with readings taken at 5-foot intervals across the cross section and 10-foot intervals in the direction of travel. Pre-construction and post-construction cross slope surveys are documented on as-built drawings and retained for ADA compliance records. On federally funded projects, FHWA requires pavement smoothness testing per ASTM E1274 (Profilograph Index) alongside cross slope verification.

How Proper Surface Preparation Impacts Long-Term Durability

The service life of any bonded concrete overlay system is more sensitive to surface preparation quality than to overlay material selection. A premium polyurea coating applied over a CSP 1 substrate on a contaminated slab will delaminate faster than a commodity latex-modified overlay applied over a properly scarified CSP 4-5 surface free of laitance and chloride contamination.

Three failure mechanisms account for the majority of premature overlay failures in commercial and infrastructure applications:

  • Insufficient profile amplitude: The overlay cannot achieve mechanical interlock. Tensile pull-off strength falls below 200 psi (ASTM C1583 threshold), leading to delamination under thermal cycling or traffic load.
  • Subsurface moisture vapor transmission (MVT): Vapor pressure from the substrate migrates through the overlay bond line. On slabs-on-grade, MVT should be below 3 lbs per 1,000 SF per 24 hours (ASTM F1869 calcium chloride test) or RH below 75% at 40% slab depth (ASTM F2170) before coating application.
  • Residual contaminants: Chloride ions, petroleum products, or curing compounds below the mechanical preparation depth suppress bonding chemistry. Chloride levels above 0.2 lb/yd3 at the surface are incompatible with most cement-based overlays without inhibitor treatment.
IMG_0289
20240910_132647

frequently asked questions

What is the difference between scarifying and grinding concrete?

Scarifying uses rotating tungsten carbide cutting wheels to fracture and remove 1/16" to 1/2" of concrete per pass, achieving aggressive ICRI CSP 4-9 profiles for bonded overlays and coating removal. Grinding uses diamond tooling to cut less than 1/16", producing CSP 1-3 profiles for fine coatings and joint leveling. Grinding refines; scarifying removes.

What compressive strength does a slab need for commercial concrete resurfacing?

A minimum in-place compressive strength of 3,000 psi, verified by core testing per ASTM C42, is required for most bonded overlay systems. Polymer-modified ultrathin overlays may require 3,500-4,000 psi. Zones below threshold require full-depth repair before resurfacing proceeds.

How is coring concrete used in infrastructure projects?

Coring extracts 2" to 4" diameter cylinders per ASTM C42 to measure compressive strength, delamination depth, chloride ion concentration, and carbonation front. In infrastructure projects, cores establish existing slab condition, justify resurfacing versus replacement decisions, and provide defensible documentation for owner approval.

What cross slope is required for ADA-compliant concrete surfaces?

ADA Standards for Accessible Design Section 402.2 limits cross slope on pedestrian accessible routes to a maximum of 1:50 (2%). Running slope is governed separately. Cross slopes exceeding 2% on accessible routes trigger non-compliance regardless of roadway or parking lot grading standards.

When is concrete surface preparation required before applying a coating or overlay?

Surface preparation is required before every coating or overlay application. The ICRI CSP target level is specified by the overlay manufacturer or coating supplier. Inadequate preparation is the leading cause of delamination and warranty voidance. Minimum: mechanical preparation to CSP 2-3 for thin coatings; CSP 4-6 for structural bonded overlays.

Precision Concrete Coring in Post-Tension & Structural Slabs

CALL FOR A QUOTE
1-800-736-4255

At a Glance

  • What this covers: Safe concrete coring in post-tension and structural slabs requires GPR subsurface scanning to +/- 0.5 in. accuracy before a drill touches the surface. Skipping this step risks severing tendons under 30,000+ psi of stored stress.
  • Who performs this work: ACI- or ASCC-certified core drilling contractors with documented ground-penetrating radar capability and structural engineer coordination, in compliance with ACI 318-19 and OSHA 29 CFR 1926 Subpart Q.
  • How cables are found: A 1.6 GHz or 2.0 GHz GPR antenna maps post-tension tendon position, depth, and drape profile before layout is marked; electromagnetic induction provides secondary confirmation for unbonded mono-strand systems.
  • How deep cables sit: Draped post-tension cables in a typical 8-to-10-inch commercial slab range from 1 inch above the bottom at midspan to near mid-depth at supports; depth varies continuously along the span and must be mapped, not assumed.
  • Why precision matters: Diamond wet-core drilling maintains a bore diameter tolerance of +/- 1/16 in., and every penetration larger than 6 inches in a post-tension slab requires structural engineer review to assess load-path and tendon stress-field impact.
  • What sets specialists apart: Experienced core drilling contractors deliver GPR scan images, core logs, and as-drilled records that satisfy building department documentation requirements and protect GCs from structural liability on commercial projects.

What Is Concrete Coring and Why Does It Matter on Structural Slabs?

Concrete coring is the process of cutting a precise cylindrical hole through a concrete slab, wall, or foundation using a rotating diamond-tipped drill barrel. On post-tension or structural slabs, the method used before and during drilling determines whether the structure remains safe or suffers irreversible damage.

Standard coring on unreinforced or lightly reinforced slabs is a relatively forgiving operation. Structural slab coring is not. Commercial buildings constructed after the 1970s, including office towers, parking structures, hospitals, and mixed-use podiums, overwhelmingly rely on post-tensioned concrete for their floor systems. These slabs contain high-strength steel tendons stressed to between 150,000 and 200,000 psi and anchored at the slab perimeter. A single severed tendon releases stored elastic energy that can initiate progressive cracking, permanent deflection, or partial collapse of the bay.

Mechanical, electrical, plumbing, fire suppression, and data infrastructure all require penetrations through these slabs. Placing those penetrations accurately without compromising structural integrity is the defining competency of a qualified core drilling contractor.

Understanding Post-Tension Slabs Before Any Core Drill Touches the Surface

A post-tension slab is a reinforced concrete floor system in which high-strength steel tendons, either unbonded monostrand (wrapped in grease and plastic sheathing) or grouted multi-strand, are threaded through the slab formwork, cast in place, and then tensioned against anchorage hardware after the concrete reaches design strength, typically at 75% or greater of the 28-day compressive strength per ACI 318-19 Section 26.10.

How Post-Tension Cables Are Positioned in a Slab

Post-tension tendons in a flat-plate or flat-slab system are arranged in two perpendicular banded and distributed patterns, with banded tendons concentrated near column lines and distributed tendons spread across the bay at regular intervals. Spacing between individual strands typically ranges from 4 to 6 feet in the banded direction and 4 to 5 feet in the distributed direction, though field conditions, pour sequence, and contractor installation variability mean actual positions frequently deviate from structural drawings.

This deviation is precisely why structural drawing review alone is insufficient before coring. On renovation and tenant improvement projects, the original structural engineer of record (EOR) may no longer be accessible, and as-built post-tension layout drawings may not exist. GPR scanning resolves the actual installed condition, not the design intent.

How Deep Are Post-Tension Cables in a Slab?

Post-tension cables in a standard 8-to-10-inch commercial slab are profiled at a variable depth along their span. This variable positioning is the drape profile, and it is deliberate. At midspan, where bending tension is highest at the bottom of the slab, tendons are positioned approximately 1 to 1.5 inches above the bottom surface (inside the minimum cover requirement of 3/4 inch for interior conditions per ACI 318-19 Table 20.6.1.3). At column supports, where bending reverses, tendons rise toward the mid-depth or upper third of the slab section.

The practical implication: a tendon that a GPR scan shows at 3 inches of depth at one location may be at 1.5 inches of depth just 4 feet away. Depth changes continuously. Assuming a safe drilling depth based on a single scan point is a structural risk. A qualified core drilling contractor maps the full drape profile across the intended core location and establishes a minimum safe clearance before committing core barrel position.

Key figure: Typical post-tension tendon drape in an 8-inch slab spans from 1.0 in. above the soffit at midspan to approximately 3.5 to 4.0 in. from the bottom (mid-depth) at column supports. GPR resolution at 1.6-2.0 GHz provides depth accuracy to +/-0.5 in. in concrete with 28-day compressive strength of 4,000-5,000 psi.

Locating Post-Tension Canyons Before Coring

Locating post-tension cables before coring is a non-negotiable first step on any structural slab, and ground-penetrating radar (GPR) is the industry-standard technology for doing it accurately, non-destructively, and without cutting power or coordinating with the building's electrical systems.

Ground-Penetrating Radar (GPR) Scanning

GPR emits short pulses of electromagnetic energy into the concrete substrate and measures the reflected signals that return when the wave encounters a material with different dielectric properties. Steel tendons, rebar, conduit, and voids all produce distinct hyperbolic reflection signatures. A 1.6 GHz or 2.0 GHz ground-coupled antenna provides the frequency-depth trade-off required for standard slab thickness: sufficient resolution to differentiate a 0.5-inch tendon from adjacent reinforcing steel, at penetration depths reaching 12 to 18 inches.

The output is a B-scan radargram, a cross-sectional subsurface image, that a trained GPR operator interprets to identify tendon location, depth, and spacing. Safe core locations are marked directly on the slab surface, typically with paint or chalk grid lines, at a standoff distance of not less than 2 inches from any identified tendon. On dense layouts, the operator works with the project structural engineer to evaluate whether a safe core path exists or whether the core location must be relocated.

GPR scanning also detects secondary hazards that traditional coring misses: embedded conduit runs, post-installed anchor locations, sleeves, waterproofing membrane layers, and subsurface voids from incomplete consolidation or prior water intrusion. Detecting these entities before drilling prevents costly rework and reduces schedule impact on occupied facilities.

Electromagnetic Induction and X-Ray Subsurface Imaging

Electromagnetic induction (EMI) scanning provides a complementary confirmation method for unbonded mono-strand post-tension systems. Monostrand tendons are ferromagnetic, and an EMI scanner detects the disruption in a generated magnetic field caused by each tendon, producing a plan-view heat map of steel density across the scan area. EMI is particularly effective at distinguishing the closely spaced, parallel tendons of a banded post-tension layout in areas where GPR radargrams are difficult to interpret due to signal interference from wire mesh or tight rebar spacing.

Concrete x-ray imaging remains the highest-resolution subsurface imaging method available for concrete, capable of resolving tendon position to within 1/8 inch, but its application on commercial coring projects is limited by radiation safety exclusion zone requirements and the logistics of positioning both the X-ray source and detector plate on opposite sides of the slab. X-ray is typically reserved for forensic structural investigation or highly congested areas where GPR interpretation is inconclusive and the structural consequence of error is severe.

The Step-by-Step Process for Safe Coring in Post-Tension Slabs

Safe post-tension slab coring follows a defined sequence that integrates structural coordination, subsurface scanning, and precision drilling. Each phase builds on the last and cannot be safely skipped or reversed.

1. Pre-Mobilization Document Review: Obtain available structural drawings, post-tension shop drawings, and as-built records from the EOR or building owner. Identify banded vs. distributed tendon zones, column bay dimensions, and any documented prior penetrations or repairs.

2. Structural Engineer Coordination: Submit proposed core locations to the EOR or a licensed structural engineer for review before scanning begins. For cores larger than 6 inches in diameter or within 18 inches of a column, written engineer approval is standard practice and required by many jurisdictions.

3. GPR Scan Grid Execution: Establish a minimum 24 x 24 inch scan grid centered on each proposed core location. Scan in both perpendicular directions to generate crossing B-scans that confirm tendon position in plan and depth in profile.

4. Safe-Zone Marking: Mark the exact tendon centerlines and depth annotations on the slab surface. Confirm a minimum 2-inch horizontal clearance from any tendon before approving the final drill point.

5. Core Drill Setup and Wet Drilling: Mount the core drill stand on a vacuum pad or mechanical anchor. Begin wet-method diamond coring using continuous water flow to control heat, reduce dust, and extend barrel life. Maintain a controlled penetration rate of 1 to 3 inches per minute in 4,000-5,000 psi concrete to prevent barrel deflection.

6. Real-Time Depth Monitoring: Track core barrel penetration depth against the mapped tendon profile throughout the cut. If the drill operator encounters unexpected resistance or a change in cutting behavior consistent with steel contact, drilling stops immediately.

7. Core Removal and Void Documentation: Remove the core plug intact where possible to allow visual inspection of the cut concrete matrix. Document core length, diameter, any reinforcement or tendon contact, and final penetration depth.

8. As-Drilled Record and Closeout: Deliver a complete as-drilled package including the GPR scan image, annotated slab plan, core log, operator certification, and equipment calibration records. This documentation satisfies building department requirements and provides the GC with structural liability protection.

Precision Coring vs. Traditional Coring: A Technical Comparison

The table below compares GPR-guided precision coring against traditional unguided coring across the dimensions that matter most on commercial structural slab projects.

Factor Precision Coring (GPR + Wet Core Drill) Traditional Unguided Coring
Cable detection before drilling GPR scan to +/-0.5 in. accuracy prior to setup None; relies on operator judgment
Tendon strike risk Minimal; cores placed in verified safe zones High; undocumented tendon layouts common
Structural engineer sign-off Standard on all post-tension work Rarely required
Dust & slurry control Wet-method diamond core with vacuum slurry recovery Dry or wet; slurry often uncontrolled
Core diameter tolerance +/-1/16 in. with carbide-tipped diamond barrel Variable; operator skill-dependent
Documentation GPR scan image, core log, as-drilled record Typically none
Typical mobilization notice 24-48 hours with site coordination Same-day common
Regulatory compliance ACI 318-19 structural concrete, OSHA 29 CFR 1926 Inconsistent

The cost difference between precision coring and unguided coring is real but modest relative to the liability exposure of a tendon strike. Tendon repair on a typical commercial slab involves structural engineer assessment, specialized coupler hardware, post-tension re-stressing equipment, and potential structural shoring. That repair scope routinely exceeds $25,000 to $75,000 per incident, exclusive of schedule impact, tenant disruption, and litigation risk.

Structural Risk Mitigation and Subsurface Coordination on Large Commercial Sites

Large commercial sites, including multi-building campuses, hospital systems, airport facilities, and institutional structures, present coring risk at a different scale than a single-tenant renovation. Volume of penetrations, coordination across multiple trades, occupied-facility constraints, and distributed structural documentation all compound the challenge.

Effective structural risk mitigation on these projects starts with a pre-construction subsurface coordination meeting that aligns the GC, structural engineer, core drilling contractor, MEP engineers, and the commissioning building owner. The agenda should cover:

  • A centralized core penetration log that tracks requested, scanned, approved, and completed cores by location and date across the entire project
  • A defined submittal process for GPR scan results, with a minimum 48-hour review window before drilling begins at any new location
  • Clear rules for core relocation authority, covering who can approve a field adjustment to a core point if scanning reveals a conflict and what documentation is required
  • Occupied-floor protocols for noise, vibration, and slurry containment, including after-hours drilling windows where structural slab penetrations are directly above operating clinical, data center, or manufacturing environments
  • A stop-work trigger definition: any GPR anomaly that cannot be conclusively interpreted as rebar, tendon, or conduit halts drilling at that location pending engineer review

On projects with BIM coordination workflows, post-tension tendon models at LOD 300 or higher can be imported into the clash detection environment to pre-screen proposed MEP penetration locations before any field scanning occurs. This digital pre-coordination layer reduces the volume of conflict discoveries in the field and shortens the GPR scan scope to confirming as-installed conditions rather than discovering them from scratch.

When to Call Specialized Core Drilling Contractors

The selection question is not whether a contractor can operate a core drill. It is whether they have the scanning capability, the structural literacy, and the documentation discipline to protect the building, the schedule, and the GC's liability position when they work in a post-tension slab.

Penhall's concrete coring teams operate across commercial, industrial, and infrastructure markets with in-house GPR scanning capability, structural engineer coordination protocols, and full documentation workflows on every post-tension slab project. Contact your regional Penhall office to discuss project scope and mobilization requirements.

penhall concrete coring

frequently asked questions

What is post-tension coring and why is it different from standard concrete coring?

Post-tension coring requires locating and avoiding high-stress steel tendons embedded in the slab before any drilling begins. Severing a tensioned cable releases stored elastic energy that can cause catastrophic slab cracking, permanent deflection, or structural failure. These risks are absent in conventionally reinforced or unreinforced concrete slabs.

How deep are post-tension cables in a slab?

Post-tension cables in a standard 8-to-10-inch commercial slab are profiled between approximately 1 inch above the bottom at midspan and mid-depth at column supports. Depth changes continuously along the span due to the drape profile. A GPR scan is required to map the actual depth before coring; assuming a fixed depth based on drawings alone is a structural risk.

How do you locate post-tension cables before drilling?

Ground-penetrating radar (GPR) is the industry-standard method for locating post-tension cables before coring. A 1.6 GHz or 2.0 GHz antenna scans the slab and returns hyperbolic reflection data identifying tendon position, depth, and spacing to approximately +/- 0.5 inch accuracy. Electromagnetic induction (EMI) scanning provides secondary confirmation for unbonded monostrand systems.

What qualifications should core drilling contractors have for post-tension work?

Core drilling contractors on post-tension slabs should carry ACI or ASCC certification, demonstrate owned GPR scanning capability, and provide proof of structural engineer coordination on prior projects. OSHA 29 CFR 1926 Subpart Q compliance is required on all commercial sites, and liability insurance should include structural damage coverage.

What happens if a post-tension cable is cut during coring?

Severing a post-tension cable releases stored elastic energy instantly, which can cause explosive concrete movement along the tendon path, loss of load transfer capacity in the affected bay, and potential progressive structural failure. Emergency repair requires a licensed structural engineer, specialized tendon coupler hardware, and re-stressing equipment. That repair scope routinely costs $25,000 to $75,000 or more per incident.

What core sizes are standard for commercial post-tension slab penetrations?

Common core diameters on commercial post-tension projects range from 2 inches for conduit sleeves to 6 or 8 inches for MEP penetrations. Any opening larger than 6 inches in a post-tension slab requires structural engineer review to assess the impact on load paths, tendon stress fields, and slab bending capacity per ACI 318-19 requirements.

Diamond Sawcutting

CALL FOR A QUOTE
1-800-736-4255

What Are Concrete Saws?

Concrete saws are specialized power tools used to cut through concrete, asphalt, brick, masonry, and other dense, stone-like materials. They are a core piece of concrete cutting equipment on commercial, industrial, and infrastructure job sites where precision, depth control, and safety matter.
Concrete cutting saws come in several sizes and configurations depending on the application. Handheld saws are often used for smaller openings and detail work, while walk-behind concrete saws are designed for flatwork such as slabs, roadways, and bridge decks. Track-mounted and remote-controlled saws are used for highly controlled or hazardous cutting environments where accuracy and operator safety are critical.
These saws can be powered by hydraulic, gasoline, diesel, or electric motors, with the power source typically determined by jobsite conditions, cutting depth requirements, and environmental considerations.

Types of Concrete Saws Used in Diamond Sawcutting

Different concrete saws are designed for different cutting scenarios. Common types include:

Handheld Concrete Saws

Compact and maneuverable, handheld concrete saws are used for wall penetrations, curb cuts, and limited-access areas. They are often paired with diamond blades for clean, controlled cuts.

Walk-Behind Concrete Saws

Walk-behind concrete saws are commonly used for slab cutting, expansion joints, trenching, and roadway work. These saws provide consistent depth control and are well-suited for long, straight cuts in horizontal surfaces.

Track-Mounted and Specialty Saws

For projects that demand extreme precision or operate in restricted or hazardous environments, track-mounted or remote-controlled saws are used. These systems are common in large-scale commercial and infrastructure projects.

Diamond Blades and Diamond Sawcutting Explained

Diamond sawcutting relies on diamond blades rather than traditional cutting edges. Despite the name, diamond blades do not “slice” material. Instead, they function as high-performance grinding wheels.

Diamond blades cut concrete by rotating at high speeds and grinding away material through abrasion. Industrial-grade diamonds are embedded into a metal bond along the blade’s edge, allowing the blade to maintain cutting efficiency even when encountering reinforced concrete and aggregate.

Common Diamond Blade Manufacturing Methods

Diamond blades are manufactured using several bonding techniques, each suited to different cutting demands:

Sintered Diamond Blades
The most common type used in professional concrete cutting. Diamonds are mixed with metal powders and bonded to a steel core through high heat and pressure, creating a durable blade designed for extended use.

Electroplated Diamond Blades
Diamonds are bonded to the blade surface using an electrical current. These blades offer fast cutting speeds but typically have a shorter service life.

Vacuum-Brazed Diamond Blades
Diamonds are welded directly to the blade surface without a metal bond. This method exposes more diamond surface area, allowing for aggressive cutting in specific applications.

Compared to abrasive or grinding wheels, diamond blades provide greater cutting efficiency, improved accuracy, and longer service life, making them the preferred choice for professional diamond sawcutting.

Safety Considerations and the Importance of Water-Fed Cutting

Concrete saws generate significant friction and heat during operation. Without proper controls, cutting can produce excessive dust, overheating, and premature blade wear.
Water-fed cutting systems are critical for safe and effective concrete saw operation. Continuous water flow serves several purposes:

  • Cools the blade to prevent overheating and warping
  • Reduces airborne silica dust for safer working conditions
  • Improves cutting efficiency and blade longevity
  • Produces cleaner, more controlled cuts

These safety considerations are one of the primary reasons professional concrete cutting services rely on specialized equipment and trained operators rather than general-purpose tools.

When to Hire a Professional Concrete Cutting Contractor

While concrete saws are powerful tools, diamond sawcutting is not a typical DIY or general contractor task. Projects involving structural concrete, reinforced slabs, tight tolerances, or safety-sensitive environments benefit from professional concrete cutting services.
A professional concrete cutting contractor brings:

  • Proper saw and blade selection for the material and depth
  • Dust and slurry control systems
  • Compliance with safety and environmental regulations
  • Precision cutting that protects surrounding structures

For complex or large-scale projects, working with an experienced provider like Penhall ensures accurate results while minimizing risk. Learn more about Penhall’s expertise in professional concrete cutting and diamond sawcutting services.

frequently asked questions

What is diamond sawcutting?

Diamond sawcutting is a concrete cutting method that uses diamond-embedded blades to grind through concrete, masonry, and asphalt with high precision and efficiency.

What materials can concrete saws cut?

Concrete saws can cut concrete, reinforced concrete, asphalt, brick, block, and other masonry materials when paired with the appropriate diamond blade.

Why is water used during concrete cutting?

Water cools the blade, reduces dust, improves safety, and helps produce cleaner, more controlled cuts during diamond sawcutting.

Are diamond blades better than abrasive blades?

Diamond blades are generally more efficient, longer-lasting, and more precise than abrasive blades, especially for professional concrete cutting applications.

How Roadway Grinding & Grooving Provide a Safer Driving Experience

The next time you cruise down a new stretch of highway or witness a jetliner touch down seamlessly, think about the invisible engineering that made that smooth, safe experience possible. That engineering is often the result of two precise, high-impact techniques: concrete grinding and grooving.

These processes are an important piece of modern pavement restoration, transforming worn-out, hazardous concrete into high-performance surfaces that enhance safety, reduce noise, and extend the lifespan of our essential transportation infrastructure from busy interstates to critical airport runways.

Diamond Grinding

When engineers talk about grinding, they are typically referring to diamond grinding, a technique designed to correct surface irregularities and improve ride quality.

What is Grinding?

Diamond grinding uses specialized equipment fitted with numerous diamond-tipped saw blades to shave off a thin, uniform layer of the concrete surface. This process is essentially like a massive, industrial-scale planer, correcting flaws across the entire slab.

Why is Grinding Necessary?

The goal of grinding is to restore the pavement's smoothness, which naturally degrades over time due to heavy traffic and environmental stress:

1. Eliminating Faulting: Grinding removes the vertical steps or "bumps" that develop at the joints between concrete slabs (known as faulting or warping). This is what creates the jarring "thump-thump" sensation on older highways.

2. Improving Ride Quality (IRI): The quality of a road is measured by the International Roughness Index (IRI). Grinding can drastically reduce the IRI, leading to a smoother, quieter, and more comfortable ride for drivers.

3. Noise Reduction: The newly textured surface resulting from grinding is smoother and more uniform than rough, faulted concrete, often leading to a noticeable reduction in tire-pavement noise.

Diamond Grooving

Grooving is the process of cutting deliberate, precise channels into the pavement. Unlike grinding, which focuses on smoothness, grooving's sole purpose is maximizing safety and performance, especially in wet conditions.

Safety Mechanics

Grooving works by applying two mechanical principles developed originally for airport runways.

1. Water Displacement: The grooves act as immediate drainage channels, pulling water, oil, or slush away from the point where the tire meets the concrete. This prevents the formation of a liquid film, which is the cause of hydroplaning at high speeds.

2. Mechanical Interlock: The diamond-cut grooves create sharp, vertical edges. These edges provide physical resistance for the tire tread to push against, offering essential mechanical grip and increasing the overall coefficient of friction, which is vital for braking and steering stability.

machinery doing airport runway grooving

Patterns Matter

The direction of the grooves is customized based on the application.

  • Transverse Grooving: Cuts are made perpendicular to the direction of travel. This is crucial for runways and high-speed braking zones because it maximizes water evacuation along the path of movement.

  • Longitudinal Grooving: Cuts run parallel to the direction of travel. This is common on highways as it improves steering control and helps vehicles track cleanly through curves.

Concrete Grinding and Grooving Combined

While both processes can be used separately, the most comprehensive and effective pavement restoration projects utilize them in tandem:

1. Grind First: The pavement is ground to eliminate all bumps and dips, ensuring a perfectly smooth profile.

2. Groove Second: The high-traction safety pattern is then precisely cut into the newly leveled surface.

This sequence delivers the best long-term outcome: a smooth, comfortable ride (from grinding) combined with superior, all-weather skid resistance (from grooving).

What are the Benefits of Diamond Grinding and Grooving

The strategic investment in diamond grinding and grooving yields massive returns for public safety and infrastructure budgets:

  • Drastic Accident Reduction: Studies have repeatedly shown that the increased skid resistance and hydroplaning prevention provided by grooving can lead to significant reductions in wet-weather accidents.

  • Extended Pavement Life: By correcting surface flaws and restoring the integrity of the concrete structure, these techniques can add 15 to 30 years of service life to the pavement. This is often far more cost-effective and longer-lasting than simply laying down a new asphalt overlay.

  • Fuel and Vehicle Savings: Smoother roads reduce the dynamic load on vehicles, leading to less wear and tear on suspension systems, reduced tire wear, and better fuel economy for trucks and cars alike.

By using the unmatched precision of diamond cutting, engineers ensure that every mile of grooved and ground pavement meets the highest standards of safety, setting the stage for smoother travel and a more durable future for our roads and runways.

  • Page 1
  • Page 2
  • Go to Next Page »
☎ CALL TO SCHEDULE SERVICE
FOLLOW US

#PenhallRedandGray

penhall menu logo
HEADQUARTERS

1212 Corporate Dr. Suite 500
Irving, TX 75038

1-800-PENHALL

CA Contractors License #568673

FIND YOUR LOCAL PROVIDER
COMPANY

Our Story

Leadership Team

Careers

LOCATIONS

Penhall Company (USA)

Concrete Coring Company (HI)

SERVICES

Concrete Coring

Concrete Cutting

Concrete Scanning

Concrete X-Ray Imaging

Private Utility Locating & Mapping

Demolition

Grinding & Grooving

Bridge Services

Surface Preparation

Concrete Breaking & Removal

Fiber Reinforced Polymer

Hydrodemolition

To receive notifications about our articles, sign up below. You may unsubscribe from these e-mails at anytime.

  • This field is for validation purposes and should be left unchanged.

ENR The Top 600 Logo
ISNetworld logo
Avetta

© Copyright 2026 | Penhall Company | Terms & Conditions | Supplier Code of Conduct | Supplier Terms & Conditions | Sitemap | All Rights Reserved

  • About Us
    • Our Story
    • Leadership Team
    • Sustainability
  • Safety
  • Services
    • Concrete Services
      • Concrete Coring
      • Concrete Cutting
      • Demolition
      • Hydrodemolition
      • Structural Repair
      • Grinding & Grooving
      • Bridge Services
      • Scarifying & Shaving
      • Breaking & Removal
      • Operated Equipment Rentals
    • Subsurface Services
      • Concrete GPR Scanning
      • Digital X-Ray Imaging
      • Private Utility Locating & Mapping
      • Fiber Reinforced Polymer
  • Industries
  • Resources
    • Articles
    • Frequently Asked Questions
  • Contact Us
  • Find a Branch
  • Request a Quote
  • JOIN PENHALL COMPANY
  • Concrete Coring Company
  • About Us
    • Our Story
    • Leadership Team
    • Sustainability
  • Safety
  • Services
    • Concrete Services
      • Concrete Coring
      • Concrete Cutting
      • Demolition
      • Hydrodemolition
      • Structural Repair
      • Grinding & Grooving
      • Bridge Services
      • Scarifying & Shaving
      • Breaking & Removal
      • Operated Equipment Rentals
    • Subsurface Services
      • Concrete GPR Scanning
      • Digital X-Ray Imaging
      • Private Utility Locating & Mapping
      • Fiber Reinforced Polymer
  • Industries
  • Resources
    • Articles
    • Frequently Asked Questions
  • Contact Us
  • Find a Branch
  • Request a Quote
  • JOIN PENHALL COMPANY
  • Concrete Coring Company