• Skip to main content

CONCRETE CORING COMPANY

  • About Us

    ABOUT PENHALL

    Penhall has been the United States' go-to concrete services partner since 1957.

    • OUR STORY

    • LEADERSHIP TEAM

    • SAFETY

    • CAREERS

    • RESOURCES

    • FREQUENTLY ASKED QUESTIONS

    • SUSTAINABILITY

    CONTACT PENHALL

    Penhall Trucks

    We've handled projects of all types and sizes, with a track record of excellence going back more than 65 years. Contact us about your next project.

    TALK TO US
  • Services

    CONCRETE SERVICES

    Whether it's coring, flat sawing, wall sawing, or breaking and removal, we pride ourselves in our experience, expertise, top-of-the-line equipment, and unwavering commitment to safety.

    • CONCRETE CORING

    • CONCRETE CUTTING

    • DEMOLITION

    • HYDRODEMOLITION

    • STRUCTURAL REPAIR

    • GRINDING & GROOVING

    • BRIDGE SERVICES

    • SCARIFYING & SHAVING

    • BREAKING & REMOVAL

    • OPERATED EQUIPMENT RENTALS

    SUBSURFACE SERVICES

    Our subsurface services provide industry-leading solutions in concrete scanning, private utility locating and mapping, digital x-ray imaging and fiber reinforced polymer, ensuring precision, safety, and efficiency.

    • CONCRETE GPR SCANNING

    • CONCRETE X-RAY IMAGING

    • PRIVATE UTILITY LOCATING & MAPPING

    • FIBER REINFORCED POLYMER

    LUNCH AND LEARN WITH PENHALL COMPANY

    Lunch & Learn

    We're excited to offer you an engaging and informative session that will introduce you to our range of services, industry expertise, and innovative solutions. As a leading provider in concrete cutting, coring, and demolition, Penhall Company is committed to delivering top-notch service and exceeding your expectations. Grab your seat, enjoy a delicious meal, and discover how partnering with us can benefit your projects.

    SCHEDULE A LUNCH & LEARN
  • Industries

    OUR PROJECTS

    Penhall Company has had the opportunity to work on some of the most challenging and wide-ranging projects in North America.

    • ALL PROJECTS

    • AVIATION

    • CHURCHES

    • COMMERCIAL

    • DOT / INFRASTRUCTURE

    • EDUCATION

    • ELECTRIC VEHICLE CHARGING

    • GRAFF

    • HEALTHCARE / HOSPITAL

    • HOSPITALITY

    • INDUSTRIAL

    • LOCK / DAM

    • POWER / NUCLEAR

    • RESIDENTIAL

    • WATER / WASTEWATER TREATMENT

    LATEST PROJECT

    Jack Peters Bridge Saw & Seal

    LOCATION: Sacramento, CA
    SERVICE: Saw Cutting & Sealing
    READ MORE
  • Locations
penhall menu logo
  • Careers
  • Contact Us
  • QUOTE REQUEST
  • This field is for validation purposes and should be left unchanged.
  • Site Contact Information

  • (XXX) XXX-XXXX
  •  
  • Job Site Location

  • After submitting this form a Penhall Company representative will be in contact with you to confirm your request. If this request is urgent, please call 1-800-PENHALL to be connected with the nearest Penhall branch. Upon submitting this form you will also receive occasional updates about our services and company announcements. You may unsubscribe from these e-mails at anytime. Grinding and grooving services are conducted by Emery Sapp & Sons, Inc. For specific inquiries related to grinding and grooving, click here or reach out to Chris Fitzpatrick at chris.fitzpatrick@emerysapp.com

  • About Us
    • Our Story
    • Leadership Team
    • Sustainability
  • Safety
  • Services
    • Concrete Services
      • Concrete Coring
      • Concrete Cutting
      • Demolition
      • Hydrodemolition
      • Structural Repair
      • Grinding & Grooving
      • Bridge Services
      • Scarifying & Shaving
      • Breaking & Removal
      • Operated Equipment Rentals
    • Subsurface Services
      • Concrete GPR Scanning
      • Digital X-Ray Imaging
      • Private Utility Locating & Mapping
      • Fiber Reinforced Polymer
  • Industries
  • Resources
    • Articles
    • Frequently Asked Questions
  • Contact Us
  • Find a Branch
  • Request a Quote
  • JOIN PENHALL COMPANY
  • Concrete Coring Company
×
  • About Us
    • Our Story
    • Leadership Team
    • Sustainability
  • Safety
  • Services
    • Concrete Services
      • Concrete Coring
      • Concrete Cutting
      • Demolition
      • Hydrodemolition
      • Structural Repair
      • Grinding & Grooving
      • Bridge Services
      • Scarifying & Shaving
      • Breaking & Removal
      • Operated Equipment Rentals
    • Subsurface Services
      • Concrete GPR Scanning
      • Digital X-Ray Imaging
      • Private Utility Locating & Mapping
      • Fiber Reinforced Polymer
  • Industries
  • Resources
    • Articles
    • Frequently Asked Questions
  • Contact Us
  • Find a Branch
  • Request a Quote
  • JOIN PENHALL COMPANY
  • Concrete Coring Company
penhall menu logo

Control Joints Explained: How They Improve Concrete Performance

Control Joints Explained: How They Improve Concrete Performance

Everything you need to know about control joints in concrete, what they are, why they’re necessary, how they’re installed, and why getting them right matters for structural integrity, surface appearance, and long-term safety.

CALL FOR A QUOTE
1-800-736-4255

At a Glance

  • Control joints are intentional, pre-planned grooves or saw cuts in a concrete slab or wall that guide cracking to specific, predictable locations as the concrete shrinks, expands, and settles.
  • Concrete will crack. Control joints don’t prevent cracking, they redirect it to inconspicuous, manageable locations rather than allowing random fractures to appear across the visible surface.
  • Proper control joint placement reduces the risk of trip hazards, water infiltration, surface deterioration, and structural delamination over the life of the slab.
  • Control joints should be cut to a minimum depth of one-quarter of the slab thickness, and spaced at intervals generally no greater than 2–3 times the slab thickness in feet.
  • Control joints differ from expansion joints and construction joints, each serving a distinct structural purpose.
  • Penhall Company provides professional concrete cutting and coring services for control joint installation, with nationwide coverage and over 65 years of concrete industry expertise.

Why Concrete Cracks, And Why That’s Expected

Concrete is one of the most durable building materials on the planet. It’s also one that cracks. This isn’t a defect, it’s physics.

When freshly placed concrete begins to cure, it undergoes a process called hydration, in which water reacts with cement to form a hardened crystalline matrix. As this process progresses, the concrete shrinks. Even under ideal conditions, a typical concrete slab will shrink by approximately 0.04 to 0.06 percent of its length as it cures. On a 100-foot slab, that’s roughly half an inch of total movement.

After curing, concrete continues to move in response to temperature changes, expanding in heat and contracting in cold. The slab also responds to changes in soil moisture, freeze-thaw cycles, loading, and settlement of the underlying subgrade. All of this movement generates internal tensile stress. When that stress exceeds the tensile strength of the concrete, the material cracks.

The question is never whether concrete will crack. The question is where. Left uncontrolled, cracks form at random, often in the most visible, most structurally problematic, or most aesthetically damaging locations. Control joints exist to answer that question before the concrete does.

What Are Control Joints in Concrete?

A control joint (also called a contraction joint) is a groove, saw cut, or formed weakened plane placed in a concrete slab, wall, or pavement to create a predetermined location where cracking will occur. By reducing the cross-sectional thickness of the concrete at that point, the joint creates a stress concentration that reliably attracts and channels cracking, keeping it hidden within the joint rather than wandering across the surface.

The result is a slab that still cracks (as all concrete does), but cracks in the right places: along neat, intentional lines that are designed to be sealed, maintained, or simply left inconspicuous rather than repaired.

How Control Joints Work

The mechanics are straightforward. Concrete in tension will crack at the weakest point in the cross-section. A control joint deliberately creates that weak point by removing material, typically to a depth of at least one-quarter of the slab thickness. At that groove, the effective thickness of the concrete is reduced, so when shrinkage or thermal stress builds, the slab cracks there first.

Aggregate interlock, the interlocking of coarse aggregate particles across the crack face, transfers load between the two sides of the joint, maintaining structural continuity even after cracking occurs. This is why control joints in well-designed slabs are not a sign of failure; they are evidence that the joint did its job.

Control Joints vs. Expansion Joints vs. Construction Joints

These three joint types are often confused, but they serve different purposes:

  • Control joints (contraction joints) are weakened planes that guide where shrinkage cracking occurs. They do not fully separate the slab.
  • Expansion joints are complete breaks in the concrete, usually filled with a compressible material, that allow two adjacent sections to expand toward each other without generating compressive stress. They’re used where concrete meets a fixed structure (a building wall, a curb, a column) or where very long runs of concrete need to be separated into independently moving sections.
  • Construction joints are where one concrete pour ends and another begins. They’re placed at the end of a workday or where a pour is interrupted, and they’re designed to allow the two pours to bond together and behave as a unit.

Understanding the distinction matters when specifying joint type, location, and detailing. The wrong joint type in the wrong location can accelerate deterioration rather than prevent it.

How Control Joints Are Installed

Control joints can be formed in fresh concrete or cut into hardened concrete, depending on the timing and method. Each approach has specific applications and requirements.

Saw-Cut Joints

Saw cutting is the most common method for installing control joints in flatwork. After the concrete has been placed and finished but before random shrinkage cracking begins, a concrete saw, either a conventional wet saw or an early-entry dry saw, is used to cut joints to the required depth.

Timing is critical. The window for saw cutting is driven by a balance between two risks:

  • Cut too early, and the saw ravels the joint edges, creating ragged, unacceptable lines as the aggregate is pulled loose by the blade.
  • Cut too late, and random cracking forms before the joints are installed, defeating their purpose entirely.

In practice, this window typically falls between 4 and 12 hours after concrete placement, though temperature, humidity, mix design, and slab thickness all affect the timing. In hot or windy conditions, the window can close within hours. Experienced contractors monitor the slab closely and cut at the right moment.

Early-entry dry-cut saws allow joint cutting to begin as soon as 1–2 hours after finishing, significantly reducing the risk of random cracking in challenging weather conditions. These saws use specialized blades designed to cut without water during the critical early period, then be followed up with conventional wet sawing if greater depth is required.

Formed or Tooled Joints

In fresh concrete, a jointing tool or grooving tool can be used to create a weakened plane during or immediately after finishing. Formed joints are common in residential flatwork such as driveways, patios, and sidewalks. While faster and lower-cost than saw cutting, tooled joints may not achieve the precise depth and width control of a saw-cut joint, and they are generally not used in high-performance industrial or infrastructure applications.

Inserts

Plastic or hardboard joint inserts can be pressed into fresh concrete immediately after placement to create a weakened plane. Inserts are particularly useful when early-entry sawing isn’t feasible or where forming the joint in advance provides a scheduling advantage. Insert depth must still meet the one-quarter-slab-thickness minimum to be effective.

Control Joint Design Guidelines

The effectiveness of control joints depends entirely on correct design. A joint in the wrong location, at the wrong depth, or spaced too far apart will not control cracking, it will simply add cost without benefit.

Depth

The universally accepted minimum for control joint depth is one-quarter of the slab thickness. For a 4-inch slab, that’s a minimum of 1 inch. For a 6-inch slab, 1.5 inches minimum. ACI 360R (the American Concrete Institute’s guide for slabs-on-ground) provides additional guidance on depth for specific applications.

Shallower joints are a common mistake and a common reason joints fail to control cracking. A joint that’s only 3/8 inch deep in a 4-inch slab has not created a sufficient stress concentration to attract the crack.

Spacing

A widely used rule of thumb is to space control joints at no more than 2 to 3 times the slab thickness in feet. For a 4-inch slab, that suggests joints every 8 to 12 feet. For a 6-inch slab, 12 to 18 feet.

Spacing recommendations also depend on aggregate size (slabs with larger maximum aggregate can tolerate wider joint spacing), water-to-cement ratio (higher W/C increases shrinkage and may require tighter spacing), subgrade conditions, and whether any reinforcement is present. Reinforced slabs can sometimes accommodate wider joint spacing, though the reinforcement must be designed to control crack width rather than prevent cracking entirely.

Layout and Pattern

Control joint panels should be as square as possible. Rectangular panels with length-to-width ratios greater than 1.5:1 tend to crack diagonally in the center rather than along the joints. Re-entrant corners, L-shaped or T-shaped areas, are natural stress concentration points and almost always crack without additional joint placement at the corner.

Joints should also be located at changes in slab thickness, at columns and other point load locations, and where the subgrade changes character (for example, at the interface between filled and undisturbed soil).

Joint Width

Saw-cut joints are typically 1/8 to 3/16 inch wide for standard flatwork. Wider joints may be appropriate when sealant is specified, as joint sealants require a specific width-to-depth ratio to perform correctly. Excessively narrow joints may not allow proper sealant installation; excessively wide joints can compromise load transfer through aggregate interlock.

How Control Joints Improve Concrete Performance

Structural Integrity

By concentrating cracking at planned, designed locations, control joints preserve the structural integrity of the slab between joints. Random cracks, particularly those that run diagonally or form in high-stress zones like re-entrant corners, can propagate unpredictably and lead to spalling, delamination, or loss of load transfer across the crack face. Control joints keep cracking predictable, manageable, and structurally sound.

Surface Aesthetics

Random cracking is visually disruptive and often impossible to fully repair. A crack that wanders across the center of a decorative concrete floor, an exposed aggregate driveway, or a polished warehouse slab is both unsightly and a maintenance problem. Control joints channel that inevitable movement to lines that can be made to blend with the overall layout of the project, aligned with column bays, tile patterns, or architectural features, so that the slab’s appearance remains consistent and intentional over time.

Safety

Uncontrolled cracking creates safety hazards that properly designed control joints help prevent:

  • Trip hazards: Random cracks can develop differential vertical displacement over time, one side of the crack rises or drops relative to the other as the subgrade settles unevenly. This creates an edge that pedestrians, forklifts, and other traffic can catch, causing falls or equipment damage. Control joints, when properly located and sealed, are designed to move together and maintain a flush profile.
  • Water infiltration: Open, random cracks allow water to penetrate the slab and reach the subgrade, where it can erode support, promote freeze-thaw damage, and accelerate deterioration. Sealed control joints manage this water pathway in a controlled, maintainable way.
  • Spalling and surface deterioration: In freeze-thaw climates, water that enters a random crack can freeze, expand, and progressively widen the crack, leading to spalling and surface loss. A sealed joint significantly limits this mechanism.
  • Delamination of surface treatments: Coatings, overlays, and sealers applied over uncontrolled random cracks will eventually crack and delaminate at those locations. Control joints that are properly reflected through surface treatments maintain the coating system’s integrity.

Long-Term Maintenance

Properly placed and sealed control joints are far easier and less expensive to maintain than random cracks. A sealed joint can be re-sealed as the sealant ages. A random crack typically requires routing and sealing, grinding to restore flush surfaces, or in severe cases, slab replacement. The maintenance cost difference over a 20- or 30-year slab lifecycle is substantial.

Should Control Joints Be Sealed?

In most commercial, industrial, and exterior applications, yes. Sealing control joints serves several functions: it prevents water and debris from entering the joint, protects the joint edges from vehicle or foot traffic damage, and in some applications, provides a degree of load transfer support at the joint face.

The appropriate sealant depends on the application. Exterior joints in pavement or flatwork are typically sealed with semi-rigid or flexible polyurethane or polysulfide sealants. Interior joints in warehouse or industrial floors may be sealed with semi-rigid epoxy or polyurea sealants that provide edge support under hard-wheel forklift traffic. In decorative applications, colored or matching sealants can be used to make joints blend into the surface treatment.

Joint sealants have a service life and must be periodically inspected and replaced. A maintenance program that includes re-sealing joints as sealants age is far less expensive than repairing the water damage and surface deterioration that results from neglected joints.

Common Control Joint Mistakes to Avoid

Cutting Too Late

This is the most common and most damaging error. Once random cracks have formed ahead of the saw, the job cannot be undone. The concrete has cracked where it wanted to, not where the joint was planned. Monitoring cure rate and cutting at the right time requires experience and attention to site conditions.

Insufficient Depth

A joint that’s too shallow will not create a sufficient weakened plane. The slab will crack randomly rather than along the joint. Always verify that joint depth meets or exceeds the one-quarter slab thickness minimum.

Incorrect Spacing

Joints spaced too far apart leave large slab panels that generate more shrinkage stress than the joint can absorb. The result is mid-panel cracking. When in doubt, tighter spacing is generally safer than wider spacing.

Ignoring Re-Entrant Corners

L-shaped, T-shaped, and other irregular slab geometries create stress concentration points at interior corners that almost always crack without supplemental joint placement. Diagonal cracks from re-entrant corners are one of the most common and most preventable failures in concrete flatwork.

Misaligned or Inconsistent Joints

Control joints must run continuously across the full width of the slab panel. A joint that terminates mid-slab or is misaligned with a joint on the other side of a wall or column creates an unresolved stress path. Random cracking will fill the gap.

Control Joint Applications Across Project Types

Flatwork and Slabs-on-Ground

Driveways, sidewalks, parking lots, patios, and warehouse floors are the most common applications for control joints. In residential flatwork, tooled joints are standard. In commercial and industrial flatwork, saw-cut joints are preferred for their precision and depth control.

Walls and Vertical Structures

Concrete walls, retaining walls, tilt-up panels, cast-in-place foundations, are also subject to shrinkage and thermal movement cracking. Vertical control joints in walls follow the same principle: a saw cut or formed groove at regular intervals creates a weakened plane that channels cracking to a planned location.

Pavements and Infrastructure

Highway and airport pavement design is built around a rigorous system of control joints, expansion joints, and dowel-bar load transfer systems. The joint patterns in concrete pavement are engineered to manage the forces generated by heavy vehicle loads, wide temperature swings, and the long service life demands of public infrastructure. AASHTO and FHWA guidelines provide detailed specifications for joint design in these applications.

Bridge Decks

Bridge deck joints must manage both thermal movement and the dynamic loads from vehicle traffic. The joint detailing in bridge work is more complex than in standard flatwork, often incorporating armored joint edges, compression seals, and drainage provisions to manage the high volume of water and debris that bridge decks are exposed to.

Penhall’s Concrete Cutting Services for Control Joints

Precise, on-time saw cutting is essential to effective control joint installation. Cut too early and you damage the joint. Cut too late and the concrete has already cracked. Penhall Company’s concrete cutting services include saw cutting for control joint installation as part of a comprehensive flatwork and infrastructure service offering.

As North America’s largest provider of concrete cutting, coring, and demolition services, Penhall brings the equipment availability, crew experience, and scheduling reliability to make sure joints are cut in the right location, at the right depth, at the right time, on projects ranging from standard commercial flatwork to complex infrastructure rehabilitation.

Penhall’s broader service offering includes GPR concrete scanning for pre-work utility and reinforcement location, selective demolition, hydrodemolition, and structural repair, allowing Penhall to support the complete project lifecycle from initial scanning through concrete removal, surface preparation, and restoration. With locations across the country, Penhall can mobilize quickly for projects in any region.
frequently asked questions

What are control joints in concrete?

Control joints are intentional, pre-planned grooves or saw cuts made in a concrete slab or wall to create a weakened plane that guides where cracks will occur as the concrete shrinks, expands, and settles. Rather than letting cracks form randomly, control joint concrete design channels cracking to specific, predictable locations that are easier to manage and less damaging to the structure.

What is the difference between a control joint and an expansion joint?

A control joint is a weakened plane cut into the concrete to control where shrinkage cracks occur. An expansion joint is a full break in the concrete, usually filled with a compressible material, that allows adjacent sections to expand and contract without generating compressive stress against each other. Control joints manage internal stress within a slab; expansion joints separate two adjacent slabs or structures entirely.

How deep should control joints be cut?

Control joints should be cut to a minimum depth of one-quarter of the slab thickness. For a 4-inch slab, that means at least 1 inch deep. For a 6-inch slab, at least 1.5 inches. Shallower joints are one of the most common reasons control joints fail to prevent random cracking.

How far apart should control joints be spaced?

A commonly used guideline is to space control joints no more than 2 to 3 times the slab thickness in feet. For a 4-inch slab, that means joints every 8 to 12 feet. For a 6-inch slab, every 12 to 18 feet. ACI 360R and other standards provide more detailed guidance based on aggregate size, mix design, and subgrade conditions.

When should control joints be saw cut?

Saw-cut control joints should be made as early as possible after the concrete has hardened enough to resist raveling, typically within 4 to 12 hours of placement depending on temperature, humidity, and mix design. In hot or windy weather, the window can close much faster. Early-entry dry-cut saws can begin cutting within 1–2 hours of finishing, which significantly reduces the risk of random cracking getting ahead of the saw.

Do control joints prevent cracking?

No. Control joints do not prevent cracking, they redirect it. Concrete will crack as it cures and moves over time. The goal of control joint concrete design is to ensure that cracking occurs at planned, inconspicuous, maintainable locations rather than wandering randomly across the visible surface.

Do control joints need to be sealed?

In most exterior and commercial applications, yes. Sealing control joints prevents water and debris infiltration, protects joint edges from traffic damage, and extends the life of the joint and the slab. Sealant type depends on the application: semi-rigid sealants for industrial floors, flexible polyurethane or polyurea for exterior pavement, and specialty products for decorative or high-traffic applications. Joint sealants have a finite service life and should be inspected and replaced as part of a routine maintenance program.

How do I get concrete cutting services from Penhall for control joint installation?

Visit Penhall’s concrete cutting service page or contact Penhall directly. To receive the most accurate estimate for control joint saw cutting, have your project location, slab dimensions and thickness, concrete mix design if available, and project schedule ready to share.

What Impacts the Cost of Concrete Cutting and Coring?

A straightforward breakdown of concrete cutting cost and concrete coring cost — what you’re really paying for, and why prices vary so much from project to project.

CALL FOR A QUOTE
1-800-736-4255

At a Glance

  • Concrete cutting cost typically ranges from $5 to $35+ per linear foot, while concrete coring cost ranges from $75 to $500+ per core — but both figures depend heavily on project-specific variables.
  • The biggest cost drivers are concrete thickness and depth, rebar presence and density, core or cut diameter, material hardness, and site accessibility.
  • Reinforced concrete — especially slabs and walls with post-tension cables — is significantly more expensive to cut or core than plain concrete because it accelerates blade and bit wear.
  • Mobilization, project location, scheduling, and whether GPR scanning is needed before work begins all factor into the final price.
  • Getting an accurate quote requires knowing your concrete’s thickness, PSI rating, reinforcement type, and site conditions. Ballpark estimates without this information are rarely reliable.
  • Penhall Company provides concrete cutting and coring services nationwide, with experienced crews and industry-leading safety standards.

Key Factors That Influence Concrete Cutting Cost

Concrete Thickness

Thickness is one of the most direct variables in concrete cutting cost. The thicker the material, the longer each cut takes, the faster blades wear, and the more passes may be required to complete the cut.

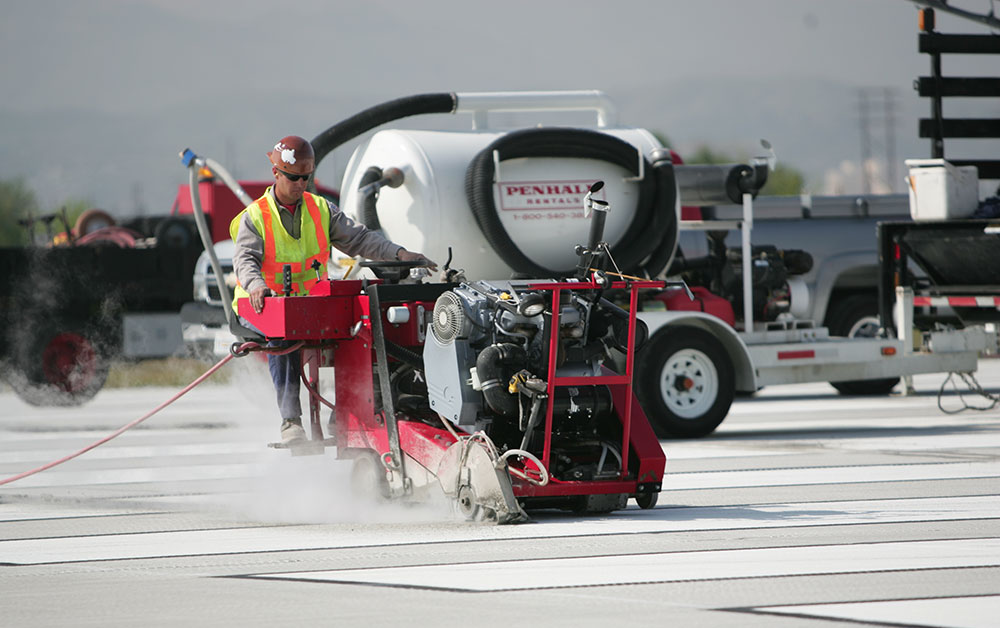
For flat sawing, the most common type of concrete cutting, used to cut horizontal slabs, blade depth is limited by equipment capacity. Standard flat saws can cut up to about 13–14 inches in a single pass. Thicker cuts require multiple passes, increasing time and cost. Wall saws and wire saws can handle greater thicknesses, but the equipment is more specialized and commands higher rates.

As a general benchmark: a straightforward cut through a 4-inch unreinforced slab will cost less per linear foot than a cut through an 8-inch reinforced slab, which will cost less than a cut through a 12-inch post-tensioned wall.

Reinforcement Type and Density

Rebar and wire mesh are the most common forms of concrete reinforcement, and both increase cutting and coring costs, but post-tension (PT) cables are in a category of their own.

When diamond blades or drill bits encounter steel, they wear significantly faster than when cutting plain concrete. A job that might yield 500 linear feet per blade on unreinforced concrete might yield only 200 feet per blade on heavily rebar-laden material. That’s more than double the blade consumption, and blades are a significant cost in any concrete cutting project.

Post-tension cables require an additional layer of precaution. PT cables are under extreme tension, and cutting through one without knowing its location can cause sudden cable release, posing a serious safety risk and potentially damaging the structure. Contractors working in post-tensioned structures must know the cable layout before cutting begins, which typically requires a GPR scan prior to any cutting or coring work. That scan is an additional cost but a non-negotiable one.

Concrete Hardness and Mix Design

Concrete is specified by its compressive strength, measured in PSI. Standard residential concrete is typically 3,000–4,000 PSI. Commercial and industrial concrete is often 5,000–8,000 PSI or higher. The harder the concrete, the faster it wears cutting equipment.

Ironically, very soft or aggregate-heavy concrete can also be harder on blades, certain aggregate types like quartzite or flint are extremely abrasive. This is why experienced contractors ask about the concrete type and age when quoting, not just the thickness.

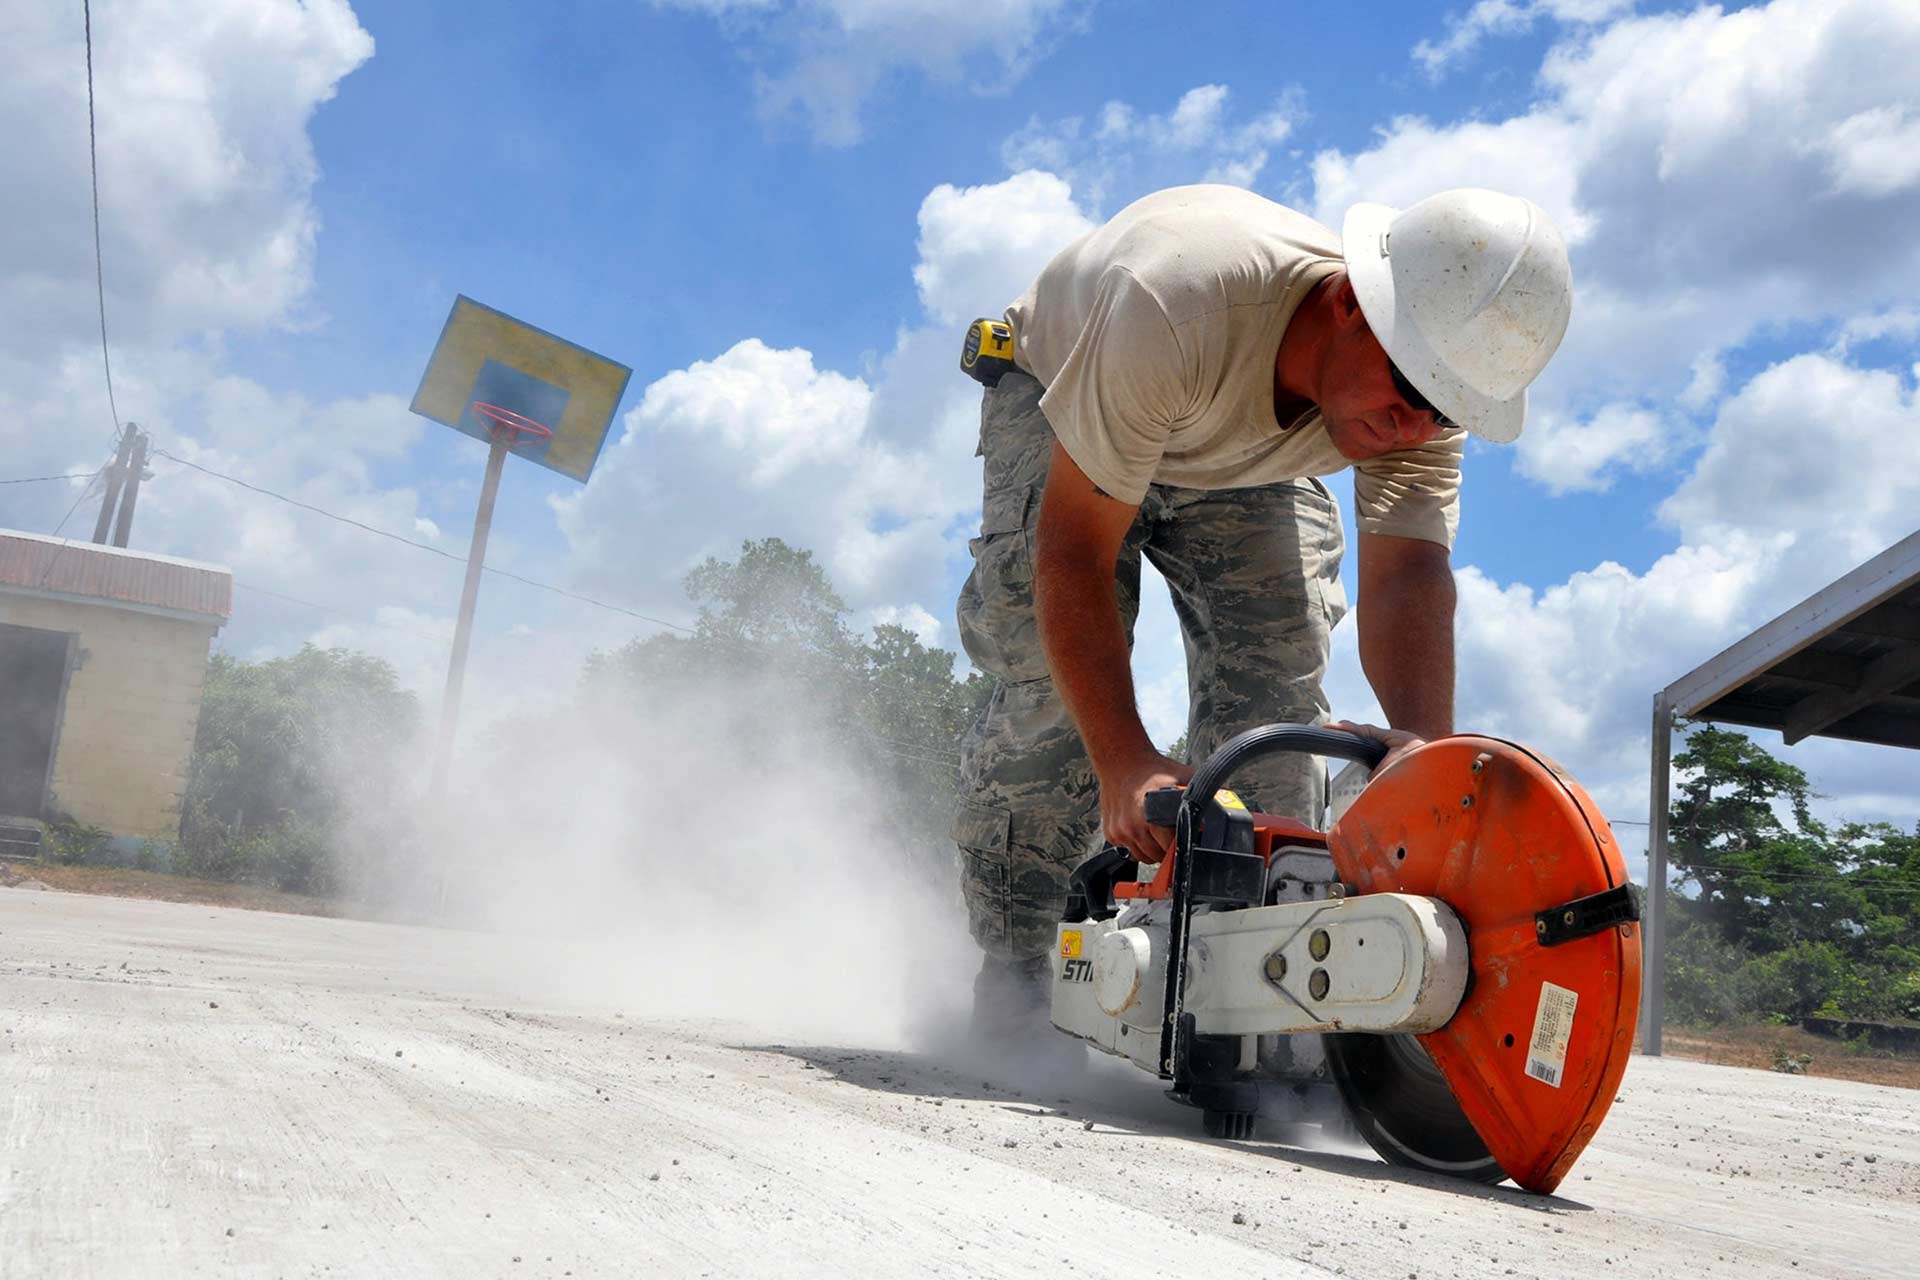
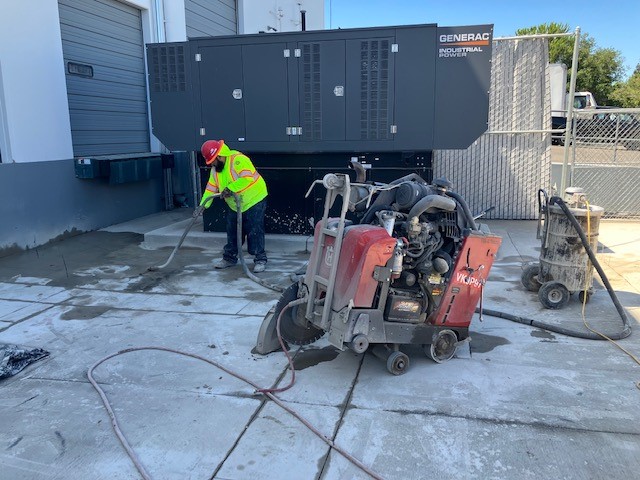
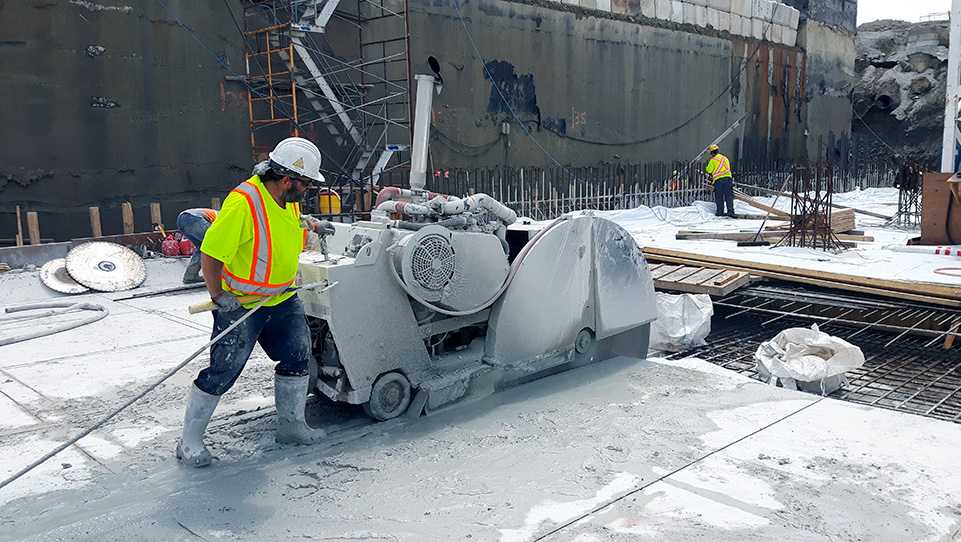
Graff team member using saw to cut through concrete
2_JoeOsborn

Type of Cut Required

Not all cuts are created equal. Different cutting methods serve different applications, and each has its own cost structure:

Flat sawing (slab sawing): Used for horizontal surfaces. Generally the most cost-effective method when applicable. Priced per linear foot.

Wall sawing: Used for vertical or angled cuts in walls, columns, and elevated slabs. Requires track mounting and more setup. Higher cost per linear foot than flat sawing.

Wire sawing: Used for large, complex, or deep cuts where other methods can’t reach. Can cut through virtually any thickness. Highest cost per linear foot but sometimes the only viable option.

Hand sawing: Used in tight or inaccessible areas. Typically limited to shallower depths. Slower and more labor-intensive.

Length and Complexity of Cuts

Mobilization costs are relatively fixed regardless of the size of the job, getting crew and equipment to the site costs the same whether there’s 20 linear feet of cutting or 2,000. This means the cost per linear foot tends to decrease as the scope of work grows. Smaller jobs carry proportionally higher per-unit costs because mobilization expenses are spread across fewer linear feet.

Cut complexity also matters. A series of straight, parallel cuts across a flat open slab is the most straightforward scenario. Tight corners, multiple elevation changes, plunge cuts, or cuts in confined spaces add labor and setup time that increases per-cut cost.

Site Accessibility and Logistics

Equipment needs to get to the work area. If the cutting zone is on an open parking lot, setup is simple. If it’s in a basement with a narrow stairwell, on an elevated bridge deck, or in a live industrial facility, logistics become significantly more complex.

Overhead clearance limits which equipment can be used. Confined spaces may require smaller equipment that cuts more slowly. Working in an occupied building creates constraints around dust suppression, water management, and noise, all of which affect efficiency and cost. Access to power and water at the work site also factor in.

Water Availability and Slurry Management

Diamond cutting requires water for cooling and dust suppression. If water must be trucked in or a water management system is needed to contain and dispose of slurry, those add to project cost. OSHA’s silica dust regulations also require specific engineering controls when dry cutting isn’t permitted, which can affect required equipment and labor.

Key Factors That Influence Concrete Coring Cost

Many of the same variables that affect concrete cutting cost apply to coring as well, thickness, reinforcement, hardness, and site access all play a role. But coring has a few additional dimensions worth understanding:

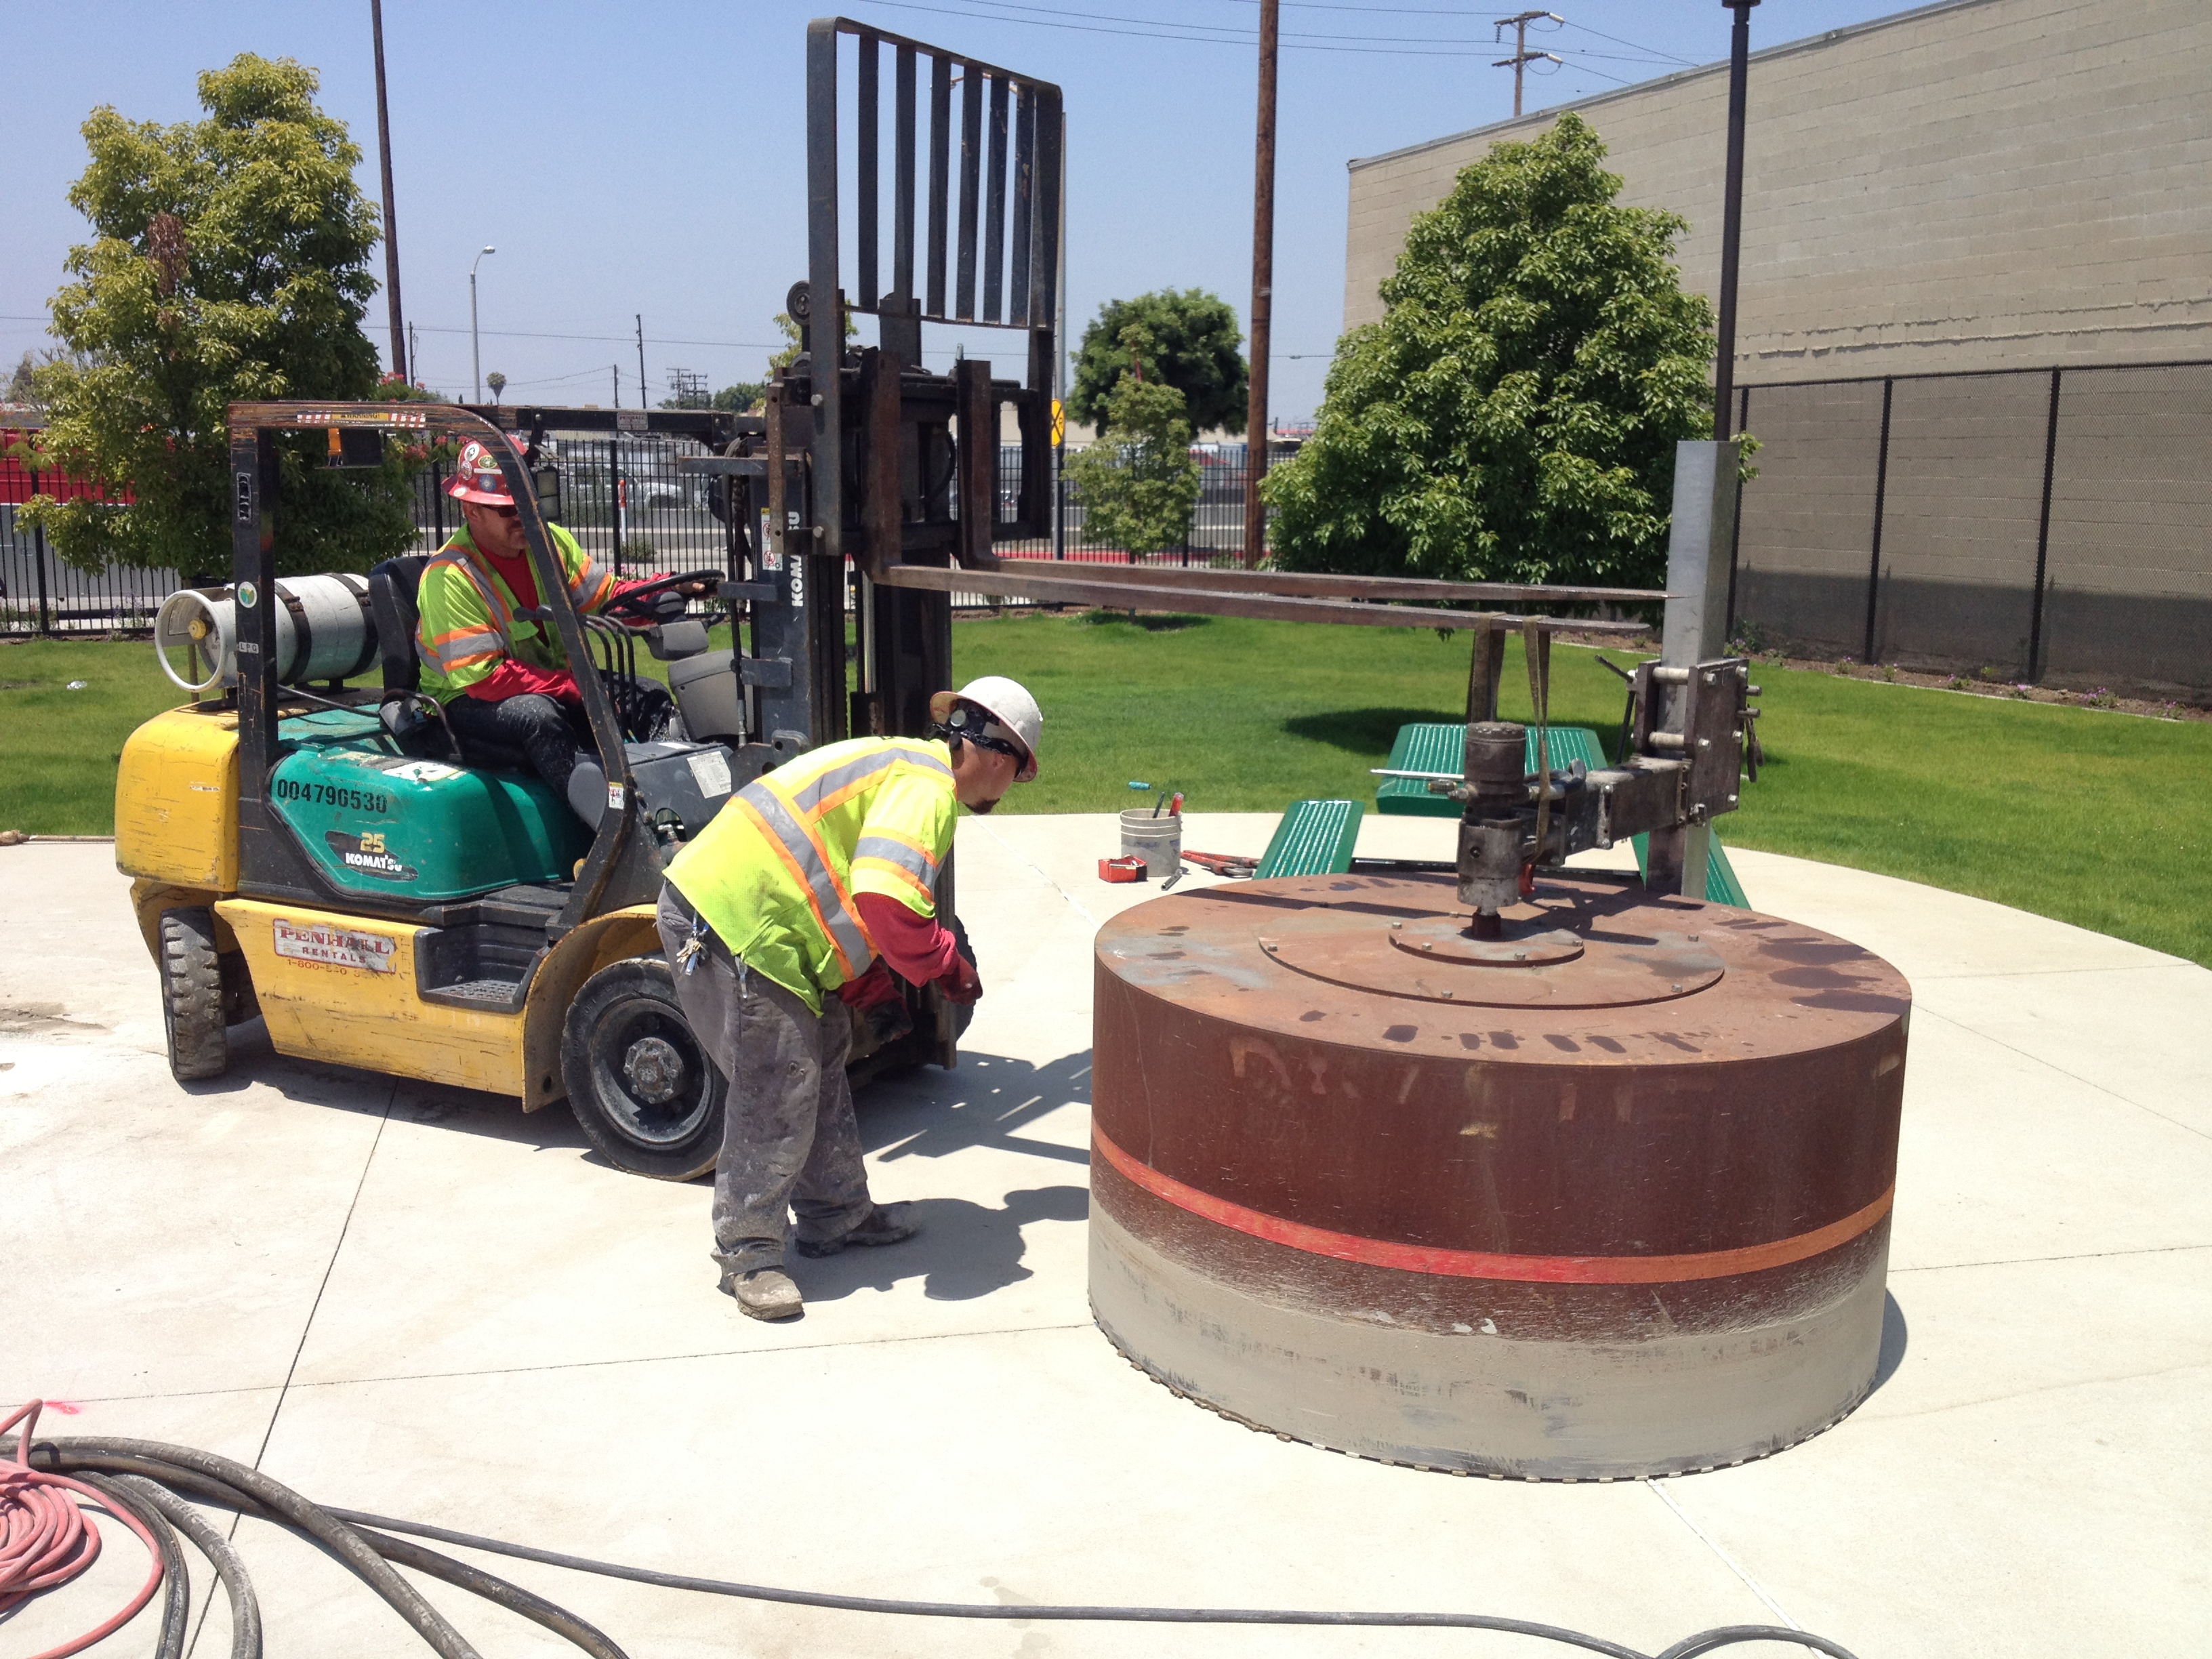
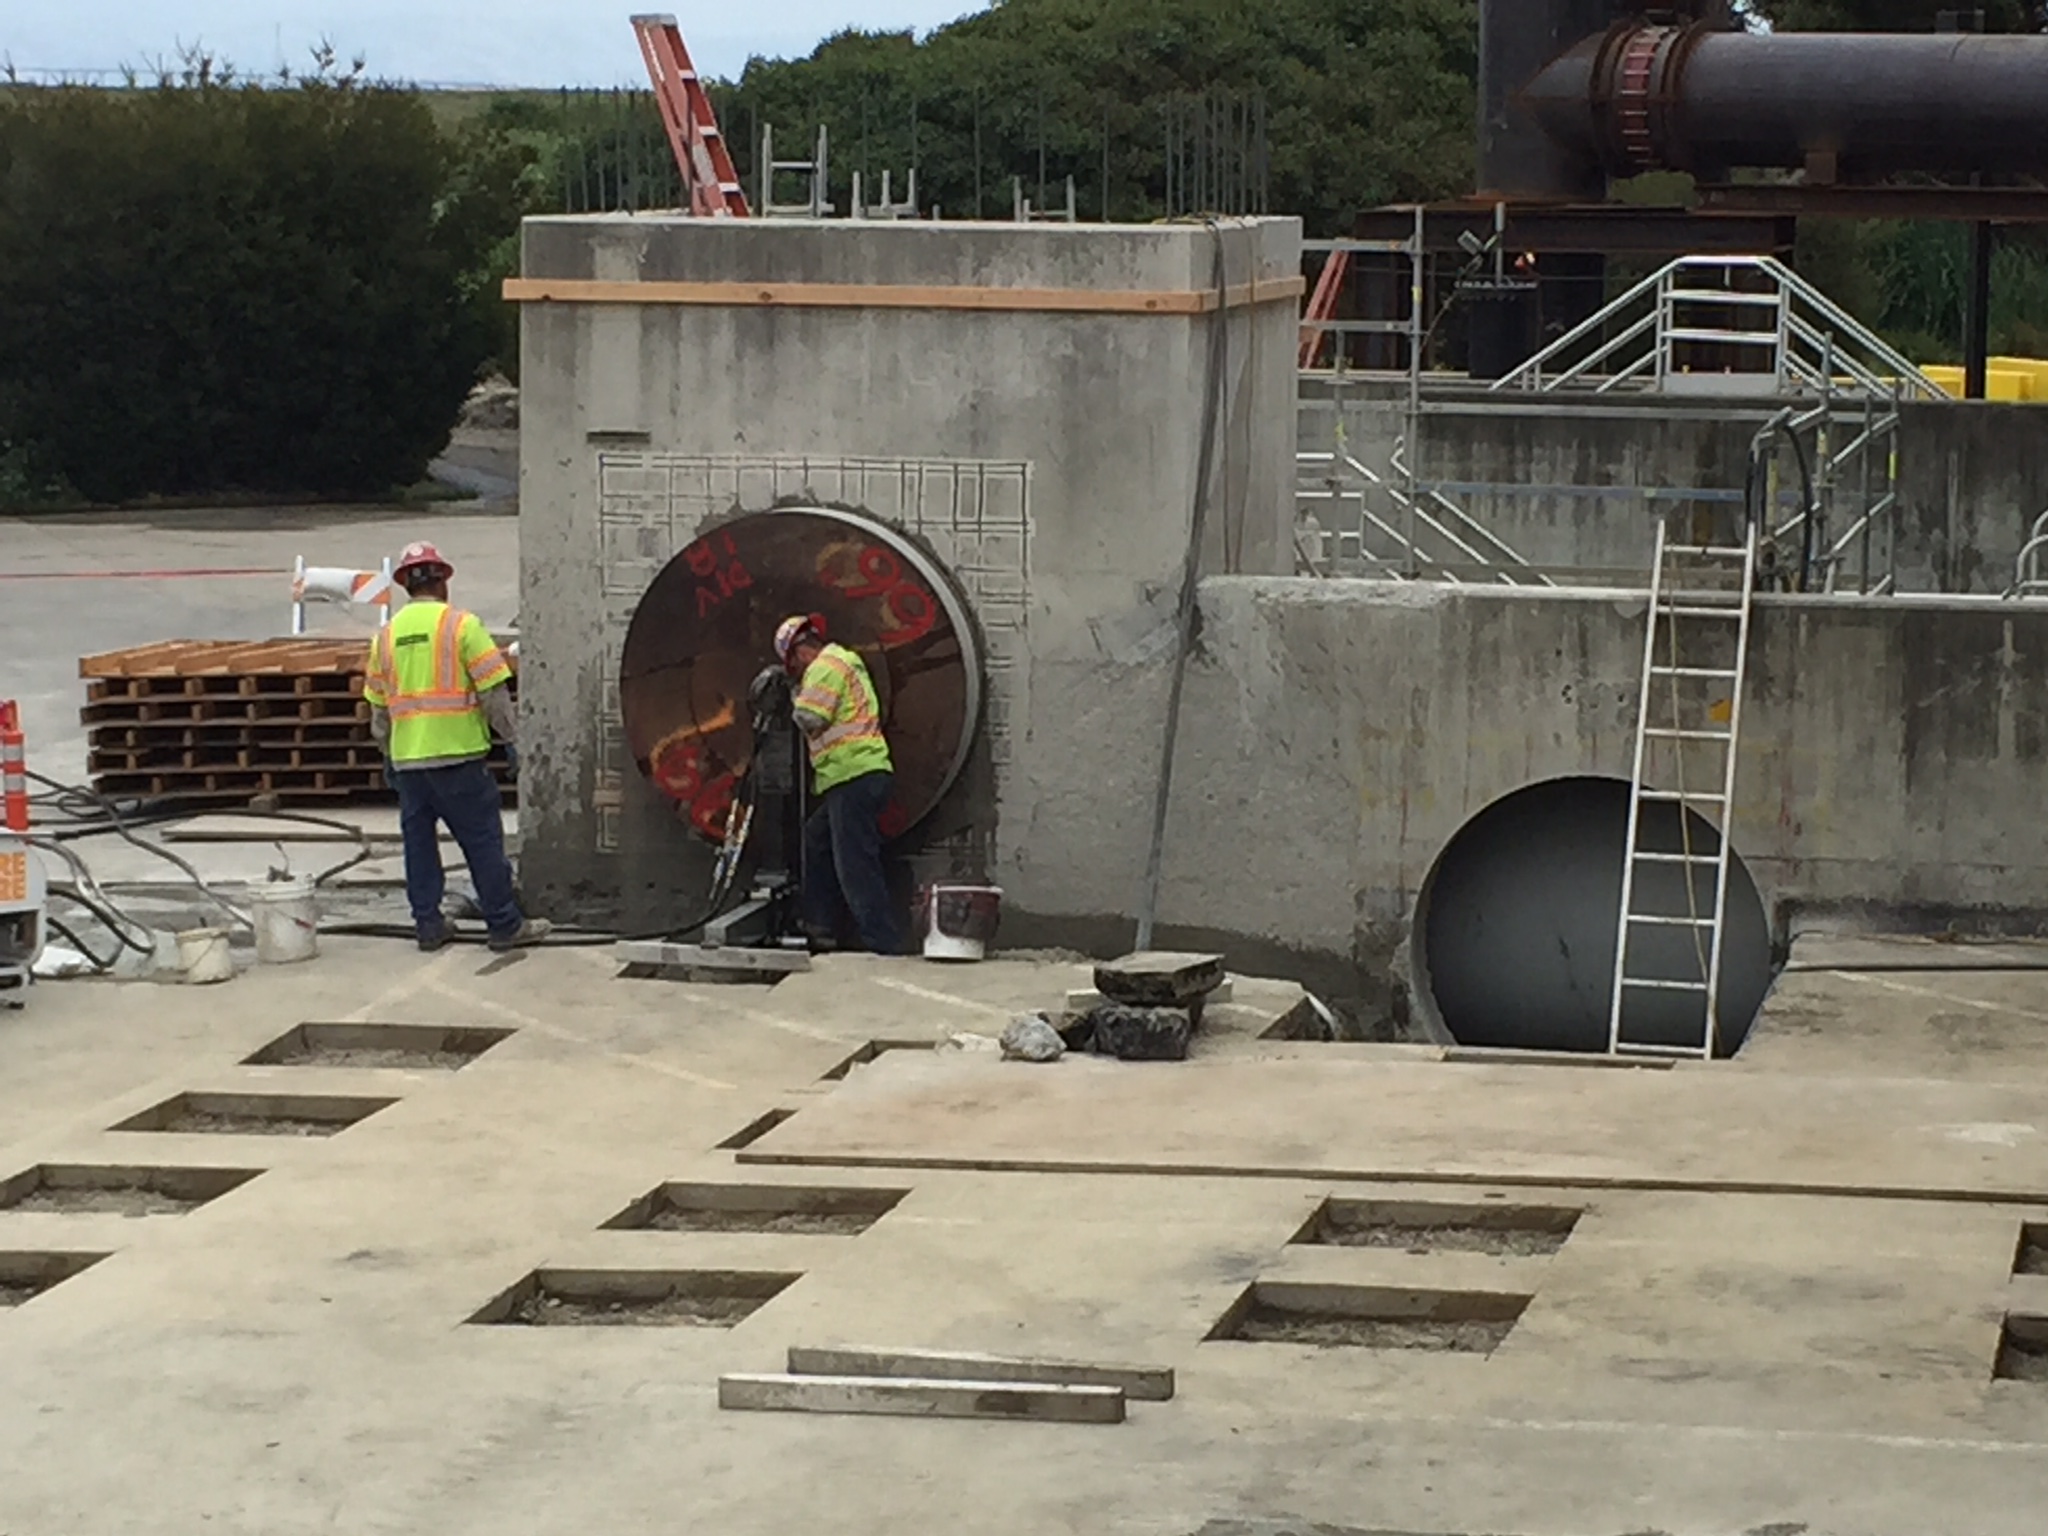
66in Diam Core 2 HPark PacWest 6-13-12
Core drilling services

Core Diameter

Core diameter is the most immediate cost variable in concrete coring. Small-diameter cores, typically 1 to 4 inches, are used for utility penetrations, test samples, and anchoring applications. Larger-diameter cores, from 6 to 36 inches or more, are used for pipes, HVAC ducts, structural openings, and other larger penetrations.

Larger diameter means a larger drill bit, more surface area being cut, greater force required, and slower drilling speed. A 4-inch core through 6 inches of unreinforced concrete is a much faster operation than a 20-inch core through the same material. Concrete coring cost scales significantly with diameter.

Depth of Core

A 6-inch core through a 4-inch slab is a fundamentally different job than a 6-inch core through a 24-inch wall. Deeper cores take longer, stress equipment more, and in some cases require core barrel extensions that add setup time. Depth is a direct multiplier on cost.

Reinforcement and Obstructions

Rebar encountered during coring accelerates bit wear and slows penetration rate. When cores need to be placed at specific locations, a GPR scan beforehand allows the crew to either avoid rebar or plan for it. Emergency repositioning of core locations in the field due to unexpected rebar adds cost and delays.

In post-tensioned slabs, hitting a PT cable with a core drill can be catastrophic. GPR scanning before coring post-tensioned concrete is not optional, it’s a safety requirement that should always be included in project scope and budget.

Number of Cores

As with cutting, mobilization costs are distributed across the total scope of work. A single core in a remote location carries a high per-core cost because the fixed costs of dispatch and setup are assigned to one penetration. A project with 50 cores of the same size in the same facility can be priced far more efficiently on a per-unit basis.

Angle and Orientation

Most concrete coring is done vertically or horizontally. Angled cores, overhead cores, or cores in confined geometries require specialized setups that take more time and sometimes require custom rigging. These scenarios carry a premium over standard coring.

Additional Cost Items to Budget For

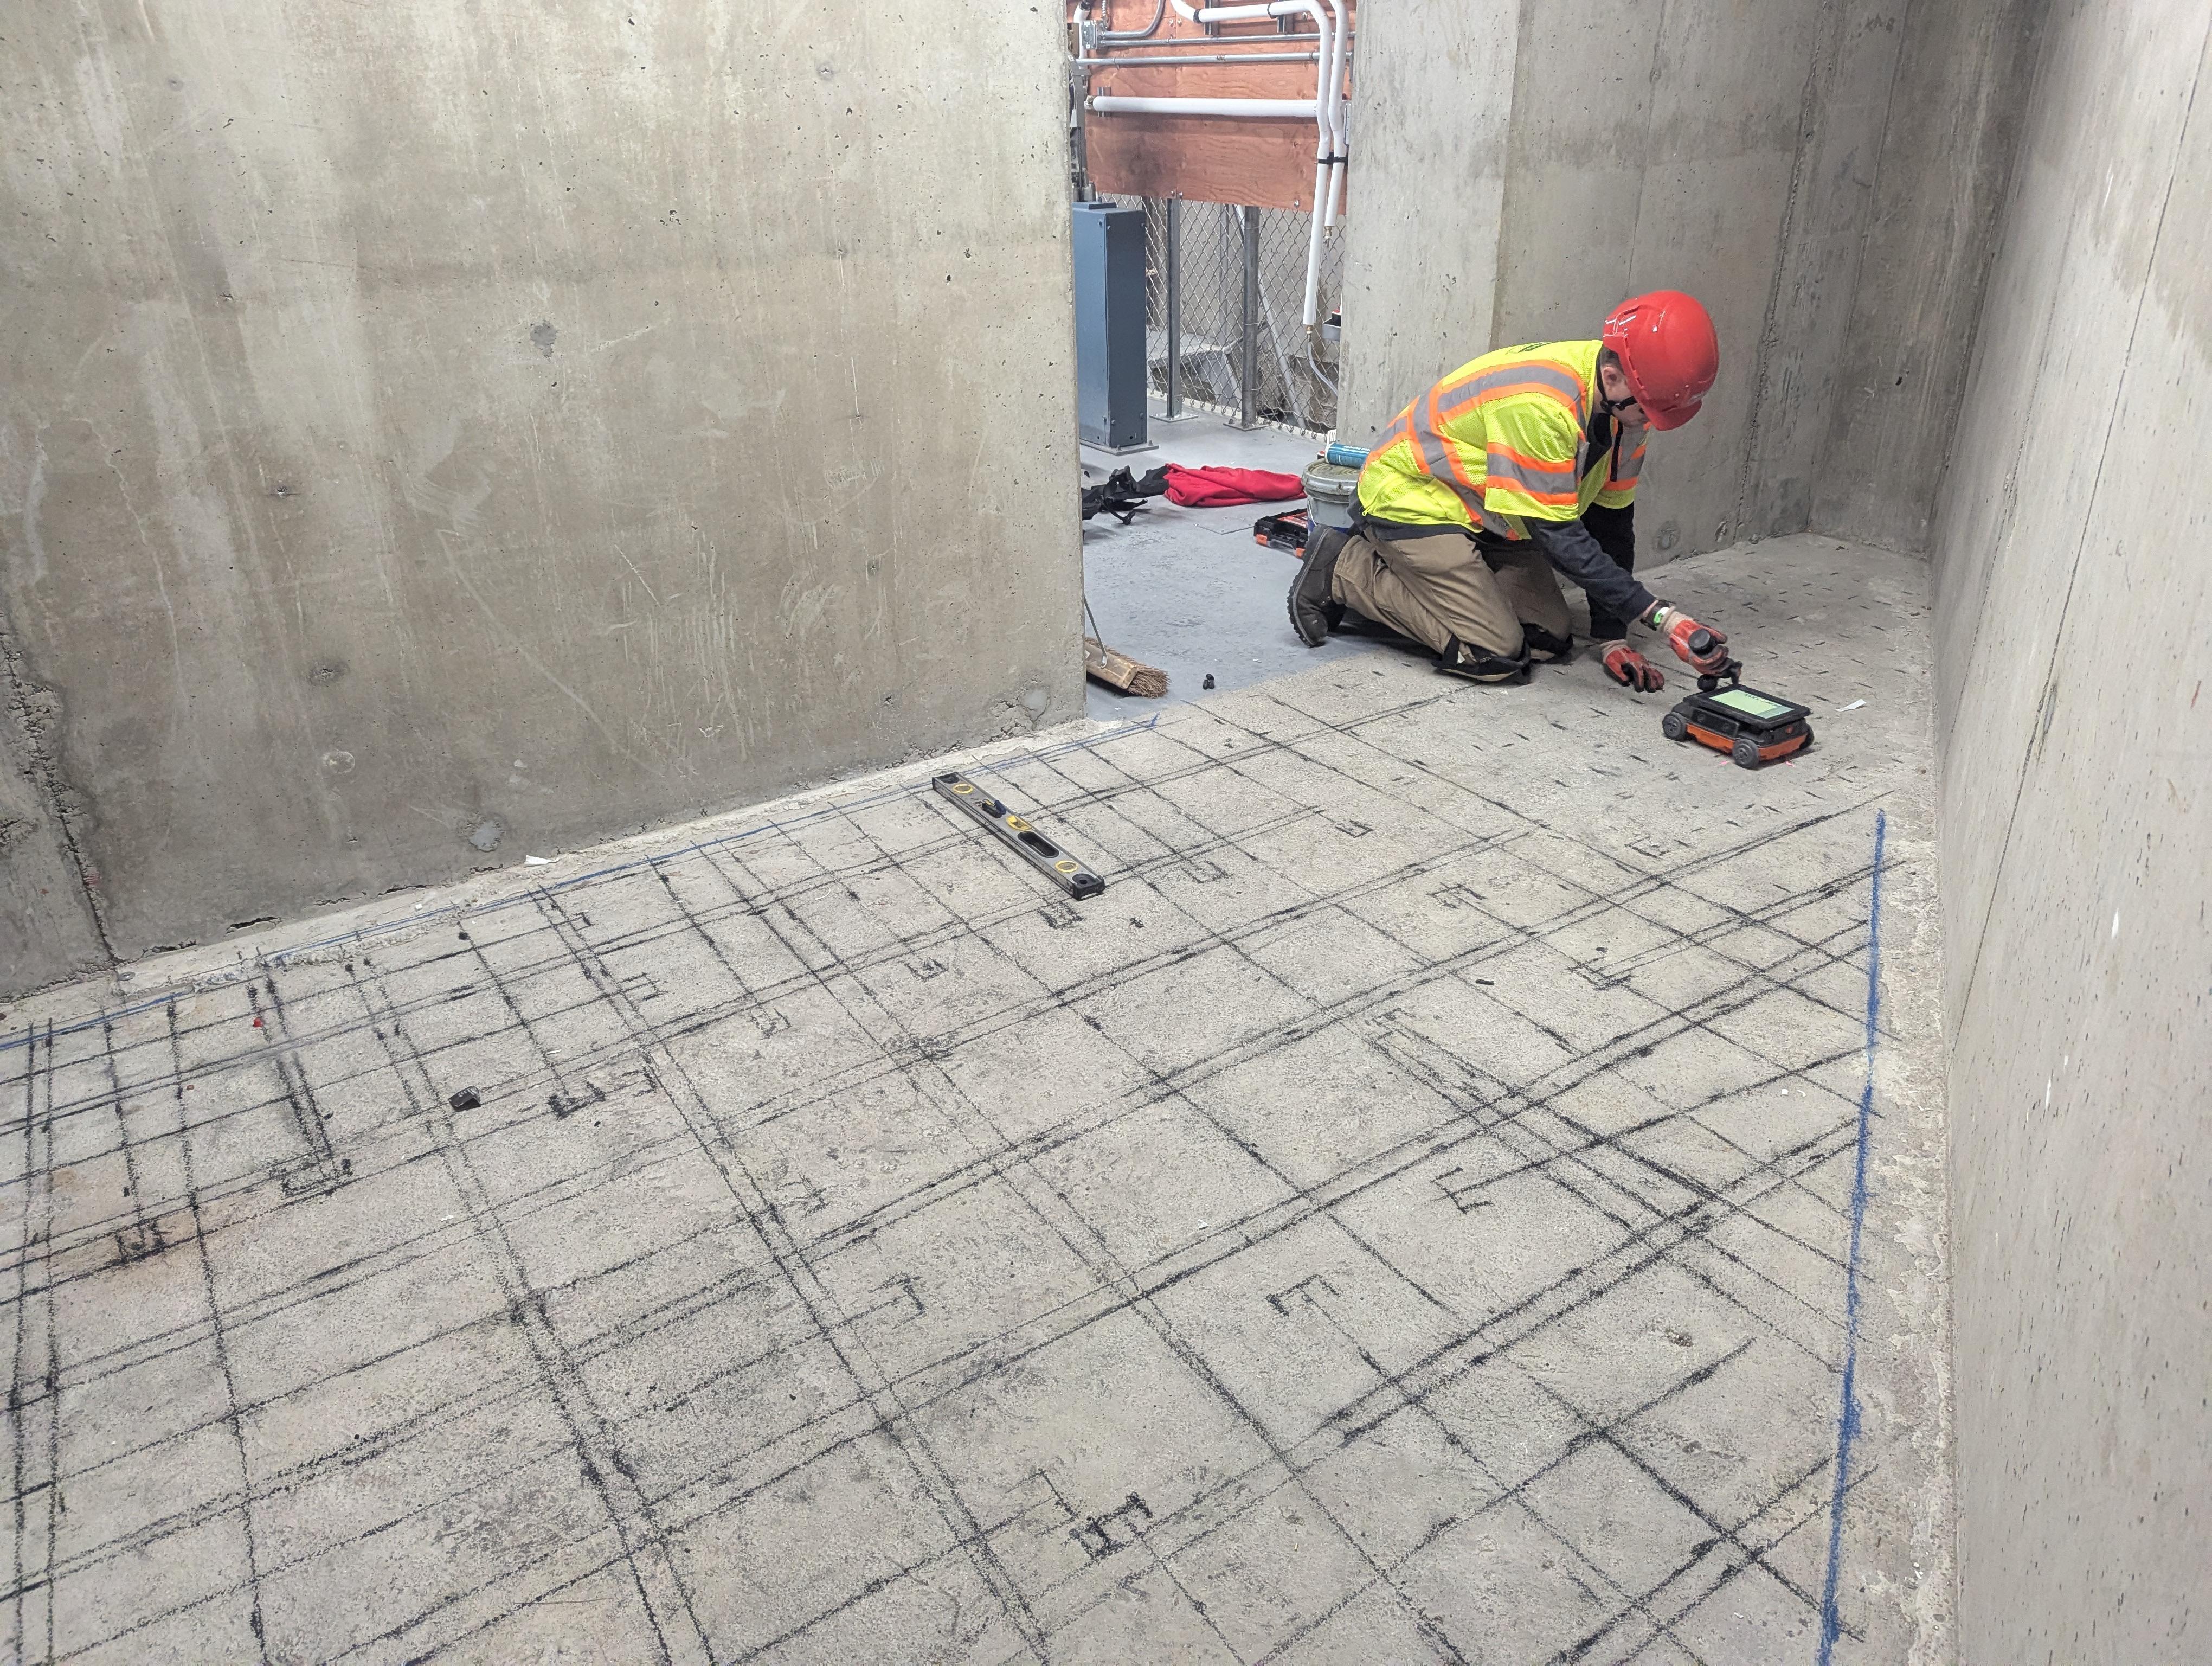
GPR Scanning

Ground Penetrating Radar (GPR) scanning is used to map the interior of concrete before cutting or coring begins. It identifies rebar locations, post-tension cables, conduits, and voids. While GPR scanning adds a line item to the project budget, it almost always saves money overall by preventing unexpected rebar hits that destroy blades, enabling strategic placement of cuts and cores to minimize reinforcement encounters, and identifying post-tension cables that could cause a safety incident if cut.

Penhall offers GPR concrete scanning as part of its suite of services, and recommends scanning before virtually any cutting or coring work begins.

Mobilization and Demobilization

Mobilization refers to the cost of getting the crew, equipment, and materials to the job site and set up. For small jobs, mobilization can represent a substantial portion of the total cost. Understanding this helps explain why getting multiple small jobs done in a single mobilization is almost always more cost-efficient than spreading them across multiple visits.

Travel and Geographic Location

Labor rates vary by region. Projects in higher cost-of-living areas or markets with tight labor availability will carry higher rates. Remote projects or those requiring long travel times will also incur additional mobilization costs.

Scheduling and Urgency

Standard business-hours scheduling is typically the most cost-effective option. After-hours, weekend, or emergency work carries overtime premiums. In some cases, project timelines or facility operations (a hospital that can’t take downtime during the day, or a highway that can only be worked on at night) necessitate off-hours scheduling, which needs to be factored into the budget.

How to Get an Accurate Concrete Cutting or Coring Quote

Ballpark figures for concrete cutting and coring are of limited value because the variables that drive cost are so specific to each project. To get an accurate quote, be ready to provide:

  • The type and dimensions of cuts or cores needed (length, diameter, depth)
  • The concrete thickness and approximate PSI or age of the structure
  • Whether the concrete is reinforced, and if so, the type of reinforcement (rebar, mesh, post-tension)
  • Project schedule requirements and any after-hours or overtime constraints

Penhall’s Concrete Cutting and Coring Services

Penhall Company’s concrete cutting and concrete coring services combine decades of field expertise with a full suite of complementary capabilities, including GPR scanning, selective demolition, and structural repair, allowing Penhall to manage the full project workflow from pre-work scanning through final restoration under a single contract.

As North America’s largest provider of concrete cutting, coring, and demolition services, Penhall brings a scale of operational depth, equipment availability, crew experience, and geographic reach, that smaller contractors cannot match. With branch locations across the country, Penhall can mobilize quickly to support projects in any region.
Penhall’s Behavior-Based Safety (BBS) program ensures that every cutting and coring project is performed with rigorous attention to worker and public safety, a critical factor on any job involving post-tension structures, occupied buildings, or active infrastructure.

Concrete Diamond Sawcutting
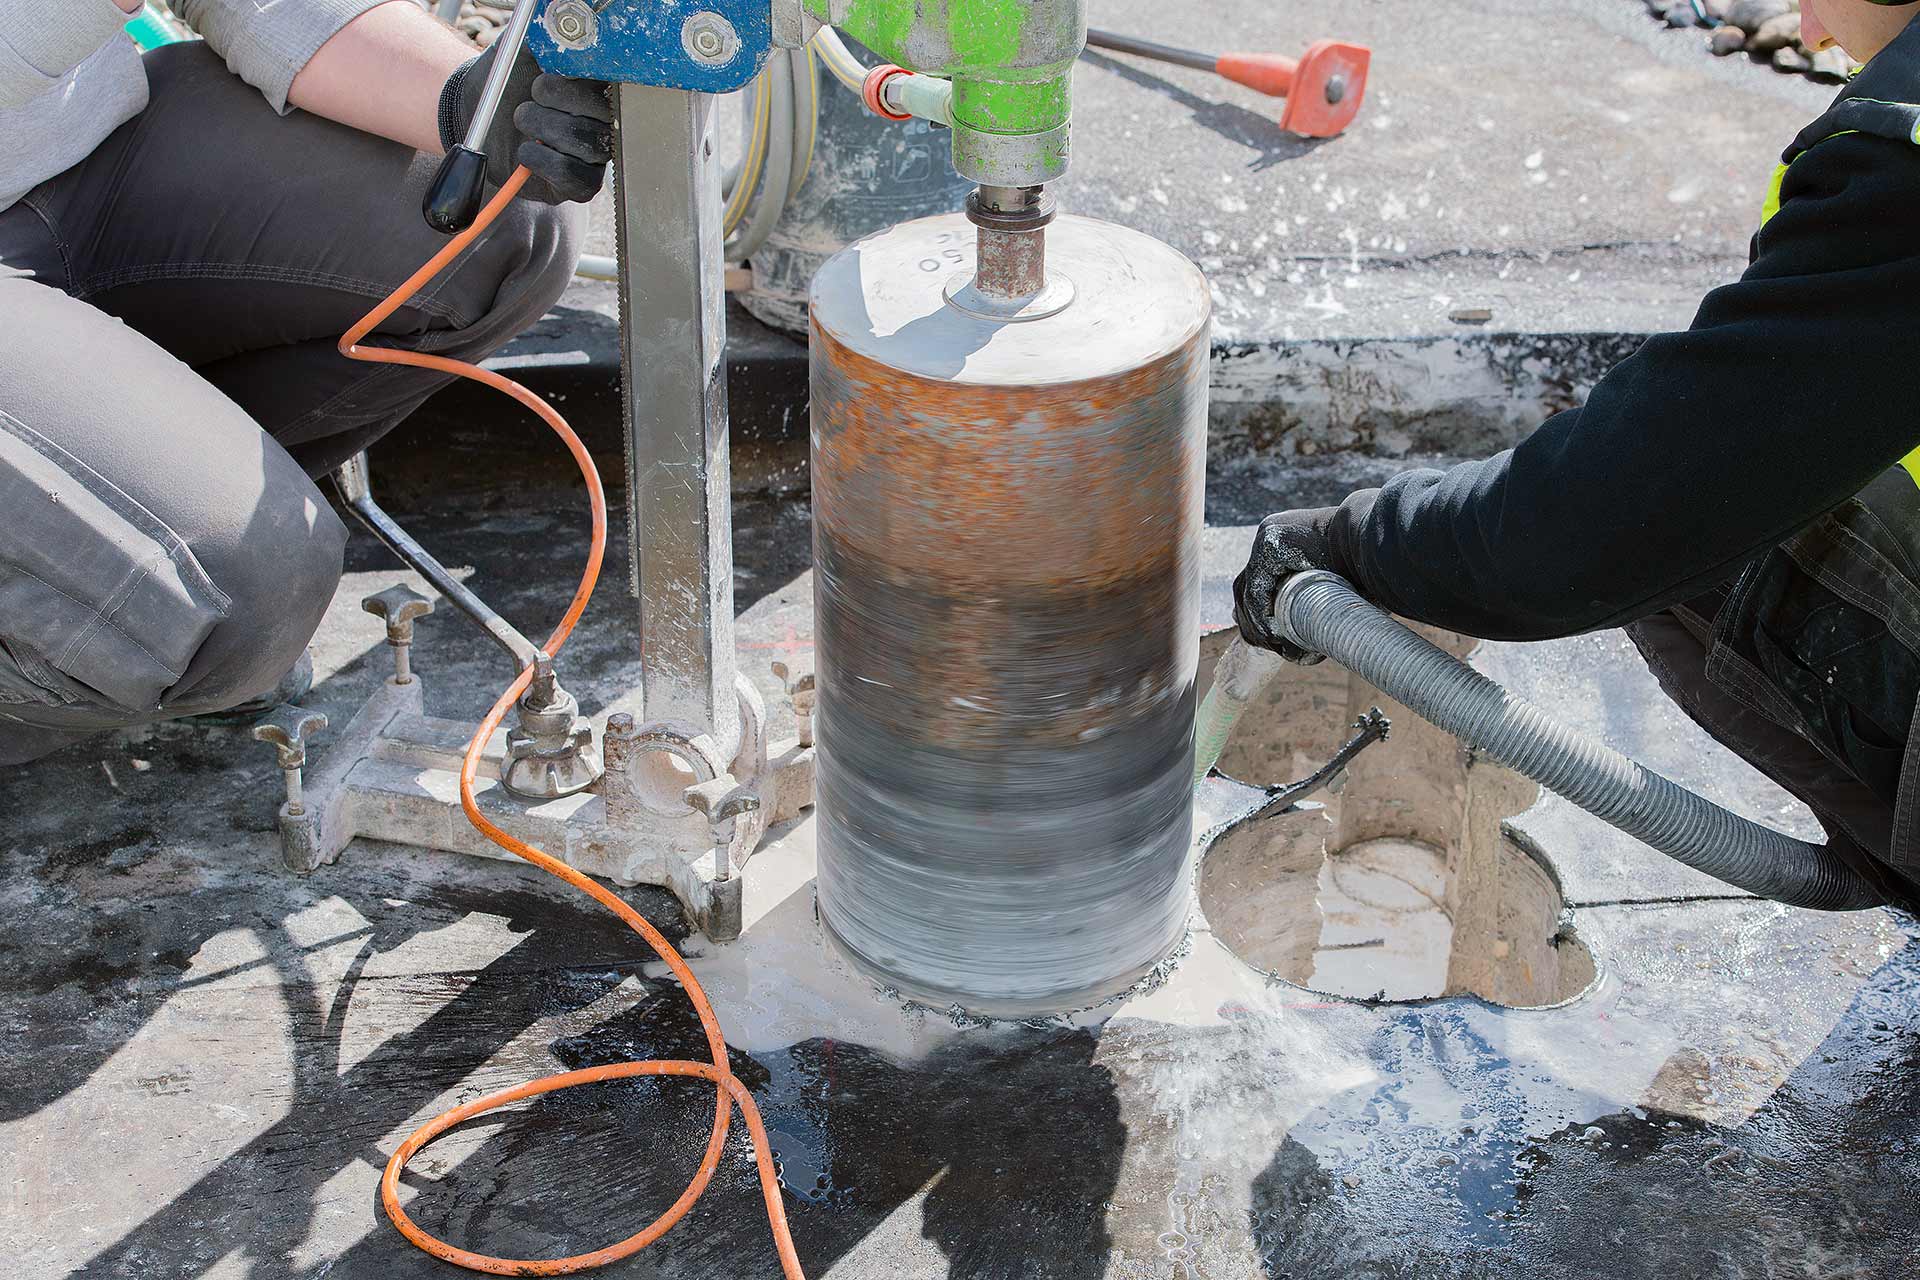
Diamond Concrete Core Drilling

frequently asked questions

How much does concrete cutting cost?

Concrete cutting cost typically ranges from $5 to $35 or more per linear foot for flat (slab) sawing, with wall sawing and wire sawing commanding higher rates. The actual cost for your project depends on concrete thickness, reinforcement, material hardness, access conditions, and the total scope of work. Contact Penhall’s concrete cutting team for a project-specific estimate.

How much does concrete coring cost?

Concrete coring cost generally ranges from $75 to $500 or more per core for standard diameters and depths. Larger diameter cores and deeper penetrations carry higher per-core prices. The number of cores being drilled in a single mobilization also significantly affects per-unit pricing. Visit Penhall’s concrete coring page to learn more or request a quote.

What is the most expensive type of concrete to cut?

Post-tensioned concrete is the most expensive type to cut or core because of the safety protocols required to avoid cutting PT cables, the need for GPR scanning beforehand, and the accelerated blade wear caused by dense reinforcement. High-PSI concrete with abrasive aggregate (such as quartzite) is also more costly than standard-strength concrete.

Do I need a GPR scan before concrete cutting or coring?

For any concrete that may be post-tensioned or that contains utilities, a GPR scan before cutting or coring is strongly recommended and often required. For standard rebar-reinforced or unreinforced concrete, a scan still helps optimize cut and core placement to minimize rebar hits, reducing blade and bit wear and keeping the job on schedule. Penhall offers concrete scanning services as a standard pre-work service.

Why does my contractor need to know the concrete thickness and PSI?

Thickness and compressive strength are the two most fundamental variables in estimating cutting and coring cost. Thickness determines how many passes are needed and whether specialized equipment is required. PSI affects how quickly blades and bits wear. Without these inputs, any quote is essentially a guess.

Can I get a flat rate for concrete cutting or coring?

Some contractors offer flat rates for simple, standardized work, for example, a standard 4-inch core through a 4-inch unreinforced slab. But for most commercial and infrastructure projects, accurate pricing requires a site review or at minimum a detailed project description. Flat rates without adequate information typically lead to change orders once the actual conditions are encountered in the field.

How do I get a concrete cutting or coring quote from Penhall?

Visit Penhall’s concrete cutting service page or concrete coring service page, or contact Penhall directly. To receive the most accurate estimate, have your project’s location, concrete thickness and type, reinforcement information, number and size of cuts or cores, and any known site conditions ready to share.

Concrete X-Ray Imaging: A Complete Guide to Seeing Inside Concrete Before You Cut

How digital X-ray technology produces real-time images of rebar, post-tension cables, conduits, and other embedded features to keep your project safe, on time, and on budget.

CALL FOR A QUOTE
1-800-736-4255

At a Glance

  • Concrete X-ray imaging (also called concrete radiography) uses X-ray radiation to produce a clear, real-time image of the interior of a concrete slab, wall, column, or beam.
  • Digital X-ray produces images in as little as 5 to 10 seconds, eliminating the delays associated with traditional film-based radiography that required off-site lab processing.
  • X-ray imaging can identify the exact location, size, and type of embedded features, including reinforcing steel (rebar), post-tension cables, electrical conduits, pipes, and wire mesh.
  • Unlike GPR scanning, X-ray requires access to both sides of the concrete, meaning it cannot be used on slab-on-grade applications.
  • X-ray is the preferred method for highly congested slabs where GPR data becomes too difficult to interpret, providing definitive clarity where radar falls short.
  • Radiation exposure from concrete X-ray imaging is minimal and well below state-mandated safety thresholds. Certified radiographers follow strict safety protocols on every scan.
  • Penhall Technologies offers digital concrete X-ray imaging services performed by trained and certified radiographers, backed by over 65 years of concrete industry expertise.

Why You Need to See Inside Concrete Before Cutting or Coring

Every concrete slab, wall, and beam contains hidden features. Reinforcing steel (rebar), post-tension cables, electrical conduits, pipes, and wire mesh are all commonly embedded within concrete structures. Striking any of these during cutting, coring, or breaking operations can have serious consequences: structural damage, electrical hazards, costly repairs, project delays, and in the case of post-tension cables, an immediate threat to worker safety.

That is why identifying the location and type of subsurface features before commencing any concrete work is not optional. It is a critical safety and planning step. And while ground penetrating radar (GPR) is the most commonly used scanning method, there are situations where GPR alone is not enough. Highly congested slabs, areas where GPR data is too cluttered to interpret, and projects that demand absolute certainty about what lies within the concrete all call for a more definitive imaging solution.

That solution is concrete X-ray imaging. In this comprehensive guide, we will explain exactly how concrete X-ray works, when it is the right choice over GPR, what it can and cannot detect, and how it fits into a safe, efficient concrete cutting workflow.

How Concrete X-Ray Imaging Works

Concrete X-ray imaging works on the same fundamental principle as a medical X-ray. Electromagnetic radiation is passed through a material, and the resulting image reveals the internal features based on how different materials absorb or transmit the radiation. Dense materials like steel rebar absorb more radiation and appear as bright, clearly defined shapes on the image, while the surrounding concrete allows more radiation to pass through.

The Digital Advantage: Real-Time Results

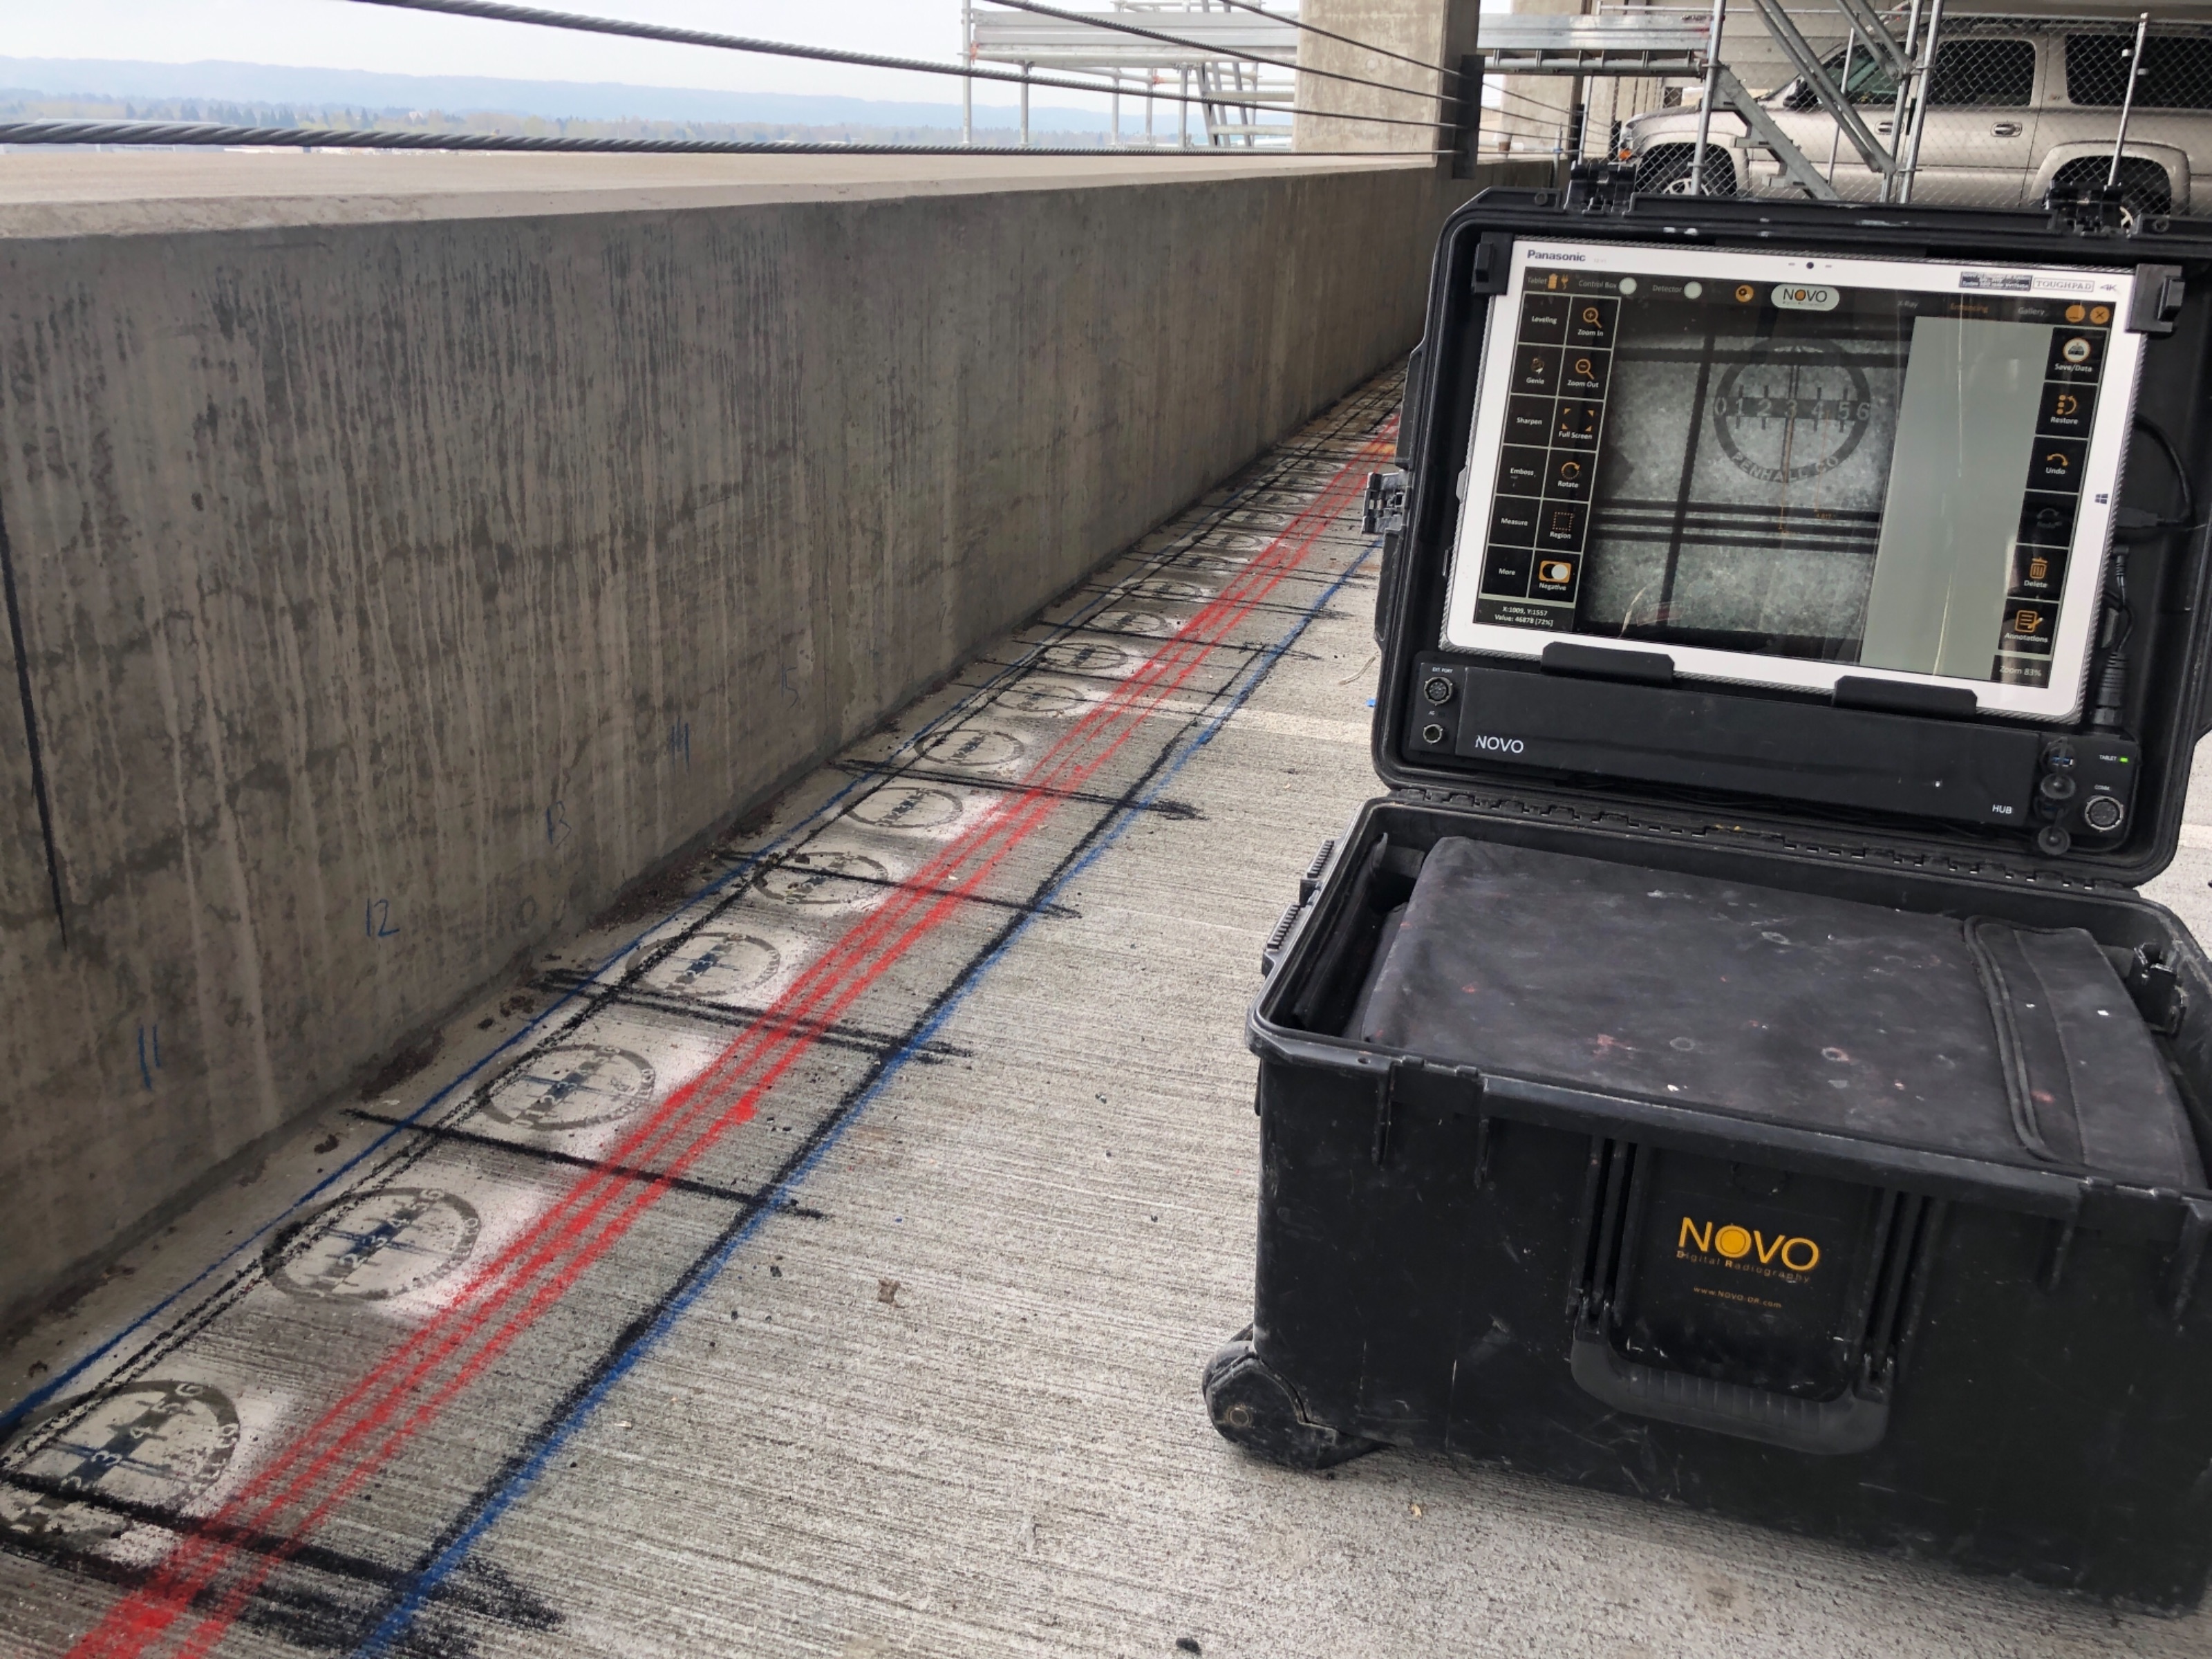
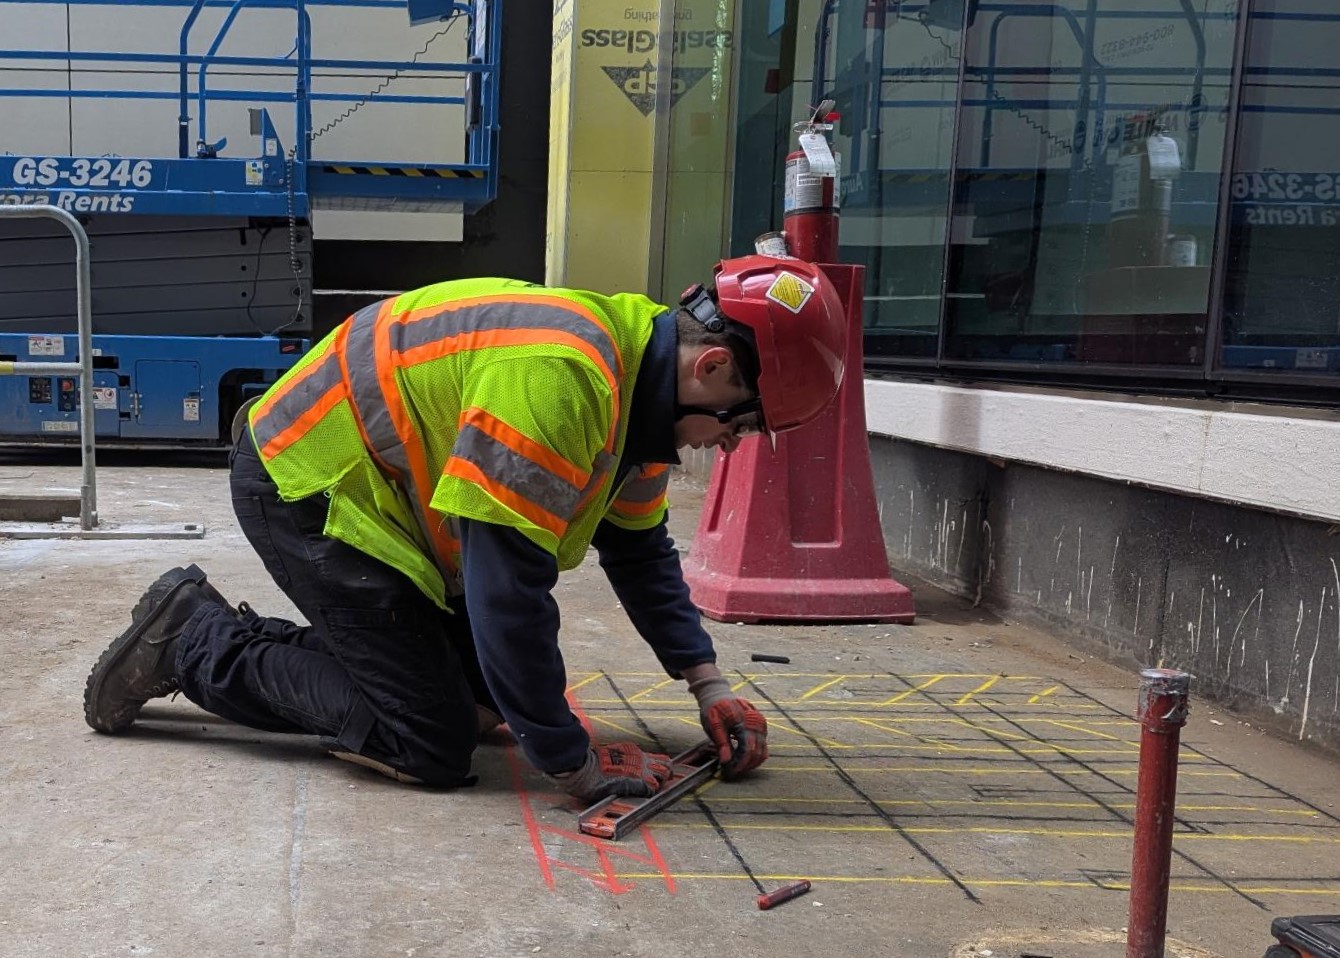
Traditional film-based X-ray imaging required the exposed film to be sent to a lab for chemical processing, a step that could take hours or even days. This made X-ray imaging impractical for most construction timelines. Digital X-ray technology has changed that entirely. With digital radiography, the X-ray image is captured electronically and displayed on a screen in as little as 5 to 10 seconds. The radiographer can examine the image immediately on site, identify all embedded features, and mark their locations directly on the concrete surface. There is no film to develop, no waiting for lab results, and no ambiguity about what the image shows.

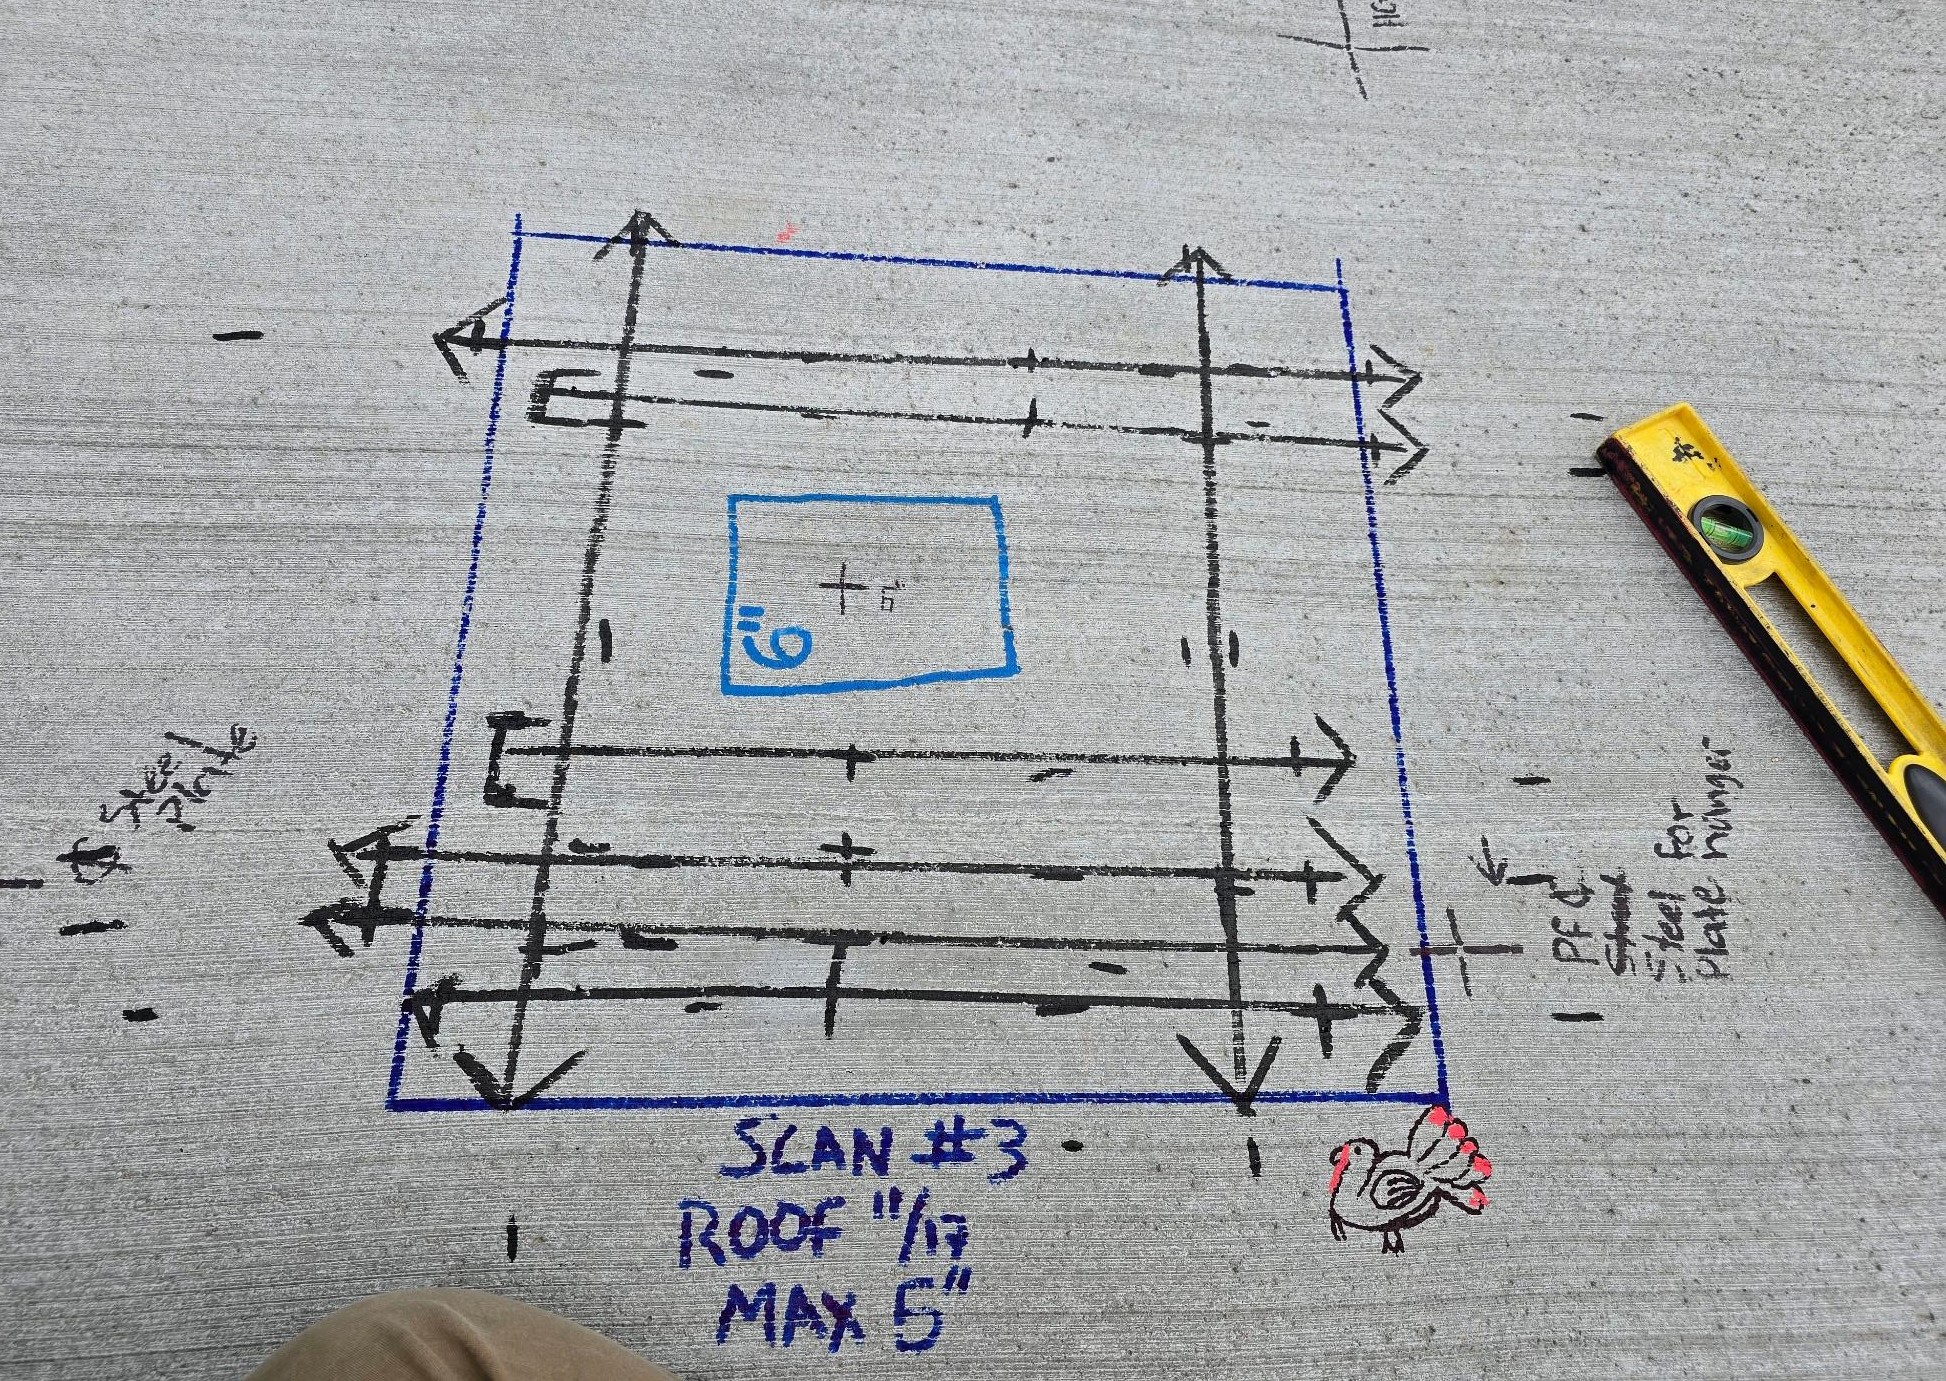
141_Xray_PDX Airport_Cindy Luu_ Mike Vasquez
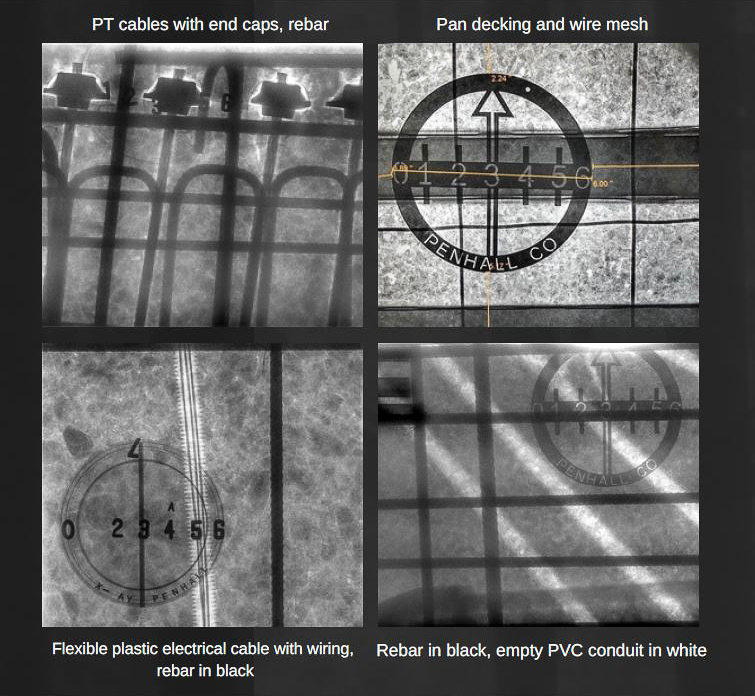
xray_images.JPG

The Setup: Access to Both Sides

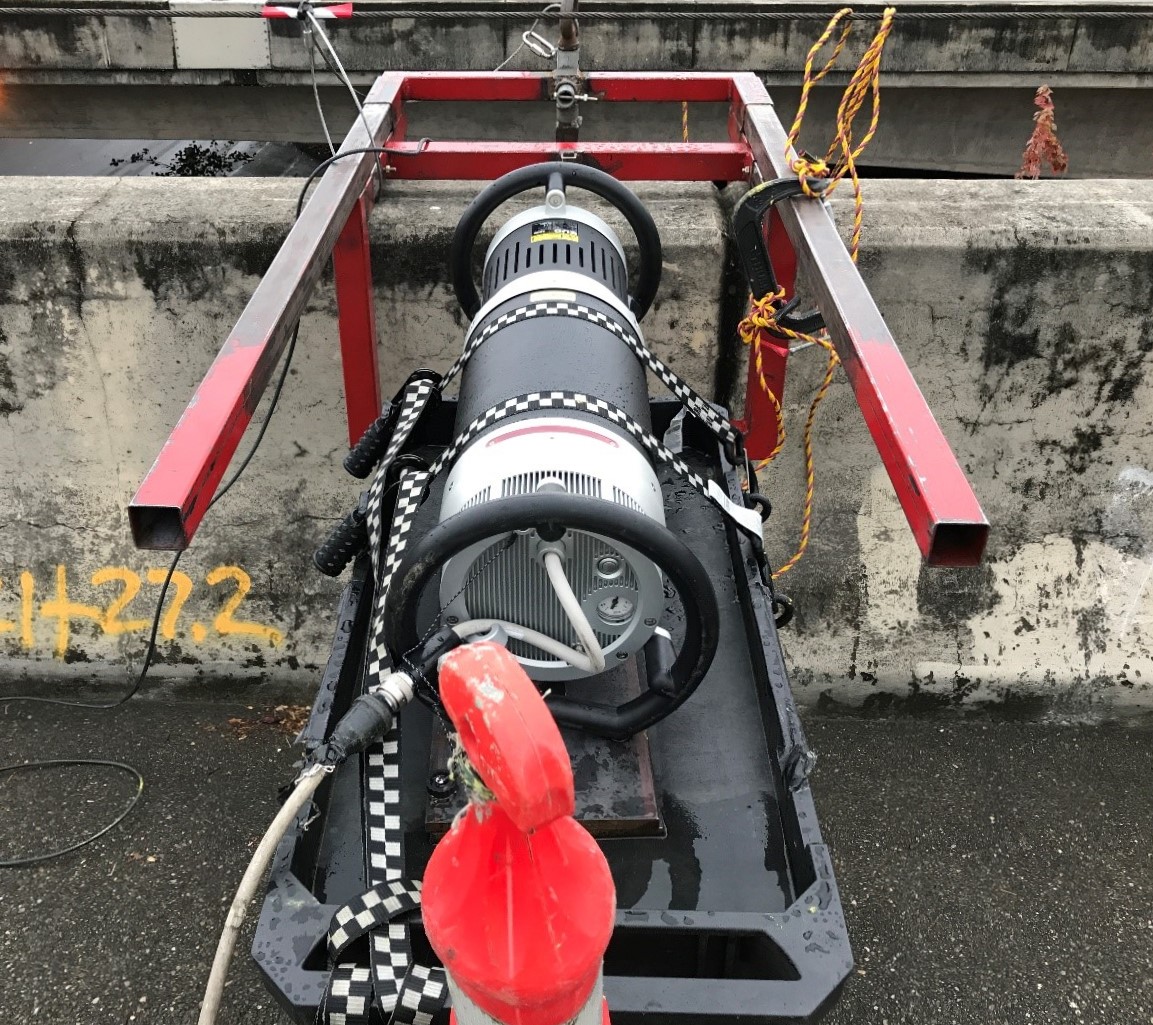
Unlike GPR, which only requires access to one side of the concrete, X-ray imaging requires access to both sides of the element being scanned. The X-ray source is placed on one side of the slab, wall, or beam, and the digital detector (or imaging plate) is placed on the opposite side. The radiation passes through the concrete, and the detector captures the resulting image. This two-sided access requirement is the primary limitation of concrete X-ray: it cannot be used to scan slab-on-grade concrete (where the bottom of the slab sits directly on the ground) because there is no way to place a detector underneath.

What X-Ray Can Detect

Concrete X-ray imaging can precisely identify a wide range of embedded features. These include reinforcing steel (rebar) and wire mesh, which are the structural backbone of most concrete elements. X-ray clearly shows rebar spacing, diameter, and orientation, allowing crews to plan cuts that avoid structural reinforcement. Post-tension cables are another critical detection target. These cables are under extremely high tension, and cutting one can cause catastrophic structural failure and pose an immediate danger to workers. X-ray provides a clear, unambiguous image of cable locations. Beyond reinforcement, X-ray can also locate electrical conduits and wiring, plumbing pipes, fiber optic lines, and other utilities embedded in the concrete.

Concrete X-Ray vs. GPR Scanning: When to Use Each Method

Both X-ray imaging and GPR (ground penetrating radar) scanning are valuable tools for locating subsurface features in concrete, and Penhall provides both services. However, they work differently and excel in different situations. Understanding when to use each method (or both together) is key to getting the safest and most efficient results on your project.

How GPR Differs from X-Ray

GPR works by emitting radio waves into the concrete and recording the reflected signals. A trained analyst interprets the resulting radargram to determine the location, depth, and approximate type of subsurface features. GPR only requires access to one side of the concrete, making it suitable for slab-on-grade and many other situations where two-sided access is not available. It can also detect voids and areas of deterioration within the concrete itself, which X-ray cannot do.

However, GPR does not produce a photographic image. The data must be interpreted by a qualified analyst, and in highly congested areas (where rebar, cables, and conduits overlap densely), the GPR data can become extremely difficult to read. This is the scenario where X-ray becomes essential. As Penhall notes, highly congested slabs are ideally suited for the application of digital X-ray, because X-ray produces a clear, definitive image that eliminates the interpretation challenges of GPR in those conditions.

Choose X-Ray When...

X-ray is the right choice when you have access to both sides of the concrete and need a definitive, unambiguous image of what lies inside. It is also the preferred method when the slab is known or suspected to be highly congested with reinforcement, when GPR results have come back inconclusive due to congestion, when you are working with green (freshly poured) concrete where residual moisture reduces GPR effectiveness, and when absolute certainty is required before making a critical cut near post-tension cables or high-voltage conduits.

Choose GPR When...

GPR is the better fit when you only have access to one side of the concrete (such as slab-on-grade), when you need to determine the depth of embedded features (X-ray shows location and type, but not depth), when you need to scan large surface areas quickly, when people will be present in the area during scanning (GPR emits no radiation), and when you need to detect voids or deterioration within the concrete. In many projects, the two methods work best in combination. A GPR scan covers a large area quickly and identifies most embedded features, and then digital X-ray is used to get definitive clarity on specific spots where the GPR data is congested or ambiguous.

Safety and Radiation: What You Need to Know

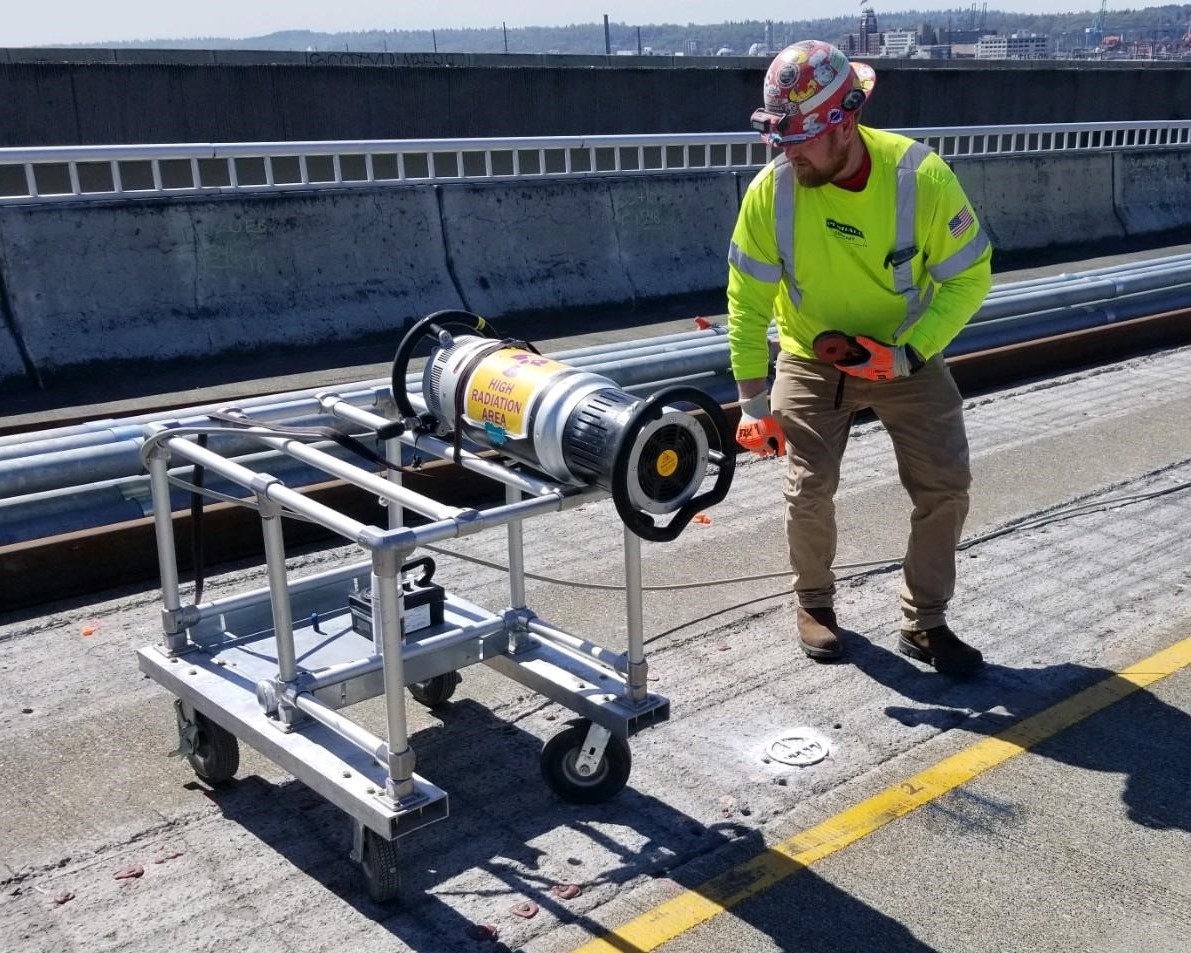
One of the most common concerns about concrete X-ray imaging is radiation exposure. It is a reasonable question, and the answer is reassuring. The radiation emitted during concrete X-ray imaging is minimal and falls well below state-mandated safety levels. Penhall's X-ray operators are trained and certified radiographers who follow strict safety protocols on every job. They wear appropriate personal protective equipment and use established exclusion zones to ensure that no one on the job site is exposed to unsafe levels of radiation.

It is worth noting that GPR scanning does not involve any radiation at all, which is one reason GPR is preferred for scans in occupied buildings like hospitals, hotels, and offices where people are present during normal business hours. When X-ray is required in these settings, the radiographer coordinates with site management to establish a brief exclusion zone during the scan, which typically takes only seconds to complete.

Common Applications for Concrete X-Ray Imaging

Concrete X-ray imaging is used across a wide range of project types and industries. Any time a clear image of the concrete's interior is needed before cutting, coring, or breaking, X-ray can provide the definitive answer.

Pre-Cut and Pre-Core Scanning

The most common application is scanning concrete immediately before cutting or coring operations. By X-raying the exact location where a core hole, wall opening, or trench will be cut, the contractor can verify that the path is clear of rebar, post-tension cables, and conduits. This prevents costly accidental strikes, structural damage, and safety incidents.

Post-Tension Slab Evaluation

Post-tension concrete slabs present unique challenges because the embedded cables are under tremendous force. Cutting a post-tension cable can cause the cable to whip violently or the surrounding concrete to fail catastrophically. X-ray imaging provides the clearest possible picture of cable locations and trajectories, giving contractors the confidence to plan safe cut paths around these critical elements.

Renovation and Tenant Improvement Projects

Commercial renovation projects frequently require new openings in existing concrete for HVAC, plumbing, electrical, and structural modifications. In older buildings where as-built drawings may be inaccurate or unavailable, X-ray imaging gives the project team reliable information about what is actually inside the concrete before any demolition or modification work begins.

Data Centers and Critical Facilities

In data centers and other mission-critical facilities, an accidental conduit strike can take down power or communication systems with enormous financial consequences. X-ray imaging eliminates the guesswork, ensuring that every penetration through concrete is planned with full knowledge of what lies within.

Quality Assurance and Structural Assessment

Beyond pre-cut scanning, X-ray imaging can also be used to verify that rebar and other reinforcement was placed correctly during new construction. If there are concerns about whether the as-built conditions match the structural drawings, X-ray provides a non-destructive way to inspect the interior of the concrete without taking cores or performing destructive testing.

Branden Moore - Oct 3
0427

Digital vs. Film-Based X-Ray: Why Digital Has Replaced Film

The shift from film-based to digital X-ray imaging has transformed the practicality of concrete radiography. With film-based systems, the exposed film had to be transported to a darkroom or lab for chemical development, a process that could take hours or days. This made X-ray imaging a bottleneck in the construction schedule and limited its use to situations where no other option existed.
Digital X-ray has eliminated that bottleneck entirely. The image is captured on an electronic detector and displayed on screen in seconds. The radiographer can evaluate the results immediately, mark the concrete surface, and give the crew clearance to proceed, all within minutes. This speed advantage makes digital X-ray practical as a routine scanning tool rather than a last resort. It also improves image quality: digital images can be enhanced, zoomed, adjusted for contrast, and stored electronically for project documentation, none of which is possible with film.

Penhall Technologies: Concrete X-Ray Imaging Services

Penhall Technologies' digital X-ray imaging services are performed by radiographers who undergo specialized training and certification. As a division of Penhall Company, the nation's largest provider of concrete cutting, coring, and demolition services, Penhall Technologies brings a unique advantage: their X-ray technicians understand common and uncommon on-the-job hazards because they work alongside the concrete cutting crews who depend on accurate scan results every day.

Penhall offers both digital X-ray imaging and GPR scanning, which means they can recommend and deploy the best scanning method (or combination of methods) for your specific project. This integrated approach, combined with Penhall's full range of concrete cutting, coring, demolition, and structural repair services, means the scanning and cutting can be managed under one provider, reducing coordination overhead and keeping your project moving.

With branch locations nationwide, Penhall can dispatch a certified radiographer to your job site quickly, minimizing delays and keeping your project on schedule.

frequently asked questions

What is concrete X-ray imaging?

Concrete X-ray imaging (also called concrete radiography) is a non-destructive testing method that uses X-ray radiation to produce a clear image of the interior of a concrete element. It reveals the exact location, size, and type of embedded features such as rebar, post-tension cables, conduits, and pipes. Penhall uses digital X-ray technology that produces images in as little as 5 to 10 seconds. Learn more about Penhall's X-ray imaging services.

How is concrete X-ray different from GPR scanning?

X-ray imaging produces a photographic image of the concrete's interior and requires access to both sides of the element. GPR uses radar waves and only requires access to one side, but produces data that must be interpreted by an analyst rather than a clear image. X-ray excels in highly congested areas where GPR data is difficult to read, while GPR is better suited for slab-on-grade scanning, large-area coverage, depth measurement, and void detection.

Does concrete X-ray require access to both sides?

Yes. The X-ray source is placed on one side of the concrete, and the digital detector is placed on the opposite side. This means X-ray cannot be used on slab-on-grade concrete or any element where the opposite side is inaccessible. For those situations, GPR scanning is the appropriate alternative.

Is concrete X-ray imaging safe?

Yes. The radiation emitted during concrete X-ray imaging is minimal and falls well below state-mandated safety levels. Penhall's X-ray operators are trained and certified radiographers who wear proper personal protective equipment and establish exclusion zones during scanning to ensure the safety of everyone on the job site.

How long does a concrete X-ray scan take?

With digital X-ray technology, a single image can be produced in as little as 5 to 10 seconds. The radiographer can evaluate the image immediately on site, mark the locations of embedded features on the concrete surface, and provide clearance for cutting or coring to proceed. The entire process for a typical scan area takes only minutes.

What can concrete X-ray detect?

Concrete X-ray can detect reinforcing steel (rebar), wire mesh, post-tension cables, electrical conduits, plumbing pipes, fiber optic lines, and other metallic or dense objects embedded in the concrete. It shows the location, size, and type of each feature. However, unlike GPR, X-ray does not determine the depth of features or detect voids within the concrete.

Can you X-ray a concrete slab on grade?

No. Concrete X-ray requires access to both sides of the element being scanned. Since a slab-on-grade sits directly on the ground, there is no way to position the detector underneath. For slab-on-grade applications, GPR scanning is the appropriate method.

When should I use X-ray instead of GPR?

Use X-ray when you need a definitive, unambiguous image of highly congested concrete, when GPR results are inconclusive, when scanning green (freshly poured) concrete where moisture reduces GPR effectiveness, and when absolute certainty is required before cutting near post-tension cables or high-voltage conduits. In many cases, GPR and X-ray work best as complementary methods.

What is the difference between digital and film-based concrete X-ray?

Film-based X-ray requires the exposed film to be developed in a lab, which can take hours or days. Digital X-ray captures the image electronically and displays it on screen in seconds, allowing the radiographer to evaluate results and mark the concrete immediately on site. Digital images can also be enhanced, stored, and shared electronically for project documentation.

How do I get a quote for concrete X-ray imaging?

For a hydrodemolition quote from Penhall Company, visit their hydrodemolition service page or contact Penhall directly. To receive an accurate quote, have the project’s location, the type of structure, the dimensions and depth of removal required, and any known site conditions or access restrictions ready to share.

What Is Hydrodemolition? A Complete Guide to High-Pressure Water Concrete Removal

Everything you need to know about how hydrodemolition works, where it’s used, and why it’s replacing traditional methods on bridges, highways, parking structures, and more.

CALL FOR A QUOTE
1-800-736-4255

At a Glance

  • Hydrodemolition (also called hydroblasting or water jetting) uses high-pressure water jets, typically 15,000 to 40,000+ PSI, to selectively remove deteriorated or sound concrete.
  • Unlike jackhammering, hydrodemolition does not cause microfractures in the remaining structure, resulting in stronger, longer-lasting repairs.
  • A single hydrodemolition robot can replace up to 25 jackhammer operators, making the process more than 25 times faster than mechanical methods.
  • The process preserves embedded rebar, cleans it of rust and corrosion, and creates an ideal rough-textured bonding surface for new concrete overlays.
  • Common applications include bridge deck rehabilitation, parking structure repair, dam and spillway maintenance, highway resurfacing, and nuclear decommissioning.
  • Hydrodemolition produces no silica dust, significantly reduces noise, and allows operators to work from a safe distance via robotic controls.
  • Penhall Company offers hydrodemolition services nationwide, backed by over 65 years of concrete expertise and an industry-leading safety program.
hydro 5
IMG_7156

Why Hydrodemolition Is Changing the Concrete Industry

Concrete is the backbone of modern infrastructure. Bridges, highways, parking garages, dams, and power plants all rely on it. But concrete doesn’t last forever. Over time, exposure to weather, de-icing chemicals, heavy traffic loads, and chloride intrusion causes concrete to crack, delaminate, and deteriorate. When that happens, the damaged material needs to be removed so the structure can be repaired and returned to service.
For decades, the standard approach was mechanical demolition, jackhammers, pneumatic breakers, and milling machines. These methods get the job done, but they come with significant drawbacks: they create microfractures in the sound concrete that remains, they can damage embedded rebar, they generate hazardous silica dust, and they’re slow and labor-intensive.

Hydrodemolition offers a fundamentally better approach. By using high-pressure water jets instead of mechanical impact, hydrodemolition removes concrete precisely and efficiently, without the structural damage, safety hazards, and inefficiencies of traditional methods. In this guide, we’ll cover everything you need to know about how hydrodemolition works, where it’s used, and why it’s becoming the preferred concrete removal method for infrastructure projects across North America.

How Hydrodemolition Works: The Process Explained

At its core, hydrodemolition is straightforward: high-pressure water is directed at a concrete surface to break it apart and remove it. But the science behind why it works so well is what sets it apart from every other concrete removal method.

The Science of Water Jet Concrete Removal

Concrete is a porous material. When ultra-high-pressure water, typically ranging from 15,000 to 40,000+ PSI, is directed at a concrete surface, the water penetrates the material’s natural micropores and pre-existing cracks. This creates internal overpressure that fractures the concrete from within, breaking it apart along its natural weaknesses. The result is selective removal: weaker, deteriorated concrete is broken apart while sound, higher-strength concrete remains intact.

This is fundamentally different from how jackhammers work. Mechanical impact tools use compressive force that doesn’t discriminate between sound and deteriorated concrete. The vibrations from jackhammering travel through the entire structure, creating microfractures in the concrete that’s supposed to remain. These microfractures weaken the bonding surface and can lead to premature delamination of repair materials down the line.

Equipment and Operation

Modern hydrodemolition is typically performed using robotic equipment. A hydrodemolition robot, essentially an automated cutting tractor, moves across the concrete surface on a track or rail system, directing the water jet in controlled, overlapping passes. High-pressure water pumps generate the necessary pressure, while support trailers manage water supply, wastewater collection, and fuel.

Operators control the robot from a safe distance, adjusting water pressure, flow rate, and traverse speed to achieve the desired depth of removal. This level of precision allows contractors to remove concrete to exact specifications, whether that’s a shallow surface scarification of 1/4 inch or a full-depth removal down to or past the rebar layer.

Three Types of Hydrodemolition Removal

Hydrodemolition can be calibrated for three distinct removal depths, depending on the project’s requirements. Hydroscarification is the shallowest application, typically removing just 1/4 to 3/4 inch of surface concrete to create a clean, rough-textured bonding surface for overlays. Partial-depth removal goes deeper, selectively extracting 3/4 inch or more of deteriorated concrete while leaving the sound material and rebar in place. Full-depth removal takes out the entire concrete section when the deterioration is too severe to preserve, often used when an entire bridge deck needs to be replaced while the structural beams below are retained.

Hydrodemolition vs. Jackhammering: Key Advantages

The advantages of hydrodemolition over traditional mechanical methods are significant and well-documented. Understanding these differences is essential for anyone specifying or managing a concrete removal or rehabilitation project.

No Microfractures

This is the single most important advantage. Because hydrodemolition uses water pressure rather than mechanical impact, the remaining concrete is left free of microfractures. Independent laboratory testing has shown that bond strengths on a hydrodemolished surface can be up to 300% higher than on a jackhammered surface. This means repairs last longer, delamination risk is dramatically reduced, and the overall lifecycle cost of the structure is lower. As Penhall notes on their hydrodemolition service page, the absence of microfractures ensures that repair work is built upon a foundation of structural integrity and durability.

Rebar Preservation and Cleaning

Hydrodemolition excels at working around embedded reinforcement. The high-pressure water removes concrete from around rebar without damaging it, and simultaneously cleans the steel of rust, scale, and corrosion. This is a major advantage because it eliminates the need for a separate sandblasting or cleaning step before new concrete is placed. With mechanical methods, rebar is often nicked, bent, or loosened by the impact forces, requiring repair or replacement before the structure can be restored.

Superior Bonding Surface

The rough, irregular surface profile left by hydrodemolition is ideal for bonding with new concrete overlays and repair materials. Unlike the relatively smooth surface left by milling or the fractured surface left by jackhammering, the hydrodemolished surface provides maximum mechanical interlock between old and new concrete. This is why bridge deck rehabilitation projects increasingly specify hydrodemolition as the removal method, the superior bonding surface translates directly to longer-lasting repairs.

Dramatically Higher Productivity

A single hydrodemolition robot can do the work of up to 25 jackhammer operators. That’s not a marginal improvement, it’s an order-of-magnitude leap in productivity. For large-scale projects like bridge deck removals or parking structure rehabilitation, this translates to significantly shorter project timelines, reduced labor costs, and less disruption to traffic or facility operations.

Improved Safety

Hydrodemolition eliminates silica dust exposure, a serious occupational health hazard associated with mechanical concrete removal that can lead to silicosis, a chronic and potentially fatal lung disease. The process also significantly reduces noise levels compared to jackhammering. And because operators control the robotic equipment from a safe distance rather than standing over a pneumatic breaker, the risk of musculoskeletal injuries and hand-arm vibration syndrome (HAVS) is virtually eliminated.

Selective Removal

Because water pressure naturally seeks out weaker concrete while leaving stronger material intact, hydrodemolition provides inherently selective removal. By calibrating the water pressure relative to the concrete’s compressive strength, operators can precisely control which concrete is removed and which stays. A general industry guideline is that it takes approximately 3.5 times the water pressure relative to the concrete’s compressive strength to achieve selective removal. So for 5,000 PSI concrete, roughly 17,500 PSI of water pressure will selectively remove deteriorated material while preserving sound concrete at that strength.

Common Applications for Hydrodemolition

Hydrodemolition is versatile and can be deployed on a wide range of structure types and project scenarios. Here are the most common applications:

Bridge Deck Rehabilitation

This is the most prominent application for hydrodemolition in North America. State departments of transportation increasingly specify hydrodemolition for bridge deck concrete removal because of the superior bonding surface it creates and the absence of microfractures. Studies have shown that bridge deck repairs performed with hydrodemolition methods last roughly twice as long as repairs where demolition was done with impact tools. Whether the scope calls for shallow scarification before a thin overlay or full-depth removal of a compromised deck, hydrodemolition delivers better long-term outcomes than any mechanical alternative.

Parking Structure Repair

Parking garages are subjected to constant exposure to water, de-icing salts, and vehicle loads. Over time, chloride intrusion corrodes the embedded rebar, causing the concrete above to delaminate and spall. Hydrodemolition is ideal for parking structure rehabilitation because it can selectively remove only the deteriorated concrete, clean the rebar, and leave a perfect bonding surface, all with minimal noise disruption to adjacent occupied spaces.

Dams and Spillways

Hydrodemolition is well-suited for dam and spillway repair work, where removing deteriorated concrete without damaging the underlying mass concrete structure is critical. The ability to work on horizontal, vertical, and even overhead surfaces makes hydrodemolition robots especially valuable in the confined and complex geometries typical of dam infrastructure.

Highway and Pavement Rehabilitation

For highway rehabilitation projects, hydrodemolition can remove deteriorated surface layers at high speed, allowing roads to be resurfaced without full reconstruction. The speed advantage of robotic hydrodemolition is especially valuable in highway work, where lane closures are expensive and every hour of delay has a real cost to the traveling public and the project budget.

Nuclear and Power Plant Decommissioning

Hydrodemolition is used in the decommissioning of nuclear power plants and other sensitive energy facilities where dust suppression, vibration control, and precision removal are non-negotiable requirements. The ability to remove concrete remotely via robotic operation is a significant safety advantage in radiologically contaminated environments.

Water and Wastewater Treatment Facilities

Treatment plant structures are constantly exposed to water and chemical processes that degrade concrete over time. Hydrodemolition allows these facilities to be repaired with minimal downtime and without introducing microfractures that could compromise the repair’s longevity.

Environmental and Sustainability Considerations

Hydrodemolition aligns well with growing environmental and sustainability requirements in construction. The process produces no silica dust, which eliminates a major airborne pollutant associated with mechanical concrete removal. Wastewater generated during hydrodemolition can be collected, treated, and recycled rather than discharged into storm drains or waterways, a practice that meets EPA effluent guidelines and supports LEED and other green building certifications.

The concrete debris removed by hydrodemolition is also easier to recycle than mechanically demolished material, because it’s free of the contamination and mixed waste that often accompanies traditional demolition. Combined with the longer lifecycle of repairs made on hydrodemolished surfaces, the overall environmental footprint of a hydrodemolition-based rehabilitation project is significantly lower than one that relies on mechanical methods.

When to Choose Hydrodemolition Over Other Methods

Hydrodemolition isn’t the right choice for every concrete removal scenario, but it’s the superior option in a wide range of situations. It’s the best fit when repair longevity is a priority and microfracture-free surfaces are essential, when rebar needs to be preserved and cleaned in place, when the project involves large surface areas where robotic automation provides significant productivity gains, when dust and noise restrictions apply (such as in occupied buildings, hospitals, or sensitive environments), when working in confined or complex geometries where mechanical equipment can’t easily access, and when environmental compliance requires dust-free operations and wastewater management.

For smaller, localized removals in areas that are inaccessible to robotic equipment, manual methods like handheld jackhammers may still be practical. But for most medium-to-large-scale concrete rehabilitation projects, especially on bridges, parking structures, and industrial facilities, hydrodemolition delivers measurably better results.

Penhall Company’s Hydrodemolition Services

Penhall Company’s hydrodemolition services combine state-of-the-art robotic equipment with over 65 years of concrete industry expertise. As North America’s largest provider of concrete cutting, coring, and demolition services, Penhall brings a level of operational depth and safety commitment that smaller contractors simply can’t match.

Penhall’s hydrodemolition capabilities are part of a comprehensive suite of bridge services and structural repair solutions that include concrete cutting, GPR scanning, demolition, and fiber reinforced polymer (FRP) strengthening. This means Penhall can handle the entire rehabilitation workflow, from pre-project scanning to concrete removal to structural repair, under a single contract, reducing coordination complexity and keeping projects on schedule.

Penhall’s Behavior-Based Safety (BBS) program ensures that every hydrodemolition project is performed with the highest regard for worker and public safety. With branch locations across the country, Penhall can mobilize quickly to support hydrodemolition projects in any region.
frequently asked questions

What is hydrodemolition?

Hydrodemolition (also known as hydroblasting or water jetting) is a concrete removal technique that uses high-pressure water jets, typically between 15,000 and 40,000+ PSI, to break apart and remove concrete. Unlike mechanical methods like jackhammering, hydrodemolition does not cause microfractures in the remaining structure, preserves embedded rebar, and creates a superior bonding surface for new concrete. Learn more about Penhall’s hydrodemolition services.

How does hydrodemolition differ from jackhammering?

The key differences are structural impact, speed, and safety. Jackhammering uses mechanical impact that creates microfractures in sound concrete, can damage rebar, generates silica dust, and requires heavy manual labor. Hydrodemolition uses water pressure that leaves no microfractures, preserves and cleans rebar, produces no dust, and is operated robotically. A single hydrodemolition robot can replace up to 25 jackhammer operators, and bond strengths on a hydrodemolished surface can be up to 300% higher than on a jackhammered surface.

What is hydrodemolition used for?

Hydrodemolition is most commonly used for bridge deck rehabilitation, parking structure repair, dam and spillway maintenance, highway resurfacing, nuclear plant decommissioning, and water treatment facility rehabilitation. It’s effective on horizontal, vertical, and overhead concrete surfaces, and it works on both reinforced and non-reinforced structures.

Does hydrodemolition damage rebar?

No. High-pressure water does not damage steel rebar because steel’s compressive properties are far stronger than concrete’s. In fact, hydrodemolition cleans rebar during the removal process, stripping away rust, scale, and corrosion. This eliminates the need for a separate sandblasting step and leaves the reinforcement ready for new concrete placement.
How fast is hydrodemolition compared to traditional methods?

Hydrodemolition is more than 25 times faster than manual jackhammering. One robotic hydrodemolition unit can accomplish the work of up to 25 jackhammer operators, significantly reducing project timelines and labor costs for large-scale concrete removal projects.

What PSI does hydrodemolition use?

Hydrodemolition systems typically operate between 15,000 and 40,000+ PSI, depending on the application. High-pressure water jetting (15,000–25,000 PSI) is common for surface preparation and shallow removal, while ultra-high-pressure (UHP) water jetting (25,000–55,000 PSI) is used for deeper or more aggressive concrete removal. To put this in perspective, hydrodemolition uses approximately 20 times the pressure of a typical household pressure washer.
Is hydrodemolition safe?

Hydrodemolition is significantly safer than mechanical concrete removal. It eliminates silica dust exposure (a leading cause of silicosis in construction workers), reduces noise, and removes the risk of hand-arm vibration syndrome (HAVS) because operators control the equipment robotically from a safe distance rather than manually operating impact tools.

What happens to the water used in hydrodemolition?

Wastewater from hydrodemolition is collected, treated, and can be recycled for reuse. The pH value of the water must be regulated before disposal in accordance with EPA guidelines. Responsible wastewater management is an important part of the hydrodemolition process and supports environmental compliance on construction projects.

What is the difference between hydrodemolition and hydroscarification?

Hydroscarification is a specific type of hydrodemolition that involves removing only a shallow layer of surface concrete, typically 1/4 to 3/4 inch, to create a clean, rough-textured bonding surface for overlays. Hydrodemolition is the broader term that encompasses hydroscarification as well as partial-depth and full-depth concrete removal.

How do I get a quote for hydrodemolition services?

For a hydrodemolition quote from Penhall Company, visit their hydrodemolition service page or contact Penhall directly. To receive an accurate quote, have the project’s location, the type of structure, the dimensions and depth of removal required, and any known site conditions or access restrictions ready to share.

POWER & ENERGY PROJECTS

Powering the Future: Penhall Company’s Concrete Services for Power and Energy Projects

From Wind Farm Retrofits to Steam Plant Demolitions: Precision Concrete Solutions for the Energy Sector

CALL FOR A QUOTE
1-800-736-4255

Concrete Expertise Where It Matters Most: The Power and Energy Sector

The power and energy industry operates on a different level of complexity. Whether it’s a coal-fired steam plant being decommissioned, a wind farm being repowered for the next generation, or a utility facility undergoing interior renovations, every project demands concrete services that are precise, safe, and on schedule. Downtime costs money, regulatory stakes are high, and the margin for error is razor-thin.

That’s exactly the environment where Penhall Company thrives. For over 65 years, Penhall has been North America’s largest provider of concrete cutting, coring, demolition, and scanning services, with a deep track record in the power and nuclear sector. From industrial-scale demolitions to precision GPR scanning and core drilling, Penhall’s teams bring the specialized equipment, rigorous safety protocols, and field-proven experience that energy projects require.

With branches across the country, including Sacramento, Austin, and Huntsville, Penhall is positioned to mobilize quickly for energy projects of any scale. In this roundup, we’re spotlighting four recent projects that showcase the range and depth of Penhall’s power and energy capabilities.

1. Ashtabula II Wind Farm Foundation Retrofit — Luverne, ND

Services: GPR Scanning, Core Drilling
Industry: Power / Wind Energy

As the wind energy industry matures, repowering existing wind farms has become a critical strategy for extending the life and output of aging infrastructure. Penhall was selected to support the structural retrofit of 33 wind turbine foundations at the Ashtabula II Wind Farm in Luverne, North Dakota. Working under Landwehr Construction for owner Otter Tail Power Company, Penhall performed extensive GPR scanning and high-volume precision core drilling to support the installation of reinforced concrete collars around each turbine foundation.

These retrofits were essential for upgrading the turbine load capacity as part of a broader wind farm repowering initiative. The project required Penhall’s technology services division to work hand-in-hand with its concrete operations team, scanning to locate existing rebar and embedded elements before drilling hundreds of precision holes to anchor the new reinforcement. It’s a perfect example of how Penhall combines advanced scanning technology with hands-on concrete expertise to deliver results in the renewable energy space.

View the full Ashtabula II Wind Farm project details →

default

2. TVA Colbert Steam Plant Demolition — Colbert, AL

Services: Core Drilling, Wall Sawing, Wire Sawing
Industry: Power / Nuclear

Decommissioning aging power plants is one of the most demanding applications of concrete cutting and demolition services, and Penhall’s work at the TVA Colbert Steam Plant demonstrates why they’re the contractor of choice for these high-stakes projects. Contracted by Homrich, Penhall’s Huntsville team performed core drilling, wall sawing, and wire sawing at the steam plant in preparation for the demolition of six stacks.

The scope of work included drilling seventy-eight 2-inch diameter, 24-inch deep holes for explosives and executing breach cuts on all six stacks. When an unexpected change order required additional drilling, Penhall adapted quickly and still completed the work a day ahead of schedule, helping Homrich recover lost time and ensuring the September 6th demolition date remained on track. That kind of flexibility and reliability under pressure is what sets Penhall apart in the power sector.

View the full TVA Colbert Steam Plant project details →

51713B9D-F526-4605-A9FD-4E3EA0073DE9_Ben Penery

3. PG&E Rocklin Tenant Improvement — Rocklin, CA

Services: Flat Sawing, GPR Scanning, Concrete Breaking, Removal
Industry: Power / Utility

Not every power sector project involves large-scale demolition. Utility companies also need precise, efficient concrete work for interior renovations and facility upgrades. Penhall’s Sacramento branch was contracted to perform flat sawing, GPR scanning, concrete breaking, and removal for an interior tenant improvement project at PG&E’s Rocklin, California facility.

The project involved saw cutting, breaking, and removing 3,000 square feet of concrete slab-on-grade, with thicknesses up to 8 inches. GPR scanning was conducted before any cutting began to locate embedded utilities and ensure safety and precision throughout the process. By utilizing industrial fans and open bay doors, the team was able to safely operate diesel-powered saws instead of electric, significantly increasing productivity and ensuring a timely project completion. It’s a great example of how Penhall adapts its approach to site conditions to deliver the best possible outcome for the client.

View the full PG&E Rocklin project details →

BCI, Rocklin 3_Brandon Rowland

4. Reloj Del Sol Wind Turbine Foundation Demolition — San Ygnacio, TX

Services: Demolition, Concrete Removal
Industry: Power / Wind Energy

On the other end of the wind energy lifecycle, Penhall’s Austin operations were contracted to demolish and remove a wind turbine foundation at the Reloj Del Sol Wind site in San Ygnacio, Texas. While the Ashtabula II project focused on extending the life of existing turbine foundations, this project involved the complete removal of a decommissioned foundation to clear the site for future development.

The scope included breaking down 650 cubic yards of heavily reinforced concrete using CAT 336 and CAT 325 excavators equipped with hydraulic hammers. Wind turbine foundations are engineered to anchor structures that stand hundreds of feet tall against extreme wind loads, which means they’re built incredibly thick and dense. Removing them safely and efficiently requires both the right equipment and the expertise to manage the demolition process from start to finish. Penhall delivered a seamless demolition, ensuring the site was fully cleared and prepared for its next chapter.

View the full Reloj Del Sol project details →

Resized_20200613_101941

The Full Lifecycle of Energy Infrastructure

What makes these four projects particularly compelling as a group is that together they represent the full lifecycle of power and energy infrastructure. Penhall retrofits aging wind turbine foundations to extend their productive life (Ashtabula II), renovates utility facilities to keep them functional and modern (PG&E Rocklin), prepares decommissioned power plants for safe demolition (TVA Colbert), and removes foundations entirely when it’s time to clear the way for what comes next (Reloj Del Sol).

Across all of these projects, the common thread is Penhall’s combination of advanced technology and deep field expertise. GPR scanning ensures that no cut or drill is made without a clear picture of what lies beneath the surface. Diamond-blade cutting and wire sawing deliver precision that protects adjacent structures and keeps projects on schedule. And Penhall’s Behavior-Based Safety (BBS) program ensures that every task, whether it’s drilling holes for explosives at a steam plant or operating heavy excavators on a remote wind farm site, is performed with the highest regard for worker and public safety.

If you’re managing a power, nuclear, or renewable energy project that requires concrete cutting, coring, scanning, or demolition, Penhall has the experience and the national reach to get it done. Explore their full portfolio of power and nuclear projects, or contact a local branch, including Sacramento, Austin, and Huntsville, to discuss your next project.

Contact Penhall today to request a quote →

CONCRETE PROJECTS

Penhall Company in Texas: A Roundup of Concrete Projects Across the Lone Star State

From Austin to Houston and Beyond: Precision Concrete Services for Healthcare, Infrastructure, Industrial, and Energy Projects

CALL FOR A QUOTE
1-800-736-4255

Penhall Company: Texas’s Trusted Concrete Services Partner

Texas is a state defined by growth, ambition, and infrastructure on a massive scale. From the booming tech corridor of Austin to the sprawling highways of Houston and the wind farms of South Texas, the Lone Star State demands concrete services that match its size and complexity. That’s where Penhall Company comes in.

For over 65 years, Penhall has been North America’s largest provider of concrete cutting, coring, demolition, and scanning services. With a deep commitment to safety, precision, and innovation, Penhall has earned a reputation as the go-to partner for projects that require surgical accuracy and heavy-duty capability alike. Their Texas operations, anchored by a strong presence in Austin, Houston, Dallas, and San Antonio, span healthcare, transportation, energy, and industrial sectors.

In this roundup, we’re highlighting five standout projects that showcase the breadth and depth of Penhall’s capabilities across Texas. Whether it’s a delicate hospital renovation in the heart of Austin or the demolition of a massive wind turbine foundation in South Texas, these projects demonstrate why contractors and facility owners across the state trust Penhall to get the job done safely and on time.

1. Dell Children’s Hospital — Austin, TX

Services: Wall Sawing, Core Drilling, Concrete Removal
Industry: Healthcare / Hospital

Healthcare construction presents some of the most demanding conditions in the industry, and this Austin project is a perfect example. Penhall was tasked with the surgical removal of a four-story, cast-in-place concrete stairwell to make way for a hospital addition at Dell Children’s Hospital. The scope of work began with the removal of architectural steel screening around the stairwell, followed by temporary shoring of the concrete structure. The team then wall sawed concrete risers and landings into manageable sections, none exceeding 10,000 pounds, and core drilled pick holes for removal by tower crane.

What made this project especially challenging was its location: the stairwell was attached directly to the hospital, adjacent to active patient rooms. Conventional excavator demolition methods were not permitted due to noise, vibration, and access constraints from the surrounding new construction. Penhall’s precision approach ensured the work was completed safely without disrupting hospital operations, a testament to the kind of careful planning and execution that Austin’s healthcare sector demands.

View the full Dell Children’s Hospital project details →

Concrete stairwell installed by Penhall at Dell's Children's Hospital

2. Heldenfels Enterprises, Inc. — San Marcos, TX

Services: Concrete Breaking, Concrete Removal
Industry: Industrial

Just south of Austin in San Marcos, Penhall took on a complex industrial project at a precast concrete manufacturing facility operated by Heldenfels Enterprises. The goal: break and remove concrete anchor blocks while preserving all vertical rebar for reuse in upgraded anchor blocks. This required a meticulous, multi-step approach.

The work scope included chipping the face of the concrete to expose horizontal rebar, torching out horizontal rebar for relief, rock drilling 6-foot-deep vertical holes, and filling those holes with expansive grout to create controlled relief cracks. The team then broke and chipped the remaining concrete, removing every piece without damaging the rebar that was designated to remain. This project highlights Penhall’s ability to perform precision demolition where preserving existing structural elements is just as important as removing the old ones.

View the full Heldenfels Enterprises project details →

Penhall team removing concrete anchor blocks

3. Reloj Del Sol Wind Turbine Foundation Demolition — San Ygnacio, TX

Services: Demolition, Concrete Removal
Industry: Energy / Industrial

Deep in South Texas, Penhall was contracted to demolish and remove a wind turbine foundation at the Reloj Del Sol Wind site in San Ygnacio. Wind energy is a growing sector across Texas, and as turbines are decommissioned or upgraded, the massive concrete foundations they sit on need to be removed safely and efficiently.

This project involved breaking down 650 cubic yards of concrete using CAT 336 and CAT 325 excavators equipped with hydraulic hammers. With a focus on safety and efficiency, Penhall delivered a seamless demolition process, ensuring the site was fully cleared and prepared for the next phase of development. It’s the kind of large-scale demolition work that requires both heavy equipment expertise and careful project management, two areas where Penhall consistently excels.

View the full Reloj Del Sol project details →

IMG_5229

4. Newt Graham Lock and Dam — Inola, OK

Services: Core Drilling, Wire Sawing, Concrete Removal
Industry: Lock / Dam / Infrastructure

Managed out of Penhall’s Austin operations, this lock and dam project demonstrates the company’s willingness and ability to mobilize for critical infrastructure work wherever it’s needed. After a barge struck a monolith structure at the Newt Graham Lock and Dam, Penhall was brought in to remove the damaged section down to sound concrete so repairs could proceed.

All work was performed inside a cofferdam, adding significant logistical complexity. The team diamond core drilled over 690 linear feet of holes, including wire access holes and rigging holes, while managing the unpredictable conditions created by the damaged monolith. Penhall then wire sawed 3,000 square feet of concrete, some sections up to 13 feet thick, and rigged and picked 15-ton sections of concrete to shore. The entire project was completed accident-free, underscoring Penhall’s industry-leading safety culture.

View the full Newt Graham Lock and Dam project details →

Penhall employees working on lock repair

5. SH 288 and I-610 Interchange — Houston, TX

Services: Bridge Demolition
Industry: DOT / Infrastructure

Houston’s highway system is one of the most complex in the country, and upgrading it requires demolition partners who can work within extremely tight windows. For the SH 288 and I-610 interchange project, Penhall was responsible for the bridge removal of a three-level highway interchange, one of the most logistically demanding types of infrastructure demolition.

Seven bridges, composed of both precast concrete girders and steel girders, were removed over multiple mobilizations, including intensive 54-hour full weekend closures. Over the course of two years, Penhall removed all seven bridge structures, hauling off more than 17,000 cubic yards of concrete for recycling. This project is a prime example of how Penhall partners with state departments of transportation to deliver critical infrastructure upgrades on schedule and with minimal disruption to the traveling public.

View the full SH 288 and I-610 Interchange project details →

Penhall employees during bridge removal on the 288 and I-610 Interchange

Built for Texas: Why Penhall Is the State’s Concrete Services Leader

From the precision required to remove a stairwell adjacent to hospital patient rooms in Austin, to the brute force needed to break down 650 cubic yards of wind turbine foundation in the South Texas heat, these five projects tell the story of a company built for any challenge. Penhall’s Texas team brings the same combination of cutting-edge equipment, rigorous safety protocols, and deep field experience to every job, whether it’s a delicate healthcare renovation or a multi-year highway interchange demolition.

What ties all of these projects together is Penhall’s commitment to doing the job right. Their investment in advanced technology, from diamond-blade cutting and wire sawing to GPR scanning and digital X-ray imaging, means clients get precise results with fewer surprises. And their Behavior-Based Safety (BBS) program ensures that every project, no matter the scale, is executed with the well-being of workers and the public as the top priority.

If you’re planning a concrete cutting, coring, demolition, or scanning project anywhere in Texas, Penhall’s local teams are ready to help. Explore their full portfolio of completed projects, or reach out to the Austin, Houston, Dallas, or San Antonio branch to discuss your next project.

Contact Penhall today to request a quote →

CONCRETE SERVICES

Diamond Core Drilling: A Complete Guide to Equipment, Techniques, and Applications

How does diamond core drilling work? What equipment is involved? And when should you hire a professional coring contractor? This guide covers everything you need to know about the tools, methods, and best practices behind precision concrete coring.

CALL FOR A QUOTE
1-800-736-4255

At a Glance

  • A diamond core drill uses a hollow, cylindrical bit embedded with industrial-grade diamond segments to grind through concrete, asphalt, brick, stone, and other masonry materials.
  • Core drilling removes a clean, cylindrical plug (the "core") without causing vibration damage, microfractures, or impact stress to the surrounding structure.
  • Three main equipment categories serve different project needs: hand-held drills (up to 3 inches), medium-duty rig-mounted drills (1 to 8 inches), and heavy-duty drills with electric, pneumatic, or hydraulic motors (8 inches and larger, with depths exceeding 100 feet).
  • Water cooling is the standard method for most core drilling, lubricating the bit, suppressing dust, and flushing debris from the hole. Dry coring is available for locations where water is impractical
  • Common applications include creating openings for electrical, plumbing, and HVAC installations, extracting core samples for structural testing, drilling anchor holes, and creating manhole or drainage penetrations.
  • Pre-drilling concrete scanning with GPR or X-ray imaging is essential to locate rebar, post-tension cables, conduits, and other embedded hazards before coring begins.
  • Penhall Company provides professional diamond core drilling services nationwide, with equipment capable of drilling from 1 inch in diameter to over 100 feet deep.
ECAE5EBA-222D-4868-8A20-A6C85CBECC79_Gerry Molina
66in Diam Core 2 HPark PacWest 6-13-12

What Is Diamond Core Drilling?

Diamond core drilling is a specialized cutting method that uses a hollow, cylindrical drill bit with diamond-impregnated segments to grind through hard materials and extract a solid cylindrical plug, known as a core. Unlike standard percussion drilling or jackhammering, which fracture material through impact, core drilling grinds its way through the material using the extreme hardness of industrial diamonds. The result is a clean, precise, perfectly round hole with smooth edges and zero vibration damage to the surrounding structure.

This technique is the industry standard for creating openings in concrete, reinforced concrete, asphalt, brick, block, stone, and other masonry materials. It is used across virtually every type of construction and renovation project, from running a single plumbing pipe through a basement slab to drilling hundreds of anchor holes on a highway bridge deck. The method's combination of precision, speed, low noise, and structural safety makes it the preferred approach whenever a round penetration is needed in a hard material.

In this guide, we will walk through how diamond core drilling works, the equipment and bit types involved, wet versus dry coring methods, the full range of applications, important safety and pre-drilling considerations, and when it makes sense to hire a professional concrete coring contractor like Penhall Company.

How Diamond Core Drilling Works

The Diamond Core Bit

The core bit is the defining component of the system. It is a hollow steel cylinder (sometimes called a barrel or can) with diamond segments bonded to its cutting end. These segments are made from a mixture of synthetic industrial diamonds and a metal matrix (typically cobalt, bronze, or iron-based). As the bit rotates against the material, the diamond particles do the actual cutting, grinding through concrete and aggregate at the microscopic level. As the outer layer of diamonds wears away, fresh diamond particles are exposed in the matrix beneath, keeping the cutting edge sharp throughout the life of the bit.

Diamond core bits are available in a wide range of diameters, typically from less than 1 inch up to 60 inches or more for specialized applications. The bit diameter determines the size of the hole. Bit length (also called barrel depth) determines how deep a single pass can drill before the bit needs to be removed and reattached with an extension. Standard barrels accommodate 12 to 14 inches of depth per pass, but extensions allow drilling to virtually any depth.

The Drilling Process

The core drilling process follows a consistent sequence regardless of the equipment size. First, the operator secures the drill to the work surface. For rig-mounted drills, this involves anchoring a drill stand (also called a mast or column) to the concrete using a small threaded anchor bolt. The drill motor is then mounted to the stand, which acts as a guide rail to keep the bit aligned and apply consistent pressure. Hand-held drills may be used freehand for smaller holes or mounted on a vacuum-base stand for added stability.

Once the drill is secured and the appropriately sized bit is mounted, the operator starts the motor and engages the feed mechanism, which is usually a hand crank or lever that advances the spinning bit into the material. Water is applied continuously to cool the bit, suppress dust, and flush the ground material (slurry) out of the hole. The bit grinds through the concrete and any embedded material, including aggregate and rebar, until it penetrates the full thickness of the structure. The resulting cylindrical core either comes out attached to the bit or can be pulled from the hole manually.

Why Diamonds?

Diamond is the hardest known natural material, rating a 10 on the Mohs hardness scale. Concrete aggregate (granite, quartz, limestone) typically rates between 3 and 7 on the same scale. This extreme hardness differential is what makes diamond the ideal cutting medium for concrete. Diamond bits grind through material rather than chipping or fracturing it, which is why core drilling produces clean holes without introducing stress cracks or microfractures into the surrounding structure. This non-impact approach preserves the structural integrity of the concrete, which is critically important when drilling in load-bearing walls, post-tensioned slabs, and other structural elements.

Core Drilling Equipment: Types and Capabilities

Core drilling equipment ranges from compact hand-held units to large, truck-mounted rigs. The right tool depends on the hole diameter, depth, material hardness, reinforcement density, orientation (horizontal, vertical, or angled), and site access constraints. Professional coring contractors like Penhall Company carry a full range of equipment to match the demands of any project.

Hand-Held Core Drills

Hand-held core drills are small, lightweight units that resemble oversized shop drills. They are designed for holes up to approximately 3 inches in diameter in slabs, walls, and other surfaces where access is tight or where only a few penetrations are needed. Hand-held drills are typically electric-powered and can be operated freehand or mounted on a portable vacuum-base stand for improved accuracy. They are well suited for light-duty work such as drilling anchor holes, small conduit penetrations, or core sample extraction for lab testing.

Medium-Duty Rig-Mounted Drills

Medium-duty drills handle holes ranging from approximately 1 to 8 inches in diameter. These units use a 15 to 18 amp electric motor mounted on a drill stand that anchors to the work surface. The stand provides a rigid guide for the bit, ensuring straight, accurate holes even through thick, reinforced concrete. Medium-duty rigs are the workhorses of the coring industry, handling the majority of plumbing, electrical, and HVAC penetrations on commercial and residential construction projects. They strike a practical balance between portability and power.

Heavy-Duty Core Drills

Heavy-duty drills are built for large-diameter holes, heavily reinforced structures, and exceptionally deep cores. These units feature high-output motors in the 18 to 20 amp range and may be powered by electric, pneumatic (air), or hydraulic systems depending on the application and site conditions. Pneumatic and hydraulic motors are particularly useful in wet environments, confined spaces, or locations where electrical power is unavailable or poses a safety risk.

Heavy-duty rigs are used for large penetrations such as manhole openings, large-diameter pipe chases, and structural cores in dams, bridges, and industrial facilities. With continuous tubing technology and extension rods, heavy-duty drilling systems can reach depths exceeding 100 feet. Penhall Company's fleet includes custom-built drilling equipment designed for exactly these high-demand applications, with the capability to drill anywhere from 1 inch in diameter to more than 100 feet deep.

Wet Coring vs. Dry Coring

Wet Core Drilling

Wet coring is the standard method for most diamond core drilling applications. Water is supplied to the bit continuously during drilling, serving three critical functions: it cools the diamond segments to prevent overheating (which degrades the diamond bond and shortens bit life), it suppresses airborne dust (particularly important for silica dust exposure control), and it flushes the ground material (slurry) out of the kerf to prevent the bit from binding. Wet coring produces faster cut speeds, longer bit life, and cleaner holes compared to dry methods. Any core drill larger than a hand-held unit will typically require water cooling.

The trade-off with wet coring is water management. The slurry (a mixture of water and ground concrete) must be contained and cleaned up, which requires vacuum systems, slurry rings, or containment barriers depending on the site. In occupied buildings, water management becomes a significant logistical consideration. Professional coring contractors plan for slurry containment as a standard part of every wet-coring job.

Dry Core Drilling

Dry coring uses specialized bits designed to operate without water. These bits typically feature vacuum-brazed diamond segments or a different bond formulation that tolerates higher temperatures. Dry coring is used in situations where water is impractical or prohibited: interior spaces where water damage is a concern, electrical rooms, data centers, occupied healthcare facilities, or locations without a water supply. Dry coring produces more dust, so it is typically paired with a vacuum attachment or HEPA-filtered dust collection system to manage airborne particulates.

Dry coring is generally limited to smaller diameter holes (typically under 4 to 6 inches) and shallower depths, because the heat generated without water cooling limits how aggressively the operator can push the bit. For larger or deeper holes, wet coring remains the more practical and efficient method.

Common Applications for Diamond Core Drilling

Diamond core drilling serves a wide range of construction, renovation, and infrastructure applications. Because it produces clean, precise holes without vibration or structural impact, it is the preferred method for penetrations in virtually any concrete or masonry structure.

MEP Installations (Electrical, Plumbing, and HVAC)

The most common application for core drilling is creating openings for mechanical, electrical, and plumbing (MEP) installations. Running conduit for electrical wiring, pipes for plumbing and fire suppression systems, and ducts for HVAC all require penetrations through concrete floors, walls, and ceilings. Core drilling creates these openings cleanly and precisely, with exactly the diameter specified by the installing trades. This is particularly important in renovation and tenant improvement projects where existing concrete must be penetrated without damaging surrounding finishes or structural elements.

Concrete Sample Extraction and Structural Testing

Core drilling is the standard method for extracting concrete samples for laboratory testing. Engineers and inspectors pull cylindrical core samples to evaluate the compressive strength, density, composition, and condition of existing concrete. This type of destructive testing is a critical quality assurance tool for new construction and a diagnostic tool for evaluating aging structures, bridges, dams, parking garages, and other infrastructure.

Anchor Holes, Doweling, and Rebar Tie-Ins

Core drilling creates the holes needed for post-installed anchors, dowel bars, and rebar tie-ins. When new concrete must be structurally connected to existing concrete (such as adding a new slab next to an existing one, or connecting a new wall to an existing foundation), engineers specify drilled holes for epoxy-set rebar or mechanical anchors. Core drilling produces the clean, consistent-diameter holes that these connections require.

Manholes, Drainage, and Large Penetrations

Large-diameter core drilling creates openings for manholes, floor drains, sump pits, and large-pipe penetrations. These applications require heavy-duty equipment and experienced operators, as the large bit diameter generates significant torque and the resulting cores can weigh hundreds of pounds. Professional contractors use rigging and handling procedures to safely extract and remove heavy cores.

Bridge, Dam, and Infrastructure Work

Core drilling plays a major role in infrastructure construction and maintenance. On bridge projects, coring is used for drainage holes, railing and barrier anchor installations, and sampling for structural assessment. On dams, locks, and water treatment facilities, core drilling provides penetrations for instrumentation, drainage, and structural monitoring. These applications often require deep drilling, angled drilling, or work in confined and hazardous environments, which is where the expertise and specialized equipment of a contractor like Penhall becomes essential.

Pre-Drilling: Why Concrete Scanning Matters

Before any core drill touches a concrete surface, it is critical to know what is embedded inside the structure. Concrete slabs, walls, and structural elements routinely contain rebar, post-tension cables, electrical conduit, plumbing lines, and other embedded items. Striking a post-tension cable during coring can cause catastrophic structural failure. Hitting a live electrical conduit can cause electrocution. Even cutting through rebar, while the diamond bit can handle it, may compromise the structural integrity of the element if the rebar was not accounted for in the engineering plan.

This is why professional coring contractors pair their drilling services with subsurface scanning. Ground penetrating radar (GPR) scanning uses radar waves to map the location and depth of embedded objects in concrete. It is fast, non-destructive, and safe to use in occupied spaces. For situations where GPR data is ambiguous or where higher-resolution imaging is needed, digital X-ray imaging provides a detailed radiographic image of the concrete cross-section.

Penhall Company provides both GPR scanning and X-ray imaging as part of its integrated service offering. Having the scanning and coring performed by the same company streamlines the workflow: the scanning analyst marks safe drilling locations directly on the concrete, and the coring crew drills with confidence knowing that every penetration has been verified. This scan-then-core approach is the industry best practice and dramatically reduces the risk of costly, dangerous utility or structural strikes.

Core Drilling vs. Other Concrete Penetration Methods

Core drilling is not the only way to create an opening in concrete, but it is the preferred method for most applications. Understanding how it compares to alternatives helps explain why.

Core drilling vs. jackhammering (impact breaking): Jackhammering creates openings by fracturing concrete through percussive impact. It is effective for large-area removal but produces irregular edges, generates significant noise and vibration, creates airborne dust and debris, and introduces microfractures into the remaining structure. Core drilling produces a clean, precise opening with no vibration, no microfractures, and far less noise and dust. For round penetrations, core drilling is faster, cleaner, and safer for the structure.

Core drilling vs. saw cutting: Concrete saw cutting (flat sawing, wall sawing, wire sawing) creates straight-line cuts and is the right choice for square or rectangular openings, trenches, and full-section removals. Core drilling is the right choice for round penetrations. Many projects require both: saw-cut openings for large ductwork, plus cored holes for conduit and piping. Penhall provides both cutting and coring services under one contract, simplifying coordination.

Core drilling vs. rotary hammer drilling: Rotary hammer drills (SDS drills) are widely used for small anchor holes and fastener installations. They work by combining rotation with a hammering action. Rotary hammers are effective for holes up to about 1.5 inches in diameter in lightly reinforced concrete. Beyond that size, or in heavily reinforced structures, diamond core drilling takes over because it can cut cleanly through rebar without binding, produces a precise hole diameter, and does not generate the impact stress that can damage the surrounding structure.

Safety Considerations for Core Drilling

Core drilling is a specialized trade that requires training, proper equipment, and adherence to safety protocols. Key safety considerations include silica dust exposure management (OSHA's Table 1 requirements for respirable crystalline silica), proper water supply and slurry containment, secure anchoring of the drill to prevent torque-related injuries, electrical safety when drilling near or through energized systems, structural evaluation to ensure that cored openings do not compromise load-bearing capacity, and fall protection when drilling on elevated surfaces.

Penhall Company maintains rigorous safety programs across all of its operations. Every coring crew is trained in equipment operation, hazard recognition, silica exposure control, and emergency procedures. This commitment to safety is one of the primary reasons contractors, facility managers, and engineers choose to hire a professional coring company rather than attempting the work with general labor and rented equipment.

When to Hire a Professional Core Drilling Contractor

While small-diameter holes in simple, non-structural concrete can sometimes be handled by general contractors with the right equipment, many coring situations call for a specialist. You should consider hiring a professional coring contractor when the concrete is structurally reinforced (rebar, post-tension cables, or wire mesh), when the hole diameter exceeds 3 to 4 inches, when the drilling depth exceeds 12 inches, when the work involves angled or overhead drilling, when pre-drilling scanning is needed to avoid embedded hazards, when OSHA silica compliance documentation is required, or when the project involves a high volume of cores.

Penhall Company has been providing professional core drilling services since 1957. With over 1,300 professionals and branch locations across North America, Penhall has the equipment, training, and field experience to handle coring projects of any scale, from a single penetration in a residential basement to hundreds of cores on a commercial high-rise or infrastructure project. Penhall's integrated service model means you can get GPR scanning, coring, concrete cutting, and demolition all from a single provider. Contact Penhall for a free quote on your next coring project.

frequently asked questions

What is diamond core drilling?

Diamond core drilling is a method of using a hollow, diamond-tipped cylindrical bit to grind through concrete, asphalt, brick, stone, or other masonry materials and remove a clean, cylindrical plug (the core). It is the standard technique for creating precise round openings in hard materials without vibration damage to the surrounding structure.

Can a diamond core drill cut through rebar?

Yes, diamond core bits are capable of cutting through steel reinforcement (rebar). The diamond segments grind through both the concrete and the embedded steel. However, cutting rebar slows the drilling speed and increases bit wear. More importantly, cutting structural rebar should only be done with engineering approval, because removing reinforcement can compromise the load-bearing capacity of the concrete element. Pre-drilling scanning with GPR or X-ray imaging helps identify rebar locations so holes can be positioned to avoid reinforcement when possible.

What sizes of holes can core drilling produce?

Diamond core drills can produce holes from less than 1 inch in diameter up to 60 inches or more. The most common range for construction applications is 1 to 12 inches. Hand-held drills handle up to about 3 inches, medium-duty rigs cover 1 to 8 inches, and heavy-duty drills handle the largest diameters. Penhall's equipment can drill from 1 inch in diameter to over 100 feet in depth.

Why is water used during core drilling?

Water serves three functions during core drilling: it cools the diamond bit to prevent overheating and premature wear, it suppresses airborne silica dust (a serious respiratory hazard), and it flushes ground material out of the hole to prevent the bit from binding. Wet coring produces faster cutting speeds and longer bit life compared to dry methods. Dry coring is available for locations where water use is impractical, but it is limited to smaller diameters and requires dust collection equipment.

How deep can a core drill go?

Standard core drill barrels accommodate 12 to 14 inches of depth per pass. Extension rods and continuous tubing systems allow drilling to significantly greater depths. Penhall Company's equipment is capable of drilling to depths exceeding 100 feet using specialized deep-drilling rigs and extension systems.

Can core drilling be done at an angle?

Yes. Specialized rigs and adjustable drilling stands allow core drilling at virtually any angle, including horizontal (through walls), vertical (through floors and ceilings), and angled orientations. Overhead and angled drilling requires additional safety precautions, specialized anchoring, and experienced operators.

Is core drilling noisy?

Core drilling produces significantly less noise than jackhammering or impact methods. The grinding action of the diamond bit is quieter than percussive tools, and the water used in wet coring further dampens sound. This makes core drilling suitable for occupied buildings, hospitals, schools, and other noise-sensitive environments. Hearing protection is still required for operators and nearby workers.

Should concrete be scanned before core drilling?

Yes. Pre-drilling scanning is strongly recommended for any coring project, and it is required on many job sites. Concrete scanning identifies the location of rebar, post-tension cables, electrical conduit, plumbing, and other embedded objects so that drill positions can be planned to avoid them. GPR scanning is the most common method, with X-ray imaging used when higher-resolution data is needed.

What materials can be core drilled?

Diamond core drilling is effective on concrete (including reinforced and post-tensioned concrete), asphalt, brick, block (CMU), stone (granite, limestone, marble), and other masonry materials. It is the preferred method for any hard material where a clean, round opening is needed.

How do I get a quote for core drilling services?

Visit Penhall's concrete coring service page or contact Penhall directly for a free quote. To receive the most accurate estimate, have the following information ready: the number and diameter of holes needed, the thickness of the concrete, whether the concrete is reinforced (rebar, post-tension, wire mesh), the orientation of the holes (floor, wall, ceiling), and the project location.

UTILITY SERVICES

Private Utility Locating and Mapping Services: A Complete Guide to Understanding Utility Markings and Protecting Your Project

What do those colored flags in your yard mean? How do you read utility markings? And when does your project need private utility locating that goes beyond what 811 provides? This guide covers it all.

CALL FOR A QUOTE
1-800-736-4255

At a Glance

  • Private utility locating identifies underground utilities on private property, picking up where 811's free public utility locating services leave off.
  • Utility flags and paint markings follow the APWA Uniform Color Code: white (proposed excavation), pink (survey markings), red (electric), yellow (gas/oil/steam), orange (communication/telecom), blue (potable water), green (sewer/drain), and purple (reclaimed water/irrigation).
  • According to the Common Ground Alliance, every dollar spent on utility locating saves an average of $4.62, contributing to an estimated $1 billion saved nationwide each year.
  • Ground penetrating radar (GPR) is the primary technology used for private utility detection, capable of locating gas lines, power lines, communication lines, sewer lines, underground storage tanks, and pipes.
  • GPS utility mapping creates permanent, detailed digital maps of underground utilities (exportable as KMZ, KML, or SHP files), accurate to within 6 inches, eliminating the need for repeated locating.
  • Utility location markings are typically valid for 14 to 21 calendar days, depending on your state. Do not remove flags until excavation is complete or the locate ticket has expired.
  • Penhall Technologies provides private utility locating and GPS utility mapping services nationwide for construction and demolition projects of all scales.
PXL_20251120_202527761
Screenshot 2026-03-04 184118

Why Private Utility Locating Matters

Before any shovel, drill, or excavator breaks ground, one critical step must come first: knowing exactly what lies beneath the surface. Underground utility lines, including gas, electric, water, sewer, and telecommunications, are buried throughout residential, commercial, and industrial properties. Striking one of these lines during excavation can result in serious injuries, service outages, environmental damage, and project delays that cost thousands of dollars or more.

Most people are familiar with 811, the national "Call Before You Dig" number that arranges for public utilities to be marked from the street to the meter. But 811 only covers public utility lines. On private property, there is an entire network of private utility lines (water lines, natural gas connections, septic systems, irrigation, communication cables, and more) that 811 does not locate. That is where private utility locating services come in.

In this guide, we will cover how to read utility markings and flag colors, what private utility locating involves, how GPS utility mapping creates a permanent record of your site, and when it is safe to remove utility flags from your yard. Whether you are a contractor planning an excavation, a facility manager overseeing a renovation, or a homeowner who just noticed colored flags in your lawn, this guide will help you understand what those markings mean and why they matter.

What We Locate: Where 811 Ends and Private Utility Locating Begins

The 811 system is an essential first step, but it has a clearly defined boundary: it locates public utilities from the street to the meter or point of connection. Everything beyond that point, on private property, is outside of 811's scope. Private utility locating companies like Penhall Technologies fill that gap, locating the full range of underground utilities that exist on private land.

Penhall's experts locate gas lines, power lines, communication lines, sewer lines, cable lines, underground storage tanks, and underground pipes. Identifying these private utility lines before excavation prevents leaks, costly repairs, service interruptions, and dangerous accidents. Using advanced ground penetrating radar (GPR) technology, Penhall's experienced analysts detect, identify, and label underground utility lines, tanks, and pipes with high accuracy.

How to Read Utility Markings: The APWA Color Code Explained

If you have ever noticed colored flags, spray paint lines, or chalk marks on a sidewalk, street, or lawn, you have seen utility markings in action. These markings follow a standardized system established by the American Public Works Association (APWA) called the Uniform Color Code. Each color corresponds to a specific type of underground utility, making it possible for excavators, contractors, and property owners to quickly understand what is buried below.

Markings typically consist of color-coded surface paint (spray paint or chalk) to indicate the route of buried lines, supplemented by color-coded vertical markers (temporary stakes or flags) for increased visibility. All marks should include the name, initials, or logo of the company that owns or operates the line. If the buried facility is wider than 2 inches, the marking should also indicate the width.

What Do White Utility Flags Mean?

White flags or paint markings indicate a proposed excavation. They outline the boundaries of where digging, trenching, or other ground-disturbing work is planned. White markings are placed by the excavator (the person or company planning to dig) to show utility locators exactly where the work will take place. When you see white flags in a yard or along a street, it means someone has submitted a dig plan for that area. The white markings help utility locators focus their work on the relevant zone.

What Do Blue Utility Flags Mean?

Blue flags or paint markings indicate potable water lines. These are the drinking water supply lines that deliver clean water to buildings and homes. Blue markings are among the most common you will see in residential areas, because water lines run to virtually every structure. Accidentally striking a water main during excavation can cause flooding, property damage, and a loss of water service to surrounding properties.

The Complete APWA Color Code

Here is the full APWA Uniform Color Code for underground utility markings:

Red Electric power lines, cables, conduit, and lighting cables
Orange Communication, alarm, or signal lines, cables, or conduit (including telecom and fiber)
Yellow Gas, oil, steam, petroleum, or other gaseous/flammable materials
Green Sewer and drain lines
Blue Potable (drinking) water lines
Purple Reclaimed water, irrigation, and slurry lines
Pink Temporary survey markings or unknown/unidentified facilities
White Proposed excavation boundaries (placed by the excavator)

After locating your utilities, Penhall's analysts mark each line with paint or flags in the designated APWA color. This standardized approach ensures clear, consistent communication on every job site.

image0000004
1000002033

How to Read Utility Pole Markings

Utility poles carry their own set of markings that communicate important information to utility workers and contractors. While these markings vary by utility company and region, there are some common elements you will find on most poles.

Most utility poles have an identification tag or stamp that includes a sequence number (a unique identifier for that specific pole), the year of manufacture or installation, the height and class of the pole (which indicates its load-bearing capacity), and the treatment type (how the wood was preserved). You may also see colored tags or bands attached to the pole by different utility companies (electric, telephone, cable) to indicate which lines on the pole belong to which provider.

Colored markers on utility poles sometimes follow the same APWA color conventions (red for electric, orange for telecom, etc.), but this is not universally standardized the way underground markings are. If you need to identify which lines are attached to a specific utility pole, the best approach is to contact the utility company directly or consult with a private utility locating service that can trace lines from the pole to their underground connection points.

Detect Hazards: How Private Utility Locating Works

Penhall Technologies uses advanced ground penetrating radar (GPR) as the primary technology for private utility locating. GPR works by emitting radio waves into the ground and recording the reflected signals. Different materials (metal pipes, plastic conduits, soil, voids) reflect the radar waves differently, allowing trained analysts to identify the location, depth, and approximate type of each buried utility.

Safety is the primary reason for utility locating, but it also protects your budget and timeline. Striking a subsurface hazard can lead to severe injuries, costly repairs, regulatory fines, and significant project delays. By investing in utility locating before breaking ground, you prevent these outcomes and keep your project moving. According to the Common Ground Alliance, every dollar spent on utility locating saves an average of $4.62.

Penhall's cutting-edge GPR equipment provides real-time data, enabling analysts to make accurate assessments quickly. Whether you are dealing with complex urban environments with dense utility networks or straightforward residential properties, Penhall's technology ensures that no subsurface hazard goes undetected. For situations where GPR data is congested or ambiguous, Penhall also offers digital X-ray imaging for definitive subsurface identification.

GPS Utility Mapping: A Permanent Record of What Lies Below

Traditional utility locating with flags and paint marks is essential for active excavation, but those markings are temporary. Paint fades, flags get pulled, and the information is lost. GPS utility mapping solves this problem by creating a permanent, detailed digital record of all underground utilities on your site.

Penhall Technologies' GPS utility mapping service takes the location data gathered during the utility locating process and uses it to create comprehensive maps of underground utilities. These maps are color-coded following APWA standards, tagged with essential metadata (utility type, depth, owner), and exportable as KMZ, KML, or SHP files for integration with GIS systems, CAD software, and project management platforms.

The maps are accurate to within 6 inches, which is more precise than most underground work requires. This accuracy means you can reference the map for future projects, renovations, or maintenance work without needing to call for a new locate every time. Penhall provides digital and PDF utility maps of all site utilities, both public and private, including depths. The maps support seamless project collaboration and communication, helping save money by providing accurate, up-to-date information and avoiding costly mistakes.

When Can I Remove Utility Flags in My Yard?

This is one of the most commonly asked questions by homeowners, and the answer depends on your state's regulations. Here is the general guidance: Do not remove utility flags while excavation work is active or planned in your area. The flags mark the locations of buried utilities, and removing them before work is complete can result in accidental utility strikes, which can cause dangerous situations (gas leaks, electrical hazards, water main breaks) and lead to expensive damage claims.

Locate markings are typically valid for a set period after the locate request is filed, usually between 14 and 21 calendar days depending on your state. (Some states use shorter windows of 10 to 15 working days.) If excavation has not started within the validity window, a new locate request must be filed and the lines re-marked.

If flags have been in your yard for more than 14 days with no visible excavation activity, it is generally acceptable to remove them, as the locate ticket has likely expired. However, the safest approach is to call 811 first and ask about the status of the locate request for your property before pulling any flags. Paint markings are not permanent and will fade over time on their own.

Some important points to keep in mind: never try to replant flags by memory if they get knocked over, because even a few inches of error can lead to a utility strike. If flags are displaced by weather, mowing, or other activity, call 811 to request a re-mark. The excavator (the company doing the digging) is generally responsible for removing flags once their work is complete.

Benefits: How Private Utility Locating Keeps Projects Safe, On Schedule, and On Budget

Investing in private utility locating before excavation delivers measurable returns. The Common Ground Alliance estimates that every dollar spent on utility locating saves an average of $4.62, contributing to an estimated $1 billion saved nationwide each year. Here is how those savings break down:

Safety: Accurate utility locating prevents accidental strikes that can cause gas leaks, electrical shocks, water main breaks, and structural damage. Protecting your crew from these hazards is the single most important reason to invest in locating services.

Cost avoidance: Repairing a damaged utility line can cost tens of thousands of dollars, plus the cost of project delays, emergency response, and potential regulatory fines. A utility locate is a fraction of that cost.

Schedule protection: Utility strikes cause immediate work stoppages. The repair process, regulatory reporting, and re-marking can set a project back days or weeks. Locating before you dig keeps the schedule intact.

Permanent documentation: GPS utility mapping provides a lasting digital record that eliminates the need for repeated locating on the same site, saving time and money on future projects.

Why Choose Penhall Technologies for Private Utility Locating

Penhall Technologies, a division of Penhall Company, brings over 65 years of concrete and construction industry expertise to every utility locating project. As the nation's largest provider of concrete cutting, coring, and scanning services, Penhall's utility locating analysts understand the real-world context of why accurate locating matters: they work alongside the crews who depend on that data to cut, core, and excavate safely.

Penhall provides both GPR scanning and digital X-ray imaging, giving you access to the right technology for every situation. Their GPS utility mapping service creates permanent, detailed records that support long-term site management. And with branch locations nationwide, Penhall can respond quickly to projects of any scale, from residential properties to complex commercial and industrial sites.

frequently asked questions

What do white utility flags mean?

White utility flags indicate a proposed excavation area. They are placed by the excavator (the person or company planning to dig) to outline where ground-disturbing work will take place. White markings help utility locators know exactly where to focus their scanning and marking efforts.

What do blue utility flags mean?

Blue utility flags mark the location of potable (drinking) water lines. These are among the most common markings in residential areas. Striking a water line can cause flooding, property damage, and loss of water service to nearby properties.

How do you read utility markings?

Utility markings follow the APWA Uniform Color Code. Each color represents a different type of utility: white for proposed excavation, pink for survey markings, red for electric, yellow for gas/oil/steam, orange for communication/telecom, blue for potable water, purple for reclaimed water/irrigation, and green for sewer/drain lines. Markings may include paint, flags, or both, along with the name or logo of the utility owner. The approximate location of the buried utility is within 18 to 24 inches on either side of the marking.

When can I remove utility flags in my yard?

Do not remove utility flags while excavation is active or planned. Locate markings are typically valid for 14 to 21 calendar days depending on your state. If no excavation has occurred after this period, the flags are generally safe to remove. Call 811 to check the status of the locate request before pulling flags. The excavating contractor is usually responsible for removing flags when work is complete.

What is the difference between 811 and private utility locating?

811 locates public utility lines from the street to the meter or point of connection. Private utility locating covers everything beyond that point on private property, including private gas lines, water lines, sewer lines, communication cables, and underground storage tanks. Both services are important for a complete picture of what is buried on your site. Learn more about Penhall's private utility locating services.

How do you read utility pole markings?

Utility poles typically carry identification tags with a sequence number, year of manufacture or installation, pole height and class, and treatment type. Colored tags or bands may indicate which utility company owns specific lines on the pole. While some color conventions overlap with APWA underground marking standards, utility pole marking is not universally standardized. Contact the utility company or a private utility locating service for specific identification.

What is GPS utility mapping?

GPS utility mapping uses location data from the utility locating process to create permanent, detailed digital maps of underground utilities. These maps are color-coded, tagged with metadata (utility type, depth, owner), and exportable as KMZ, KML, or SHP files. They are accurate to within 6 inches and eliminate the need for repeated utility locating on the same site.

How accurate is private utility locating?

GPR-based utility locating is generally accurate to within 6 inches horizontally. The approximate location of a marked utility is within 18 to 24 inches on either side of the surface marking, which is referred to as the tolerance zone. Penhall's GPS utility mapping service achieves accuracy within 6 inches, which exceeds the precision required for most underground work.

What does it cost to have utilities located on private property?

The cost of private utility locating depends on the size and complexity of the site. For a quote, visit Penhall's private utility locating service page or contact Penhall directly. Have the project location, site size, and scope of work ready for the most accurate estimate.

What color are gas line markings?

Gas lines are marked with yellow flags or paint, following the APWA Uniform Color Code. Yellow indicates gas, oil, steam, petroleum, or other gaseous and flammable materials. Gas line strikes are among the most dangerous utility incidents, making accurate marking essential before any excavation.

SAFETY PLANNING

The Guide to Construction Pre-Task Planning (PTP)

Pre-Task Planning (PTP) helps identify hazards and implement safety measures before work begins, ensuring a safer, more efficient job site. By planning ahead, teams improve communication, reduce risks, and enhance productivity.

CALL FOR A QUOTE
1-800-736-4255

The Guide to Construction Pre-Task Planning (PTP)

Pre-task planning (PTP) is a construction safety process used to identify job-specific hazards and plan controls before work begins. In construction environments where conditions change daily, PTP helps crews anticipate risks, align on responsibilities, and reduce the likelihood of incidents during high-risk activities.

In short, PTP in construction is about stopping to think before starting work.

What Is a PTP in Construction?

A PTP in construction is a brief, task-focused safety discussion or assessment completed prior to performing work. Unlike broad safety plans or company-wide policies, PTP focuses on the specific task, location, and conditions present on a given jobsite that day.
PTP is commonly used alongside job hazard analysis (JHA) processes and broader construction safety planning efforts, but it is more immediate and task-driven. It is especially important for work involving concrete cutting, concrete coring, drilling, or demolition, where hidden hazards and changing site conditions can significantly increase risk.

How Does Pre-Task Planning Work?

PTP involves assessing specific tasks and potential risks to create a comprehensive plan that prioritizes safety management. The process is broken down into three key steps:

1. Before the start of any task or job, the supervisor/employee (or whoever is in charge of the project) needs to identify three main things:

The task(s) that need to be completed that day.

The potential hazards that could be involved in the completion of those tasks.

The corrective measures that will be put in place to avoid/mitigate the identified hazards.

For example, let’s say the project task is to flat saw a six inch thick slab of concrete. One of the first things that need to be done is for the supervisor or person in charge of the project, to walk the site with the customer (and walk the site solo) to identify potential hazards, such as:

  • Underground services: Typically when cutting concrete, Penhall Company Concrete Cutting Professionals are continually exposed to gas lines, water lines or electrical lines that could be under the concrete or asphalt or embedded in the concrete.
  • Traffic: If the work is conducted on a street or near an area where people are driving, the crew needs to determine what kind of barriers or work area delineations need to be put in place to protect the safety of the workers and drivers.
  • Pedestrians: Work that is conducted in public areas can expose both workers and bystanders to harm (e.g. flying objects, slip/trip hazards, exhaust fumes, etc.).

2. Once all the potential hazards have been identified, measures must be put in place to control the hazards.

For example:

  • Underground services: Call 511 (number for dig alert) and have someone come out and identify what’s underground and where it’s at.
  • Traffic: Put a truck between worker and traffic; delineate the work area using cones, etc.
  • Pedestrians: Use spotters to keep unauthorized people out of the work area; vacuum slurry water immediately; etc.

3. Pre-Task Planning is also applied to the tools and equipment used on the job and the personal protective equipment (PPE) that the crew wears and uses.

It’s important to remember that PTP should also be applied to tools, machinery, and personal protection equipment (PPE). Identifying the potential hazards related to equipment and verifying that corrective measures are in place is an essential part of ensuring safety, productivity, and morale. This proactive safety approach helps mitigate potential risks and enhance compliance with safety standards.

For instance, if a blade is used, one of the corrective measures to prevent someone getting cut would be to use a blade guard and to inspect the structural integrity of the blade guard.

In addition, if a situation changes while the job is underway, all workers must take a “time-out and stop work,” to conduct a new PTP to evaluate the changing hazards and to assess whether the existing corrective measures will sufficiently mitigate the hazards, or if new corrective measures need to be implemented. This ensures that the job hazard analysis (JHA) remains relevant and effective.

Here are a few examples of questions that operators should ask themselves during their PTP process to validate that the equipment is in good condition and functioning properly before it gets to a customer’s location or job site.

Flat Saw:

  • Does the engine have oil?
  • What is the hydra drive fluid level? Is that sufficient?
  • Does it lift and lower smoothly?
  • Are the blade guards in place?

Small Gas Powered Equipment:

  • Is the oil level sufficient?
  • Is the On/Off switch working properly?
  • Is the battery and connections functioning properly?

Hydra Pack:

  • Is the engine oil level ok?
  • Are the remote and override switches ok?
  • Are there any leaks?
  • Is the GPM flow adjusted to match the tool?
  • Is the PSI adjusted to match the tool?

Core Drilling:

  • Is the carriage tight on the mast?
  • Does the carriage have all the handles and rack gear? Are they ok?
  • Are the base adjusters in place?

Trailers:

  • Is the tire pressure adequate?
  • Are the tires in good condition? What about the rims?
  • Do the springs have defects?
  • Is the pintle eye in good condition?
  • Is the ball/pintle hitch attached and locked?
  • Is the coupler in place?
  • Are the lights working?

Wall Saws:

  • Is the carriage tight on the track?
  • Are the output/blade shaft threads ok?
  • Are the factory guards in place and ok?
  • Are the blade flanges and keyway ok?
  • What is the condition of the hoses? Is it sufficient?
  • What is the condition of the electric cables and plugs?
  • Are there any cracked swivels?

Hand Saw/Chop Saw:

  • Are the factory blade guards in place?
  • Is the output/blade shaft ok?
  • Is the trigger clean and operating freely?

Diamond Tools:

  • Is the proper blade guard installed?
  • Is the blade/core free of cracks?
  • Is the blade flat and positioned to run at the selected RPM?
  • Does the saw/shaft speed match the blade specified RPM?
  • Is the blade rotation correct?
  • Is the core bit RPM set to match the diameter and application?

Who Is Responsible for PTP on a Construction Site?

Effective task planning involves all team members to ensure comprehensive safety management.

If the job is a contract job or a job that is managed by a supervisor, the supervisor will create his/her hazards list and corrective measures. Then, during the morning “Pre-Task Planning” meeting, the supervisor will review the day's plan, hazards and corrective measures and then seek input from the crew and ask if there’s anything on the PTP that they think has been left out or overlooked or needs to be added. This gives the employees the opportunity to contribute to the planning of the project that they will be working on.

However, if an hourly service employee is working independently on a job, they will create their own PTP documents.

Example Pre-Task Planner

Physical Hazards

  • Falling Objects
  • Sharp Objects
  • Walking and Working Surfaces
  • Impact From or By
  • Work Over or Near Water
  • Heavy Lifting
  • High Noise
  • Hot Surfaces

Task Specific Hazards

  • Fall from Height 6 Ft.
  • Scaffolding
  • Climbing Ladders
  • Electrical Energy
  • Excavations and Trenching
  • Confined Space Entry
  • Slips, Trips and Falls
  • Moving Machinery
  • Hand Power Tools
  • Raising and Lowering Materials
  • Floor or Wall Opening
  • Traffic
  • Pinch or Crush Points
  • Machinery Operations

Traffic and Pedestrian Control

  • Signage and Barricades
  • Flag Person
  • Arrow Boards
  • Delineations
  • Traffic Control Plan

Fall Protection and Prevention

  • Full Body Harness
  • Fall Plan
  • Vertical Life Line
  • Guard Rails
  • Retractable Lanyards
  • Lanyards
  • Hole Covers and Barricades
  • Control Access Zones

Excavation and Trenches

  • Competent Person
  • Escape Ladder
  • Barricades and Plating
  • Shoring, Sloping and Benching
  • Signage and Cones

Confined Space Entry

  • Permits Completed
  • Crew Trained
  • Ventilation
  • Atmosphere Monitored
  • Rescue Plan
  • Emergency and Medical

First Aid Kit

  • Call 911
  • Call Dispatch

Health and Housekeeping

  • Trash and Debris Contained
  • Liquids Available
  • Respirator Clean
  • Heat Stress

Why Is PTP Important for Concrete Cutting, Coring, and Drilling?

Concrete cutting activities introduce unique risks that make pre-task planning especially important. These risks can include:

  • Embedded utilities or services within concrete
  • Post-tension cables or reinforcing elements
  • Traffic or pedestrian exposure
  • Slurry, dust, and noise hazards
  • Limited access or confined work areas

PTP helps teams identify these hazards before cutting begins, when adjustments can still be made. This proactive approach supports safer decision-making and reduces the chance of damage, injury, or unplanned downtime.

How PTP Supports Jobsite Hazard Identification

One of the most valuable aspects of PTP is its role in jobsite hazard identification. Rather than assuming conditions are known or unchanged, PTP requires crews to verify what is present at the time of work.

This is particularly important on existing structures, renovations, or occupied facilities, where drawings may be incomplete or conditions may differ from expectations. Identifying hazards early allows teams to involve the right professionals, adjust methods, or delay work until risks are properly addressed.

Why Pre-Task Planning Matters Before Cutting Concrete

Before any concrete cutting, coring, or drilling begins, understanding what lies beneath the surface is critical. Pre-task planning creates the pause needed to ask the right questions before irreversible actions are taken.

By integrating PTP with professional assessment and detection services, contractors can reduce risk, protect workers, and preserve structural integrity. This is why companies like Penhall emphasize hazard identification and planning before cutting activities begin.

Preparing for the Unexpected

While thorough Pre-Task Planning significantly reduces risks, it's impossible to predict every scenario. That's why it's crucial to have backup plans in place. Consider potential delays or issues such as adverse weather conditions, equipment breakdowns, or absent employees.

By being proactive and having contingency plans, you can reduce stress and resume progress quickly if unexpected issues arise. This level of preparedness not only enhances safety but also demonstrates professionalism and commitment to project success.

Remember, the goal of Pre-Task Planning isn't just to complete paperwork, it's to create a safer, more efficient work environment for everyone involved. By consistently applying these principles and remaining vigilant, we can all contribute to a culture of safety in the construction industry.

frequently asked questions

What is PTP in construction?

PTP in construction is a pre-task planning process used to identify hazards and plan controls before specific work activities begin.

What is a PTP in construction used for?

A PTP is used to improve jobsite safety by addressing task-specific risks related to equipment, environment, and site conditions.

Is pre-task planning the same as a job hazard analysis?

Pre-task planning and job hazard analysis are closely related, but PTP is typically more immediate and focused on the work being performed that day.

Who completes a PTP on a construction site?

Supervisors typically lead PTP on managed jobs, while individual workers complete PTP for independent service tasks.

Diamond Sawcutting

CALL FOR A QUOTE
1-800-736-4255

What Are Concrete Saws?

Concrete saws are specialized power tools used to cut through concrete, asphalt, brick, masonry, and other dense, stone-like materials. They are a core piece of concrete cutting equipment on commercial, industrial, and infrastructure job sites where precision, depth control, and safety matter.
Concrete cutting saws come in several sizes and configurations depending on the application. Handheld saws are often used for smaller openings and detail work, while walk-behind concrete saws are designed for flatwork such as slabs, roadways, and bridge decks. Track-mounted and remote-controlled saws are used for highly controlled or hazardous cutting environments where accuracy and operator safety are critical.
These saws can be powered by hydraulic, gasoline, diesel, or electric motors, with the power source typically determined by jobsite conditions, cutting depth requirements, and environmental considerations.

Types of Concrete Saws Used in Diamond Sawcutting

Different concrete saws are designed for different cutting scenarios. Common types include:

Handheld Concrete Saws

Compact and maneuverable, handheld concrete saws are used for wall penetrations, curb cuts, and limited-access areas. They are often paired with diamond blades for clean, controlled cuts.

Walk-Behind Concrete Saws

Walk-behind concrete saws are commonly used for slab cutting, expansion joints, trenching, and roadway work. These saws provide consistent depth control and are well-suited for long, straight cuts in horizontal surfaces.

Track-Mounted and Specialty Saws

For projects that demand extreme precision or operate in restricted or hazardous environments, track-mounted or remote-controlled saws are used. These systems are common in large-scale commercial and infrastructure projects.

Diamond Blades and Diamond Sawcutting Explained

Diamond sawcutting relies on diamond blades rather than traditional cutting edges. Despite the name, diamond blades do not “slice” material. Instead, they function as high-performance grinding wheels.

Diamond blades cut concrete by rotating at high speeds and grinding away material through abrasion. Industrial-grade diamonds are embedded into a metal bond along the blade’s edge, allowing the blade to maintain cutting efficiency even when encountering reinforced concrete and aggregate.

Common Diamond Blade Manufacturing Methods

Diamond blades are manufactured using several bonding techniques, each suited to different cutting demands:

Sintered Diamond Blades
The most common type used in professional concrete cutting. Diamonds are mixed with metal powders and bonded to a steel core through high heat and pressure, creating a durable blade designed for extended use.

Electroplated Diamond Blades
Diamonds are bonded to the blade surface using an electrical current. These blades offer fast cutting speeds but typically have a shorter service life.

Vacuum-Brazed Diamond Blades
Diamonds are welded directly to the blade surface without a metal bond. This method exposes more diamond surface area, allowing for aggressive cutting in specific applications.

Compared to abrasive or grinding wheels, diamond blades provide greater cutting efficiency, improved accuracy, and longer service life, making them the preferred choice for professional diamond sawcutting.

Safety Considerations and the Importance of Water-Fed Cutting

Concrete saws generate significant friction and heat during operation. Without proper controls, cutting can produce excessive dust, overheating, and premature blade wear.
Water-fed cutting systems are critical for safe and effective concrete saw operation. Continuous water flow serves several purposes:

  • Cools the blade to prevent overheating and warping
  • Reduces airborne silica dust for safer working conditions
  • Improves cutting efficiency and blade longevity
  • Produces cleaner, more controlled cuts

These safety considerations are one of the primary reasons professional concrete cutting services rely on specialized equipment and trained operators rather than general-purpose tools.

When to Hire a Professional Concrete Cutting Contractor

While concrete saws are powerful tools, diamond sawcutting is not a typical DIY or general contractor task. Projects involving structural concrete, reinforced slabs, tight tolerances, or safety-sensitive environments benefit from professional concrete cutting services.
A professional concrete cutting contractor brings:

  • Proper saw and blade selection for the material and depth
  • Dust and slurry control systems
  • Compliance with safety and environmental regulations
  • Precision cutting that protects surrounding structures

For complex or large-scale projects, working with an experienced provider like Penhall ensures accurate results while minimizing risk. Learn more about Penhall’s expertise in professional concrete cutting and diamond sawcutting services.

frequently asked questions

What is diamond sawcutting?

Diamond sawcutting is a concrete cutting method that uses diamond-embedded blades to grind through concrete, masonry, and asphalt with high precision and efficiency.

What materials can concrete saws cut?

Concrete saws can cut concrete, reinforced concrete, asphalt, brick, block, and other masonry materials when paired with the appropriate diamond blade.

Why is water used during concrete cutting?

Water cools the blade, reduces dust, improves safety, and helps produce cleaner, more controlled cuts during diamond sawcutting.

Are diamond blades better than abrasive blades?

Diamond blades are generally more efficient, longer-lasting, and more precise than abrasive blades, especially for professional concrete cutting applications.

CONCRETE SERVICES

6 Penhall Projects in Selective Concrete Removal

CALL FOR A QUOTE
1-800-736-4255

When it comes to complex construction and renovation, the first step is often the most critical: clearing the way. Selective concrete removal is a precise science that requires a balance of heavy-duty power and surgical accuracy. As industry leaders since 1957, Penhall Company has mastered this balance, utilizing state-of-the-art equipment—from diamond-tipped saws to robotic demolition—to ensure structural integrity remains intact while unwanted materials are cleared safely and efficiently.

Whether working at 8,000 feet in the air or inside a high-tech pharmaceutical lab, Penhall’s projects showcase how expert concrete removal keeps the nation’s infrastructure moving. Here is a look at six recent projects that highlight the versatility and precision of the Penhall team.

1. High-Altitude Concrete Removal at Palisades Ski Resort

At the iconic Palisades Ski Resort, "extreme" isn't just for the skiers—it applies to the construction, too. Working at high altitudes presents unique logistical challenges, including thin air and unpredictable mountain weather. Penhall was tasked with selective concrete removal to facilitate resort upgrades. By utilizing specialized equipment suited for the terrain, they ensured the project remained on schedule for the upcoming season, demonstrating their ability to operate in even the most rugged environments.

2. Precision Wall Sawing at Capitol Park Hotel

Transforming a historic landmark like the Capitol Park Hotel requires a delicate touch. To assist in the building's adaptive reuse, Penhall utilized precision wall sawing to create new openings and structural modifications. Because the hotel is located in a dense urban area, the team focused on vibration control and noise mitigation, ensuring that the historic facade remained protected while the interior was modernized for its next chapter.

3. Precision Trench Cutting at Gemini Bio

In the sterile environment of a pharmaceutical facility like Gemini Bio, there is zero room for error. Penhall was contracted to cut and remove 100 linear feet of a 2-foot-wide trench for new piping. Despite a change in the project scope that required deeper excavation, the team adapted quickly—utilizing flat sawing and expert excavation to complete the work ahead of schedule. Their clean worksite protocols ensured that the sensitive facility operations were never compromised.

4. Tenant Improvement at PG&E Rocklin

For the PG&E Rocklin facility, Penhall provided essential concrete cutting and removal services as part of a major tenant improvement project. This job required a high degree of coordination with other trades to ensure the building’s footprint was ready for new electrical and mechanical installations. By delivering clean, precise cuts and efficient debris removal, Penhall helped pave the way for a more functional and modern workspace for the utility giant.

5. Industrial-Scale Removal at AdvanSix Chemical Plant

Working inside an active chemical plant like AdvanSix requires the highest level of safety certification and precision. Penhall performed concrete cutting and removal within the facility, where navigating around existing infrastructure and hazardous materials is part of the daily routine. The team utilized specialized methods to ensure no sparks or debris interfered with the plant's sensitive chemical processing operations, proving that safety and productivity can go hand-in-hand.

6. Robotic Demolition at Embassy Suites

At the Embassy Suites in Virginia Beach, Penhall faced a structural challenge: removing an overhanging concrete section and girders during active hotel construction. The team employed a combination of core drilling, wall sawing, and wire sawing to separate the sections. To maximize safety in a tight space, they utilized robotic demolition, which allowed for powerful breaking and removal without putting operators in harm's way. The result was a flawless execution that kept the hospitality project on its fast-tracked timeline.

Tait - Palisades 1_Brandon Rowland
Midstate - Wall Removal in Alley 2_Brandon Rowland
Market One - Dock Saw Cut & Removal - 1_Brandon Rowland
BCI, Rocklin 3_Brandon Rowland
AdvanSix01_Rabih Araki
IMG_20210609_140754417_HDR_Ronald-Allen

Contact Penhall Company for Concrete Removal

From the peaks of the Sierra Nevada to the strict confines of a chemical plant, these projects prove that no two concrete removal jobs are the same. Each requires a tailored strategy, the right technology, and an unwavering commitment to safety. By partnering with a specialist like Penhall, project managers ensure that their demolition is handled with the precision necessary to make the rest of the build a success.

Ready to start your next project? Explore more concrete removal solutions and see why Penhall remains the go-to partner for North America’s most challenging builds.

CONCRETE PROJECTS

Building the Future of SoCal, A Roundup of Recent Concrete Projects

CALL FOR A QUOTE
1-800-736-4255

Building the Future of SoCal, A Roundup of Recent Concrete Projects

Southern California is a region defined by constant evolution. From the vertical growth of the Los Angeles skyline to the essential infrastructure hidden beneath the streets of Orange County and San Diego, the demand for precision concrete services has never been higher. For decades, Penhall Company has been a cornerstone of this development, providing the expertise in concrete cutting, coring, and demolition required to keep SoCal moving forward.

Working in Southern California presents unique challenges—dense urban environments, strict environmental regulations, and the need to maintain public utility services during construction. Penhall’s local teams have consistently met these challenges head-on. Here is a look at six diverse projects that showcase the scale and precision of our work across the Southland.

1. Topanga Tower – Los Angeles, CA

At the Topanga Tower project, Penhall demonstrated why we are the leaders in high-rise concrete solutions. This project required surgical precision to facilitate structural modifications within a towering commercial space. Our team utilized advanced wall sawing and core drilling techniques to ensure that the building's structural integrity remained uncompromised while making way for modern architectural upgrades.

2. High-Stakes Restaurant Demolition – Southern California

In the fast-paced world of retail and dining, "downtime" is not an option. Penhall was tasked with a selective demolition project for a local restaurant undergoing a total floorplan reimagining. We performed precise slab sawing and removal within a tight footprint, ensuring that the surrounding structures were protected and the site was cleared quickly so the renovation crew could begin work immediately.

3. Kettler Elementary School – Huntington Beach, CA

Infrastructure for our schools requires a commitment to safety and cleanliness. At Kettler Elementary, Penhall provided concrete cutting and removal services to support campus improvements. Working around school schedules requires a high degree of coordination and dust mitigation to ensure a safe environment for students and staff. Our team delivered clean, precise cuts that allowed for the seamless installation of new utilities.

4. Hyperion Water Reclamation Plant – Playa Del Rey, CA

The Hyperion Plant is one of the largest wastewater treatment facilities in the world, and maintaining it is a massive undertaking. Penhall was brought in to perform specialized concrete coring and cutting to assist with facility upgrades. Working in a complex industrial environment like Hyperion requires strict adherence to safety protocols and the ability to work around sensitive, active machinery—challenges our team handled with ease.

5. San Diego County Water Authority Pipeline 3 – San Diego, CA

Securing the water supply for San Diego is a critical mission. In this infrastructure project, Penhall assisted the Water Authority by performing essential concrete removal and modifications on Pipeline 3. Dealing with large-scale water infrastructure requires heavy-duty equipment and a deep understanding of reinforced concrete. Our work helped ensure that this vital lifeline remains operational for the thousands of residents who depend on it.

6. Orange County Sanitation District Plant 2 – Huntington Beach, CA

At OCSD Plant 2, Penhall showcased its expertise in industrial-grade concrete removal. This project involved complex cutting within a wastewater treatment environment to allow for system modernization. By utilizing specialized diamond sawing technology, our team was able to cut through heavily reinforced concrete walls and slabs, allowing the district to upgrade its processing capabilities with minimal disruption to the plant’s operations.

Strengthening the Southern California Landscape

From the classrooms of Huntington Beach to the massive pipelines of San Diego, these projects highlight the versatility required to build and maintain Southern California’s infrastructure. Whether it is a high-rise tower or a subterranean water main, the common thread is the need for a partner who understands that precision and safety are paramount.
At Penhall, we take pride in being a part of the Southern California story. These projects are more than just concrete and steel; they are the foundations of the communities where we live and work.

Ready to start your next SoCal project? Contact our local experts today to see how our decades of experience can help you cut through the noise and get the job done right.

penhall empployee using concrete cutter with penhall truck and palm trees in background

DEMOLITION

Modern Bridge Demolition Projects

CALL FOR A QUOTE
1-800-736-4255

Roundup: Modern Bridge Demolition Projects

Concrete is a critical part of infrastructure, forming the foundations and spans of the bridges that connect our world. However, maintaining that connectivity requires constant renovation, repair, and sometimes complete replacement.

Demolition in the heavy highway and bridge sector is high-stakes work that cannot tolerate error. It requires precision to isolate concrete segments, powerful cutting technology to sever massive structural elements, and logistical coordination to manage debris removal over active roadways or environmentally sensitive waterways.

The following projects showcase how Penhall’s specialized concrete services, particularly precision cutting techniques like wall sawing and wire sawing, are essential to safely and efficiently deconstruct and renew bridges, vital transportation links.

Bridge Demolition Project Spotlights

1. SR 520 Bridge Removal – Lake Washington (Seattle, WA)

The Challenge: Executing extensive precision cutting and coring for the removal of the SR-520 bridge segments over Lake Washington. The project involved environmental constraints, restricted access (requiring temporary trestle bridges and barge-mounted cranes), and evolving demolition sequencing.

The Approach: This massive DOT project was defined by sheer scale, requiring 75,000 linear feet of flat sawing (cutting concrete up to 34 inches thick), 7,000 core holes, and 16,500 square feet of wire and wall sawing. These precise cuts were necessary to segment the bridge deck and structural components into manageable pieces for safe, crane-lifted extraction.

Key Takeaway: Demonstrates the comprehensive use of advanced concrete cutting techniques (flat, core, wire, and wall sawing) to manage complex bridge removal over sensitive marine environments.

1_JoeOsborn

2. Bridge Demolition on Hwy 99 (Sacramento, CA)

The Challenge: The safe and rapid demolition and removal of the 21st Ave undercrossing bridge over active Highway 99—a critical, high-profile infrastructure project.

The Approach: The operation began with slotting the bridge deck and torching the internal rebar. Utilizing boom lifts and excavators, the team rigged the massive girders to a 550-ton crane. The crane then lifted and relocated the large concrete segments to a staging area for subsequent breaking and removal.

Key Takeaway: Highlights the intense logistical coordination required for heavy highway work, ensuring zero disruption and maintaining strict safety protocols while maneuvering huge structural components over live traffic.

21st Ave Remove Girders 1_Brandon Rowland

3. Wall Sawing Services for HWY 147 Bridge Removal (Raleigh, NC)

The Challenge: Performing a precision cut for the replacement of a bridge joint slide plate on the HWY 147 bridge, requiring the removal of the existing joint while preserving the structural integrity of the surrounding bridge deck.

The Approach: The team employed a specialized wall sawing unit (Husqvarna 482) with custom angle brackets to execute a precise 45-degree angle cut into the slide plate.

Key Takeaway: Illustrates the surgical nature of bridge maintenance, where wall sawing is used not for total demolition, but for accurate, selective cuts required for structural replacement and repair, completing the work on a precise schedule.

20200314_030916_Ryan Honeycutt

Building the Future of Infrastructure

Bridge projects from the multi-year, multi-service removal over Lake Washington to the targeted joint replacement in North Carolina underscore that modern infrastructure maintenance relies on a blend of brute strength and refined techniques. The common threads running through these successes are the commitment to precision cutting technologies (like diamond sawing), logistical planning, and a focus on safety, especially when operating over active highways and sensitive ecosystems. By mastering the removal of concrete giants, infrastructure experts ensure that today’s demolition paves the way for the stronger, safer bridges of tomorrow.

How to Ensure a Safe Construction Site

Construction remains one of the most hazardous industries globally, but the sobering truth is that nearly every accident is preventable. Companies specializing in concrete services from cutting and coring to demolition and grinding must have foundational safety practices and protocols. A commitment to health and safety is a critical strategy that directly impacts productivity, profitability, and crew morale.

By implementing and maintaining these five core strategies, project managers can ensure a Zero Accident Work environment that protects employees, clients, and the public.

5 Tips for a Safe Concrete Construction Site

1. Thorough Job Site Set-up and Hazard Identification

Safety starts long before the first team member steps foot on site. The project management team must conduct a meticulous, site-specific hazard assessment to identify every potential risk factor.

  • Hazardous Materials Survey: A crucial, early step is asking clients for a project-specific Hazardous Materials Survey. This allows the team to pinpoint and safely address materials like lead-based paint, asbestos, mercury in light fixtures, or hydraulic oil in elevators before the main workforce arrives. Addressing these hidden chemical and environmental risks prevents serious, long-term employee health exposure.

  • Utility & Structural Mapping: Especially in concrete work, confirming the location of all live utilities, rebar, post-tension cables, and buried lines (using GPR scanning or X-ray imaging) is paramount. Striking an unknown utility can be fatal.

2. Clear, Layered, and Documented Communication

In complex construction environments, clear communication is the grease that prevents accidents. Safety information must flow up, down, and laterally across all organizational layers.

  • Information Relay Protocol: Establish a formal path for hazard information. For example, sales and project managers must relay initial site conditions and potential hazards to dispatchers and safety professionals.

  • The Pre-Task Safety Huddle: Before any new task begins, the crew must pause and collectively answer four critical questions:

1. What am I about to do? (Define the task)
2. Is there anything that can go wrong? (Identify the risks)
3. What have I done to correct the problem? (Implement controls)
4. What have I done to communicate the problem? (Ensure awareness)

  • Site-Specific Safety Plans (SSSPs): Every unique project should have a written SSSP. This plan, reviewed by the project management team and discussed with the entire workforce, ensures that corrective actions are documented and implemented before work commences.

3. Consistent Training and Verification of Competency

Training is the bedrock of safety culture. It must be an ongoing, continuous process, starting from the executive level and extending to every boot on the ground.

  • Initial & Recurrent Training: Beyond basic new hire orientation, all team members require recurrent training on recognizing safe vs. unsafe conditions, effective safety communication, and correcting hazardous behaviors.

  • Equipment Specialization: Crew members operating specialty equipment—such as flat saws, wall saws, core drills, or hydrodemolition robots—must be certified specifically on the use and safety aspects of that particular machine. Management must formally sign off on each employee’s ability to complete unsupervised, specialized activities to ensure competence.

  • Empowering the Workforce: Training should instill a sense of ownership over safety, empowering every worker to recognize hazards, stop unsafe work without fear of reprimand, and mentor less-experienced teammates.

4. Leverage Seasoned Expertise and Experience

Experience, often measured in years or even decades, is an invaluable safety asset on any concrete construction site. Seasoned operators often possess a deep, intuitive ability to recognize subtle, developing hazards that may escape the notice of a less-experienced crew.

  • Mentorship and Knowledge Transfer: Companies must prioritize pairing experienced operators with newer team members. This structured mentorship accelerates skill development and transfers critical, situational hazard recognition that cannot be taught solely in a classroom.

  • Situational Awareness: An experienced workforce understands the subtle nuances of concrete behavior, equipment limitations, and the specific risks associated with complex cuts or structural removals, ensuring that safety-related issues are communicated quickly and accurately to supervisors before they escalate into incidents.

5. Cultivate a Positive and Collaborative Work Environment

Safety is inherently tied to morale. A positive work environment fosters trust, which is essential for a robust safety culture.

  • Trust and Accountability: When supervisors and management interact professionally and respectfully with their teams, it cultivates a positive atmosphere where workers trust that their well-being is genuinely valued.

  • Team Cohesion: A collaborative environment means that crew members look out for one another. Workers are more willing to report hazards, challenge an unsafe directive, or intervene to correct a co-worker’s unsafe act when they feel a strong sense of team cohesion and mutual support. A positive attitude, fostered by leadership, ensures that the safety message resonates as an act of care, not just a set of rules.

At the end of the day, safety is not a matter of chance—it is a result of meticulous planning, continuous training, clear communication, and an unwavering commitment to maintaining a positive, professional environment where every individual is empowered to protect themselves and their team.

0322-2

GPR Concrete Scanning Common Misconceptions

Ground Penetrating Radar (GPR) has revolutionized safety and precision in the construction industry. By allowing analysts to see inside concrete slabs before cutting or coring, GPR scanning prevents catastrophic damage to post-tension cables, rebar, and electrical conduits, saving both time and millions of dollars.

However, because GPR is a technology that relies on specialized interpretation, many misconceptions about its capabilities and limitations persist. Before scheduling your project’s next concrete scan, debunk the top five myths about GPR to ensure you understand what the technology can and cannot do.

Debunking the Top 5 Myths About Concrete Ground Penetrating Radar

Myth 1: GPR Provides a Clear, Photographic Image of the Subsurface

  • The Reality: Operating the equipment is easy; interpreting the data is a specialized skill.

Many people believe the GPR screen shows a crystal-clear picture—like an MRI or X-ray—of rebar, wires, and pipes. The truth is less cinematic. The GPR equipment measures reflected radio waves, and the resulting image is a complex black and white display resembling static or a jagged line profile.

When the radar pulse encounters an object (like a pipe or rebar), the signal reflects back to the antenna, appearing as a characteristic hyperbola shape on the screen. The analyst's job is not just to point the machine, but to interpret the size, shape, and depth of hundreds of these hyperbolas and differentiate them from background noise. This critical analysis requires extensive training and experience, not just owning the equipment.

Myth 2: If I Buy the GPR Equipment, I Can Scan Myself

  • The Reality: Operating the equipment is easy; interpreting the data is a specialized skill.

GPR devices are designed to be user-friendly, leading many to believe that simply running the unit over concrete is sufficient. As noted above, the value of GPR lies entirely in the expertise of the analyst.

Professional GPR analysts are trained to read specific patterns and subtle changes in the data that distinguish between different objects. For instance, a skilled analyst can often use the spacing and pattern of the hyperbolas to differentiate between structural rebar, which is intentionally spaced, and random, non-structural elements like an abandoned electrical conduit. Buying the scanner gets you the data; hiring an analyst gets you the accurate, marked-up answer.

Myth 3: GPR Can Scan Successfully Under Any Surface Condition

  • The Reality: Surface conditions, especially moisture, significantly affect GPR success.

GPR works by transmitting electromagnetic signals into the concrete and timing the return echoes. This process is highly sensitive to the electrical properties of the material being scanned.

  • Moisture Content: Concrete that is less than three months old or that is saturated with water has a very high moisture content. Moisture dramatically increases electrical conductivity, causing the radar signal to scatter or reflect immediately back to the antenna. This prevents the signal from penetrating deeply, resulting in poor or unusable data.

  • Surface Finish: Highly conductive surfaces or dense materials like aluminum plating, granite, or marble flooring can also impede the signal, making successful penetration difficult or impossible. For best results, concrete should be well-cured and dry.

Myth 4: GPR Can Scan at Unlimited Depth

  • The Reality: GPR depth penetration is limited, especially in dense concrete.

While some low-frequency GPR units can scan deep into the ground (e.g., utility locating), the high-frequency equipment used for detailed concrete scanning is restricted. In standard concrete applications, GPR is typically limited to a maximum depth of approximately 18 to 24 inches.

If your project requires scanning concrete thicker than this range, or if the slab is inaccessible from one side, GPR may not be the ideal solution. In such cases, other non-destructive testing (NDT) methods, like concrete X-ray imaging, may be necessary to gain a clear view of the lower layers.

Myth 5: GPR is 100% Precise—It Guarantees the Location Within a Millimeter

The Reality: GPR is non-destructive but offers a practical range of accuracy.

GPR is considered highly accurate, but it is not a perfect pinpoint tool. Under ideal conditions (dry, well-aged concrete), a professional GPR analyst can typically locate the center of a target within one-quarter of an inch and determine its depth within a half-inch.

Several factors common on job sites can affect this accuracy:

  • Dense Reinforcement: Multiple layers of rebar, dense wire mesh, or complex internal structures (like pan decking) can cause signal clutter, making it harder to isolate individual targets.

  • Target Size and Material: Small, irregular objects are harder to define than large, uniform pipes.

By choosing to incorporate GPR scanning into your project and understanding its true capabilities, you transform a potential blind cutting operation into a precise, planned, and far safer procedure.

scan low angle

How Roadway Grinding & Grooving Provide a Safer Driving Experience

The next time you cruise down a new stretch of highway or witness a jetliner touch down seamlessly, think about the invisible engineering that made that smooth, safe experience possible. That engineering is often the result of two precise, high-impact techniques: concrete grinding and grooving.

These processes are an important piece of modern pavement restoration, transforming worn-out, hazardous concrete into high-performance surfaces that enhance safety, reduce noise, and extend the lifespan of our essential transportation infrastructure from busy interstates to critical airport runways.

Diamond Grinding

When engineers talk about grinding, they are typically referring to diamond grinding, a technique designed to correct surface irregularities and improve ride quality.

What is Grinding?

Diamond grinding uses specialized equipment fitted with numerous diamond-tipped saw blades to shave off a thin, uniform layer of the concrete surface. This process is essentially like a massive, industrial-scale planer, correcting flaws across the entire slab.

Why is Grinding Necessary?

The goal of grinding is to restore the pavement's smoothness, which naturally degrades over time due to heavy traffic and environmental stress:

1. Eliminating Faulting: Grinding removes the vertical steps or "bumps" that develop at the joints between concrete slabs (known as faulting or warping). This is what creates the jarring "thump-thump" sensation on older highways.

2. Improving Ride Quality (IRI): The quality of a road is measured by the International Roughness Index (IRI). Grinding can drastically reduce the IRI, leading to a smoother, quieter, and more comfortable ride for drivers.

3. Noise Reduction: The newly textured surface resulting from grinding is smoother and more uniform than rough, faulted concrete, often leading to a noticeable reduction in tire-pavement noise.

Diamond Grooving

Grooving is the process of cutting deliberate, precise channels into the pavement. Unlike grinding, which focuses on smoothness, grooving's sole purpose is maximizing safety and performance, especially in wet conditions.

Safety Mechanics

Grooving works by applying two mechanical principles developed originally for airport runways.

1. Water Displacement: The grooves act as immediate drainage channels, pulling water, oil, or slush away from the point where the tire meets the concrete. This prevents the formation of a liquid film, which is the cause of hydroplaning at high speeds.

2. Mechanical Interlock: The diamond-cut grooves create sharp, vertical edges. These edges provide physical resistance for the tire tread to push against, offering essential mechanical grip and increasing the overall coefficient of friction, which is vital for braking and steering stability.

machinery doing airport runway grooving

Patterns Matter

The direction of the grooves is customized based on the application.

  • Transverse Grooving: Cuts are made perpendicular to the direction of travel. This is crucial for runways and high-speed braking zones because it maximizes water evacuation along the path of movement.

  • Longitudinal Grooving: Cuts run parallel to the direction of travel. This is common on highways as it improves steering control and helps vehicles track cleanly through curves.

Concrete Grinding and Grooving Combined

While both processes can be used separately, the most comprehensive and effective pavement restoration projects utilize them in tandem:

1. Grind First: The pavement is ground to eliminate all bumps and dips, ensuring a perfectly smooth profile.

2. Groove Second: The high-traction safety pattern is then precisely cut into the newly leveled surface.

This sequence delivers the best long-term outcome: a smooth, comfortable ride (from grinding) combined with superior, all-weather skid resistance (from grooving).

What are the Benefits of Diamond Grinding and Grooving

The strategic investment in diamond grinding and grooving yields massive returns for public safety and infrastructure budgets:

  • Drastic Accident Reduction: Studies have repeatedly shown that the increased skid resistance and hydroplaning prevention provided by grooving can lead to significant reductions in wet-weather accidents.

  • Extended Pavement Life: By correcting surface flaws and restoring the integrity of the concrete structure, these techniques can add 15 to 30 years of service life to the pavement. This is often far more cost-effective and longer-lasting than simply laying down a new asphalt overlay.

  • Fuel and Vehicle Savings: Smoother roads reduce the dynamic load on vehicles, leading to less wear and tear on suspension systems, reduced tire wear, and better fuel economy for trucks and cars alike.

By using the unmatched precision of diamond cutting, engineers ensure that every mile of grooved and ground pavement meets the highest standards of safety, setting the stage for smoother travel and a more durable future for our roads and runways.

DEMOLITION

5 Demolition Projects Highlighting Concrete Removal

CALL FOR A QUOTE
1-800-736-4255

Roundup: 5 Demolition Projects Highlighting Concrete Removal

Demolition is more than tearing or knocking down a structure. It’s a highly specialized discipline requiring precision, robust technology, and safety protocols. Whether clearing a path for a new highway or selectively removing elements from a standing hospital, modern demolition demands a strategic approach tailored to the unique constraints of each site.

Expertise in services like selective concrete demolition, precision cutting (using techniques like wire sawing and wall sawing), and meticulous material recycling ensures that every project is completed safely, efficiently, and with minimal environmental impact.

The following projects showcase the dynamic range of demolition work across various sectors, from large municipal centers and complex infrastructure to sensitive academic and commercial environments.

Project Spotlights

1. Large-Scale Demolition at Cobre Valley Globe Community Center (Tucson, AZ)

The Challenge: Executing the comprehensive structural and soft demolition of an entire community center, requiring the removal of large concrete structures and extensive site clearing.

The Approach: This project was tackled using a full suite of diamond-based services, including flat sawing, core drilling, and wall sawing, followed by heavy concrete breaking and removal equipment. This systematic dismantling ensured the large facility was cleared safely and in preparation for the next phase of community development.

Key Takeaway: Demonstrates the ability to manage large-scale, full-scope wrecking projects using a blend of controlled cutting and heavy removal methods.

20220107_104221_Brad Roman

2. Concrete Cutting & Demolition at UC Davis Sacramento (Sacramento, CA)

The Challenge: Performing precision concrete cutting and removal of exterior structures—including walkways and bike rack areas—on an active university campus that demanded minimal noise and disruption near high-traffic areas and sensitive offices.

The Approach: The team utilized GPR (Ground Penetrating Radar) scanning to meticulously map the subsurface and ensure safe cutting limits. Precision flat sawing was then employed alongside specialized, low-noise equipment for concrete breaking and removal.

Key Takeaway: Highlights the importance of non-destructive testing (NDT) and noise mitigation when executing demolition within sensitive, operational academic or institutional environments.

HDR debug info : SBAR:2.7 WHAR:1.6 BAR:6.6 WBR:40.6 WDR:0.0 CB:1 CR:0.4 U:0 UW:0 US:0 LIF:0.0 OCD:0 EXT:0.0 UGN:0.0 AIScene(27) HDR ret(0) Bracket Info:0,-6,-9,-12,-15,-18,0,0,0,0,PEV(-9)   AC brightness(116.2) bright_enhenced_level(0.0) brightness_shift(1.0) brightness_high_level(215), contrast_enhanced_level(1.0) isOutdoor(0)  WDR(1,0)SV(0)SGL(0)HGL(11)SGLPU(11)SGLAY(0)AY(116)

3. Bridge Demolition on Hwy 99 (Sacramento, CA)

The Challenge: Safely and quickly demolishing and removing the massive 21st Ave bridge undercrossing on Highway 99, a complex infrastructure task performed directly above an active major highway.

The Approach: This high-stakes operation required meticulous planning, beginning with slotting the bridge deck and torching the rebar. The main structural components (girders) were rigged and lifted using a heavy-duty 550-ton crane while excavators precisely broke the ends free.

Key Takeaway: Showcases expertise in heavy highway and bridge demolition, emphasizing the essential coordination between heavy lifting equipment, precision cutting, and rigid safety protocols over active public infrastructure.

21st Ave Remove Girders 3_Brandon Rowland

4. Steel Building & Concrete Demolition at USDA Site (Tucson, AZ)

The Challenge: The comprehensive demolition of 11 separate steel buildings, along with the removal of over 15,000 square feet of concrete slabs and 50,000 square feet of asphalt pavement at a federal USDA site.

The Approach: The project combined GPR scanning for subsurface hazard detection with large-scale cutting and heavy demolition, utilizing excavators and Bobcats for efficient material handling.

Key Takeaway: Demonstrates proficiency in multi-material demolition, safely clearing both steel-framed structures and extensive concrete/asphalt paving, all while adhering to the stringent requirements of a government facility site.

20210518_120333_Brad Roman

5. Restaurant Demolition (Huntington Beach, CA)

The Challenge: Providing a complete, single-source demolition and clearing solution for a private owner of a 10,000-square-foot former restaurant site.

The Approach: A "turnkey" demolition solution was delivered, which included managing every logistical detail: hazardous material abatement, securing the site with fencing, cutting and capping utilities (like the sewer), total wrecking of the structure, and final site grading.

Key Takeaway: Illustrates the value of full-service demolition, offering owners simplified project management by combining specialized services like abatement, wrecking, and utility isolation under one contractor.

Aerial photo of demolition

Safety, Precision and Scale Across All Sectors

These diverse projects demonstrate that modern demolition is defined by flexibility and precision. Whether tackling a massive community center, a federal facility, or a smaller commercial property, the underlying commitment remains the same: to utilize cutting-edge technology (like GPR and precision saws) and experienced operators to deliver safe, clean, and efficient results. This focus on planning and specialized execution ensures that every structure, regardless of its size or complexity, is removed correctly, minimizing risk and maximizing the potential for the site's next phase of development.

GRINDING & GROOVING

What Is Concrete Grooving?

CALL FOR A QUOTE
1-800-736-4255

What Is Concrete Grooving?

Concrete grooving is a specialized construction process that involves cutting channels or patterns into the surface of hardened concrete to improve traction, drainage, safety, and performance across a wide range of environments — from highways and airport runways to industrial floors and agricultural facilities.

Though grooves may look simple, they are cut with a high-precision process and serve a powerful function to extend the lifespan of concrete surfaces, ensuring the longevity, safety, and performance of vital transportation surfaces. Grooving techniques address different challenges specific to heavy traffic, high speeds, and intense weather conditions.

How Does Concrete Grooving Work?

Concrete grooving involves cutting precise, shallow channels into the pavement surface. Unlike grinding, which focuses on smoothness, grooving focuses on maximum friction and drainage, making it especially critical for high-speed environments like airport runways and curves on highways. The concrete grooving process utilizes specialized, heavy-duty grooving machines equipped with multiple diamond blades. These machines cut uniform, precise lines into the concrete.

The fundamental way concrete grooving works is through two primary principles: Water Displacement (Drainage) and Mechanical Interlock (Grip).

Water Displacement

The main reason smooth concrete surfaces become slick is the formation of a liquid film (water, oil, manure, etc.) that causes hydroplaning—the moving object rides on top of the liquid, losing solid contact with the pavement. The grooves are cut deep and wide enough to act as immediate drainage channels that capture and divert this liquid away from the contact zone. This action forces the liquid to flow into the groove, ensuring the tire rubber or hoof claw maintains direct, solid, high-friction contact with the surface ridges between the grooves. This principle is analogous to the treads on a car tire, which are specifically designed to channel water away, but in this case, the drainage is engineered directly into the pavement itself.

Mechanical Interlock

While drainage solves the liquid problem, mechanical interlock provides the physical grip. A smooth surface offers no purchase for lateral or braking force once the coefficient of friction is compromised. Grooving utilizes specialized diamond-tipped blades to cut channels with sharp, 90-degree-angle walls. These crisp, defined edges act as a physical obstruction for the moving object to push against. For vehicles and aircraft, these edges function like thousands of tiny cleats, providing mechanical resistance against skidding, which is vital for reducing stopping distance and maintaining control during hard braking.

What is Diamond Grooving?

Diamond grooving describes a specific, high-precision method of cutting channels or grooves into a hard surface, most often concrete, using diamond-tipped blades. The term diamond refers to the cutting tools used. Industrial-grade diamond particles are bonded to the steel cores of the saw blades. Diamond is the hardest material on the Mohs scale, allowing these blades to efficiently and precisely cut through extremely hard materials like fully cured concrete, asphalt, and stone without quickly dulling or damaging the aggregate.

How does Diamond Grooving Work?

Diamond grooving uses specialized machinery that mounts hundreds of closely spaced diamond saw blades onto a rotating drum. This equipment is capable of:

Cutting Precise Channels: The blades are set to a specific depth (e.g., ¼ inch) and spacing (e.g., 1 ½ inches apart) to create uniform, parallel channels in the pavement.

Achieving Clean Edges: The hardness of the diamond ensures the groove walls are crisp and defined, which is critical for providing the maximum mechanical interlock (or grip) for tires or hooves.

Efficiency: The strength of the diamond allows for rapid cutting, making it the most efficient method for large-scale projects like highways and runways.

Applications for Concrete Grooving

The need for high-performance traction dictates where grooving is most frequently employed. The specifications (depth, width, and spacing) are customized for the specific application.

Airport Runways and Taxiways

For runways and taxiways, concrete grooving is a non-negotiable safety measure designed to prevent aircraft from hydroplaning during critical high-speed operations like takeoffs and landings, particularly in heavy rain.

The pattern most commonly employed is transverse grooving, where channels are cut perpendicular to the direction of travel. This orientation is specifically chosen to maximize the rate of water evacuation along the runway's length where speeds are highest. The resulting safety impact is profound: grooving significantly reduces stopping distances on wet concrete, which is a major factor governed by Federal Aviation Administration (FAA) safety standards and ensures operational integrity even in adverse weather.

Highways, Bridge Decks and Tunnels

Grooving's application extends beyond air travel to crucial ground infrastructure. Here, the primary purpose is to increase wet-weather skid resistance and enhance steering control for civilian vehicles. The pattern used is more variable; it's often longitudinal grooving (parallel to traffic flow) on straight sections to aid in water channeling and steering, but switches to transverse grooving on steep ramps and sharp curves where lateral stability is paramount.
The safety impact minimizes the risk of cars skidding out of control on slick surfaces like wet bridge decks or within tunnels where humidity and condensation accumulate. Furthermore, in highway rehabilitation projects, grooving is frequently combined with concrete grinding (profiling) to first correct surface unevenness before applying the final texture.

Ramps, Loading Docks and Walkways

Concrete grooving is essential for safety in industrial and commercial areas, including ramps, loading docks, and walkways. The goal here is to enhance safety for both pedestrians and heavy equipment like forklifts.

Since these areas involve lower speeds but frequent turning and heavy loads, the pattern typically used is a tight, linear or diamond pattern. This texture is specifically designed to provide reliable grip for foot traffic and smaller wheels, reducing the risk of slips and falls in areas prone to moisture or spills.

Why is Concrete Grooving Essential for Safety?

Preventing Hydroplaning on Runways: This is the most crucial application. When a jet lands at high speed, water can build up beneath the tires. The grooves act as immediate drainage channels, evacuating the water and allowing the tire rubber to make direct contact with the concrete. Grooving dramatically increases the friction coefficient, preventing dangerous skidding and hydroplaning during braking.

Increasing Cornering Traction: On sharp highway curves or ramps, transverse grooves (cut perpendicular to traffic) provide additional mechanical grip, helping tires maintain their path and reducing the risk of skidding, particularly in wet conditions.

"Rumple Strip" Effect: While the primary goal is safety, grooving also provides an audible and tactile warning to drivers when used on highway shoulders or medians, indicating a departure from the lane.

Penhall corrective profile grinding

Safety Considerations for Concrete Grooving Projects

Safely grooving concrete requires adherence to safety protocols, primarily because the process generates hazardous silica dust and involves high-powered machinery. Before starting, Personal Protective Equipment (PPE) is mandatory. This includes an N95 or better respirator to guard against dangerous crystalline silica dust, safety goggles or a face shield, hearing protection from the loud machinery, and heavy-duty gloves and clothing to protect the skin from abrasion and debris.

Site preparation and hazard control are equally critical. For large-scale projects, wet-cutting is mandatory; a continuous stream of water must be used to suppress silica dust at the source, transforming it into a manageable slurry that must be immediately vacuumed and disposed of according to environmental rules. Before any cutting begins, the subsurface must be scanned (e.g., using Ground Penetrating Radar) to locate and mark any hidden utilities, electrical conduits, or cables, as striking these can result in severe injury or electrocution.

Finally, operating the powerful grooving equipment requires caution and control. The operator must perform a full inspection before use, checking all safety guards and confirming that electrically powered equipment is using a GFCI. Maintain a balanced position and never force the machine; allow the equipment and the diamond blades to cut naturally to prevent dangerous kickback or jamming. By adhering to dust control, utility checks, and proper machine handling, the high risks associated with concrete grooving can be effectively managed.

  • « Go to Previous Page
  • Page 1
  • Page 2
  • Page 3
  • Page 4
  • Page 5
  • Go to Next Page »
☎ CALL TO SCHEDULE SERVICE
FOLLOW US

#PenhallRedandGray

penhall menu logo
HEADQUARTERS

1212 Corporate Dr. Suite 500
Irving, TX 75038

1-800-PENHALL

CA Contractors License #568673

FIND YOUR LOCAL PROVIDER
COMPANY

Our Story

Leadership Team

Careers

LOCATIONS

Penhall Company (USA)

Concrete Coring Company (HI)

SERVICES

Concrete Coring

Concrete Cutting

Concrete Scanning

Concrete X-Ray Imaging

Private Utility Locating & Mapping

Demolition

Grinding & Grooving

Bridge Services

Surface Preparation

Concrete Breaking & Removal

Fiber Reinforced Polymer

Hydrodemolition

To receive notifications about our articles, sign up below. You may unsubscribe from these e-mails at anytime.

  • This field is for validation purposes and should be left unchanged.

ENR The Top 600 Logo
ISNetworld logo
Avetta

© Copyright 2026 | Penhall Company | Terms & Conditions | Supplier Code of Conduct | Supplier Terms & Conditions | Sitemap | All Rights Reserved

  • About Us
    • Our Story
    • Leadership Team
    • Sustainability
  • Safety
  • Services
    • Concrete Services
      • Concrete Coring
      • Concrete Cutting
      • Demolition
      • Hydrodemolition
      • Structural Repair
      • Grinding & Grooving
      • Bridge Services
      • Scarifying & Shaving
      • Breaking & Removal
      • Operated Equipment Rentals
    • Subsurface Services
      • Concrete GPR Scanning
      • Digital X-Ray Imaging
      • Private Utility Locating & Mapping
      • Fiber Reinforced Polymer
  • Industries
  • Resources
    • Articles
    • Frequently Asked Questions
  • Contact Us
  • Find a Branch
  • Request a Quote
  • JOIN PENHALL COMPANY
  • Concrete Coring Company
  • About Us
    • Our Story
    • Leadership Team
    • Sustainability
  • Safety
  • Services
    • Concrete Services
      • Concrete Coring
      • Concrete Cutting
      • Demolition
      • Hydrodemolition
      • Structural Repair
      • Grinding & Grooving
      • Bridge Services
      • Scarifying & Shaving
      • Breaking & Removal
      • Operated Equipment Rentals
    • Subsurface Services
      • Concrete GPR Scanning
      • Digital X-Ray Imaging
      • Private Utility Locating & Mapping
      • Fiber Reinforced Polymer
  • Industries
  • Resources
    • Articles
    • Frequently Asked Questions
  • Contact Us
  • Find a Branch
  • Request a Quote
  • JOIN PENHALL COMPANY
  • Concrete Coring Company